I was planning on building a pretty basic door with chicken wire and 1x wood, but I really like the sound of your sliding door. Do you have pictures of yours that I could see? ...
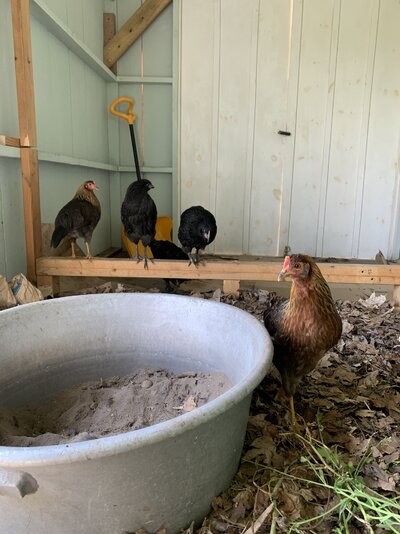
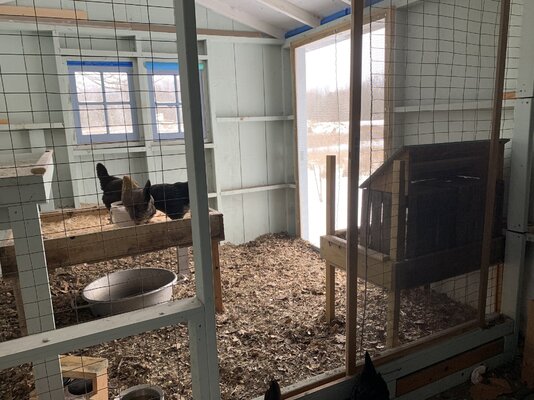
The beam the builder put in from side to side across the top of the walls. We added a strip of metal as a wear plate. And a 1x4 for the door to slide between it and the beam. The unpainted upright stud is there for the screen door to stop against and to attach the fence I used for the wall between the coop side and the storage side.
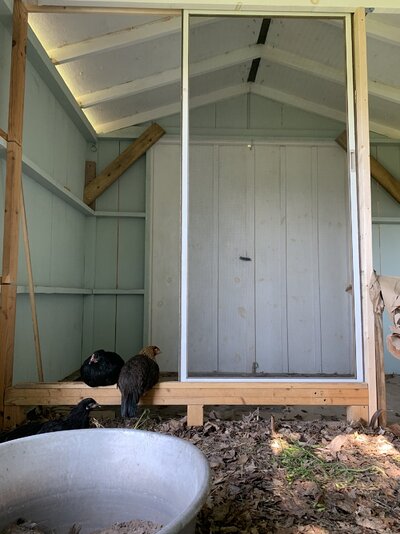
The screen door we bought at a salvage place. Set in place but without the wall in place yet.
The bottom of the door is held on top of the short wall with strips of wood on each side of the space for the door to slide.
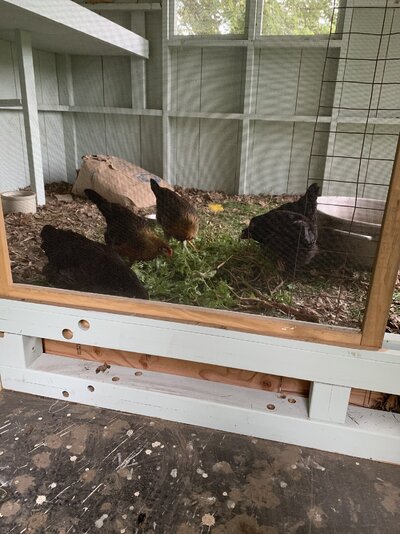
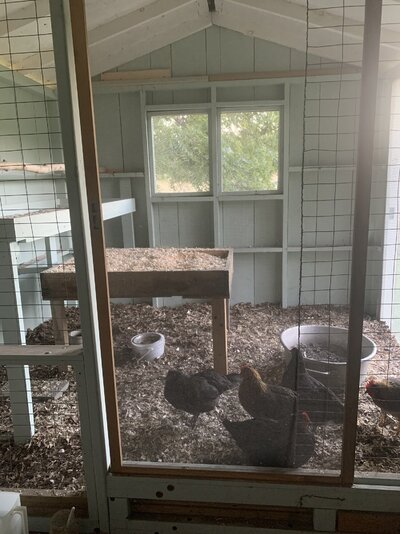
A couple of pictures of the whole thing because I don't have a single pictures that shows it very well.
The door lifts up so it can be tilted out over the track at the bottom. So it comes out easily.
The beam the builder put in from side to side across the top of the walls. We added a strip of metal as a wear plate. And a 1x4 for the door to slide between it and the beam. The unpainted upright stud is there for the screen door to stop against and to attach the fence I used for the wall between the coop side and the storage side.
The screen door we bought at a salvage place. Set in place but without the wall in place yet.
The bottom of the door is held on top of the short wall with strips of wood on each side of the space for the door to slide.
A couple of pictures of the whole thing because I don't have a single pictures that shows it very well.
The door lifts up so it can be tilted out over the track at the bottom. So it comes out easily.
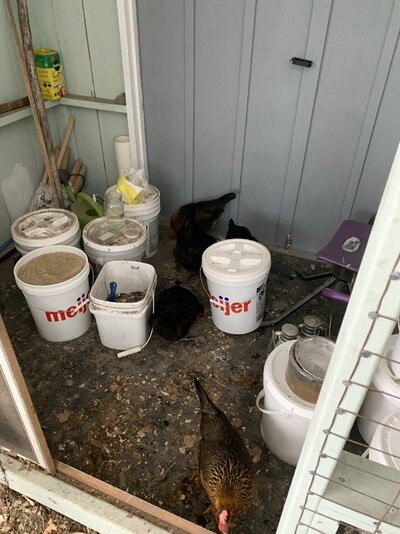
if that is the prefab temp coop in the back---could you butt it up next to the pop up door and then plastic it off for the winter and give them this extra space to come out and about? that way you wouldn't have to construct anything-they would already be used to it and would have a place to go and hang--just a thought
I have thought about doing that but I am not sure how to make a connection between the coop and the prefab since the pop door on the coop will be about 3 feet off the ground.
I made some progress this weekend. On Friday I built the trusses by making a template on the floor. I forgot to take a picture of that part but here is Albert inspecting my work when I was done.
Saturday was a wall building day. My daughter helped for a good portion of the day which made things so much easier. We finished the two 12 foot walls, but I am waiting until all are built before standing them up and attaching them to the floor. I had no idea how brutal a framing nailer is on the wrists!
After 6 straight days of rain I was finally able to get back out to work on the coop. First order of business was to trim some tree limbs that would run into the coop. The ladder was terrifying, but I got it done.
Next was standing up the walls. This went pretty well! I used some 2x4 bracing to help hold things steady. I used a 4 ft level to make sure the walls were plumb and thankfully everything lined up in the end.
The next step will be installing the windows but I need some advice. I dry fit them into the openings and everything looks good, but do I need anything else? I've seen posts about flashing and caulk, do I need that? I will be putting T1-11 siding directly on the wall frames and it is not thick enough to totally fill the space on the windows. Should that be covered by trim?
Do I just nail the window in the studs as is, then put the siding in the groove? WIll it leak? Thanks for your help!
No.
Windows need to be set inside a proper frame, with angled sills to shed rain/snow.
Where did you get that window...did it come with installation instructions?
No.
Windows need to be set inside a proper frame, with angled sills to shed rain/snow.
Where did you get that window...did it come with installation instructions?
Technically the windows should be mounted to the framing and then you run your siding up to it. Along with prior application of Tyvec and flashing.
However, you should keep in mind what you're building. Its not for humans and there's no building inspector coming around.
I'm in the middle of a coop build myself using T-111 siding and I'll be installing my windows after the fact. Trim and silicone will keep it plenty dry. I've done it many times before.
If you want to build a "to code" structure meant for people than I can guide you in that direction, but its absolutely not necessary.


")