Another Day at the Funny Farm
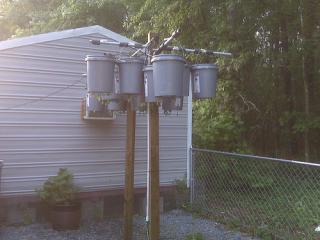
The whole adventure started when we decided to install an above ground pool we got off Craigslist (for FREE). 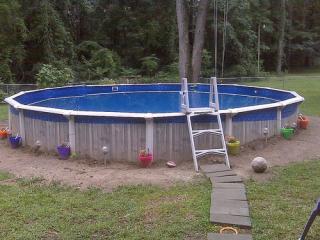
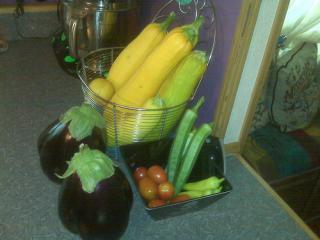
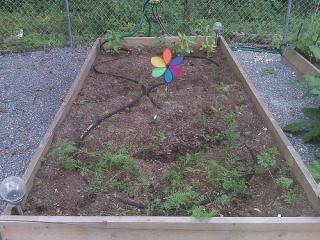
We partially buried it and had to do something with the dirt - and so our adventure in raised bed gardening began. I had originally started with 4 beds, then decided we needed 2 more - before it was over - we had 8. Can I add how much I despise digging? After this adventure was over - I GAVE away our wheelbarrow - I NEVER intend to use one again. We were extremely lucky this summer, considering none of us knew what we were doing. We planted squash (FANTASTIC), peppers (sweet and hot) (produced more than we could possibly use), bell peppers (8 small), onions (didn't work), okra (not enough to eat - but saved for seed), eggplant (FANTASTIC), tomatoes (TONS), lettuce (several meals), sweet potatoes (about 3 good sized ones - I didn't know they needed so much room), beans (several varieties - didn't plant these quite right for maximum production), carrots (got a meal out of them - but DANG they were some ugly carrots!), sunflowers (SO much fun to watch grow), cucumbers (2 - the pumpkins smothered the plant), pumpkins (1 small - had to pull the plants - they are NOT designed for beds) and 2 full beds of strawberries. I believe if you're going to do something - go ALL OUT! We went into this gardening adventure with a 'we'll see what happens' attitude - it was so much fun to watch our work turn into something tangeable!
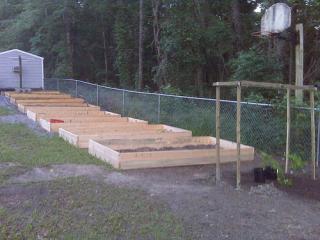
I also planned to make this a permanent fixture in our lives - so when I built it - or thought it up to be built - I went with what would be the easiest in the long run (not necessarily what would be the quickest way to get to what we wanted RIGHT then). I added an automatic watering system to the raised beds (soaker hoses x8 and 2 timers - attached to the back fence). I bought a ton of green garden hose and cut each one to reach the soaker hose in the beds (meaning there wouldn't be a ton of extra hose to trip over). And I designed the coolest watering system for our tomato trees.
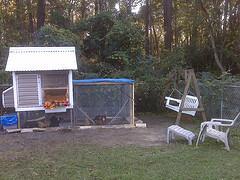
After months and months of lurking/reading the forums and longing for some chickens to call my own - we (son and I) waited until hubby was out of town to buy some - NOTHING like the element of surprise! By the time he got home from Atlanta, labor day weekend, we had this... I'm pretty sure we've broken any and all rules on building correctly - but we're rather happy with the progress we've made!
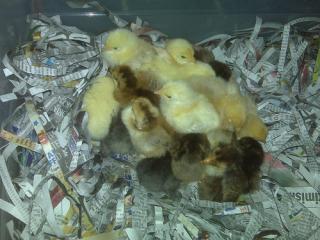
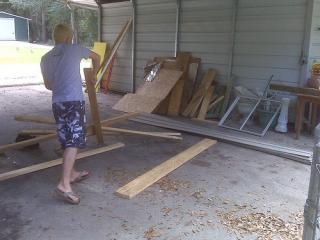
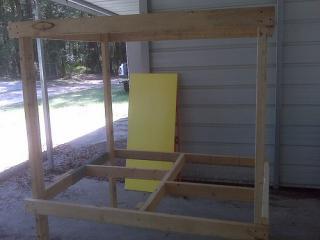
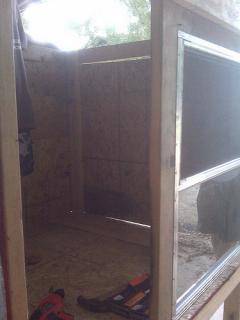
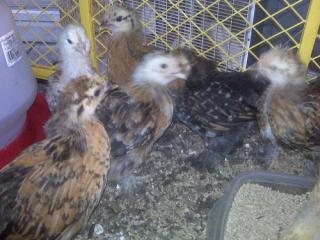
Quite a feat considering we'd (son & I) had NEVER used a power saw before - or measured for that matter! To make things simple - we went with SOLID numbers 4'x6'. Did I mention that we didn't have plans either? Just kinda made it up on the fly as we've gone along! We went dumpster diving to get most of the wood - I drove to a new construction site and tossed the kid in (such a great mom, eh?) we managed to score quite a huge amount of usuable 2x4's and pressboard. I got a window and vinyl siding from my brother (who shook his head A LOT at the prospect of the 'terrible two' building something without supervision) and a doggy door from my mom. At this point we were pretty excited and had NO $$ spent in supplies for our coop!! I purchased week old chicks from a lady in Ga (about 30 mins from us - we're in FLA) - I had only wanted 2 - my son wanted a dozen - we ended up with 20! The person we purchased them from doesn't sex them - so it was a hit or miss on whether you were going to get girls (which is all we wanted) - so she added an extra 8 in for good measure. So far it looks like we've got 6 males - but they're still a little young to be certain. During the next few weeks we managed some progress on the house and lost 2 chicks. Thanks to the forum I knew to separate the sick ones and did not loose any more.
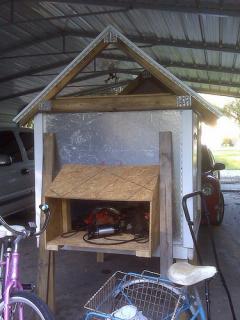
I purchased 5 trusses on Craigslist for $30 - because I was pretty sure we'd have issues getting them put together. I also had to purchase corner trim and J rail for the siding installation $40. I had to stop siding because I needed the inside corner trim to go around the nest box. The 2x4's by the nest box are for roof support. Hubby got into the chicken spirit pretty easily and built the nest box for us the weekend after labor day.
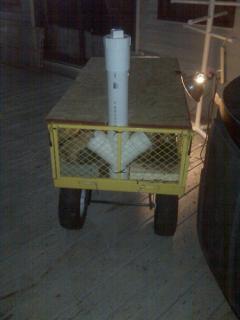
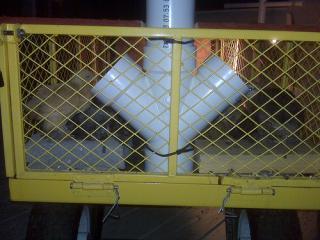
As of 10/2 - the chicks are about 5 weeks old and doing well - Right now, the 'girls' are living in my yard wagon on our porch - so I'm looking forward to them getting out into their own house!!
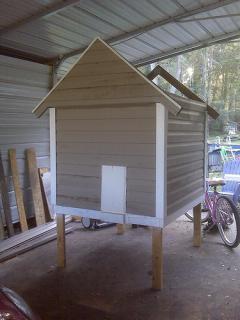
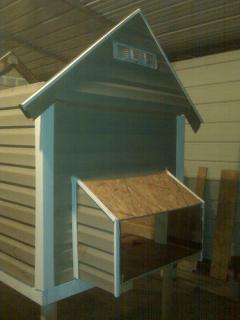
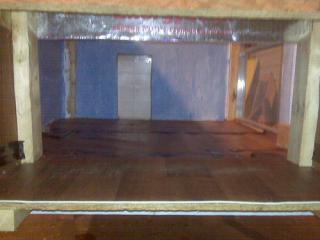
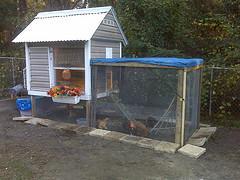
10/3-4 Did not get nearly as far as I had hoped (isn't that always the case?).. but making slow and steady progress. Finished the vinyl siding (w/3 sticks to spare!), the vinly flooring done (free - left over from when we had it installed in our house), roof vents installed (front and back)& made an auto-feeder for their temp home ($24.62 - 2nd trip to lowes for misc $58.31).

10/10 - Another trip to Lowes - roofing materials & screws $53.41. Finally got the house moved into the yard (from it's original location in my driveway) - but no real work done. I think some construction is going to HAVE to be finished soon - I'm hearing of a chicken uprising peeping from the wagon. Another milestone this wknd - the roosters went to a great home about 30 miles from us!
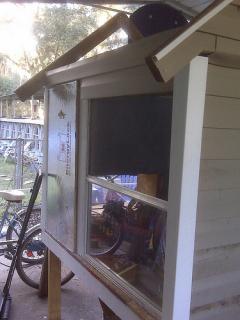
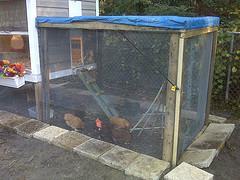
11/16 - Took some materials back to lowes to use fundage for hardware cloth. FINALLY got the door hung and the first part of the run built over the weekend. Spent $23.15 (over the returns) on chicken wire. The tarp is temporary - no time to run to lowes for more white panels. We have BIG plans for the 2nd section of the run - gathering supplies now!
Total cost so far: $229.49