Susie's Green Acre
Chicken Coop

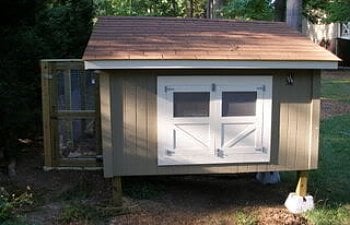
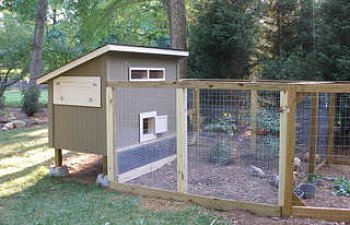
Here is our coop after several weeks of after work work. The coop is 8 by 4 and the yard is 12 by 12. Right now it houses 2 Golden Comets and 4 Araucanas (which I think are truly EE's). Our dogs pen is to the right of the chickens run. Her name is Sam.
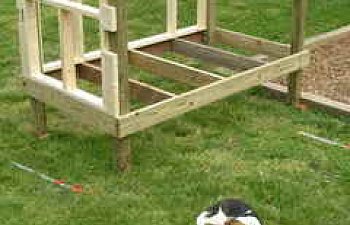
We started by deciding that we wanted the short side to be as tall as I am so that I would have no problem reaching the inside. So the short 4by4 is cut 5.5 feet and the tall 4by4 is cut 7 feet. We left two feet open at the bottom so I could easily remove the poo that fell out from the wire floor. The outside dimensions are 4 by 8 feet so we could make the best use of lumber. We assembled the 4by4 posts using lag bolts through 2by6. We also put three 2by6 boards across the bottom as floor supports. We then added the walls one at a time with framed openings for the egg door (shown on left side), access door (on short back side), chicken door and vents (on the tall front side, not shown) and a solid right side. We set the walls flush with the 2by6 wood and had to add scraps of 2by4 material to the 4by4s to have something to nail the siding edges to.

The framing is finished. We put the interior panels up first. We had to slide them in the roof opening after they were cut to size. We did not put any insulation in between the walls as we are in central NC. After this step my DH pulled wire into the walls to do two things. The first was to provide me an outlet inside for lights or fans. He also put the outlet on a switch so when nothing was plugged in there was no power running to the outlet. The second was for a low watt light on the front so we could see after dark to shut the door or feed the dog.


We missed a few steps with pictures. Next we added the siding. For the roof we ran several 2by4 rafters along the width of the coop and then put a piece of plywood on top. We then added paper and shingles. Banding was then put around the roof, door openings, and the corners to create a more finished look.
The doors were cut out of plywood and put into a frame similar to what a kitchen cabinet door would be. They were then hung and latches added.
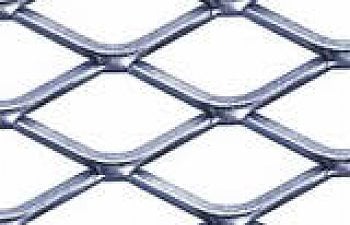
The floor is made out of expanded metal for the poo to fall through. The metal edges are wider than hardware cloth to hopefully avoid the problems they can have from walking on a wire floor. Not all of the poo falls through, but what does not is easily swept up with a dustpan and broom. This will be covered with thin plywood and shavings when winter comes to keep them warm. It is great over the summer. In our 100+ degree weather the coop was never warmer than it was outside!

The coop sits up on concrete deck supports on one side because of the elevation difference in the land. The door to the run is "hidden" on purpose on the right side of the coop.

The access doors have expanded metal screens in the openings with plexi glass cutouts that can be added in winter for draft protection. The feeder and waterer hang behind these doors and the roost runs the length of the coop next to the front wall (above the chicken door). I purchased the feeder and waterer from Mypetchicken.com. The feeder is great but I have trouble keeping the waterer hung do to the weight of it on the cable I have to hang it from. The exterior was painted with Valspar Duramax paint to match the house and the interior was sealed with Thompson Water Seal.

Chicken Coop

Here is our coop after several weeks of after work work. The coop is 8 by 4 and the yard is 12 by 12. Right now it houses 2 Golden Comets and 4 Araucanas (which I think are truly EE's). Our dogs pen is to the right of the chickens run. Her name is Sam.
We started by deciding that we wanted the short side to be as tall as I am so that I would have no problem reaching the inside. So the short 4by4 is cut 5.5 feet and the tall 4by4 is cut 7 feet. We left two feet open at the bottom so I could easily remove the poo that fell out from the wire floor. The outside dimensions are 4 by 8 feet so we could make the best use of lumber. We assembled the 4by4 posts using lag bolts through 2by6. We also put three 2by6 boards across the bottom as floor supports. We then added the walls one at a time with framed openings for the egg door (shown on left side), access door (on short back side), chicken door and vents (on the tall front side, not shown) and a solid right side. We set the walls flush with the 2by6 wood and had to add scraps of 2by4 material to the 4by4s to have something to nail the siding edges to.
The framing is finished. We put the interior panels up first. We had to slide them in the roof opening after they were cut to size. We did not put any insulation in between the walls as we are in central NC. After this step my DH pulled wire into the walls to do two things. The first was to provide me an outlet inside for lights or fans. He also put the outlet on a switch so when nothing was plugged in there was no power running to the outlet. The second was for a low watt light on the front so we could see after dark to shut the door or feed the dog.
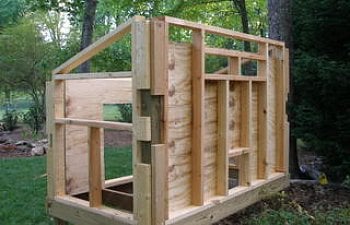
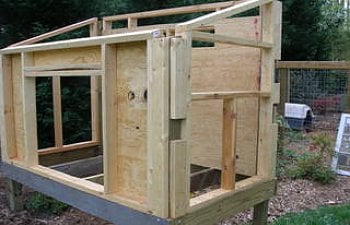
We missed a few steps with pictures. Next we added the siding. For the roof we ran several 2by4 rafters along the width of the coop and then put a piece of plywood on top. We then added paper and shingles. Banding was then put around the roof, door openings, and the corners to create a more finished look.
The doors were cut out of plywood and put into a frame similar to what a kitchen cabinet door would be. They were then hung and latches added.
The floor is made out of expanded metal for the poo to fall through. The metal edges are wider than hardware cloth to hopefully avoid the problems they can have from walking on a wire floor. Not all of the poo falls through, but what does not is easily swept up with a dustpan and broom. This will be covered with thin plywood and shavings when winter comes to keep them warm. It is great over the summer. In our 100+ degree weather the coop was never warmer than it was outside!
The coop sits up on concrete deck supports on one side because of the elevation difference in the land. The door to the run is "hidden" on purpose on the right side of the coop.
The access doors have expanded metal screens in the openings with plexi glass cutouts that can be added in winter for draft protection. The feeder and waterer hang behind these doors and the roost runs the length of the coop next to the front wall (above the chicken door). I purchased the feeder and waterer from Mypetchicken.com. The feeder is great but I have trouble keeping the waterer hung do to the weight of it on the cable I have to hang it from. The exterior was painted with Valspar Duramax paint to match the house and the interior was sealed with Thompson Water Seal.
