| Originally we had planned on a 4X6 Coop and had the run planned for another section of our yard but because of neighbour kids and such we had to plan for them to be re-located to a less accessible area of the yard. Also we decided to make the coop bigger to accommodate around 30 adult birds and then a separate section for hatchlings and chicks along with a separated run area for the baby to younger chicks. |
| 09/27/2010 |
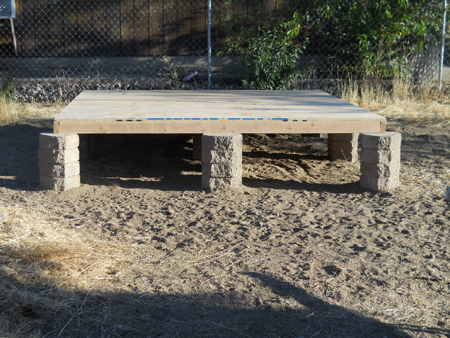
| We got the foundation re-located to the new area of the yard and we have been working on the coop hardcore the last two nights. I even drug out the extension cord and the living-room lamp out in the yard so we could keep working after dark. *LOL* Although I was disappointed at first that we had to move the chickens I think this new spot has turned out to be much better. There is a lot more room and shade too. We got the floor completely finished last night (minus the door cut out and the linoleum/vinyl flooring that will be put down after the walls are up). For some weird reason plywood doubled in price from last week. We went down and priced everything out, bought our 2X4's and since the truck was full we figured we would get the plywood later. Well it has only been 5 days and the price for 3/4in went from $16/sheet to $44/sheet. It's like my DH said, did Swamp Loggers miss a deadline or something?  We ended up getting 4 sheets of 1/2 in instead and then just doubled up on it when we put the floor down. (Glued and screwed) We paid about the same price for 4 sheets of 1/2 in as we would have 1 sheet of 3/4 in. and now we have an 1 in floor. We ended up getting 4 sheets of 1/2 in instead and then just doubled up on it when we put the floor down. (Glued and screwed) We paid about the same price for 4 sheets of 1/2 in as we would have 1 sheet of 3/4 in. and now we have an 1 in floor.  |
| Here are some pictures of the floor so far: |

Completed Floor and Foundation |

|
| Three tiers of bricks on the outside of each side. |

|
| Three tiers of bricks underneath as well to help support the floor. |
|
| This is what it looks like finished. |
We are planning on adding a second side to expand the coop on the right side so that we have one side for the adult hens and the second side will be for storage, hatching and baby chicks. Also 8X8 but it will be separated by chicken wire on the inside and then there will be a separate run on the other side too for the older babies to get some sunshine and get used to being out in a yard. So over all 8X16 coop and then the run is about 24 ft. X 56 ft. Nice size for around 30 birds with plenty of room for expansion. |
| 10/10/2010 |
Well we had tons of rain for a whole week and a half which haulted our chicken coop building progress but it finally let up and we were able to get the frame for the side walls up and the braces for the roof. Finances and the cost of lumber going up has also hindered the progress. With winter coming on everything is almost doubling in prices, fencing and lumber both have gone WAY up in price but we will definitely get this finished before the cold weather sets in for the girls. |

|
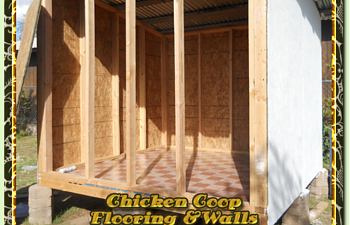
| We used 2X4's for the side walls, they are placed 2 ft. apart on each side. We are going to add 4 external nesting boxes on each side that will be 24"X12"X14". |

|
| The walls are 8ft high from the front, tapering down to 6ft high in the back. We will be putting the roosts on the back wall. |

|

|
| The roof braces are cut from 20ft 2X6 boards that I picked up on CL's. We cut them down to 10ft in length to give a nice over hang so that when it rains the nesting boxes will not get wet or covered in snow during the winter. |

|
| We will be covering the roof with Clear PVC corrugated roof sheets to allow for extra light and also give some warmth during the winter months. |
Well that is it so far, we will be working more on it this week provided the weather holds up. ") |
| 10/30/2010 |

|

|

|

|

|

|

|

|
| 11/26/2010 |
| Well the Chicken Coop is as finished as it is going to get until Spring. We still need to make some additions like adding the window, building the permanent nest boxes on the outside of the coop, etc. We also will be adding another 8X8 addition to this coop so that we have the main adult coop and then the breeding/hatching area. We are going to build 4, 4X4 individual breed coops for our Orpingtons, GLW & SLW and Australorps so that we can breed specifically for those types in the Spring but we have run out of good weather and money for that project so it will have to wait until later. |

|
| Here is the finished for now coop. We are using the 55 gallon drums on the side for feed storage. They are great for keeping the food out of the reach of predators and rodents and it also is waterproof. |

|
| This is the ramp and chicken door leading to the chicken run. Which for now is my entire yard. The chickens are having such a wonderful time free ranging in my yard and because the ground is frozen it put a halt to our fencing project. |

|
| This is what the coop looks like when you open the door to go inside. |

|
| We set up these temporary nests made out of rubbermaid totes that are screwed directly onto the wall. They have been using these since we got the chickens and since we ran out of good weather for the winter these will do until Spring. |

|
| The girls love these nests and they were super easy to put together. |

|
| I had to take a picture of the mini-roost my DH made for the baby chickens. |

|
| Roosting area. |
| 12/17/2010 |
| The first real snow of the winter for the chickens, the coop has held up really well to rain and snow so far. It has stayed warmish and dry inside. |

|

|
| More pictures and progress to come... |
Chicken Coop Building Project
- Author Eglyntine
- Publish date
- Updated
- Article read time 4 min read
-
- Tags
- medium-coops
Article information
More from Eglyntine
-
 Brooders Coops Runs10/16/2010 We wanted to have our Main Coop finished before the babies...
 -
Adult Chickens11/26/2010 Here are my girls and boys as of November 2010: The Black...
-
Eglyntines Member PageHi all, I'm Nikki, I've been married to an amazing man for the last...
-
BabiesWe finally got our baby chick order from Ideal in today. Now I...