Building our Coop
I designed the coop and run myself but this was truly a family project. Two of my sons helped me build our coop which truly makes it special to me. We got a lot of wood from people. We re-purposed a lot of stuff too. All in all we were able to build the coop for less than $300. I designed the coop to be 2'x3'x4' inside dimensions. Here it is framed out and with the floor in. We just used 2x3s and they worked perfectly. For $1.88 a piece you can't go wrong! You'll notice the front (far) rises six inches above the framing to allow for a ventilation area you can see later.Framed Out

This is put together with 3" framing nails. At the time I did not have the right size decking screws but i later reinforced it with 3" galvanized decking screws (given to me from a friend!). We had to make sure to not only measure width and height for accuracy but also measure the dimensions across so as to not get the diamond thing.
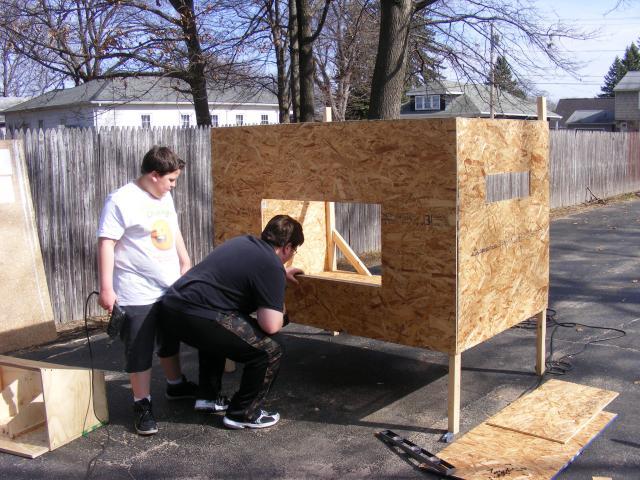
Closed In, Nesting Box Built and Installed
This is the coop with the wall panels going up and the opening for the external nesting box cut out. This pic is of my two sons screwing in the reinforcement for the nesting box.
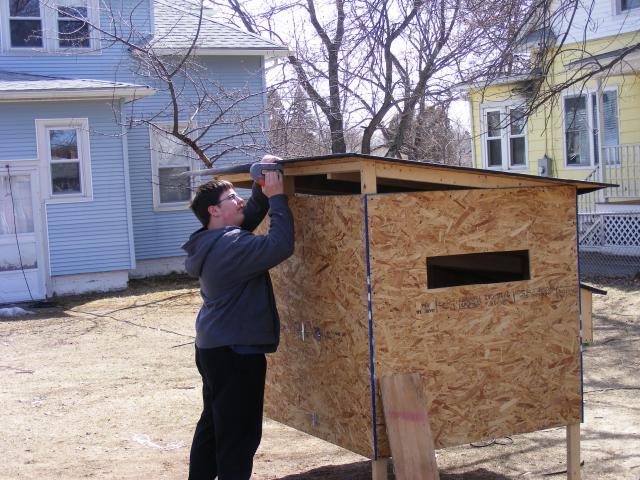
In this next pic we have the coop roof completely sheeted. We framed the roof, sheeted it and covered it with roofing paper. I wanted to make sure we have extra protection for the harsh New England winters.
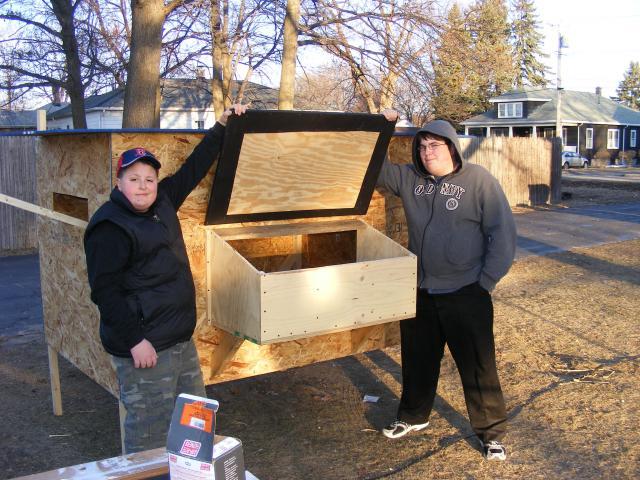
Here is the nesting box, completed and installed.
Completed Coop
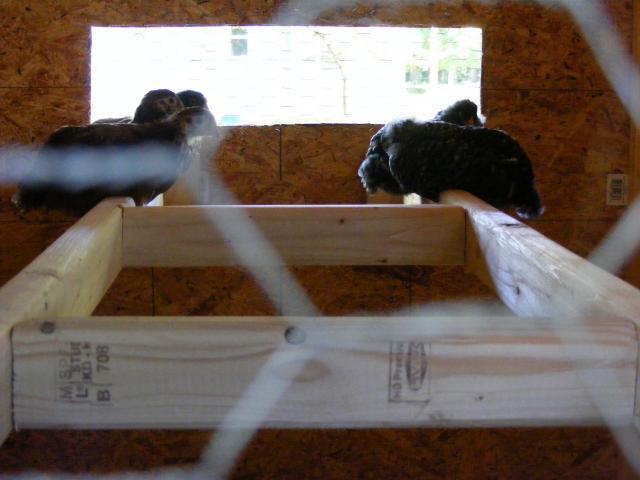
Here is the coop completed. Note the access door for cleaning and changing their food. Note /the rise in the front which gives the roof a pitch and we built in ventilation. I also made their roost out of 2x3s rounded over to best simulate natural branches for roosting.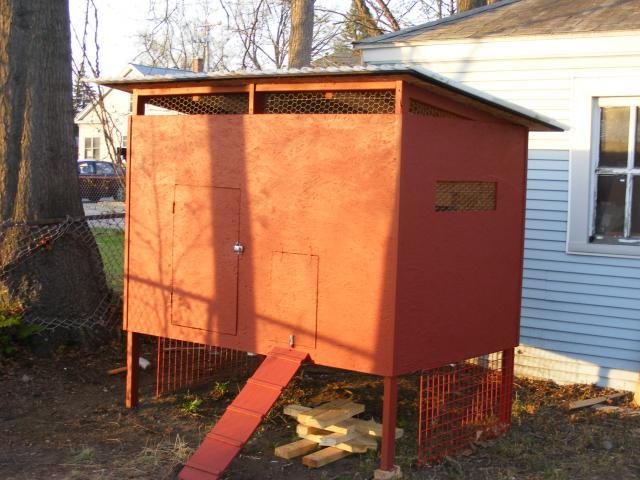
This pic is just about a week after they moved into the coop full time. They took to the roost pretty quickly!!
I roofed the nesting box the exact same way we did the roof and it has been great! Never a leak!
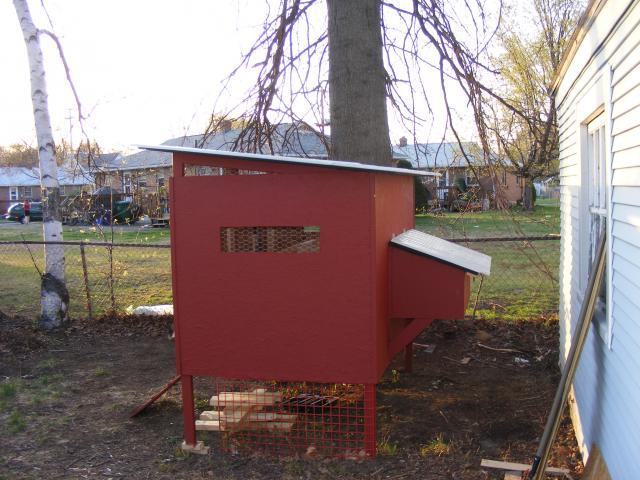
Note the external nesting box. It has three nesting areas in it and provides access from the outside without having to go through the front and try to reach through. The box is built out of 5/8" plywood and is very sturdy. I also put 2x4s in for added support and the are screwed to the framing for the floor.

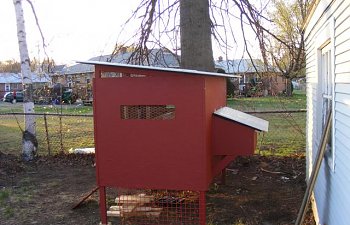
I still have to finish painting the run but the run was built entirely out of re-purposed 2x6s that my Bro-in-law ripped into 2x3s for me. The red grating around the bottom of the coop was given to me for free too.
I built it with 18" of space under the coop to give the girls extra run space as well as a shaded area to keep cool. They have already used that space for their dust baths.
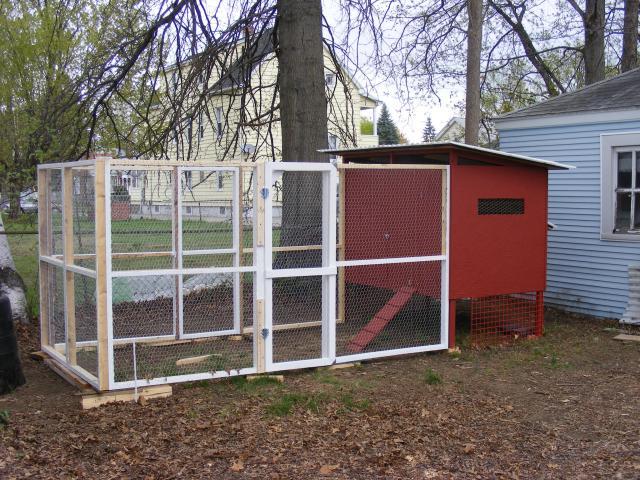
This was also before the run was set. It now sits on bricks all around. Still have some minor security things to do like bury poultry netting all around to keep digging predators out etc. They are safe though. They sleep inside the coop and I close it at night. Plus I am there most of the day to monitor them for now.
So far so good. Since I posted these pics we have had a VERY severe stretch of weather in New England and the coop/run has stood up to it all!
This Spring I plan to paint the run to match the coop and I may start replacing the bottom poultry netting with hardawre cloth as we can afford to; although we have had zero predators. We are in a rather urban/suburban setting. I also want to paint the coop with white trim to give it more of a barn look. An automatic pop door would be great too!!!
More to come in Spring 2012...