The Misfit Barn (Salt Lake City, UT)
This coop was constructed using a prefabricated cedar dog house purchased at Lowe’s. Modifications to the original structure included adding an attached nest box, additional ventilation, vinyl covered plywood flooring, and two roosts.
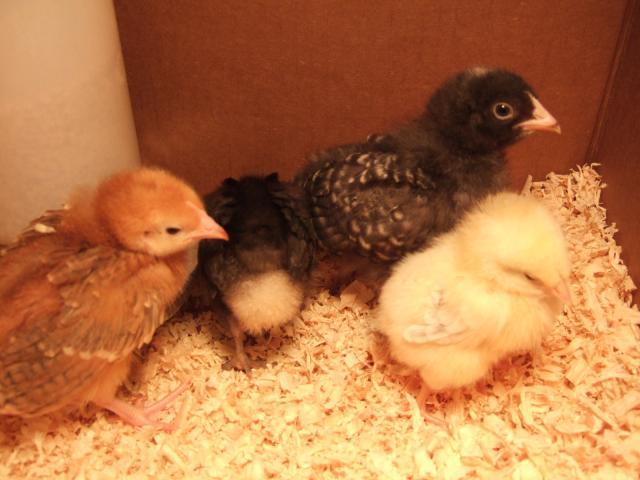
After the loss of one of our RIRs this Spring, we decided to jump back on the wagon and purchased four new chicks (RIR, Delaware, Barred Rock, and Austrolorp). As no flock is complete without a respectable coop, we immediately decided to build a new and improved chicken barn/mansion. Rather than starting from scratch (I learned my lesson last time), we decided it would be easier to retrofit an existing structure for our needs. Although the final product was well worth it, it was a lot more effort than originally anticipated.

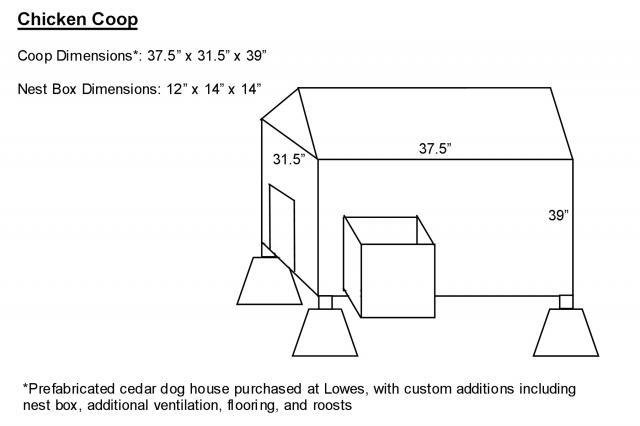
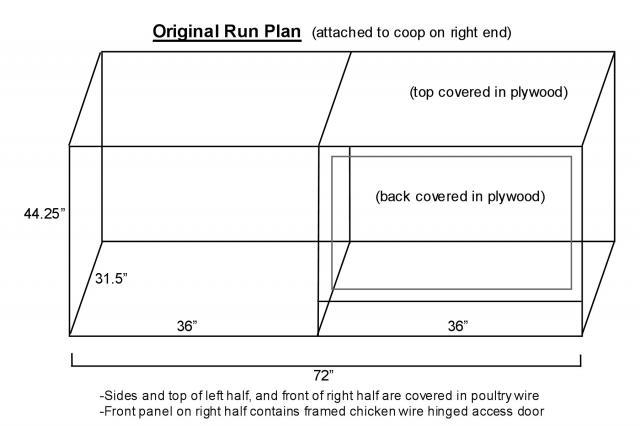
Below are the original plans for our monumental endeavor, including dimensions for each of the pieces.
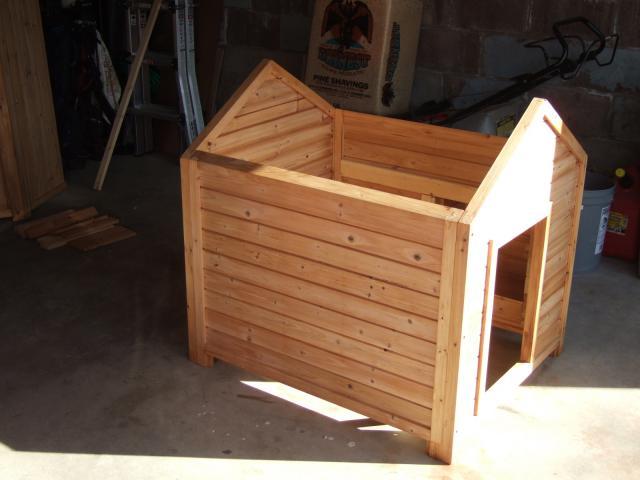
As shown above, we began with a stock cedar dog house (purchased at Lowe’s) equipped with a removable roof to make cleaning easier.
Building the Nest Box
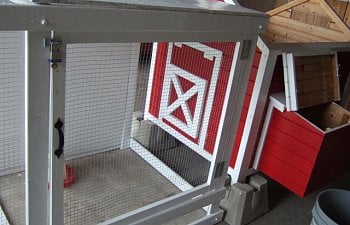
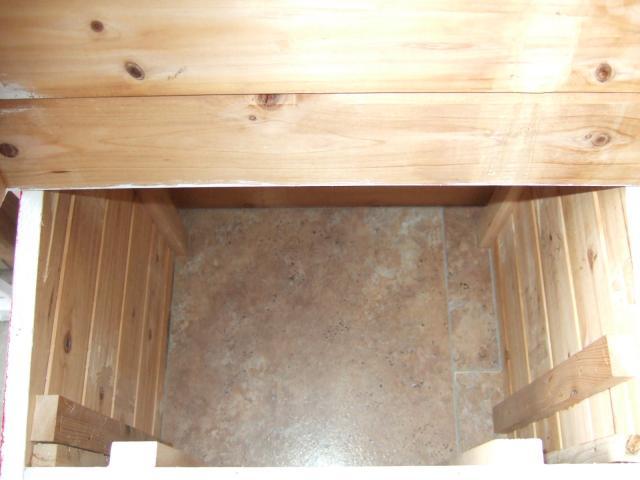
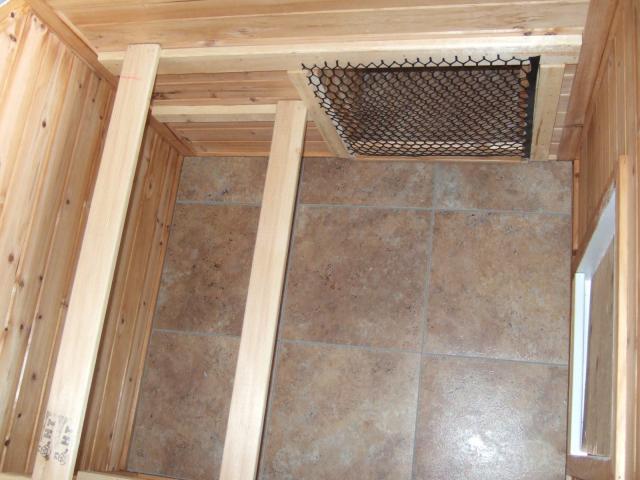
The first task was to add an attached external next box which would allow us to free up extra internal floor space. By removing the cedar flooring, we had more than enough wood planking to build a matching nest box. The floor inside the coop was replaced with plywood and covered with 12 inch vinyl flooring tiles. The nest box extends 12 inches from the coop and stands 14 inches wide and 14 inches tall. The roof is removable in order to access eggs. Additionally, internal framing reinforced the nest box inside the coop for extra stability. The same vinyl tile used in the coop was also used inside the bottom of the nest box for ease of cleaning.
Adding the Roosts
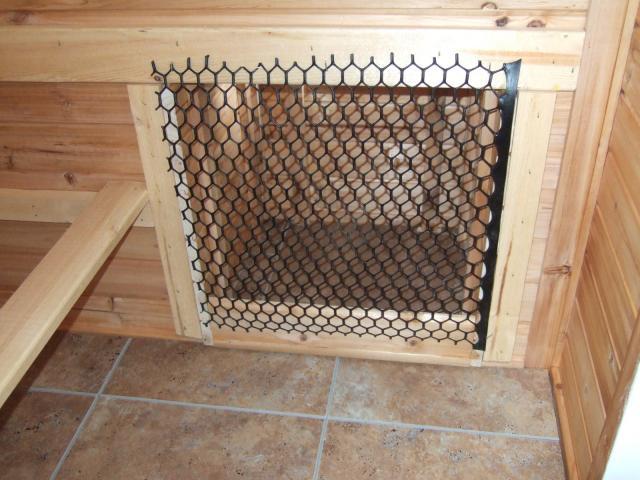
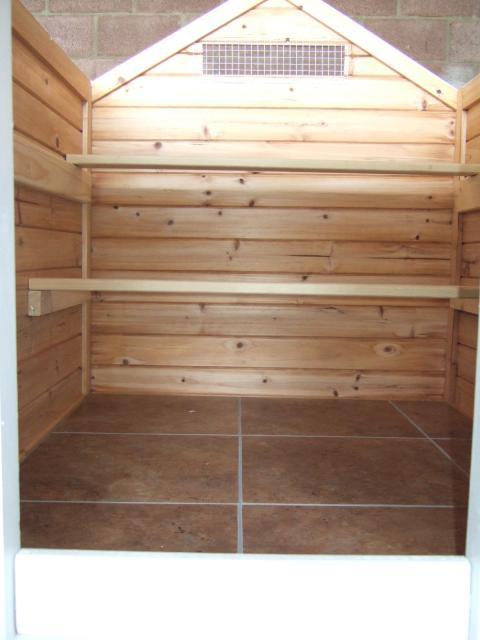
To construct the roosts, we ran supports down both sides of the inside of the coop using 1”x 3” pine lumber. The roosts were then added using the same material, set approximately 8 inches apart, at 7 and 18 inches above the floor. Because our chicks are still too young to lay, we added temporary netting in front of the nest box to deter them from using it as a hiding place/ bedroom.
After completing the roosts we opened a 3”x 12” section of the back wall to create additional ventilation. The gabled roof also provides additional air circulation through vents at the top.
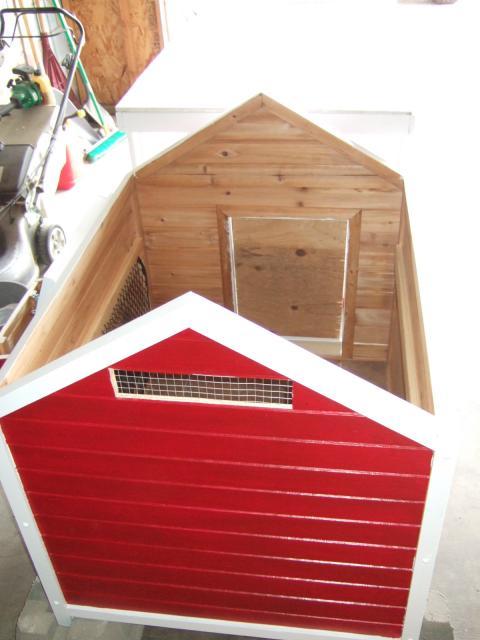
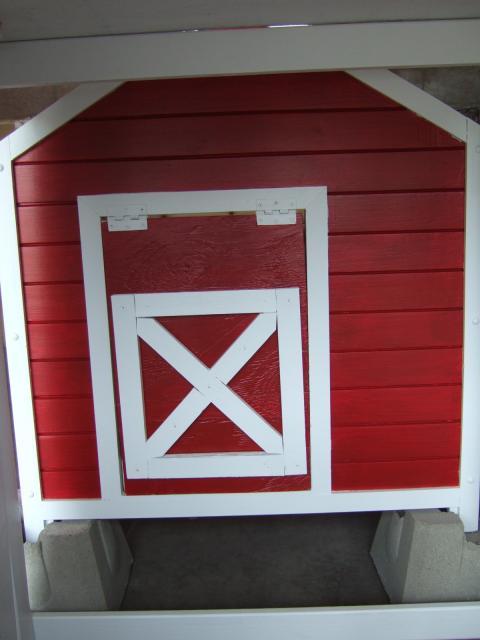
After completing the interior of the coop, the outside was painted barn red with white trim.
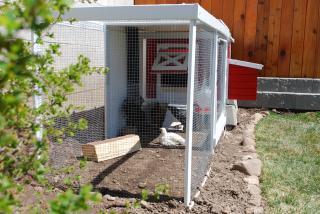
Building the Run
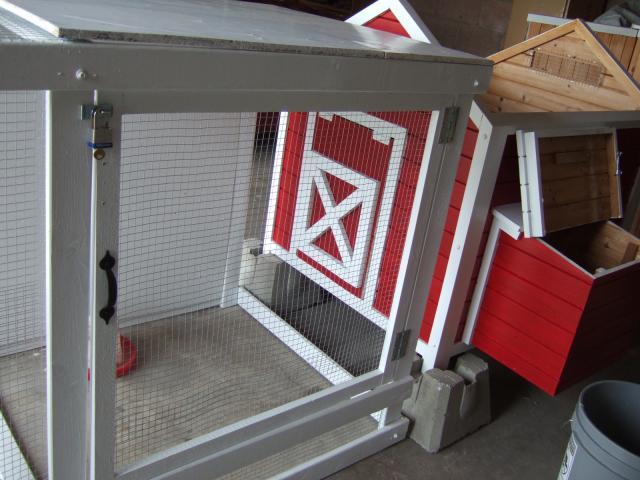
The run was constructed using 1”x 3” pine lumber for the frame. It is 6 feet long split into two three foot sections (the right end covered with plywood for protection from the weather, and the left end covered with chicken wire).
A hinged door was created using a 1”x3” pine frame filled with chicken wire. After constructing the frame, it was painted white to match the red and white coop.
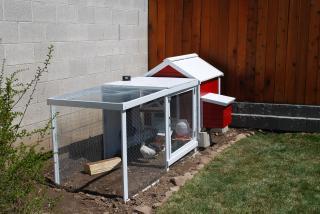
When construction was complete, the coop was placed on 8” cinderblock bases to add ventilation under the floor and keep rodents out.
Currently we are waiting for the chicks to get big enough to put outside. In the meantime, the coop lives in the garage awaiting final placement. Once the coop is in its final location, the run will be buried 5 inches below grade to keep out predators and rodents, and will be attached to the front of the coop using additional chicken wire. We will post final pictures once the coop it is in place and totally complete.
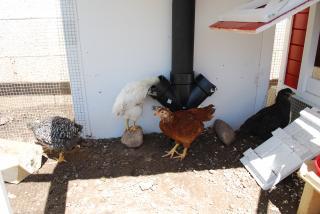
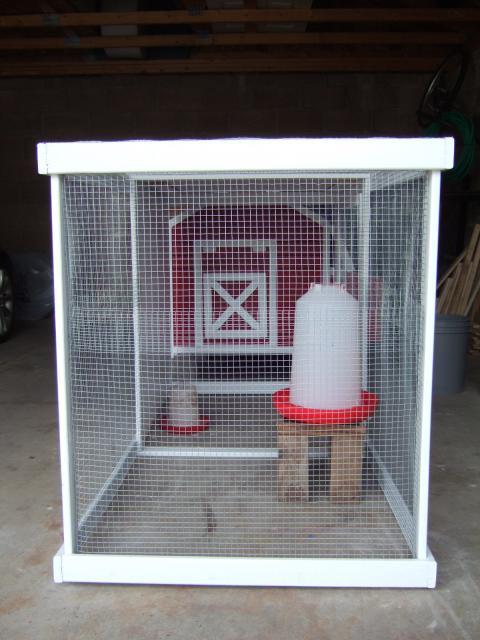
Here are the final pictures. I made a feeder out of 4in pvc pipe with a little hanger tape on the front to keep the feed in, it works great!!! I put a few rocks under it so they can get at it until they grow a bit.
This coop was constructed using a prefabricated cedar dog house purchased at Lowe’s. Modifications to the original structure included adding an attached nest box, additional ventilation, vinyl covered plywood flooring, and two roosts.
After the loss of one of our RIRs this Spring, we decided to jump back on the wagon and purchased four new chicks (RIR, Delaware, Barred Rock, and Austrolorp). As no flock is complete without a respectable coop, we immediately decided to build a new and improved chicken barn/mansion. Rather than starting from scratch (I learned my lesson last time), we decided it would be easier to retrofit an existing structure for our needs. Although the final product was well worth it, it was a lot more effort than originally anticipated.
Below are the original plans for our monumental endeavor, including dimensions for each of the pieces.
As shown above, we began with a stock cedar dog house (purchased at Lowe’s) equipped with a removable roof to make cleaning easier.
Building the Nest Box
The first task was to add an attached external next box which would allow us to free up extra internal floor space. By removing the cedar flooring, we had more than enough wood planking to build a matching nest box. The floor inside the coop was replaced with plywood and covered with 12 inch vinyl flooring tiles. The nest box extends 12 inches from the coop and stands 14 inches wide and 14 inches tall. The roof is removable in order to access eggs. Additionally, internal framing reinforced the nest box inside the coop for extra stability. The same vinyl tile used in the coop was also used inside the bottom of the nest box for ease of cleaning.

Adding the Roosts
To construct the roosts, we ran supports down both sides of the inside of the coop using 1”x 3” pine lumber. The roosts were then added using the same material, set approximately 8 inches apart, at 7 and 18 inches above the floor. Because our chicks are still too young to lay, we added temporary netting in front of the nest box to deter them from using it as a hiding place/ bedroom.
After completing the roosts we opened a 3”x 12” section of the back wall to create additional ventilation. The gabled roof also provides additional air circulation through vents at the top.
After completing the interior of the coop, the outside was painted barn red with white trim.
Building the Run
The run was constructed using 1”x 3” pine lumber for the frame. It is 6 feet long split into two three foot sections (the right end covered with plywood for protection from the weather, and the left end covered with chicken wire).
A hinged door was created using a 1”x3” pine frame filled with chicken wire. After constructing the frame, it was painted white to match the red and white coop.

When construction was complete, the coop was placed on 8” cinderblock bases to add ventilation under the floor and keep rodents out.
Currently we are waiting for the chicks to get big enough to put outside. In the meantime, the coop lives in the garage awaiting final placement. Once the coop is in its final location, the run will be buried 5 inches below grade to keep out predators and rodents, and will be attached to the front of the coop using additional chicken wire. We will post final pictures once the coop it is in place and totally complete.
Here are the final pictures. I made a feeder out of 4in pvc pipe with a little hanger tape on the front to keep the feed in, it works great!!! I put a few rocks under it so they can get at it until they grow a bit.