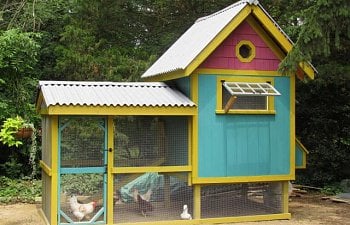
Poppy's Surprise!

First thing....I know "Awesome" is spelled wrong above, but I have no idea how to change it!
First thing....I know "Awesome" is spelled wrong above, but I have no idea how to change it!
This massive coop undertaking was a direct result of my dad (Poppy) wanting to suprise my kids with baby chicks for Easter. Knowing I was allergic to cats and dogs, my dad thought it would be funny to bring a box of 6 chickens to my doorstep as pets for my girls!
Needless to say, as a city boy, I was not happy. I knew nothing about chickens or any other barnyard animal for that matter. But then I discovered Backyard Chickens! What a lifesaver! I learned so much about these crazy little creatures from the great community here. Then I discovered the Coop Design section.....big mistake! My mind started racing and I sat down with a few pages of graph paper and a mechanical pencil and the rest is history. While this is an original design I definately borrowed some ideas from the other members. (I had no clue about perches and egg boxes and ramps before viewing the other coop designs, so thanks!) Here are a few pics of the process. I hope you enjoy them.

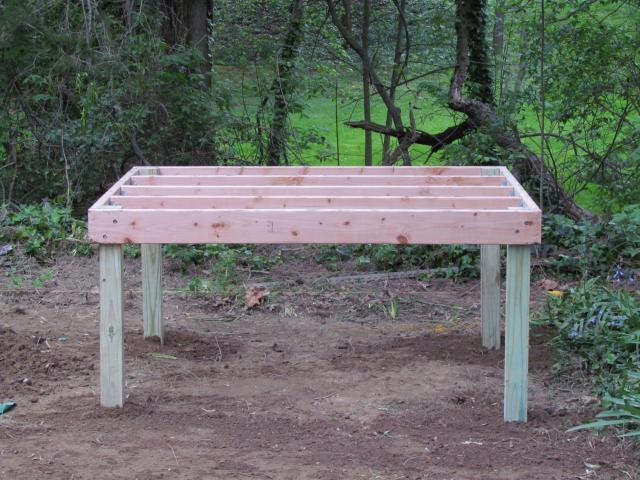
This is the preliminary drawing of the coop. Some changes were made to the finished product but this served as a basic model of the proportions.
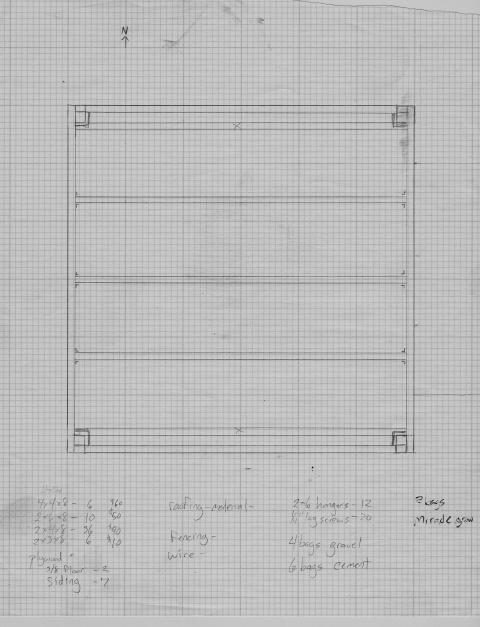
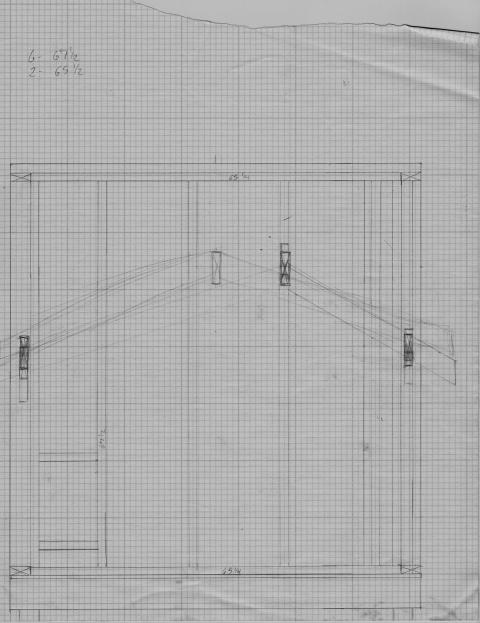
Here is the plan for the floor joists. 2X6 construction with joist hangers and 4x4 posts in the corners. The dimensions are 6ft X 6ft. Note***If I had known that a 6 x 6 structure would have generated so much waste I would have definately changed that part...Since most materials come in 4 x 8 sizes and 8 foot board lengths, you basically have 2 feet of wasted material when it comes to the 2x4's. Also, if you do like the 6x6 size (which I do) I would create the frame a few inches smaller because you pretty much end up with 23" boards as waste when you start to build to the outer materials and those size boards are good for nothing! Below is the actual pic of this structure. The 4x4's are buried about 2 feet and concreted in place.
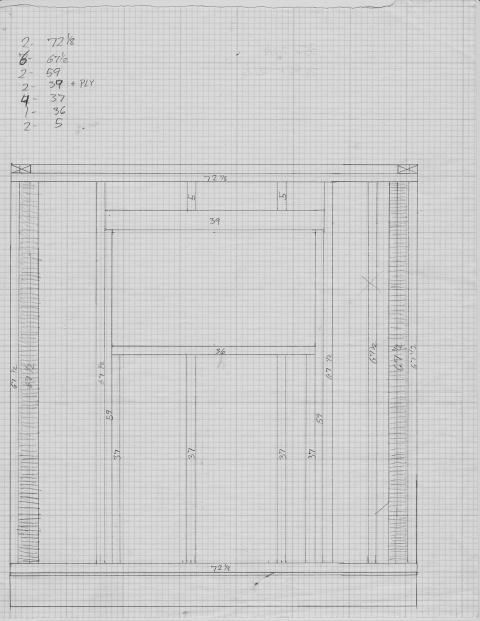
This is the plan of the front wall of the coop. Numbers represent inches. Cut list at the top. I know, it's built like a house! That's the problem with reading "house framing" books...I totally overdid it! But it's solid.
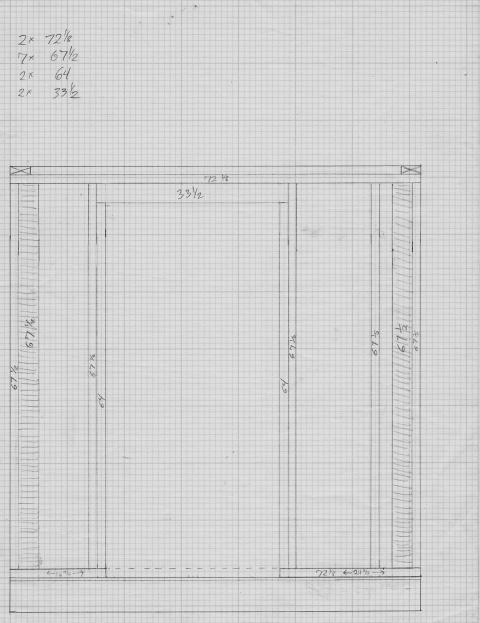
This is the back wall with opening for door.
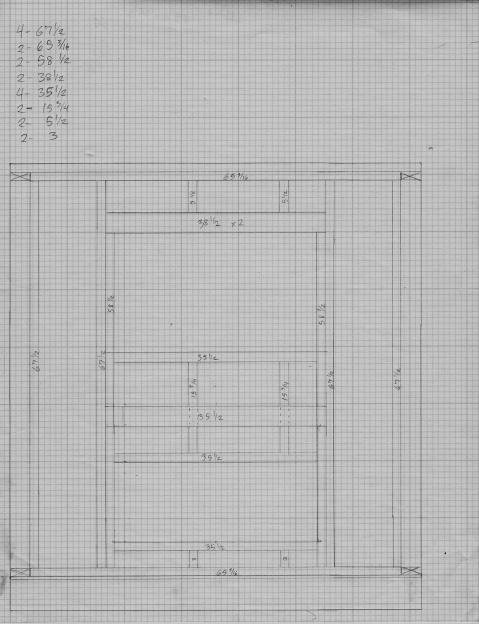
Next is the egg box wall with window opening. This was the most complicated wall.
Next is the wall that joins to the run. I wasn't sure how I wanted the run roof to connect to the coop, but I eventually decided to just center it on the wall and use equal sized roof rafters on the same pitch.
Here's a pic of the front and back walls in place.

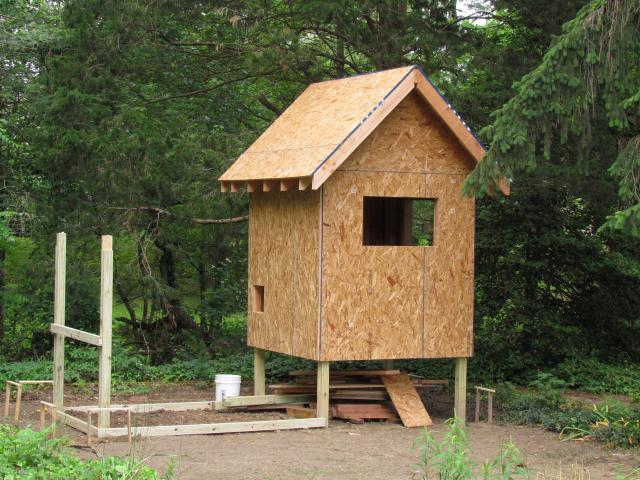
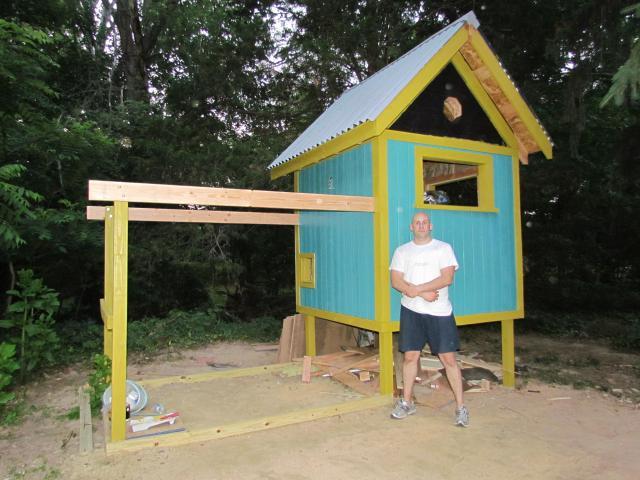
I know this is a big jump in construction but I didn't want to put too many boring pics on this page. The walls are complete and sheathed with the roof rafters in place. The total height of the coop is approximately 12 feet tall!
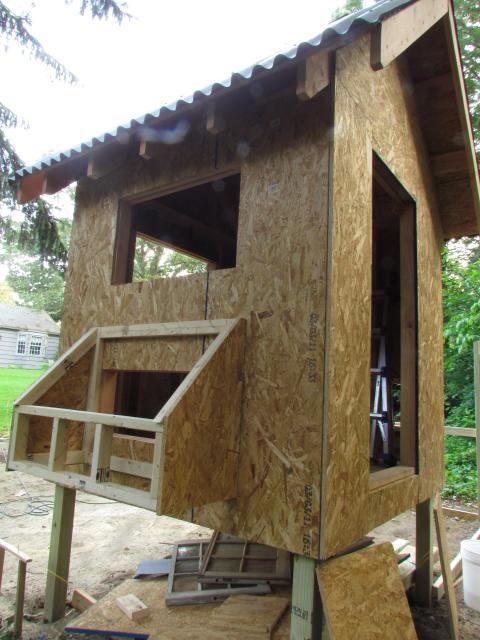
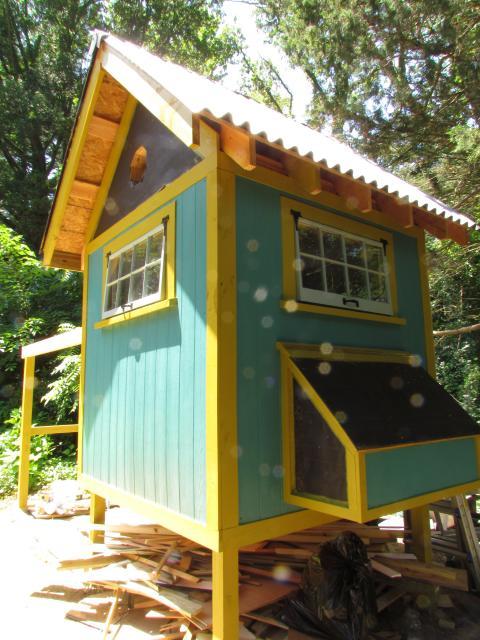
The roofing material is on and the egg box construction has begun...again with the over-framing....the egg box supports my weight with no problem...200+ pounds!!! I think it'll handle a couple broody hens! haha. The roof material is an Ondura product I found at the local home center. A little pricey but easy to install and it'll last 50 years. It's basically like a sheet of shingle material that mimics the look of galvanized steel roofing minus the eventual rust!
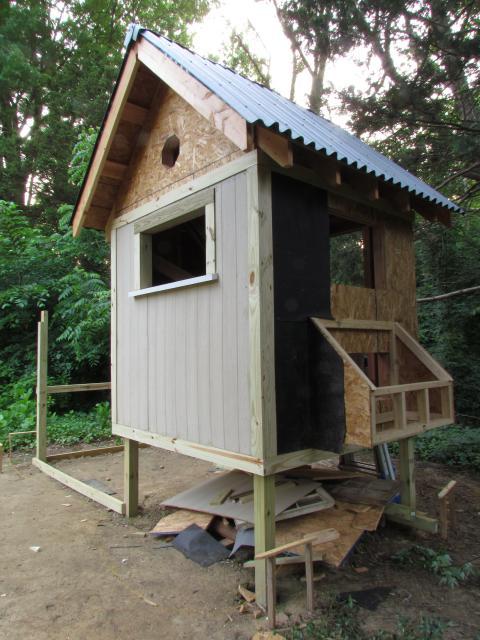
Next the tar paper vapor barrier was stapled in place and the smartboard sheathing was screwed in place. The smartboard really takes paint well. I used a 100 % silicone caulk on all edges of the material to make sure it doesn't absorb moisture and break down over time. I milled the window sill plates out of 2x6's and used a 14 degree angle to help the water shed away from the structure. I also cut a drip edge in the bottom of the sill so rain doesn't get under the sheathing material.
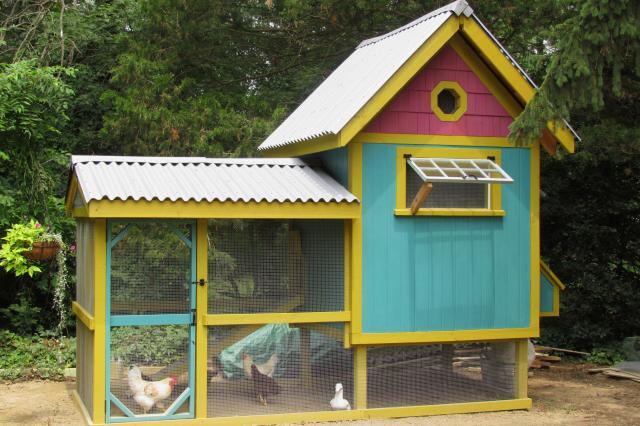
Finally some color! This is all my wife's domain. She's the color expert and I knew there was no chance of beige or brown being acceptable! When she told me she was going to use a greenish color for the body I was concerned the coop would blend in with the surrounding trees.....guess I was wrong! It's more of a blueish green. I thought I'd put myself in this one so you can get an idea of scale. I'm 6 feet tall.
The windows were reclaimed from my garage...they were hiding in the rafters when we bought the house...I designed the window openings from the beginning to fit the windows I had. Planning is important. They did need to be trimed slightly though but it was no problem with the assistance of my dad's table saw. inside of the window opening I stapled 1/2 inch hardware mesh for security and screen to cut down on flies (another tip I learned from the BYC community!) The egg box lid is attached with a piano hinge for easy access to the eggs from the outside of the coop. A lot of custom cut pieces to get the egg box to work. I had a general plan but it ended up turning into a monster project. I kept the roof of the egg box as a 45 degree angle to match the roof of the coop.
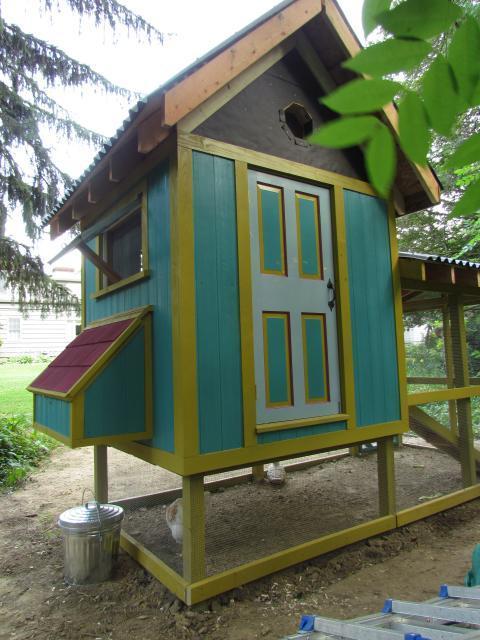
Next is a view of the back of the coop. The large door was cut down to size from a leftover door found in our basement. My wife again went crazy with the color. She painted all of the detailed rectangles in different colors as a decoration for the outside of the coop but when I attached the hinges to the door frame it turned out she painted the inside of the door! Oops. We took the door down and she painted the other side all fancy too. Now the chickens have something pretty to look at too! The egg box was topped with cedar shingles and the hardware cloth was attached to the run area. I burried the cloth in a 1 foot by 1 foot trench all the way around the coop. LOTS OF DIGGING! The wire goes down the ditch, along the bottom, and back up the front wall of the ditch. Then it was all filled in.
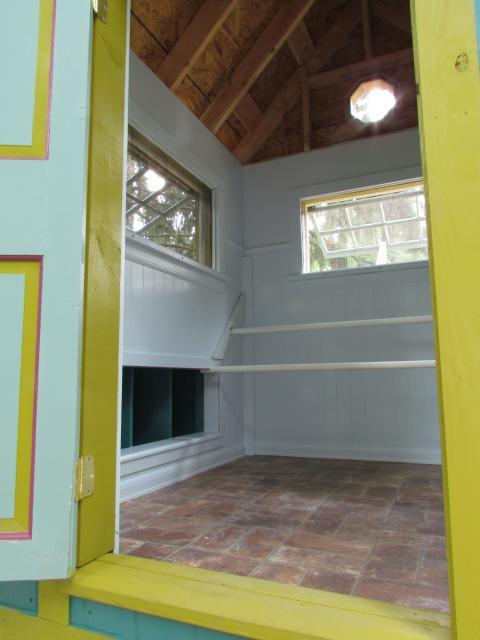
Here's a pic of the inside. The walls and floor are insulated. I used a linoleum sheet and PVC trim boards at the floor level for ease of cleaning. I ran a bead of 100% silicone caulk around the edges to make sure no nastiness was absorbed into the flooring. You can see the three nesting boxes and two perches made out of large curtain rods (another garage find) I know the wainscoating is a bit much, but I like it! I'm going to insulate the gable walls and roof before winter. I also plan on running electric for a light for heat in the winter.
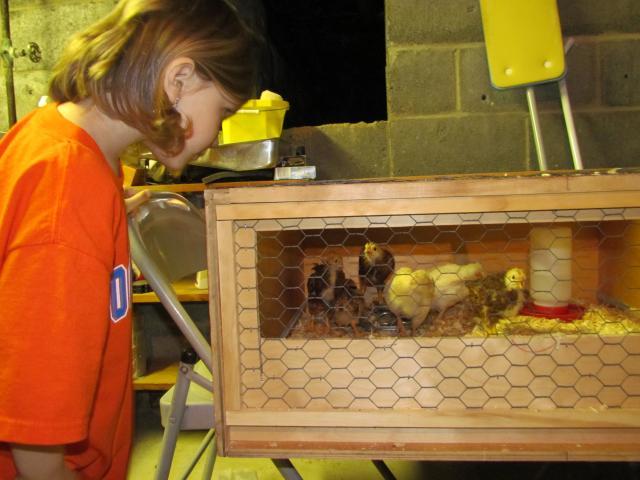
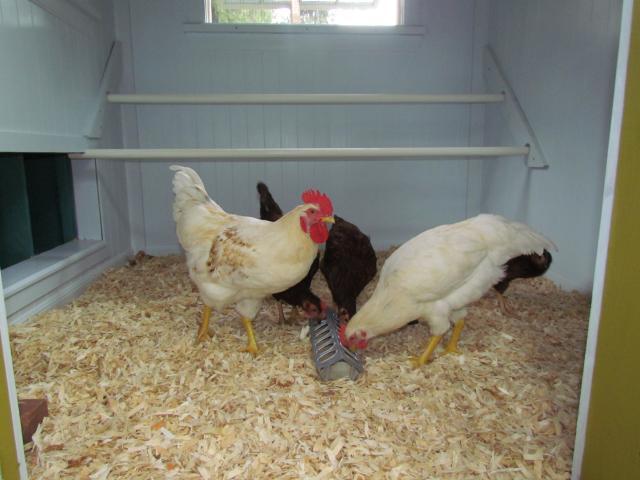
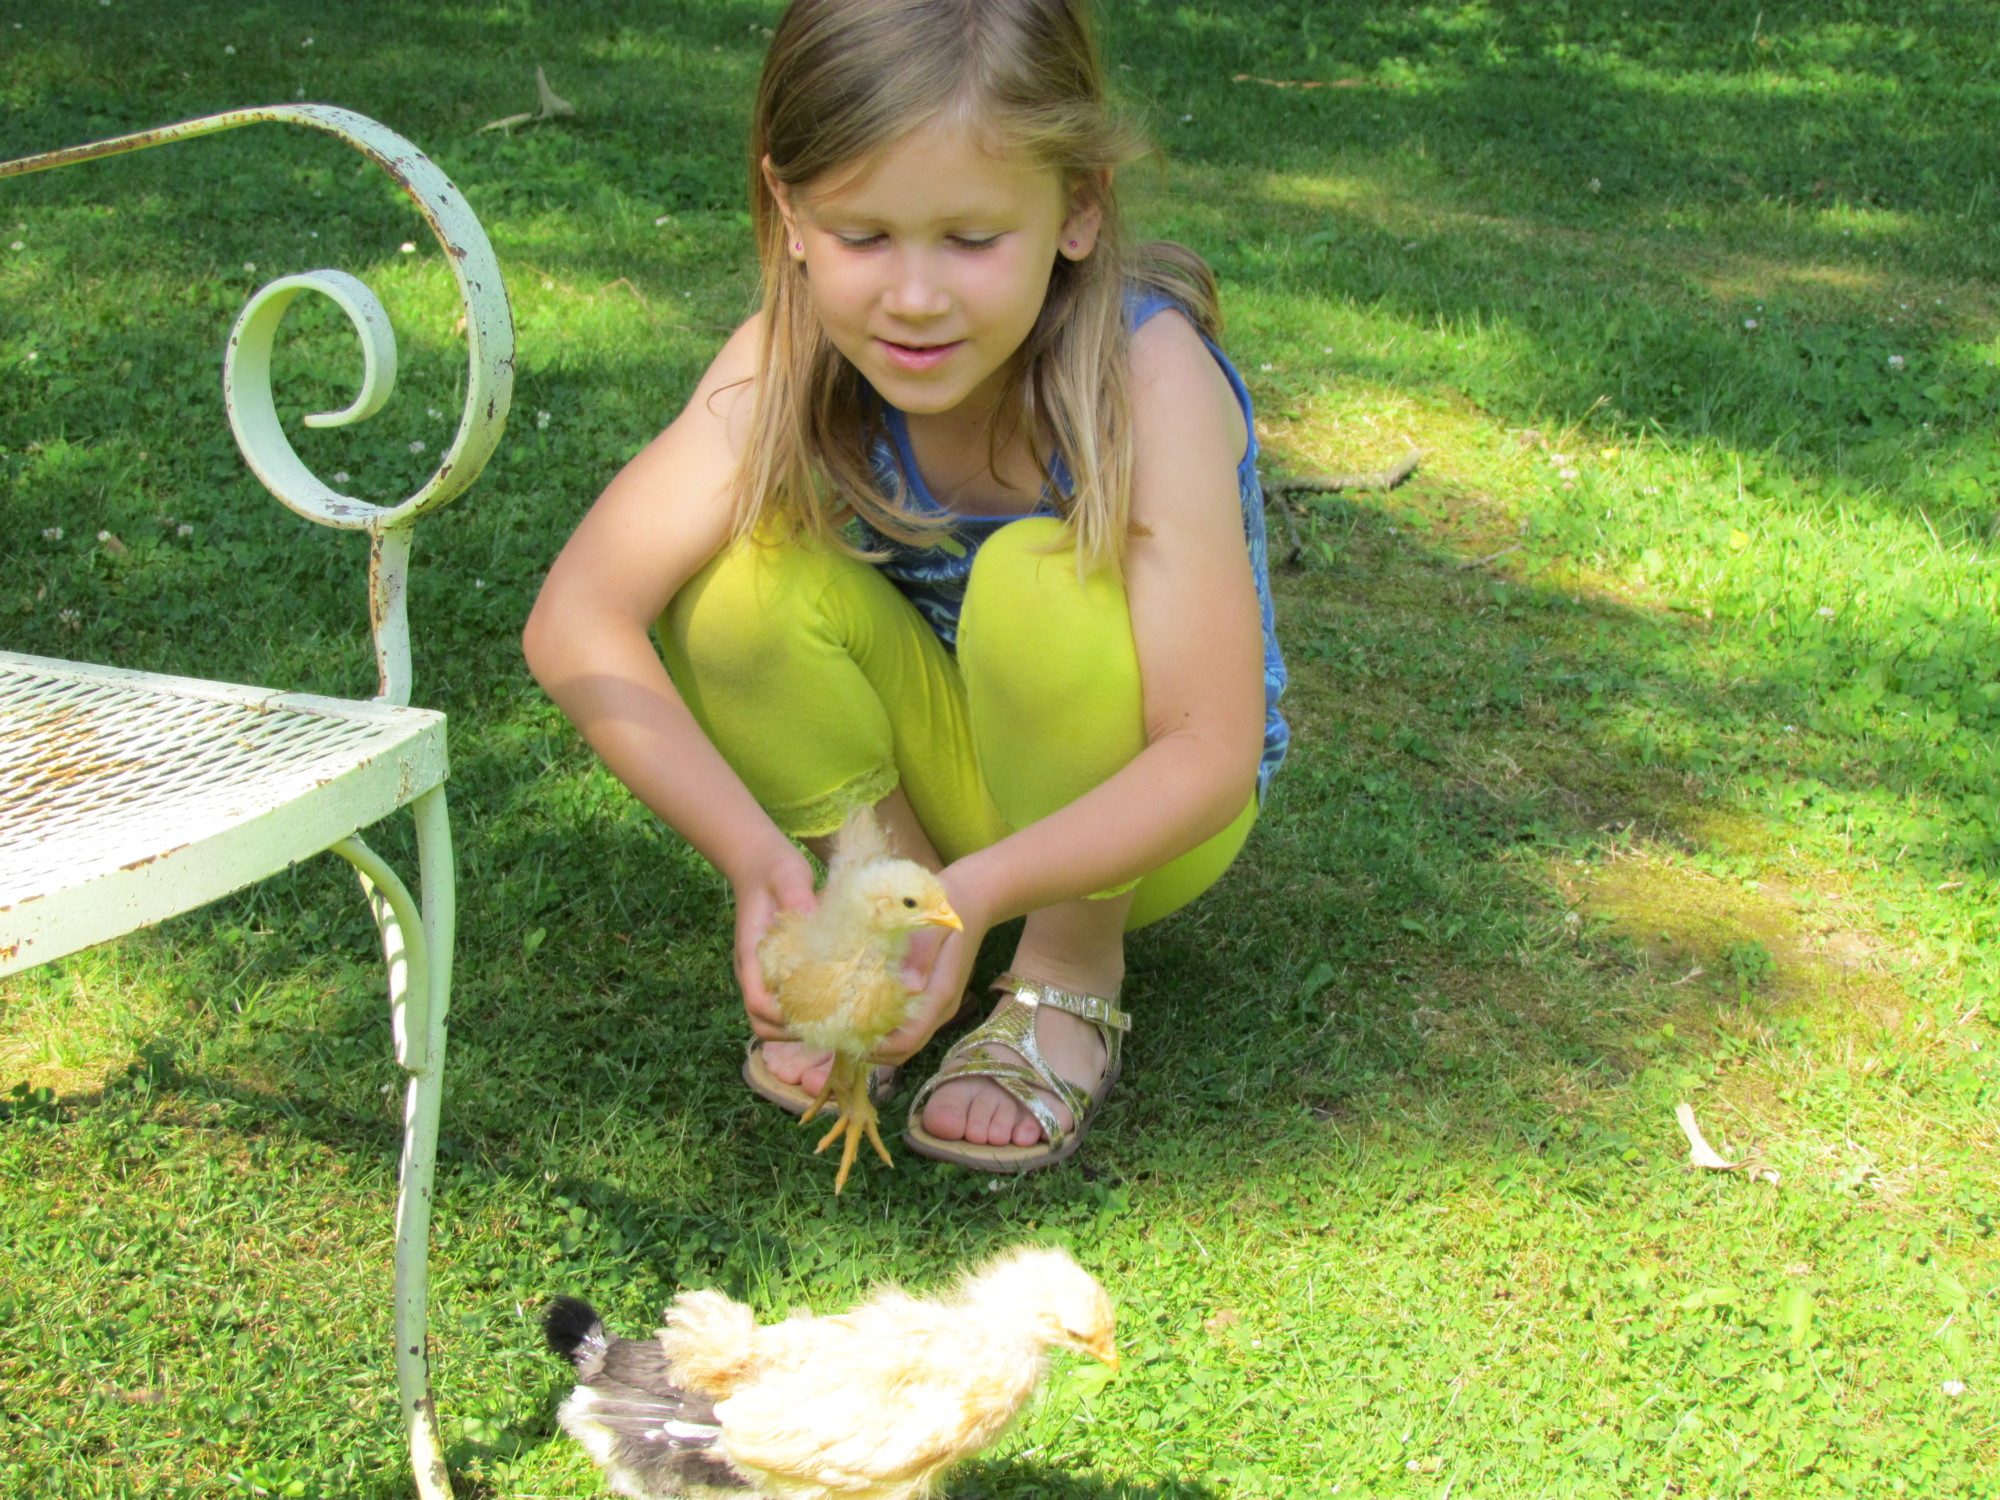
Here is a pic of the chicks on their first day in the coop. They were about 3 months at this point. The coop will never be this clean again! I later purchased hanging food and water containers that are about 2 gallons each. I thought my white chickens were Orpingtons for the longest time but I'm starting to think they are leghorns. The roo is Roofus and the hen is (large)Marge! The other RIR's are Milly, Lilly, and Buddy. We're hoping to get a few more hens in the future since I've read that a good ratio of hens to roos is 10 to 1.
Here's Roofus trying to get used to coming down the ramp. A little precarious at first, but they're pros now.

And here's the (almost) finished coop! Still some trim to attach and finishing touches. I did put a few large branch perches in the run area. My wife also wants a window box built for the front window and of course some chicken friendly landscaping around the coop. My work is never done! It took about 2 and a half months of all of my free time and more money than I'd like to admit, but we really love our new coop and the chicks seem to love it too. I hope you've enjoyed this. I was certainly inspired by all of the great coop designs I looked through on the BYC pages.
April 8, 2012 - Easter
OK, there have been some major and occasionally disturbing developments since getting the chickens last year.
1) Marge, the all white leghorn, is actually a rooster as well. We still call him Marge! But this brings our ratio to 3 roosters, 2 hens. For the longest time I was under the impression I could make this work. After all, I have grown somewhat attached to these creatures. Well, After about six months old, the two white roosters became super aggressive and Roofus managed to chase my wife across the backyard. That was the end of her involvement with our backyard chickens and the beginning of her fear of extremely large birds!
2) The 3 to 2 ratio has taken its toll on my poor girls. I watched as their feathers slowly disappeared from their backs and their backs became red and sore looking. I thought to myself, they are going to molt anyway and their feathers will grow back soon. Well, as I was getting ready to head out the door for my overnight wedding anniversary trip, I checked on the chickens one last time. I was horrified to see Milly had a huge gash across her thigh and the skin was completely peeled back. I immediately separated the boys and girls, keeping the girls inside the coop with access to the egg boxes and the boys outside in the run. Luckily the inside of the coop is large enough to keep the girls from going stir crazy! Milly seems to be healing nicely and they are both benefiting from not being continuously mounted all day. I let the girls walk around the yard when I'm outside so they can free range a little. But now, I'm stuck with the predicament of having to get rid of my roosters to save my hens. I honestly am feeling less and less bad about it as it concerns my white roosters because they have become very aggressive and constantly attack me when I open the run to change their food and water. I do however feel bad about having to get rid of Buddy, my RIR rooster. He has never once attempted to bite or scratch me. But his is the biggest of the roosters and I'm afraid he will hurt the hens.
So, if you are new to raising chickens, use this story as a cautionary tale of what not to do. It seems roosters should be housed seperately or there needs to be a large number of hens to one rooster ratio. Don't fool yourself and be willing to accept that you cannot control everything. When you take a wild animal and control its living conditions, you are responsible for its safety and well being. An emotional decision to keep the roosters led to an even harder emotional decision to get rid of them.
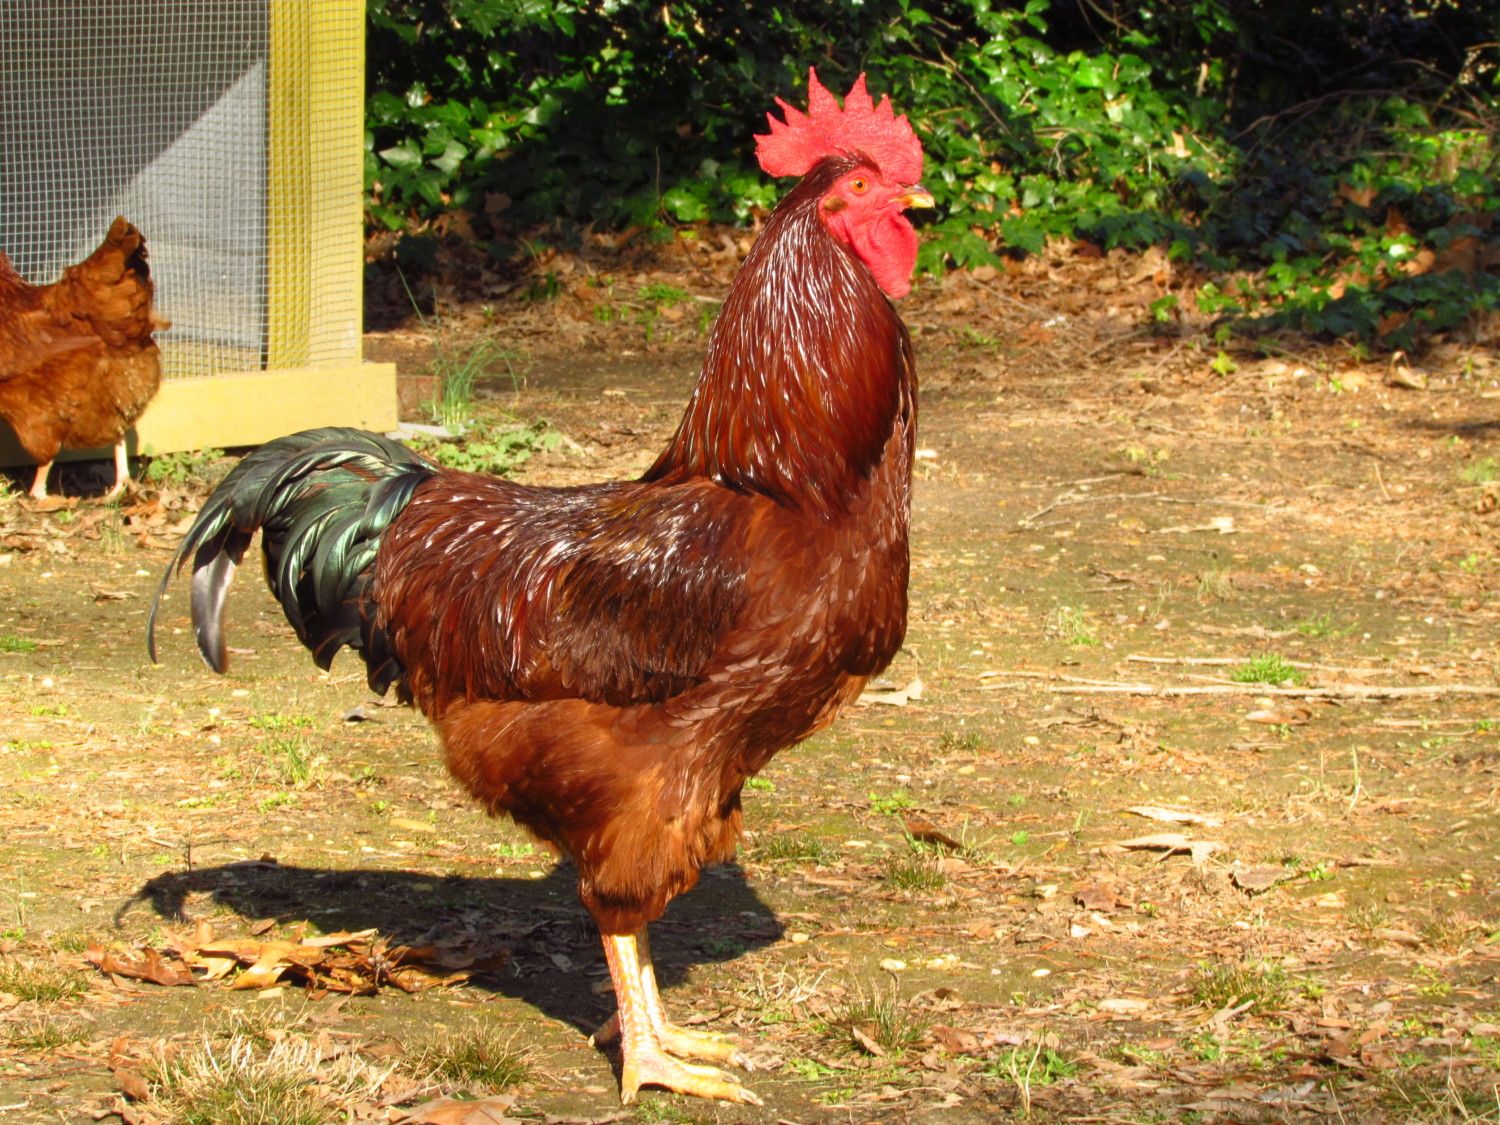
Here is my "Buddy" He's a really good rooster.
I am hoping to get about six more pullets this week to add to the flock!!! I have read to introduce them to the existing girls slowly....we will see how it goes!
May 25, 2012
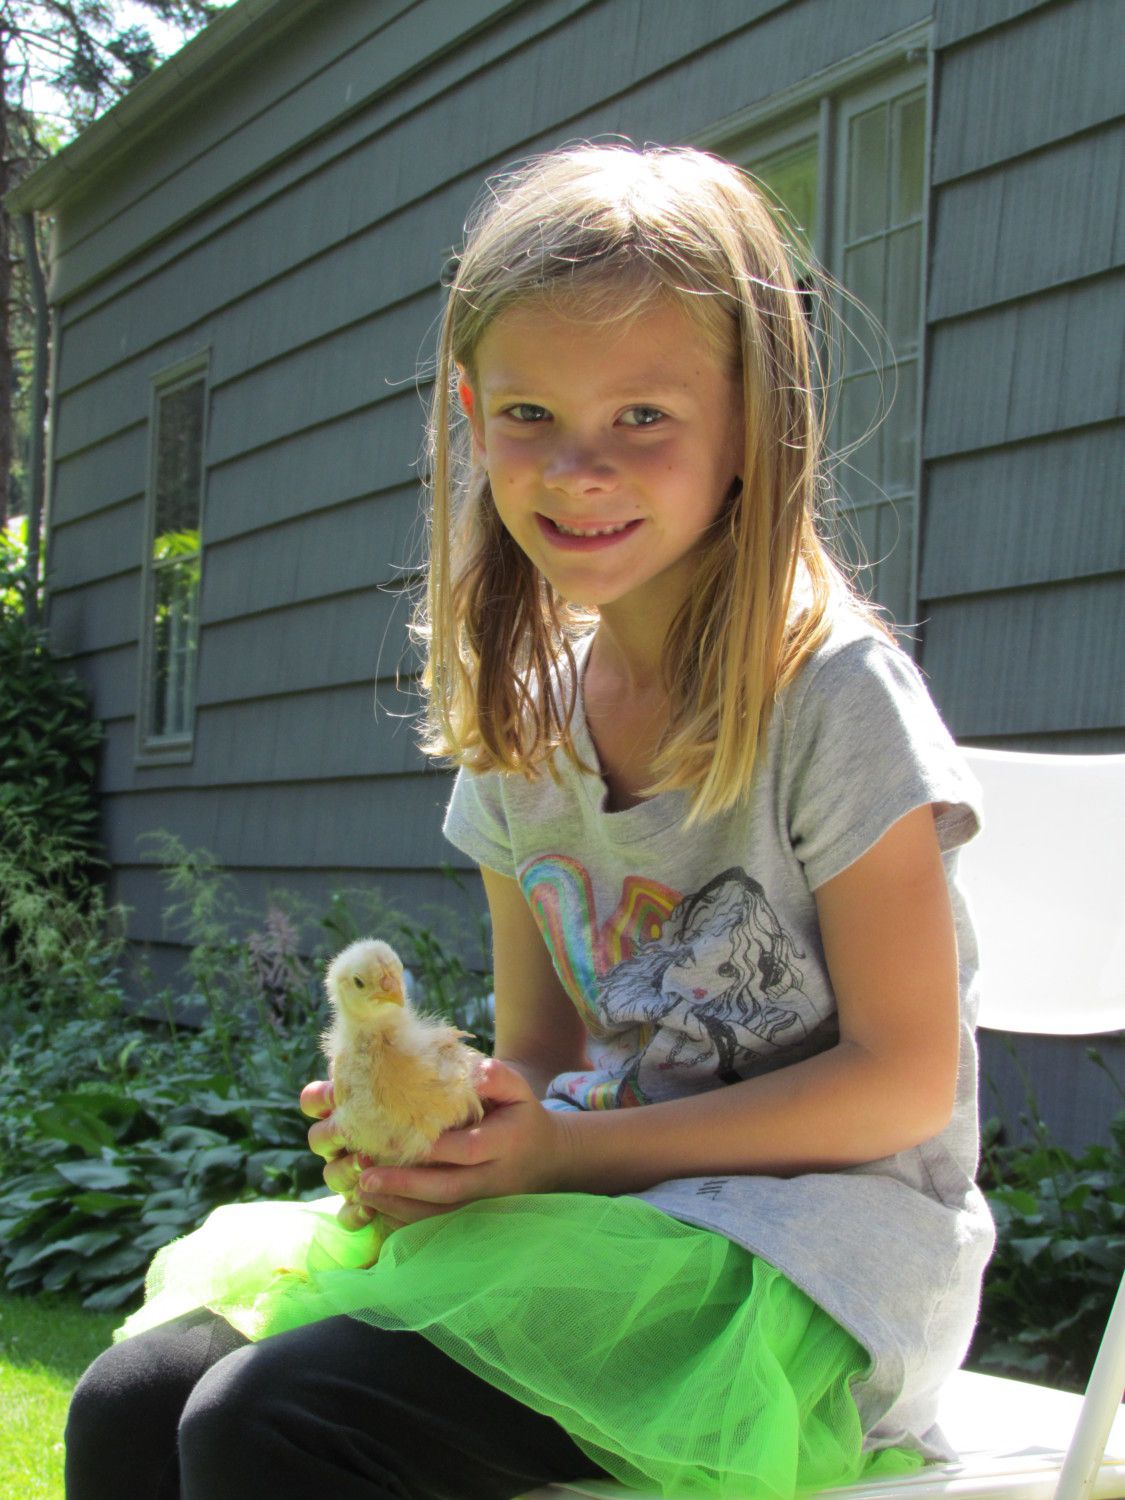
Finally got a few new chicks today! The new additions are two black australorps and two buff rocks. The first batch of chicks were got from Poppy were already about 4 weeks old, so this is our first experience with babies. I hope all goes well. I'd really like to locate a couple of barred rocks too, but they have been hard to find.
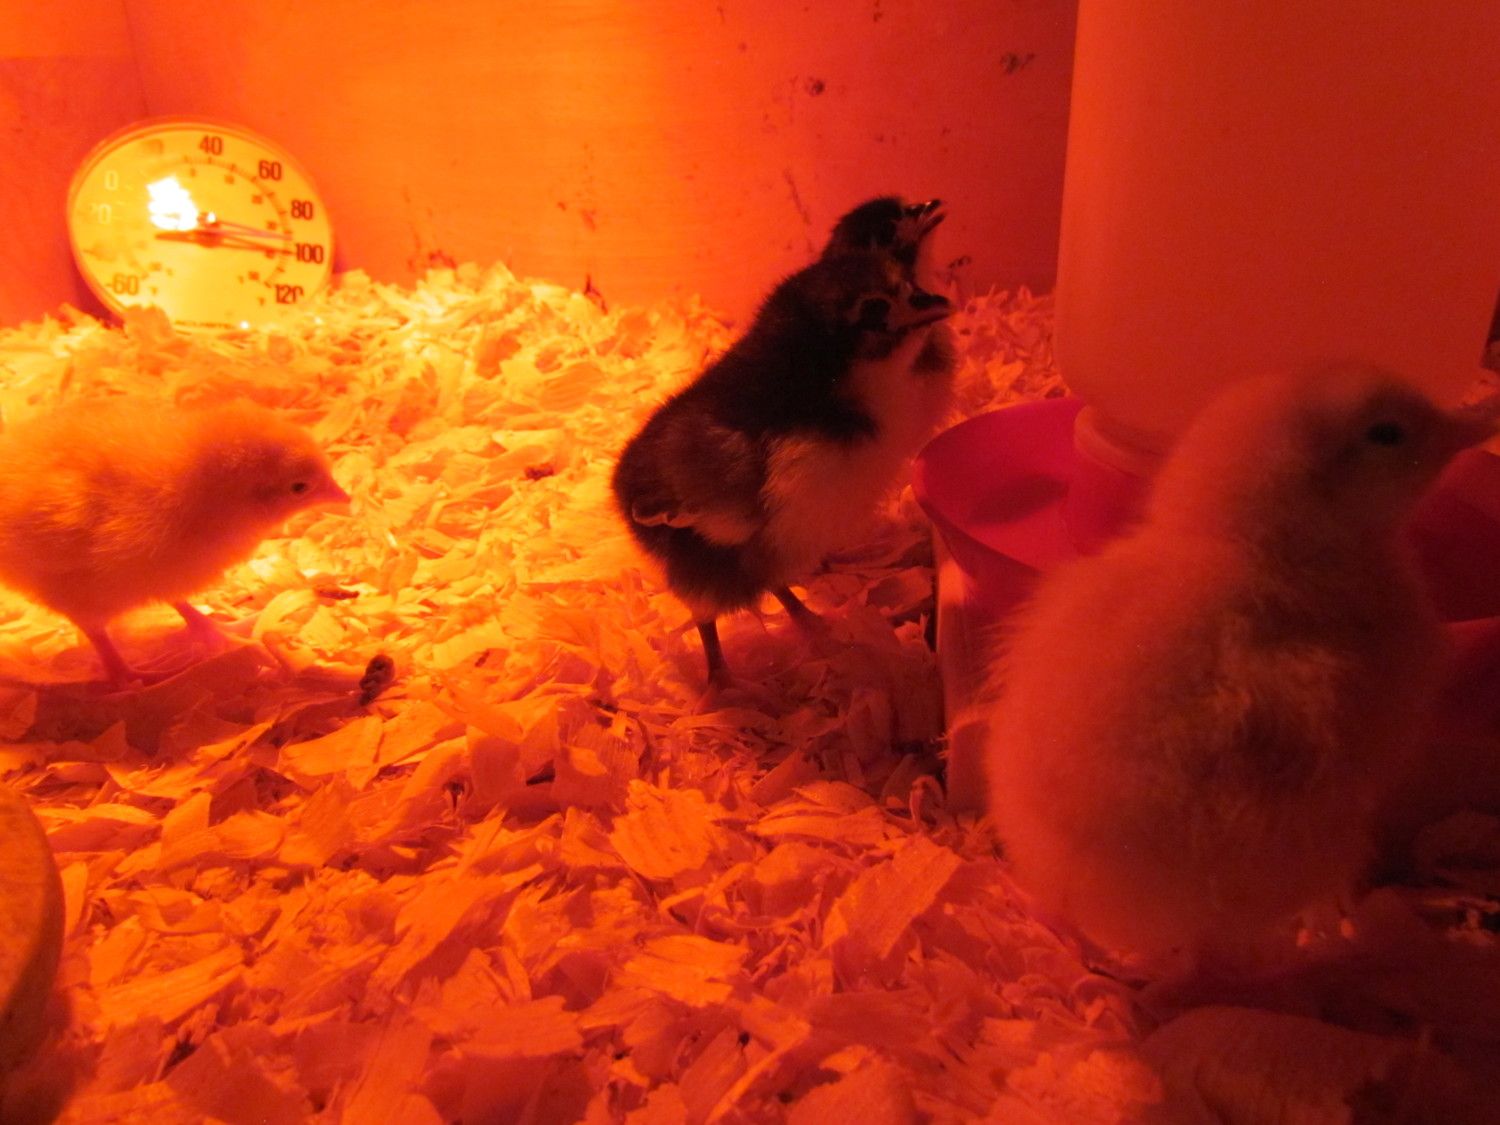
I know the temp is a little high here, but I was just getting the light adjusted to the right height.
Here is a video of the chicks...
June 10, 2012 - New chicks are 2 1/2 weeks old. I'm starting to wonder if I'm cursed with more boys because the black australorps are kind off aggressive. They fly around and land on eachother. I'm keeping my fingers crossed...hopefully it's just the breed.

July 8, 2012
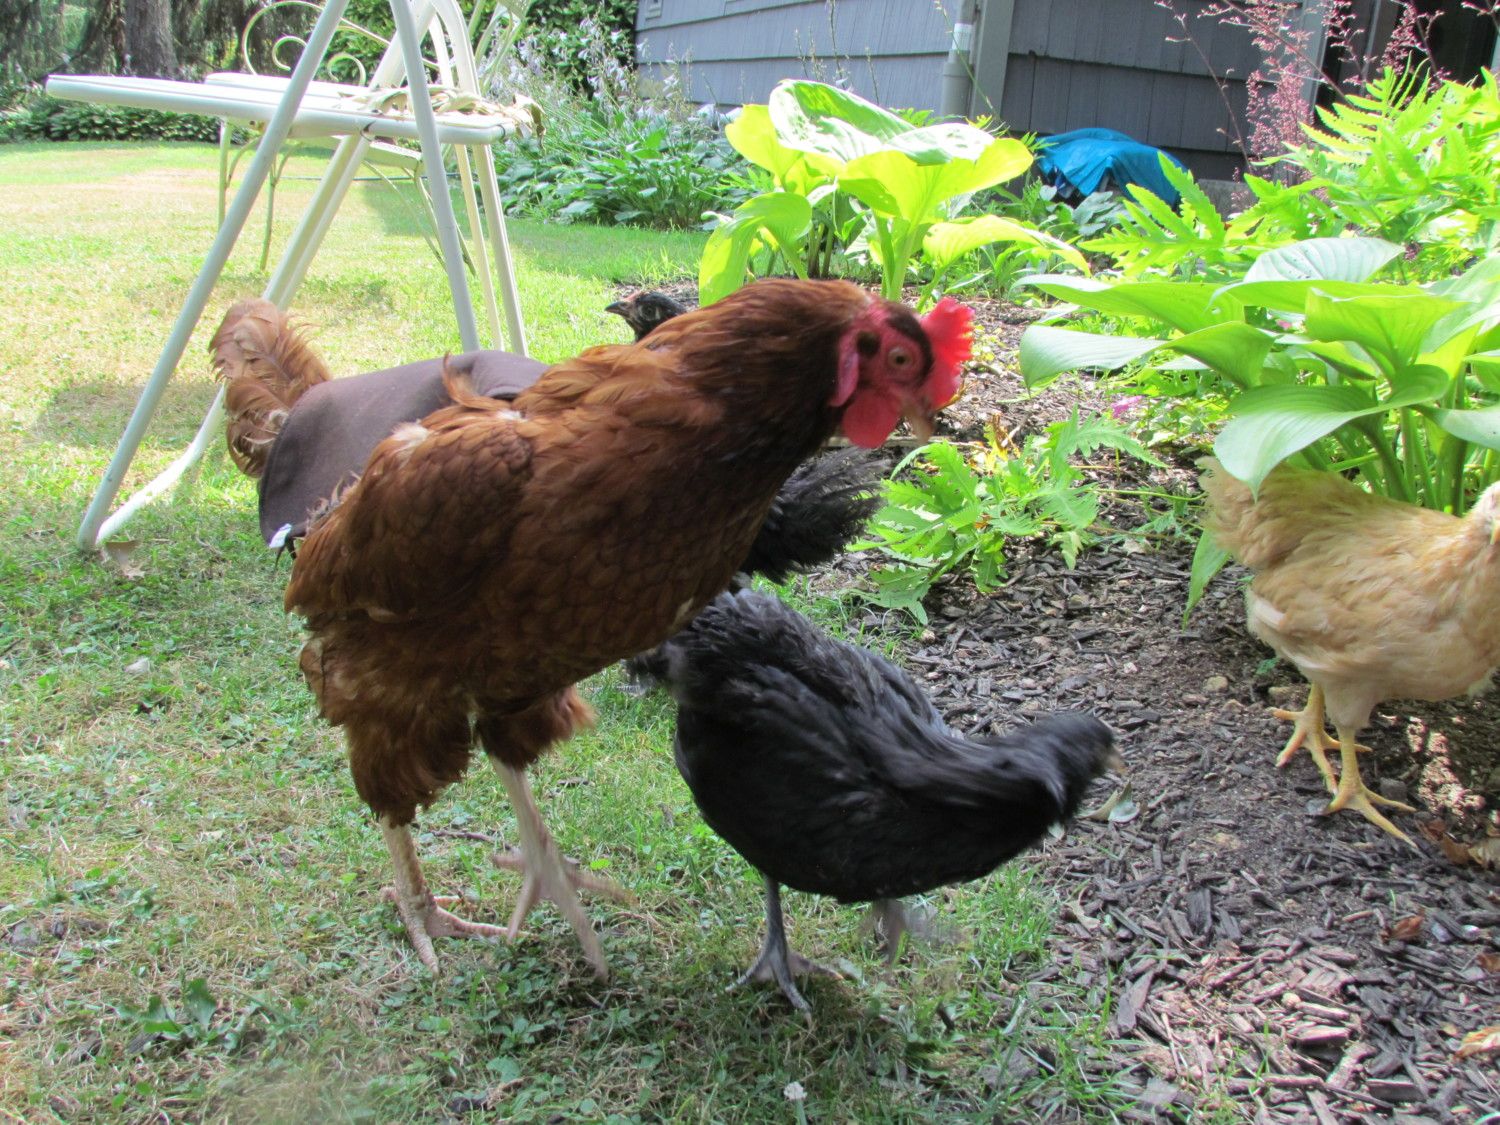
The chicks are almost 7 weeks old and they are getting huge! I think three of them are girls for sure, but I have my concerns about one of my Black Australorps. The tail feathers stick up and I saw the neck feathers standing on end today when they were playing outside. I have introduced the new chicks to the "old chicks" and my big girls quickly put them in their place! I keep a close eye on them to make sure they don't get abused and only let them co-mingle for a short period of time. I'm going to start planning a temporary addition to the coop so they can get to know eachother through the hardware wire.
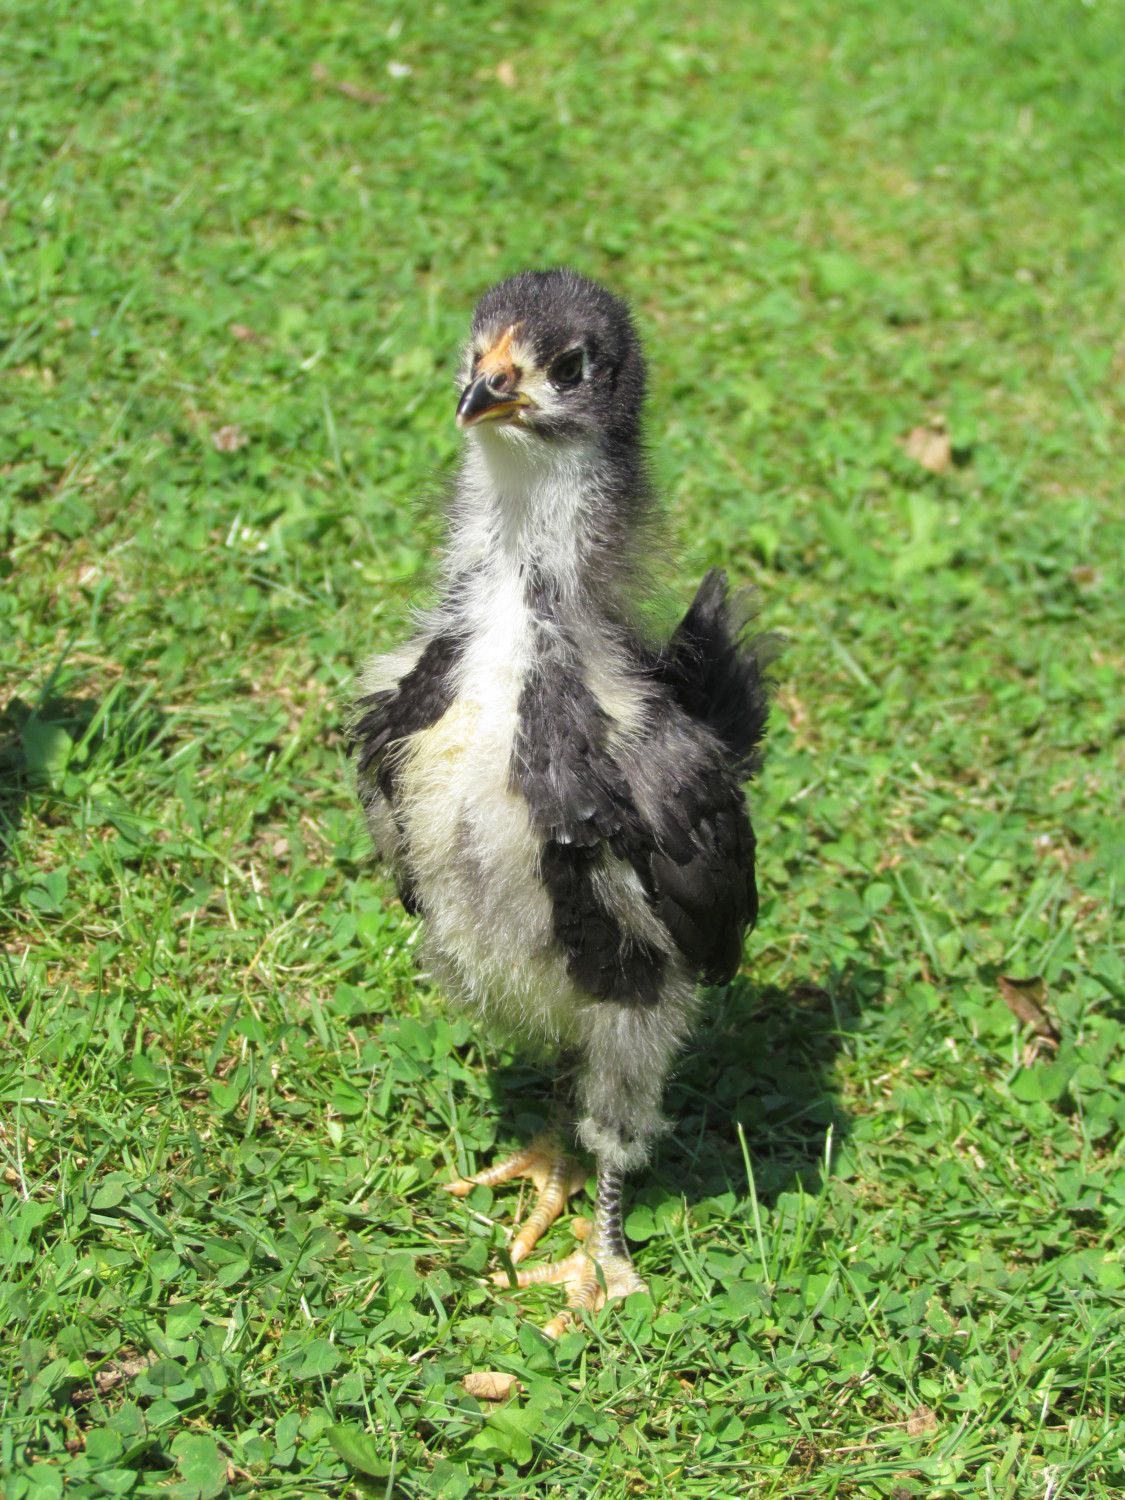
Keeping my fingers crossed, but this one looks a lot like a boy!
Lilly is keeping the little ones on their toes!
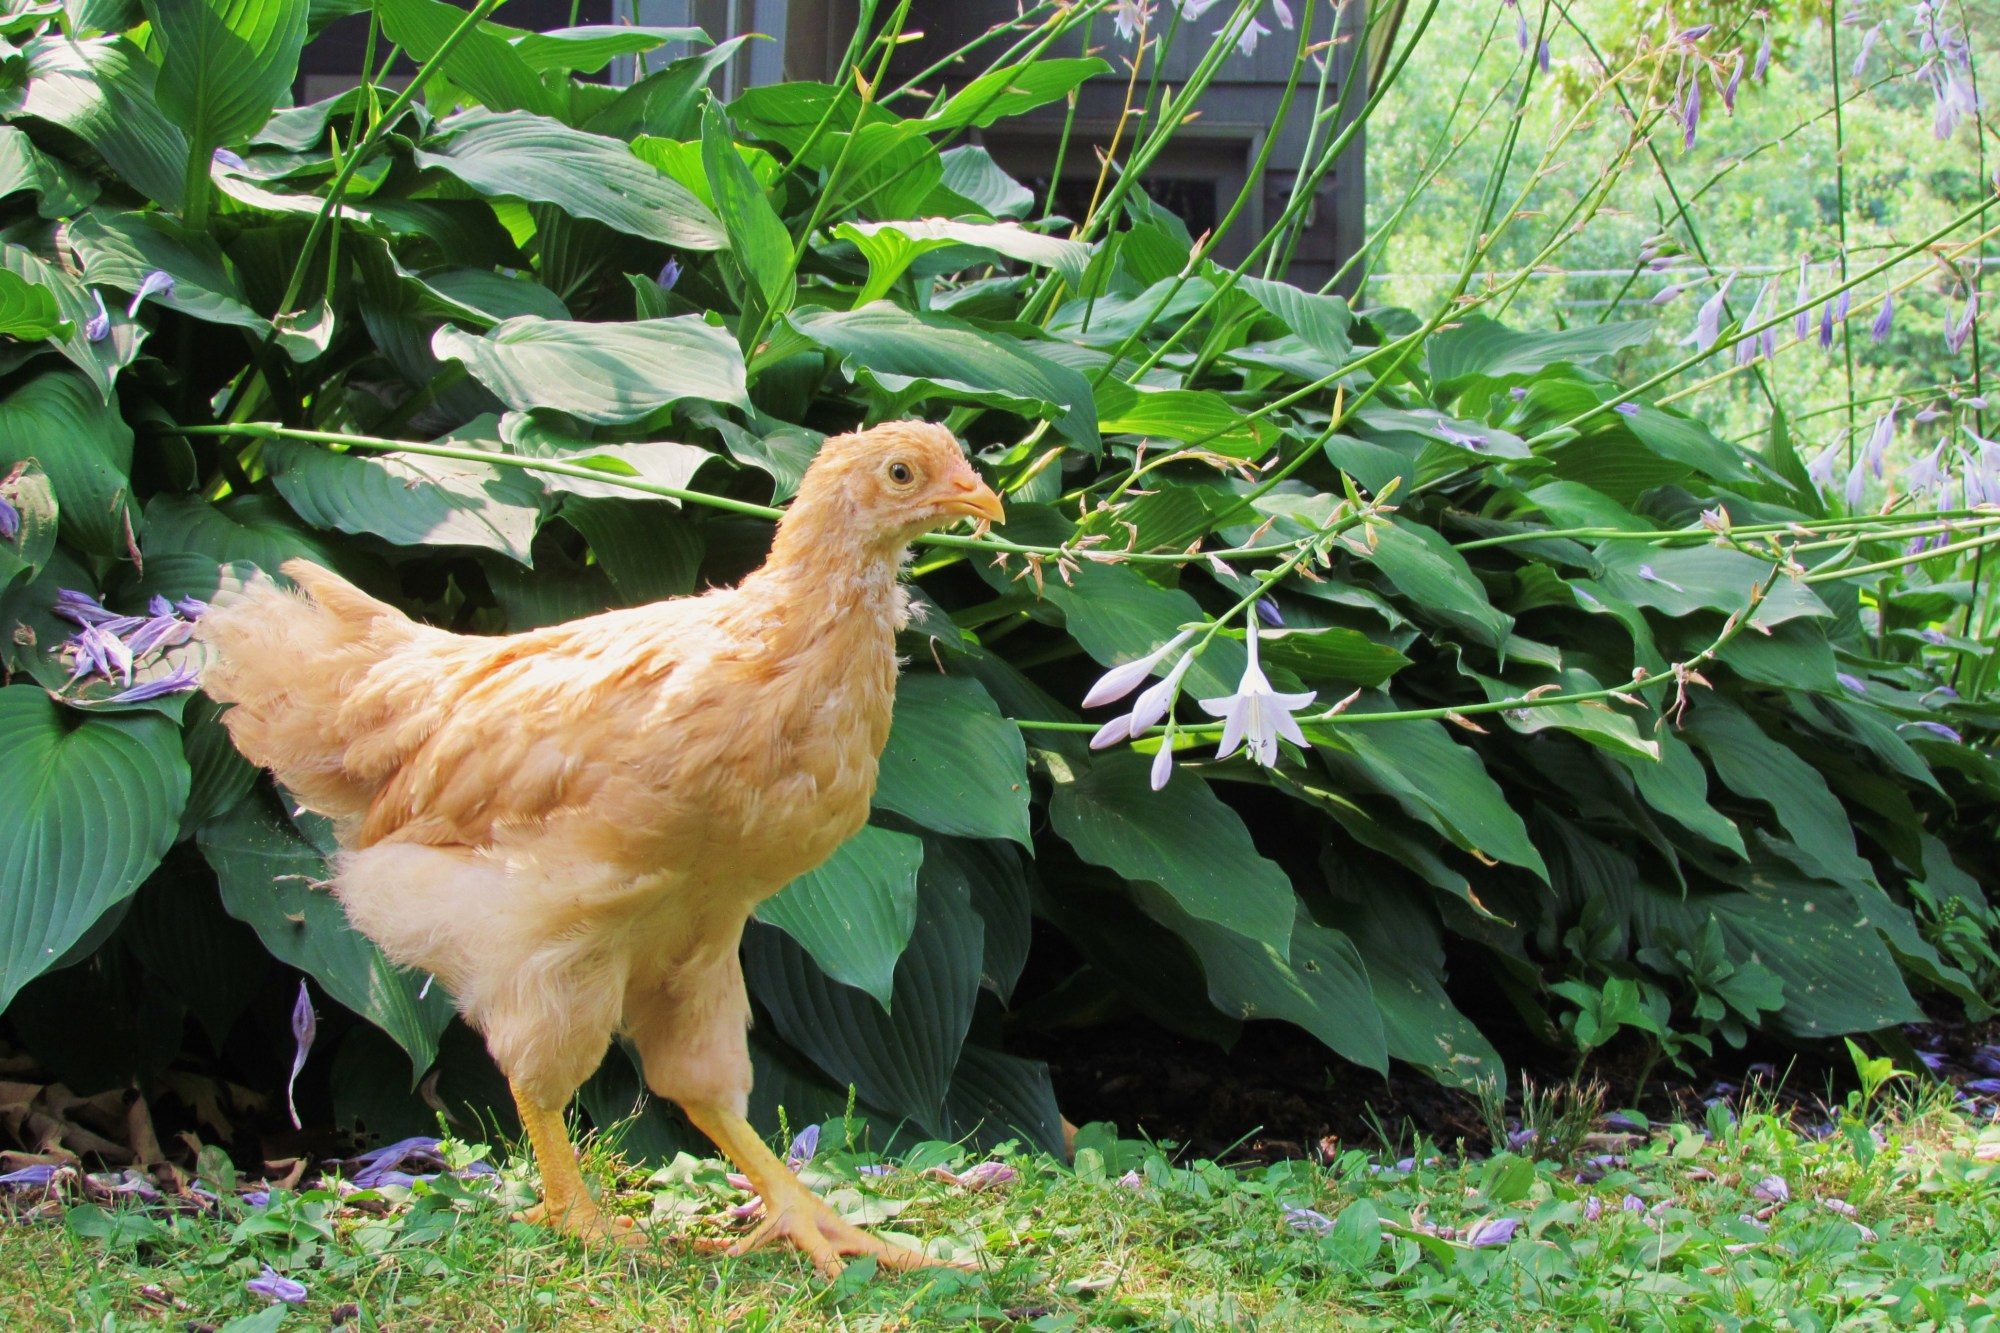
One of my pretty buffs.
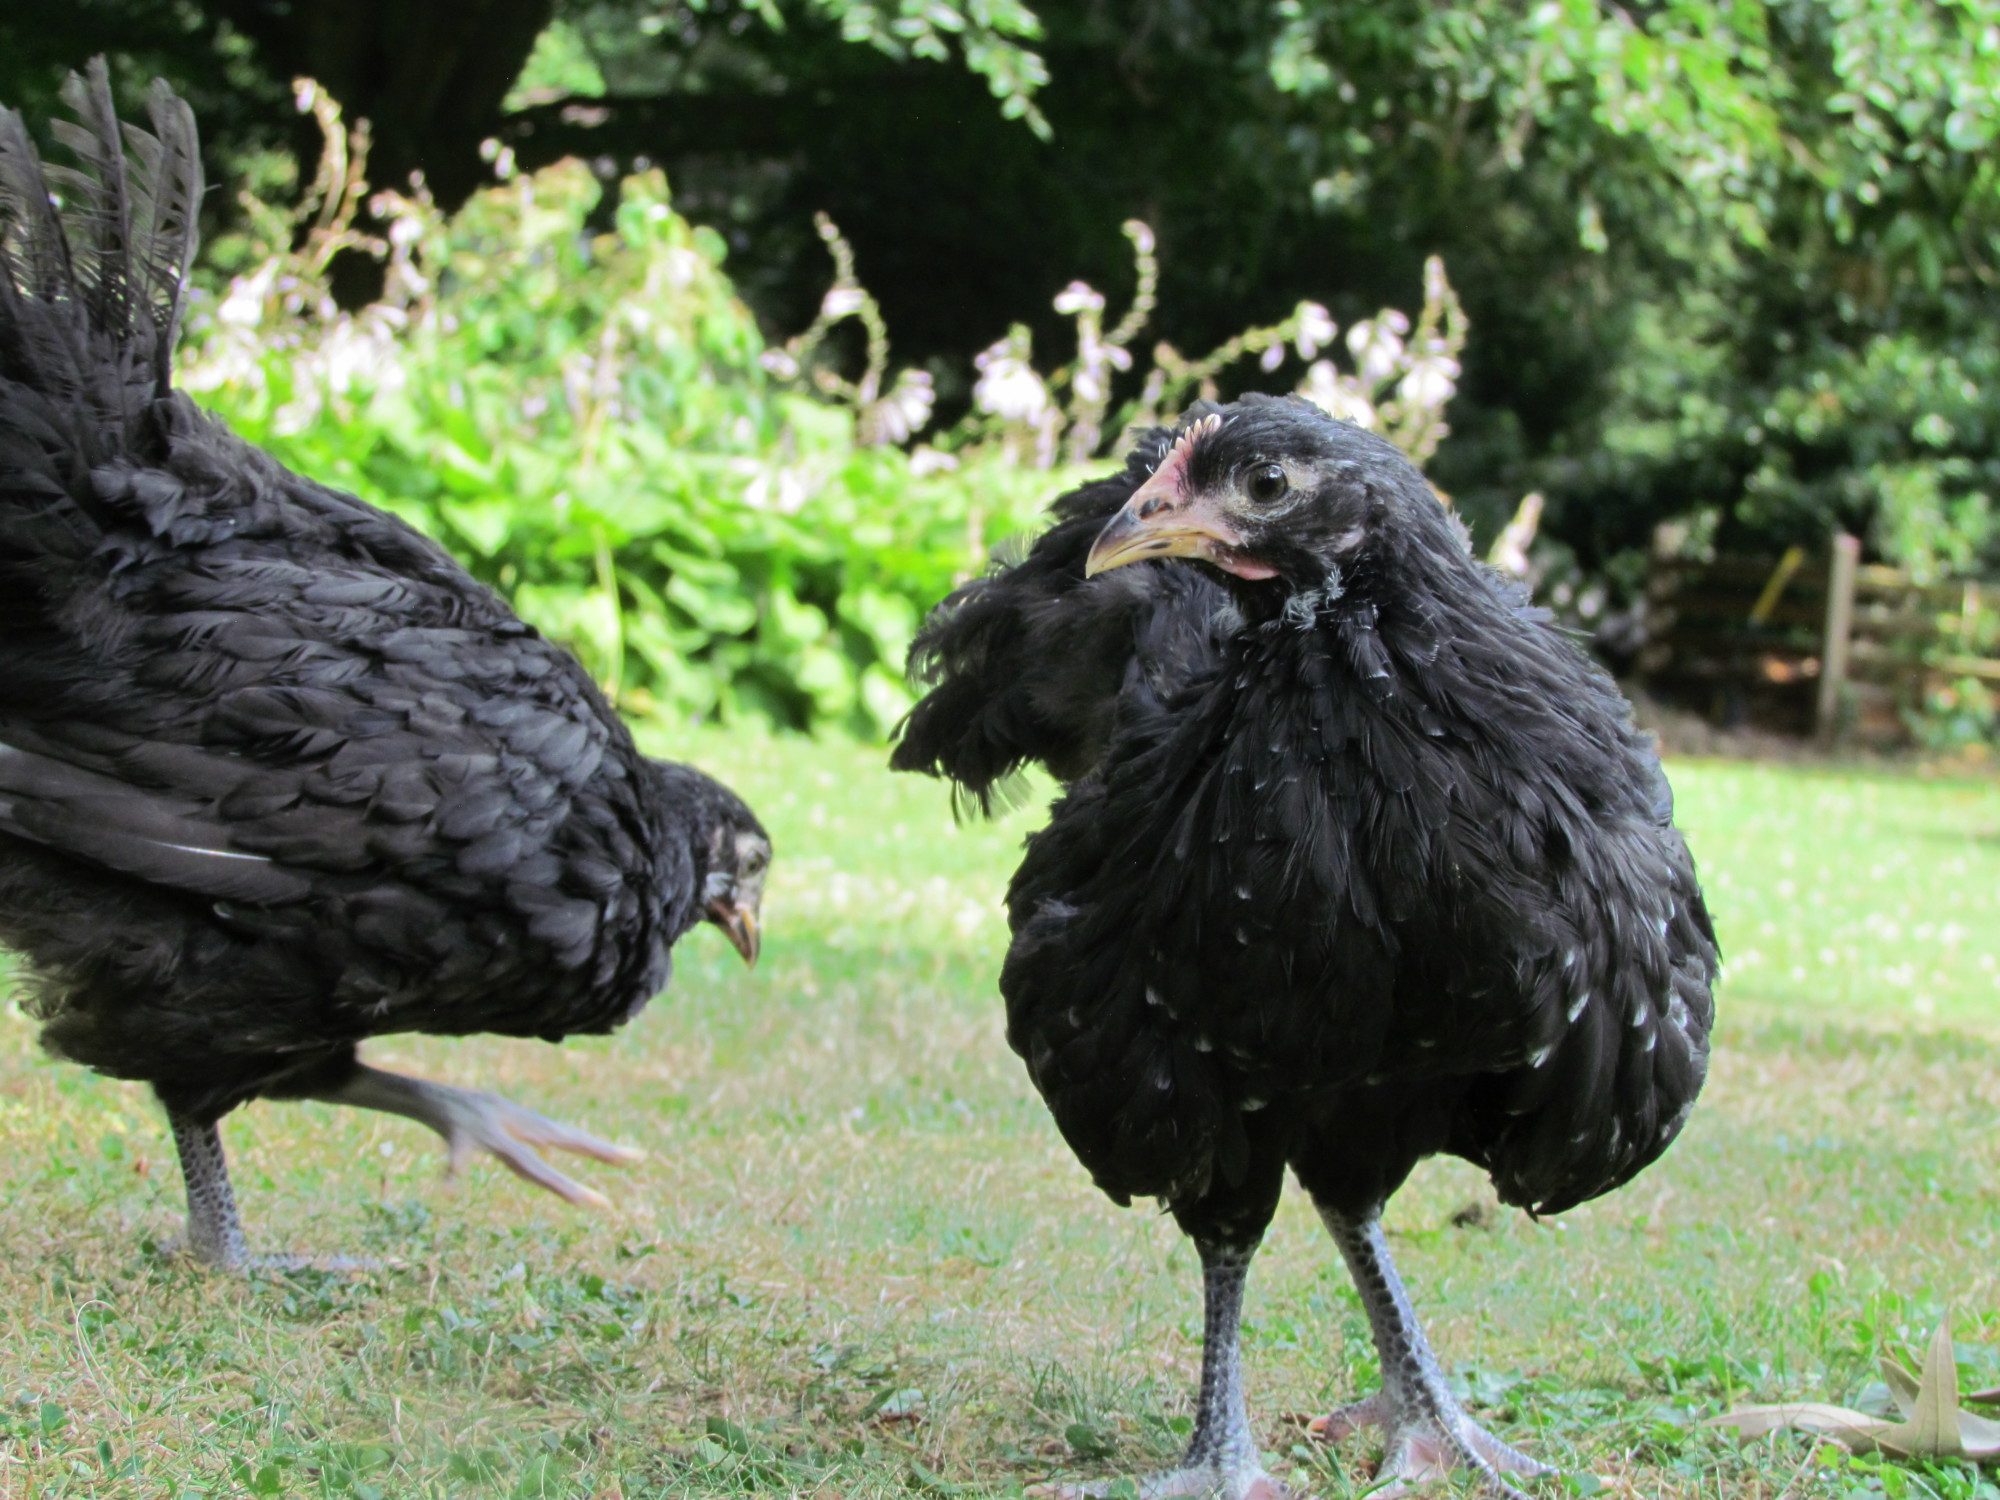
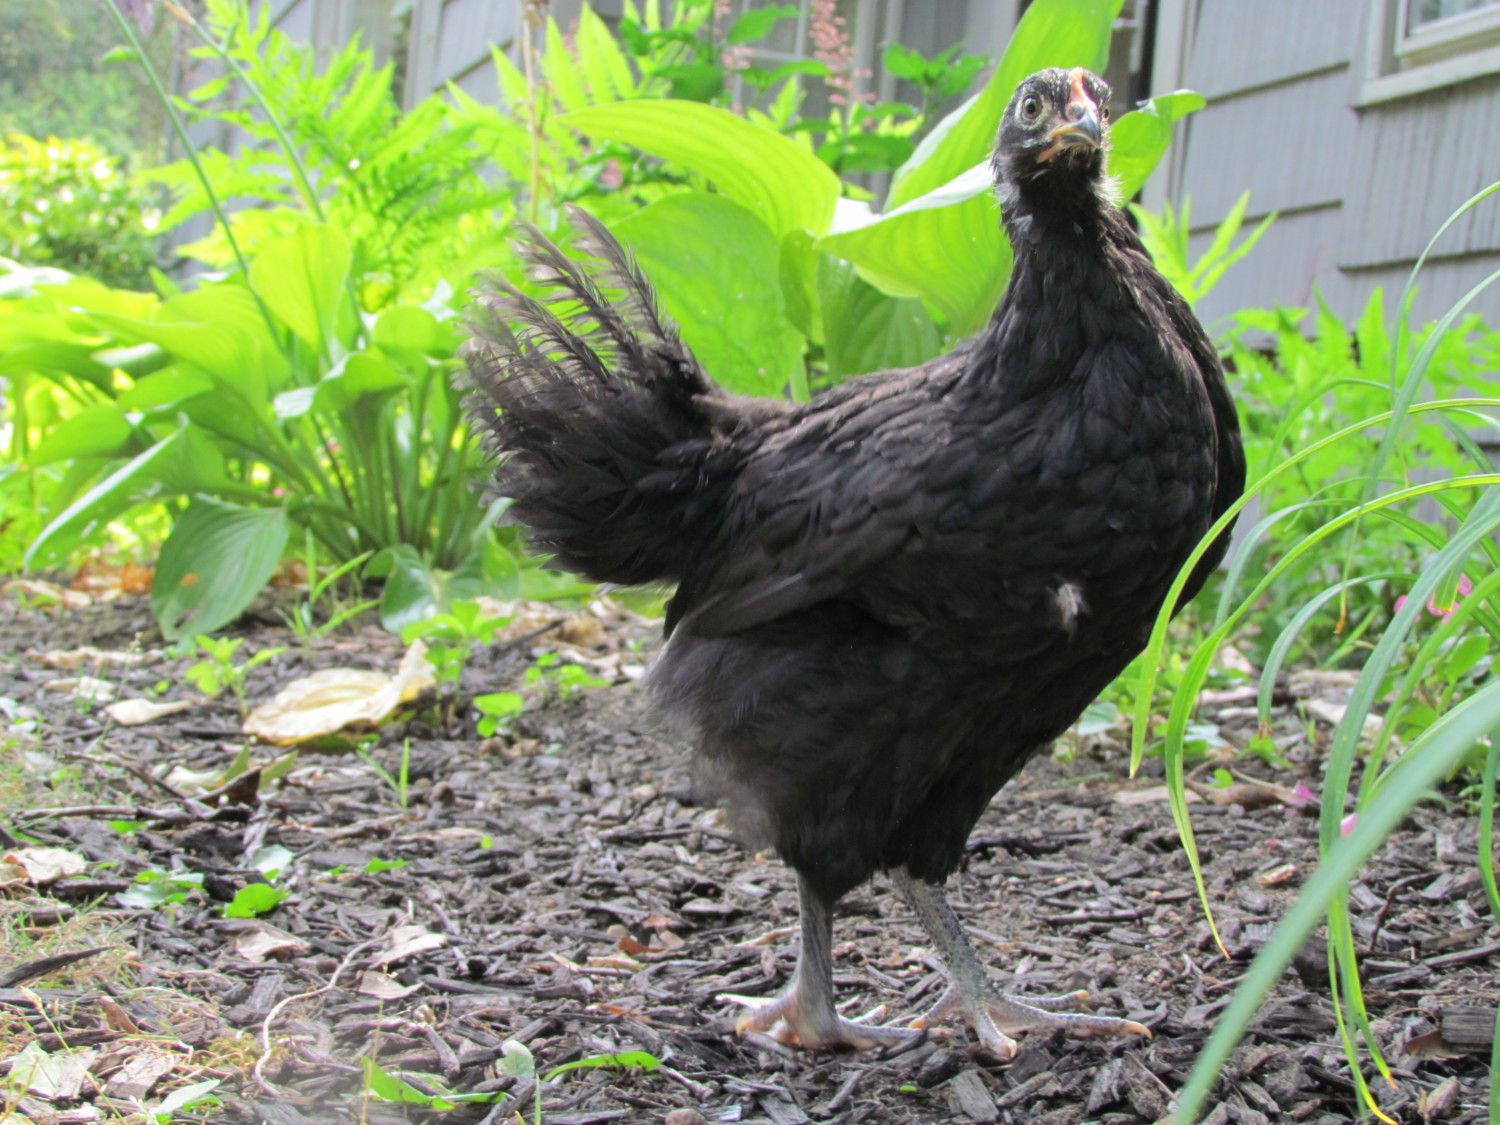
My black Australorps!
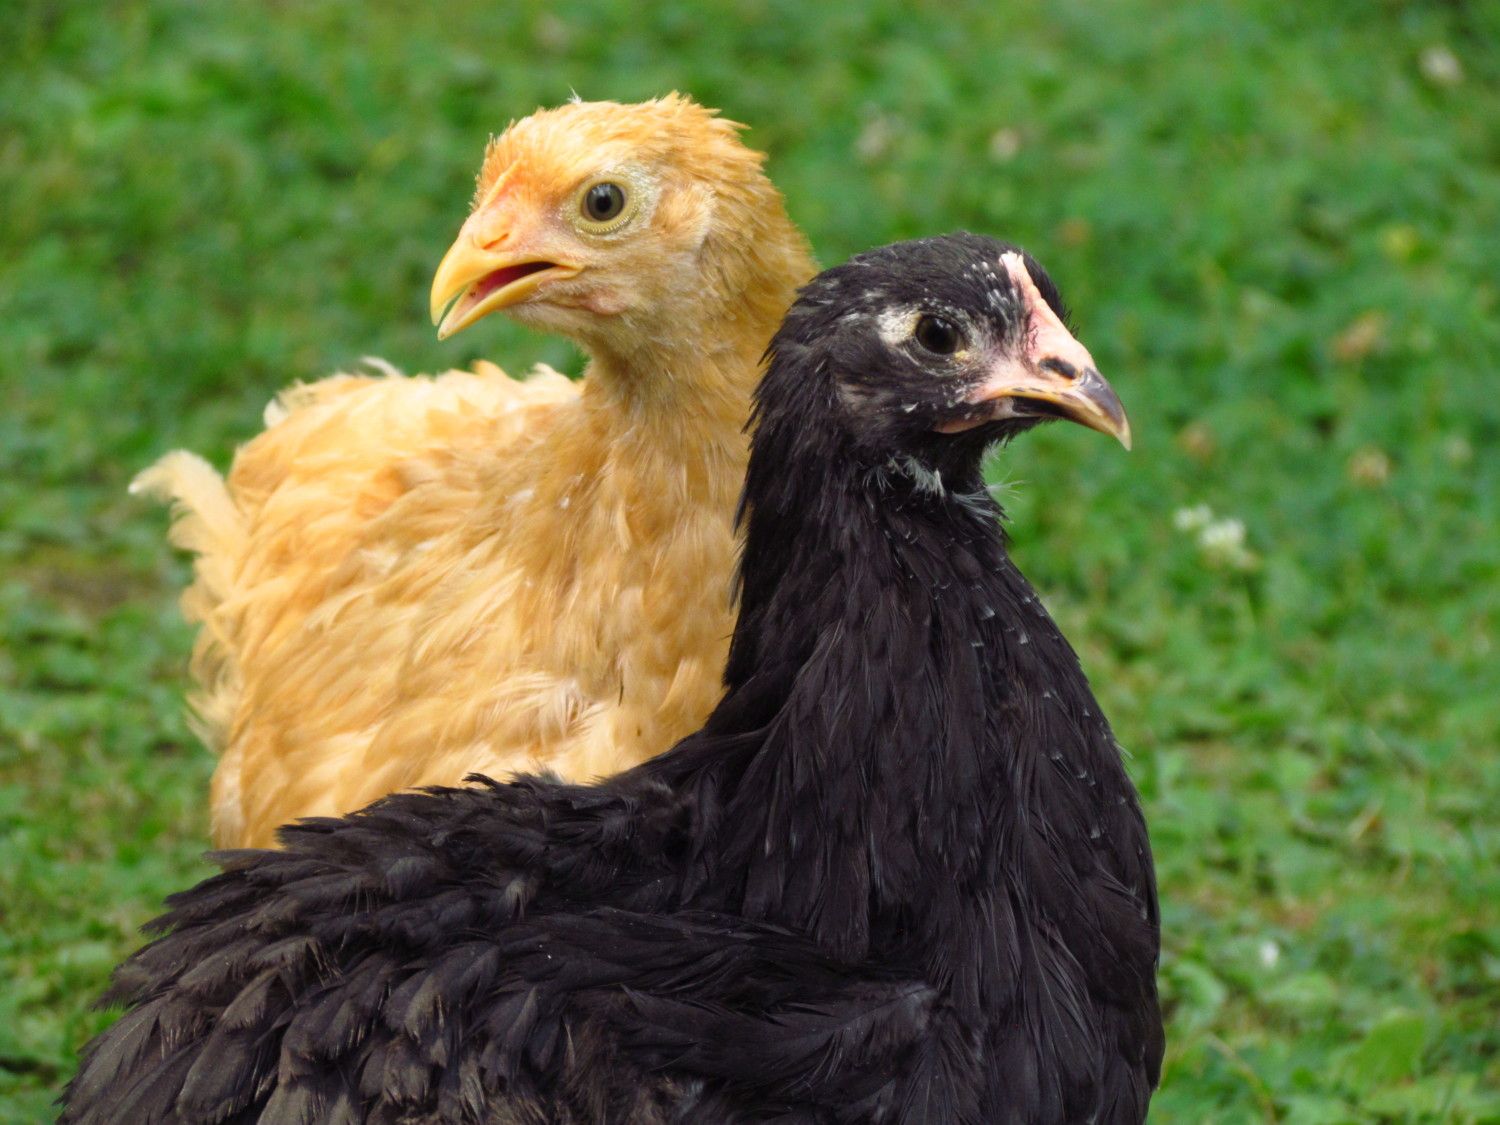
A little Yin and Yang moment.
July 24, 2012
I spent all day yesterday getting the coop ready for the new chicks. I added a partition wall to keep the big chicks separated from the little chicks and added an access door on the back side of the coop. I have read that you need to introduce the two flocks gradually, so the little ones are segregated to the area of the run that is under the main coop. The two areas are separated by a hardware cloth wall so they can see eachother and get used to one another. Adding the access door to the back of the coop allows me to reach all of the corners of the run for easier raking and lets me bring the little chicks in and out. I hope this works! It feels a little wierd not having the babies in the basement anymore. Now I have to walk all the way outside to see them.

October 23, 2012
A sad day...I finally got rid of Buddy, my last rooster. No more cock-a-doodle-dooing all day. I guess my neighbors will be happy about that. It was finally time for the new chicks to become integrated with the old hens and I just couldn't subject them to the same torture Milly and Lilly had to endure. Buddy is a really huge rooster and his spurs have gotten really big. It was a hard decision that Buddy has made easier for me because he has become very aggressive lately and started attacking me when I would go into the coop at feeding time.
January 6, 2013
Happy new year to anyone reading this! It's been a while since I posted so I thought I'd give a few updates. Life is much easier without the roosters. I really felt bad about getting rid of them, but the pain subsided pretty quickly! (Sorry Buddy) I guess it helps that the hens are doing much better without them. Milly and Lilly have made a full recovery. I thought they would never get their feathers back, but they went through a pretty ugly molt and now they are fully feathered in time for winter. I pleased to say that all of the new chicks are indeed hens. Whew! The two Buff Rocks are huge and fluffy and the Black Australorps are pretty fuzzy too. They are all really soft. I put some plastic on three sides of the run to keep the area free of any major drafts. We have gotten down to about 30 degrees I guess so far and the new hens still sleep outside in the run on their branches. Milly and Lilly like to sleep inside the coop.
This is Coconut. She has had a bit of a crossed-beak since she was little, but she has had no problem eating and has quickly become a dominant force in the coop. She is the biggest by far. And she has become the first to start laying eggs out of the new hens. We have gotten about 5 so far. It is crazy that she knew to go lay her eggs in the nesting boxes since she doesn't really spend any time in the coop at all. Her and the other new girls pretty much just hang out in the run and sleep there too!
Milly and Lilly, my Rhode Island Reds, have gotten all of their back feathers back! I felt so bad for them...it was starting to get cold and they were molting, but they are back in shape now.