The Building of my Coop!
My first coop was one I found free on Craigslist. While it was a marvelous coop for my first one, after a few months of using it I quickly found out that it wasn't meeting all of my needs. Here's a picture of the little A-Frame for reference:

Pic Disclaimer: I did add hardware cloth over the chicken wire for added protection, as well as more coon proof latches.
The first problem was that waterers and feeders were hard to find places for. The most effecient setup was to use nipple waterers attached to the 2x4 'rafters', but that caused its own problems as access was hard. Also when it rains the water tends to go into the seam of the main door. As my chickens grew it became obvious that the coop was not tall enough for their adult heights or to provide them with suitable roosts. And trying to get the birds up into the coop when they didn't want to was quite a challenge. After a few weeks of this problem I did come up with a fairly brillant solution, which involved bribing them out into their attached pen with BOSS, and closing the door quickly. I'd then pull up the ramp, open the main coop door and herd them inside. Not exactly convient, but it works.
Which prompted me to build my own coop. Though I will definitely be keeping the first coop in use, as it did work great as a coop for younguns.
The first dilemna was what did I want in a coop. Well as I stated all the negatives to my current coop, I wanted to avoid all of them. I also wanted to be able to walk into my new coop, house quite a few more chickens than I have, and have much more ventilation for the oncoming summer months. Then how to go about doing it. Lucky for me, my DBF is an amazing carpenter! As I am not knowledgeable about building in anyway, I will try to include some of his tips and tricks that I thought particularly interesting. And if you have any question please let me know and I can get him to answer them")
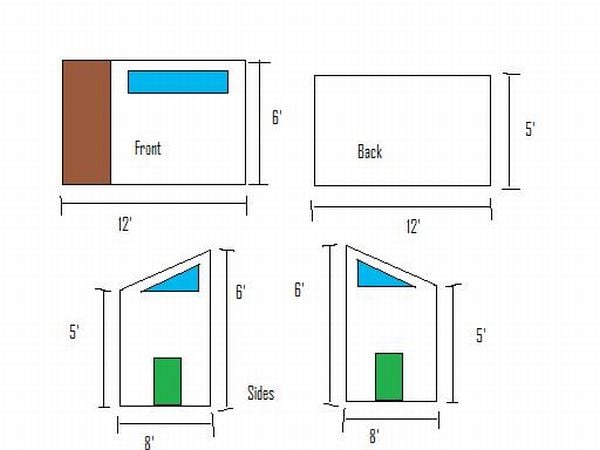
First we put our heads together and drew A LOT of different sketches. Here's one that I did on MS Paint. The brown is the human door, the blue are vents, and the green are chicken doors.
Now we had an idea of what we were doing, so we moved onto what materials to use. I wanted all recycled materials, and he likes building with new materials. So we compromised. He made the roof and the floor from lumber, and I "helped" build the walls out of pallets.
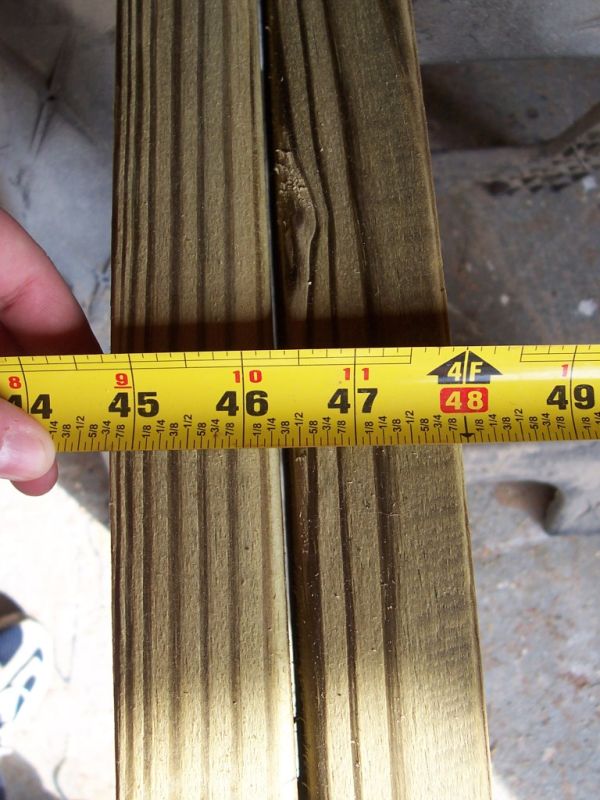
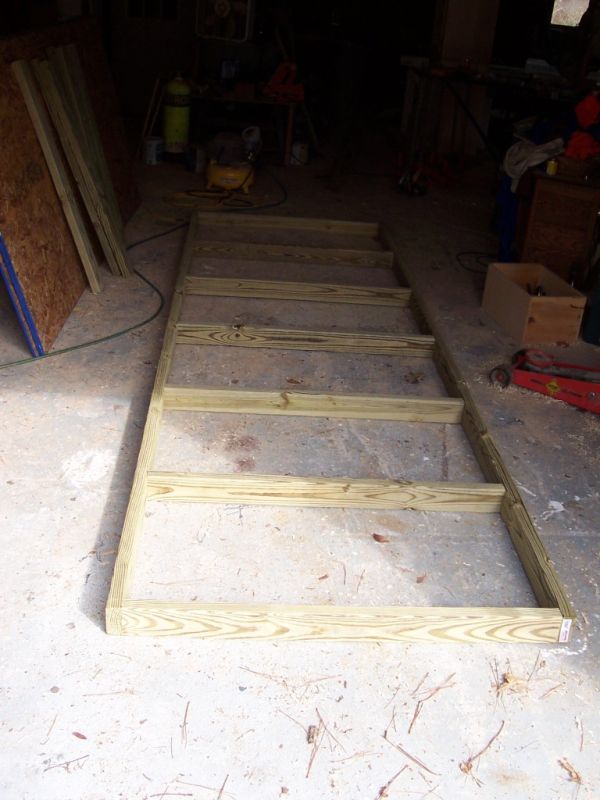
First came the floor. We went with pressure treated lumber for the floor framing. We decided to make two 4'x12' rectangles (out of 2x4s) and screw them together for added strength. The one thing I learned that truly surprised me is that a 2x4 isn't exactly 2 inches by four inches. So it's important to make your cuts according to your exact boards. Here's a trick for cutting the the joists to the right length. We knew we wanted each rectangle should be 48 inches wide. So grab your tape measure, place it across the two outer boards at 48 inches and see where the other edge lays, and you have your measurements. Here's the pic:
We cut our boards to 44 and 7/8 to get the width we wanted.
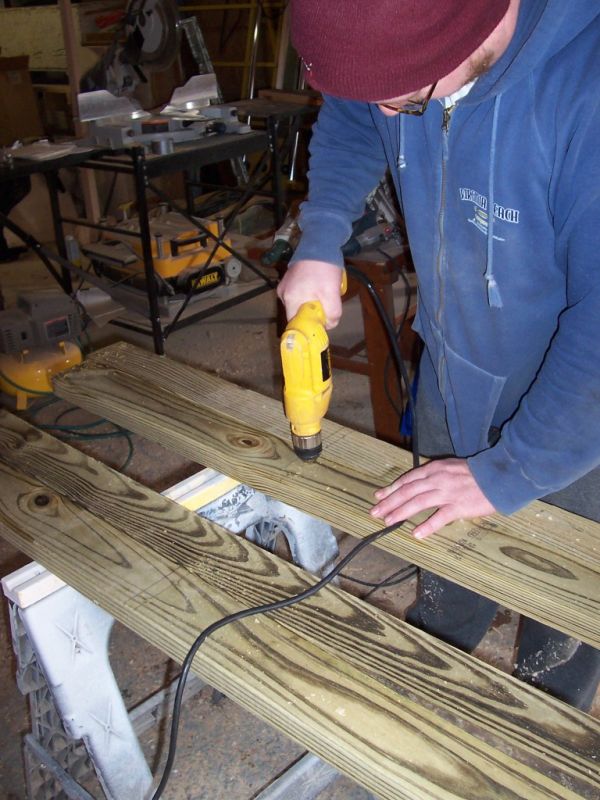
We placed a 2x4 every two feet in each rectangle. To start we lined up the outer 2x4s and marked where the floor joists would go, and then pre-drilled screw holes.
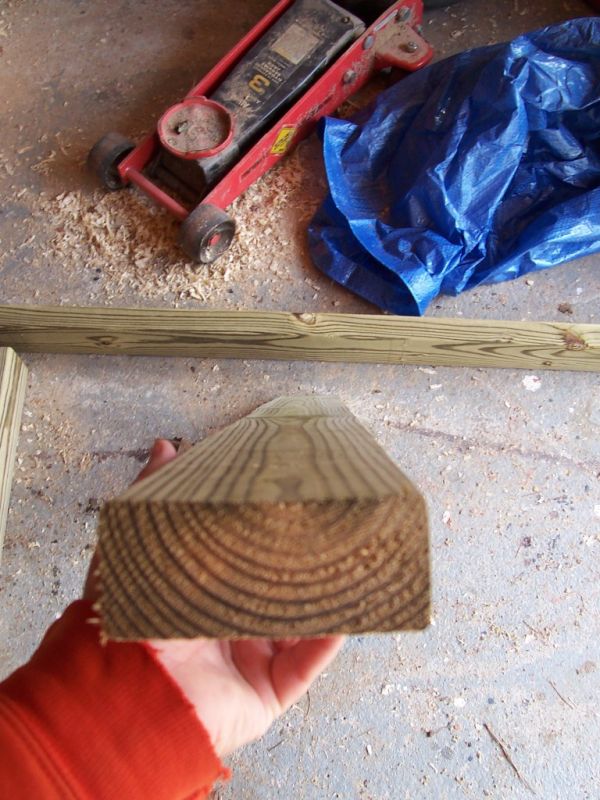
When placing the joists you want to look for crowns in the 2x4s. To do so hold the board as shown in the picture, and look down the left and right sides.
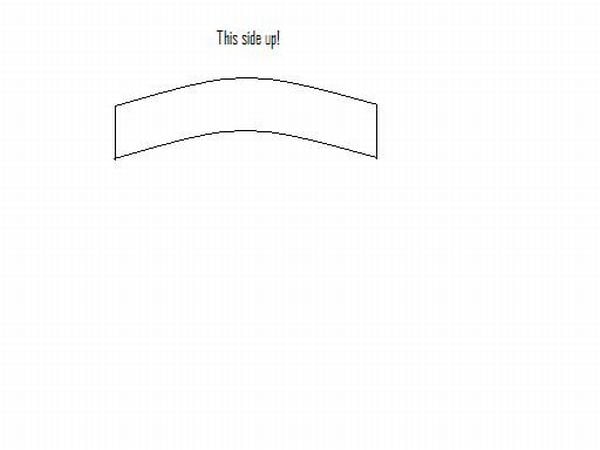
If you notice that the board has a curve to it, you want to be sure that you place the board with the crown up. Over time the crown will keep the floor from sagging. The picture below is terribly exagerrated. Don't use a board that curved. Haha! But it gives you an idea of what to look for.
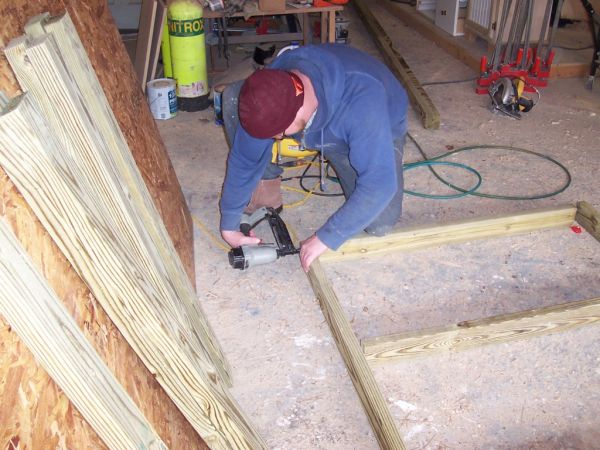
Then we laid all the boards where and how we wanted them. DBF tacked everything in place with his nail gun, and I followed behind him and screwed it all together. We did this just for ease. The staples just kept the boards from moving when screwing the pieces together. And just to note, we put two 3" screws per joint.
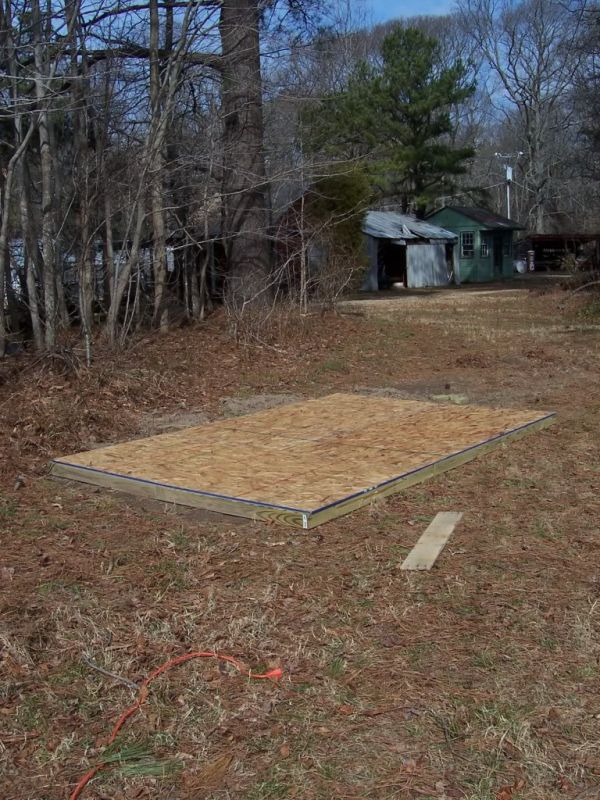
The finished product, shown below, was laid next to its twin and then covered in OSB to form the floor. Oh and before we screwed the two rectangles together we laid them out were we wanted them. Doing so allowed us to see how level the ground was, which it was not level at all. We had to use the bucket on the tractor to level out the ground, and it took a lot of playing around. But leaving the two rectangles unattached gave us a better idea of where and how much to lower/buildup the ground.
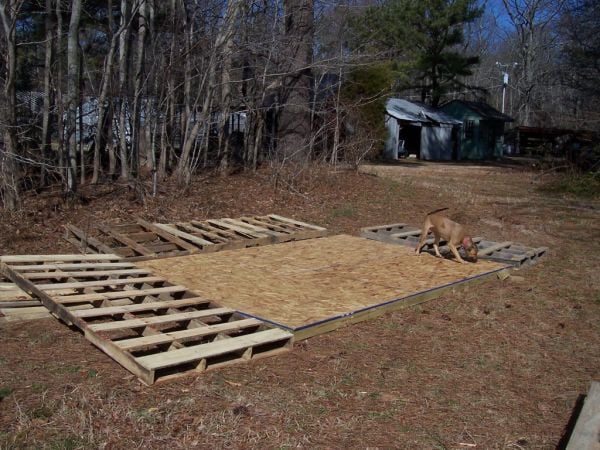
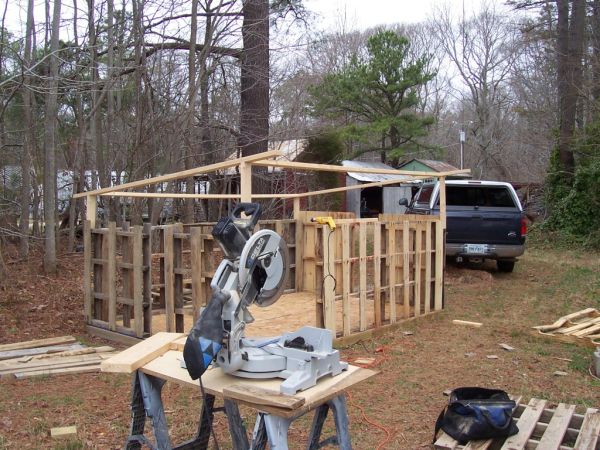
The next lesson I learned was when using pallets, for the sake of your sanity, use pallets that are all the same size. Ours were not even mostly the same size, which caused a few headaches. We laid out the pallets around the floor to get an idea of where each one should be. I will admit that I did get as far as screwing a few walls together, only to realize that those particular pallets wouldn't work there because they weren't the right heights for their locations. And easy enough fix, but it was still annoying to do all that work and have to take it all apart.
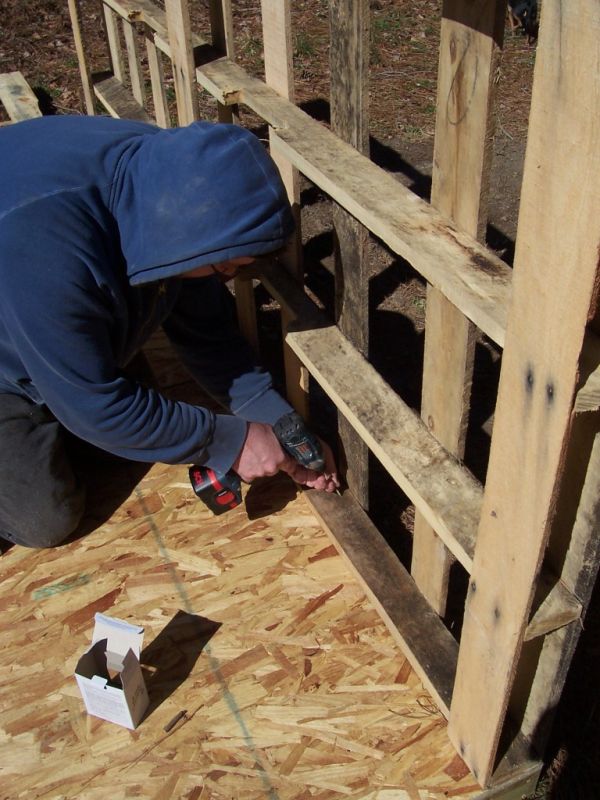
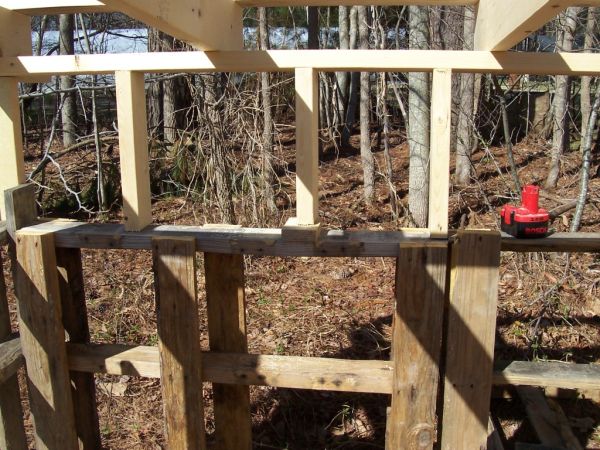
The important part when screwing the pallets to the floor was to make sure that the screws go into the floor joists. Luckily the lines on the OSB are marked at both 16" and 24". So we jsut had to run the screws down the 24" line. If you get confused about were your joists are just remember that you can see where the screws went to hold them together from the edge of the floor platform.
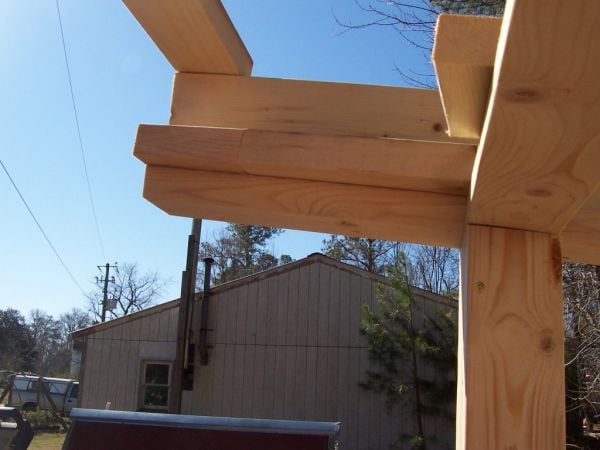
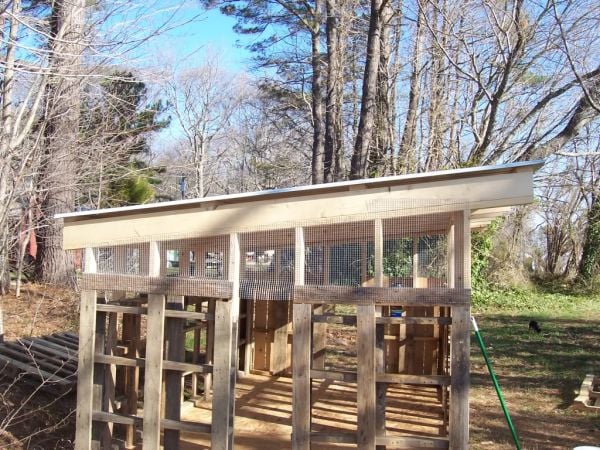
Next came framing in the roof. We used 2x4s for the initial roofing frame on which we laid 2x6s for extra strength. To figure out the correct angles on the roof supports we attached the four corner supports. Then we laid the cross 2x4 across them and marked them at the angle we wanted. It ended up being 5.5 degree angle. Then we cut all the other supports to fill in between the corner ones. Here the important thing to remember is to measure AT LEAST twice, and cut once. It seems we forgot that addage a few times, and ended up too short on some of them. A few shimmies later and we were all better (see pic lol).
The 2x6s were cut on both ends so that they would be parellel to the walls. And we added 2x4 pieces to attach the sheathing to later.
Next came the roof and the hardware cloth for the vents. We had some metal roofing donated to us from some one who had it laying around after replacing their own roof. It was a beautiful deep green color. But unfortunately we couldn't leave it that color. Our summers can get beastly hot, so leaving the roof that color would provide me with plenty of roasted chickens, but that's not what we were going for. Haha! So I applied two coats of white paint, and viola heat friendly roof.
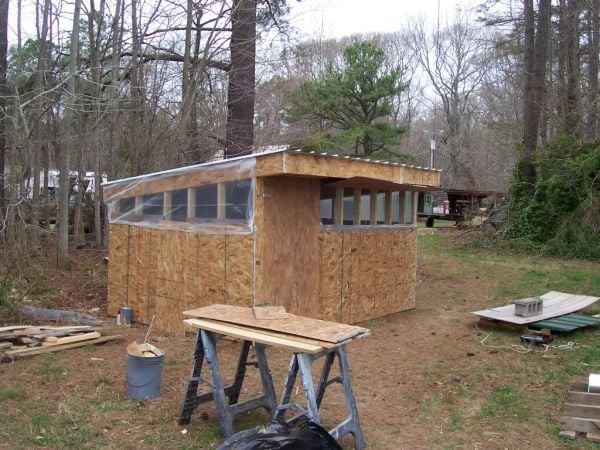
We ran into a bit of a dilemna after that. We had originally planned on using more of the donated roofing as siding. We held up our first sheet only to find out that we couldn't get it to line up properly. Using the uneven pallets as walls made the coop less that perfectly square. We debating on whether or not to just slap it up there. But after all the time and effort we'd already put in we didn't want to have the finished product look bad. So we ran to Lowes and bought OSB, which lucky for us was on sale. We put that on and then just ran the router along the edges to trim it to exactly where it had to be.
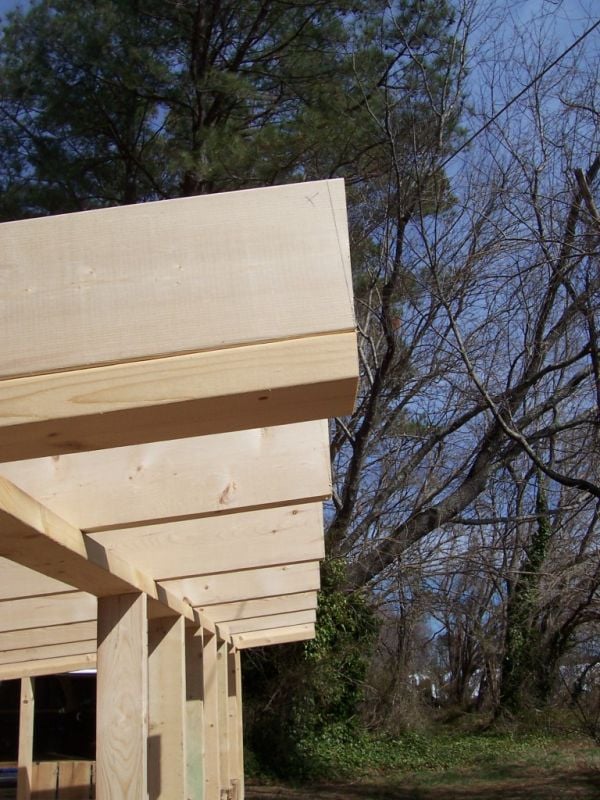
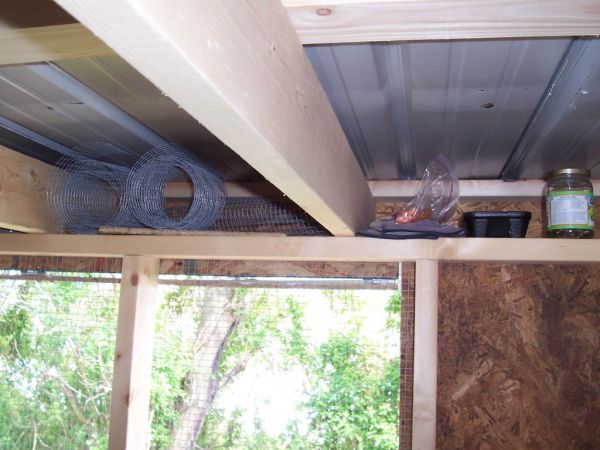
As an added bonus, I ended up with alot of cubby holes for storage. The sheathed ends of rafters formed the storage areas. And they've already come in handy.
Then we added the human door and the front vent door. If you notice in the picture we are using wooden twist latches, one in the middle and one at the bottom of the human door. And we used them on the vent doors, but with the hardware cloth they are for nothing more than keeping the vent door closed. The screws through them are quite tight. And I truly have a hard time opening them. To be safe though, we did add a metal latch with snap clip on the bottom of the human door. I figure racoons would try to pry the door open from the bottom, so that's where I put the stronger latch.
We still have a few things to finish up. The two side vent doors need to be made. For now we have clear plastic over them for rain protection. The run and pop doors need to be put together. And that's about it. I've managed to get some paint on it to protect the OSB, but it's just a coat of primer.
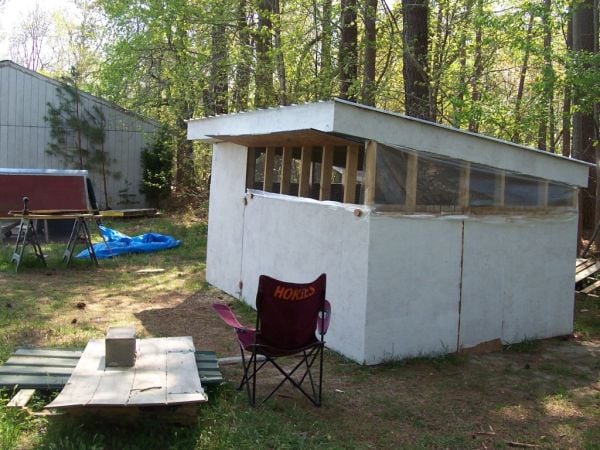
So why not put a few more pictures. Here's the whole coop:
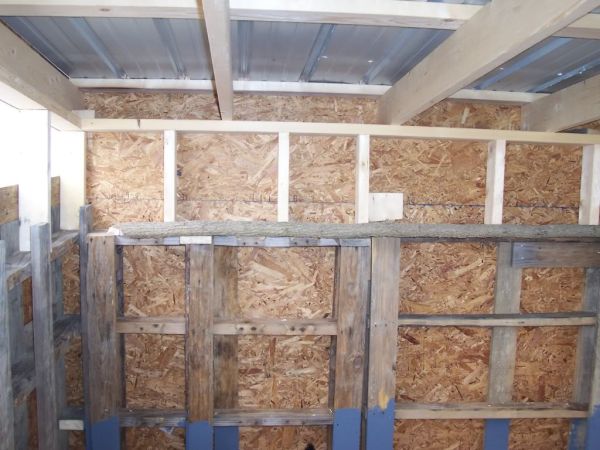
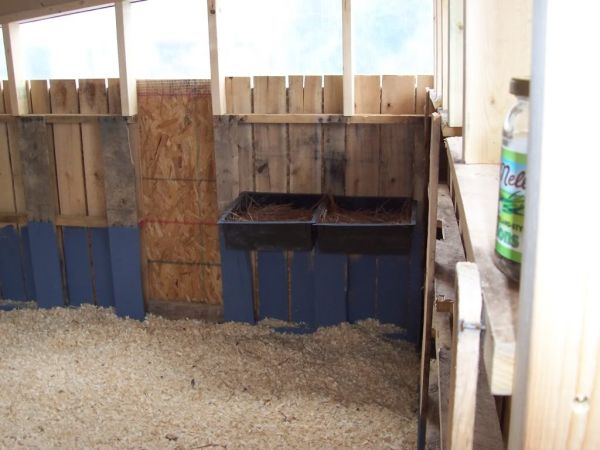
The roost and nest boxes:
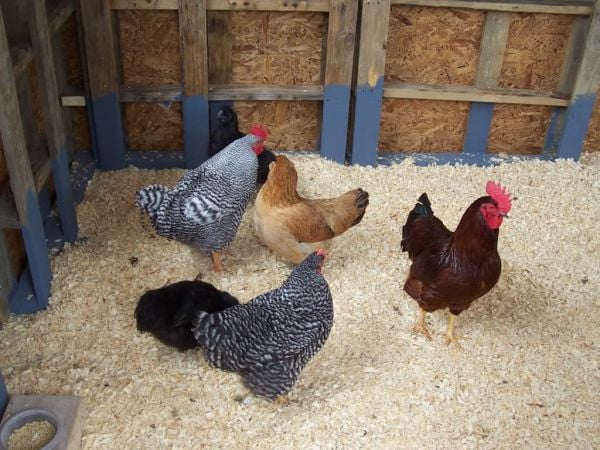
And the chickens loving their new digs:
Now with primer and my favorite chicken watching chair:
My first coop was one I found free on Craigslist. While it was a marvelous coop for my first one, after a few months of using it I quickly found out that it wasn't meeting all of my needs. Here's a picture of the little A-Frame for reference:

Pic Disclaimer: I did add hardware cloth over the chicken wire for added protection, as well as more coon proof latches.
The first problem was that waterers and feeders were hard to find places for. The most effecient setup was to use nipple waterers attached to the 2x4 'rafters', but that caused its own problems as access was hard. Also when it rains the water tends to go into the seam of the main door. As my chickens grew it became obvious that the coop was not tall enough for their adult heights or to provide them with suitable roosts. And trying to get the birds up into the coop when they didn't want to was quite a challenge. After a few weeks of this problem I did come up with a fairly brillant solution, which involved bribing them out into their attached pen with BOSS, and closing the door quickly. I'd then pull up the ramp, open the main coop door and herd them inside. Not exactly convient, but it works.
Which prompted me to build my own coop. Though I will definitely be keeping the first coop in use, as it did work great as a coop for younguns.
The first dilemna was what did I want in a coop. Well as I stated all the negatives to my current coop, I wanted to avoid all of them. I also wanted to be able to walk into my new coop, house quite a few more chickens than I have, and have much more ventilation for the oncoming summer months. Then how to go about doing it. Lucky for me, my DBF is an amazing carpenter! As I am not knowledgeable about building in anyway, I will try to include some of his tips and tricks that I thought particularly interesting. And if you have any question please let me know and I can get him to answer them
First we put our heads together and drew A LOT of different sketches. Here's one that I did on MS Paint. The brown is the human door, the blue are vents, and the green are chicken doors.
Now we had an idea of what we were doing, so we moved onto what materials to use. I wanted all recycled materials, and he likes building with new materials. So we compromised. He made the roof and the floor from lumber, and I "helped" build the walls out of pallets.
First came the floor. We went with pressure treated lumber for the floor framing. We decided to make two 4'x12' rectangles (out of 2x4s) and screw them together for added strength. The one thing I learned that truly surprised me is that a 2x4 isn't exactly 2 inches by four inches. So it's important to make your cuts according to your exact boards. Here's a trick for cutting the the joists to the right length. We knew we wanted each rectangle should be 48 inches wide. So grab your tape measure, place it across the two outer boards at 48 inches and see where the other edge lays, and you have your measurements. Here's the pic:
We placed a 2x4 every two feet in each rectangle. To start we lined up the outer 2x4s and marked where the floor joists would go, and then pre-drilled screw holes.
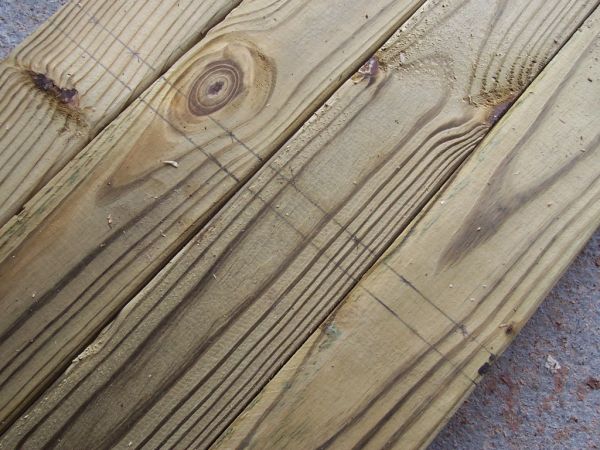
When placing the joists you want to look for crowns in the 2x4s. To do so hold the board as shown in the picture, and look down the left and right sides.
If you notice that the board has a curve to it, you want to be sure that you place the board with the crown up. Over time the crown will keep the floor from sagging. The picture below is terribly exagerrated. Don't use a board that curved. Haha! But it gives you an idea of what to look for.
Then we laid all the boards where and how we wanted them. DBF tacked everything in place with his nail gun, and I followed behind him and screwed it all together. We did this just for ease. The staples just kept the boards from moving when screwing the pieces together. And just to note, we put two 3" screws per joint.

The finished product, shown below, was laid next to its twin and then covered in OSB to form the floor. Oh and before we screwed the two rectangles together we laid them out were we wanted them. Doing so allowed us to see how level the ground was, which it was not level at all. We had to use the bucket on the tractor to level out the ground, and it took a lot of playing around. But leaving the two rectangles unattached gave us a better idea of where and how much to lower/buildup the ground.
The next lesson I learned was when using pallets, for the sake of your sanity, use pallets that are all the same size. Ours were not even mostly the same size, which caused a few headaches. We laid out the pallets around the floor to get an idea of where each one should be. I will admit that I did get as far as screwing a few walls together, only to realize that those particular pallets wouldn't work there because they weren't the right heights for their locations. And easy enough fix, but it was still annoying to do all that work and have to take it all apart.
The important part when screwing the pallets to the floor was to make sure that the screws go into the floor joists. Luckily the lines on the OSB are marked at both 16" and 24". So we jsut had to run the screws down the 24" line. If you get confused about were your joists are just remember that you can see where the screws went to hold them together from the edge of the floor platform.
Next came framing in the roof. We used 2x4s for the initial roofing frame on which we laid 2x6s for extra strength. To figure out the correct angles on the roof supports we attached the four corner supports. Then we laid the cross 2x4 across them and marked them at the angle we wanted. It ended up being 5.5 degree angle. Then we cut all the other supports to fill in between the corner ones. Here the important thing to remember is to measure AT LEAST twice, and cut once. It seems we forgot that addage a few times, and ended up too short on some of them. A few shimmies later and we were all better (see pic lol).
The 2x6s were cut on both ends so that they would be parellel to the walls. And we added 2x4 pieces to attach the sheathing to later.
Next came the roof and the hardware cloth for the vents. We had some metal roofing donated to us from some one who had it laying around after replacing their own roof. It was a beautiful deep green color. But unfortunately we couldn't leave it that color. Our summers can get beastly hot, so leaving the roof that color would provide me with plenty of roasted chickens, but that's not what we were going for. Haha! So I applied two coats of white paint, and viola heat friendly roof.
We ran into a bit of a dilemna after that. We had originally planned on using more of the donated roofing as siding. We held up our first sheet only to find out that we couldn't get it to line up properly. Using the uneven pallets as walls made the coop less that perfectly square. We debating on whether or not to just slap it up there. But after all the time and effort we'd already put in we didn't want to have the finished product look bad. So we ran to Lowes and bought OSB, which lucky for us was on sale. We put that on and then just ran the router along the edges to trim it to exactly where it had to be.
As an added bonus, I ended up with alot of cubby holes for storage. The sheathed ends of rafters formed the storage areas. And they've already come in handy.
Then we added the human door and the front vent door. If you notice in the picture we are using wooden twist latches, one in the middle and one at the bottom of the human door. And we used them on the vent doors, but with the hardware cloth they are for nothing more than keeping the vent door closed. The screws through them are quite tight. And I truly have a hard time opening them. To be safe though, we did add a metal latch with snap clip on the bottom of the human door. I figure racoons would try to pry the door open from the bottom, so that's where I put the stronger latch.

We still have a few things to finish up. The two side vent doors need to be made. For now we have clear plastic over them for rain protection. The run and pop doors need to be put together. And that's about it. I've managed to get some paint on it to protect the OSB, but it's just a coat of primer.
So why not put a few more pictures. Here's the whole coop:
The roost and nest boxes:
And the chickens loving their new digs:
Now with primer and my favorite chicken watching chair: