Our Chicken Raising Adventure
I must admit, when my wife said she wanted to rent an incubater this summer so we could hatch some chicks, I was a little leery.
What do we do with them after they hatch? How long do we keep them once they do? Are you sure we can give them back? These were but a few of the many questions racing through my mind.
"It will be a great learning experience for the kids", she said.
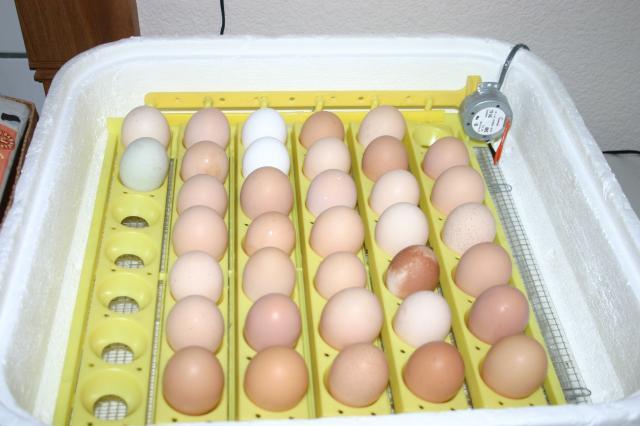
So, firm in the knowledge that we could return them after the learning experience was over, I agreed. The next thing I know, she brings home the weirdest looking ice chest I have ever seen, and 3 dozen eggs.
The adventure begins.
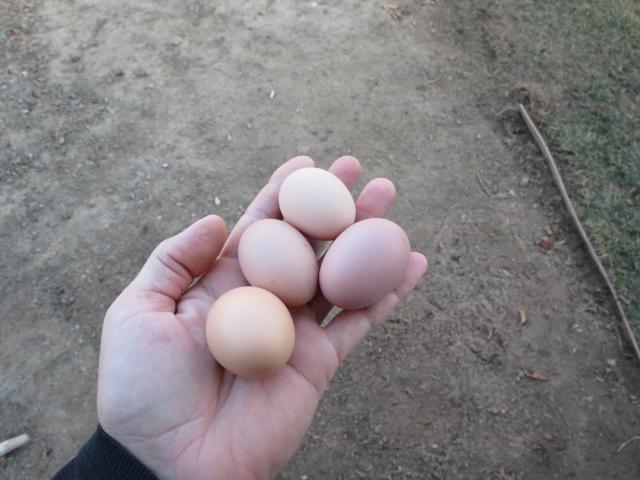
As you can see, we had 1 green egg, 2 white eggs, and the rest were various shades of brown. We have no idea at this point what we have.

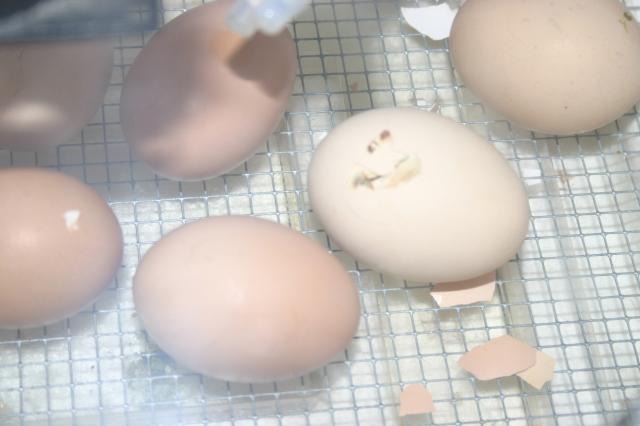
Twenty days later, the little guys started coming into the world.
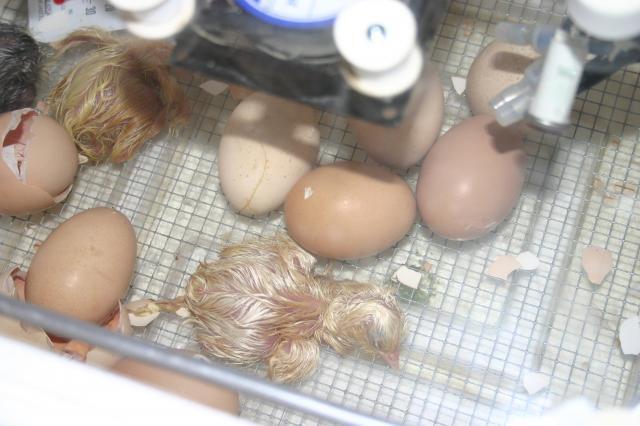
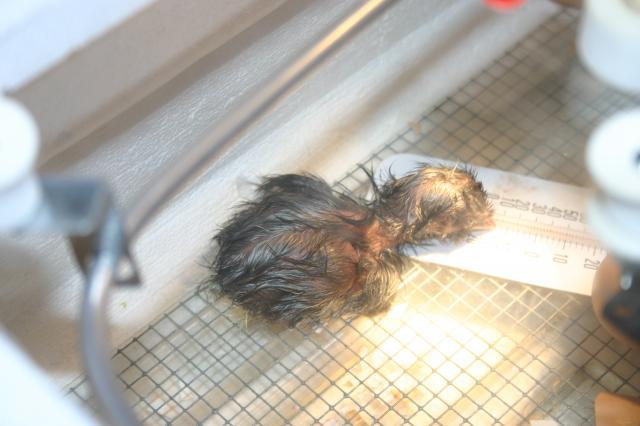
They are so helpless for a while after they hatch. They get exhausted very easily, and just flop down and snooze. It looks like they are dead, but after a little catnap , they are up again and exploring.
Of the 36 eggs, 23 hatched, including the 2 white ones. Unfortunately, the green one, which is the one everybody wanted to hatch, didn't.
The Brooder
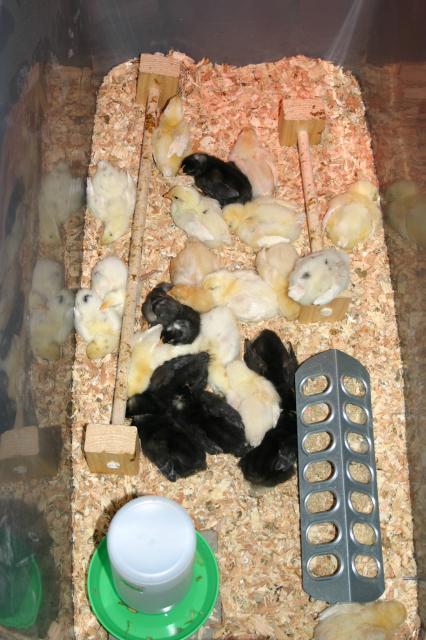
Our chicks first home was a 55 gallon tote container, lined with shavings, and kept in our Family Room, under a heat lamp.
Well, needless to say, that didn't hold 23 growing chicks for very long, so an upgrade was in order.
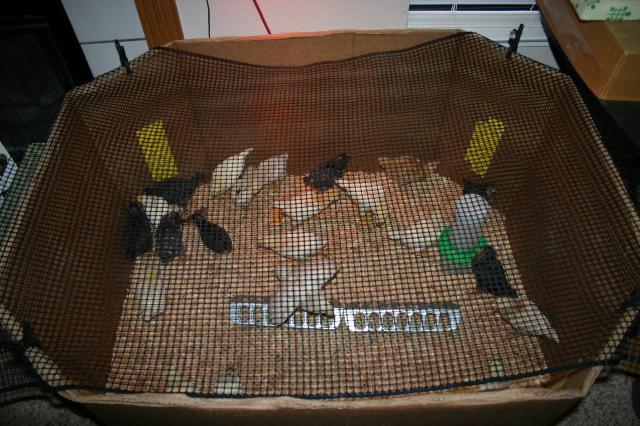
My wife was able to acquire a cardboard watermelon display from the local grocery store. We added an underlayment of heavy plastic, taped off the big holes in the side, netted the top, and the chicks second home was ready.
The Coop
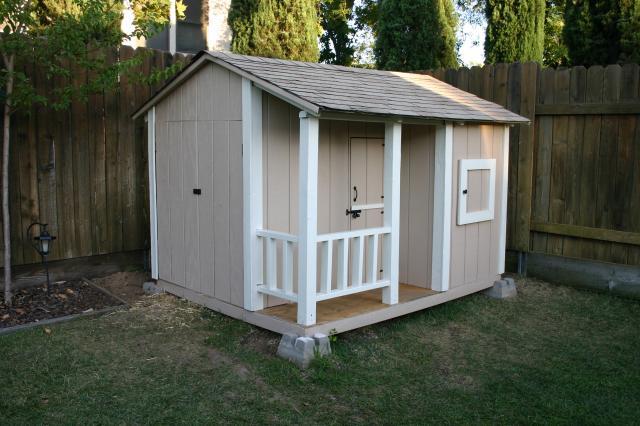
At this point, I had been thinking for a little while about what I was going to do for a nice outside coop , which means, for all you people keeping track, yes, I changed my mind about keeping them. I remembered that some good friends of ours had built a playhouse for
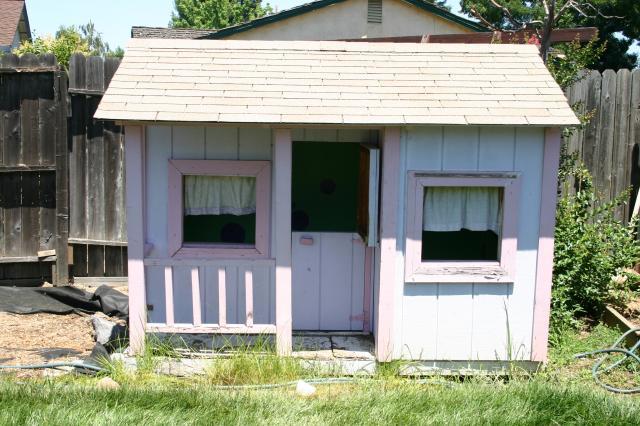
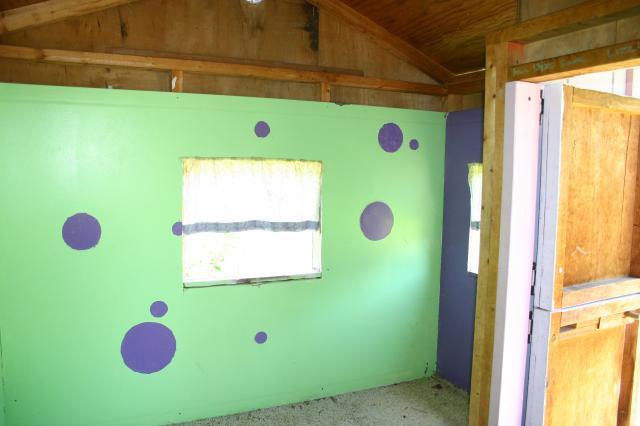
their girls several years ago. The girls are too old to really play in it anymore, so I asked them if they
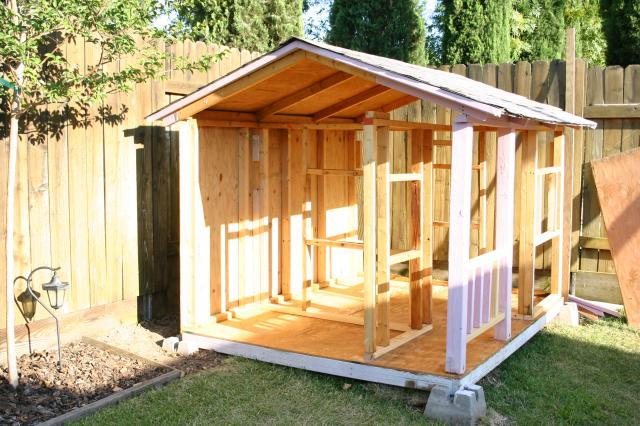
wanted to get rid of it. When they agreed, I thought, excellent, this will save us the cost of building a coop from scratch. When I went to get it, my first thought was, wow, I thought it was smaller than that. Here is what I had to work with. It was roughly 6ft x 8ft.
I must admit, when my wife said she wanted to rent an incubater this summer so we could hatch some chicks, I was a little leery.
What do we do with them after they hatch? How long do we keep them once they do? Are you sure we can give them back? These were but a few of the many questions racing through my mind.
"It will be a great learning experience for the kids", she said.
So, firm in the knowledge that we could return them after the learning experience was over, I agreed. The next thing I know, she brings home the weirdest looking ice chest I have ever seen, and 3 dozen eggs.
The adventure begins.
As you can see, we had 1 green egg, 2 white eggs, and the rest were various shades of brown. We have no idea at this point what we have.
Twenty days later, the little guys started coming into the world.
They are so helpless for a while after they hatch. They get exhausted very easily, and just flop down and snooze. It looks like they are dead, but after a little catnap , they are up again and exploring.
Of the 36 eggs, 23 hatched, including the 2 white ones. Unfortunately, the green one, which is the one everybody wanted to hatch, didn't.
The Brooder
Our chicks first home was a 55 gallon tote container, lined with shavings, and kept in our Family Room, under a heat lamp.
Well, needless to say, that didn't hold 23 growing chicks for very long, so an upgrade was in order.
My wife was able to acquire a cardboard watermelon display from the local grocery store. We added an underlayment of heavy plastic, taped off the big holes in the side, netted the top, and the chicks second home was ready.
The Coop
At this point, I had been thinking for a little while about what I was going to do for a nice outside coop , which means, for all you people keeping track, yes, I changed my mind about keeping them. I remembered that some good friends of ours had built a playhouse for
their girls several years ago. The girls are too old to really play in it anymore, so I asked them if they
wanted to get rid of it. When they agreed, I thought, excellent, this will save us the cost of building a coop from scratch. When I went to get it, my first thought was, wow, I thought it was smaller than that. Here is what I had to work with. It was roughly 6ft x 8ft.
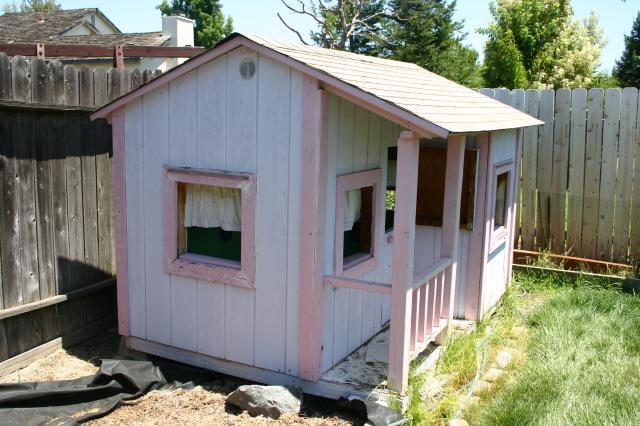

So, disassembly began.......

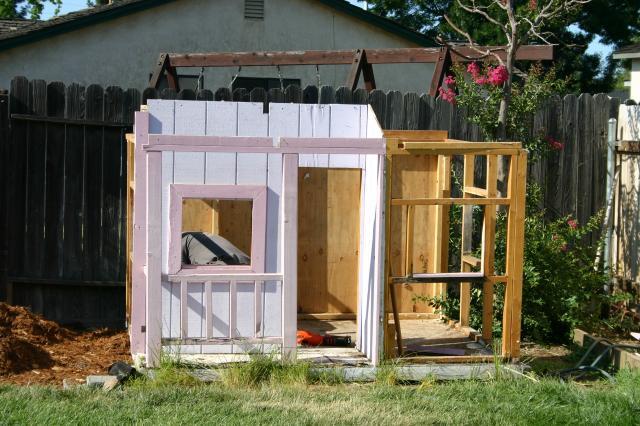
Once it was loaded onto a trailer, and hauled to our house, I stacked all the pieces for reassembly.
And the construction began.
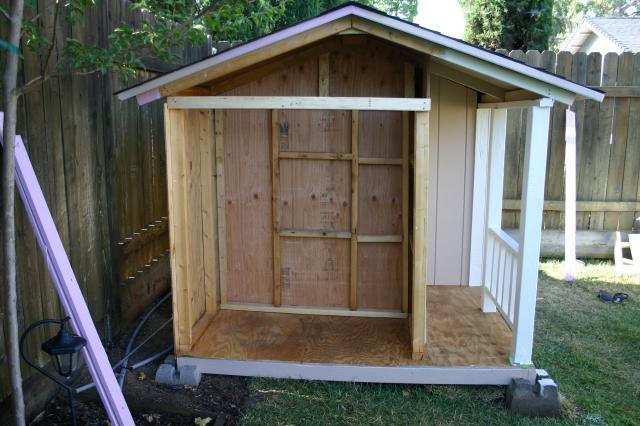
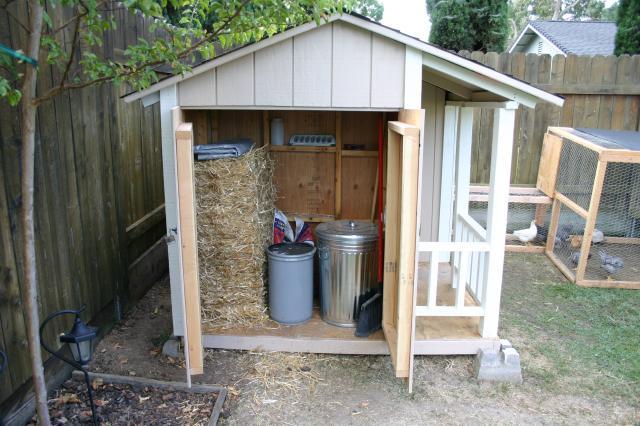
I decide to split the floorplan approximately 70/30, and make a storage shed for all the chicken related supplies I might need.
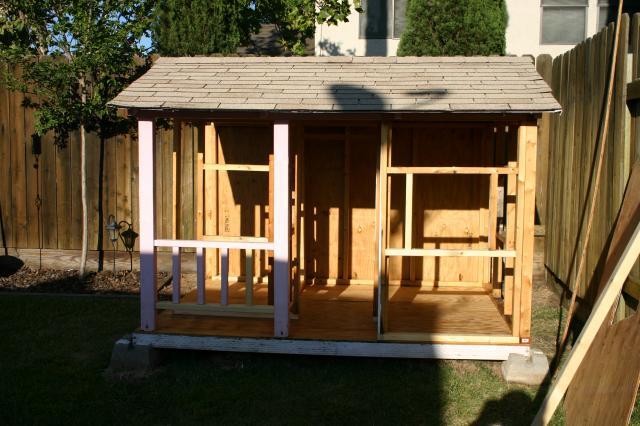
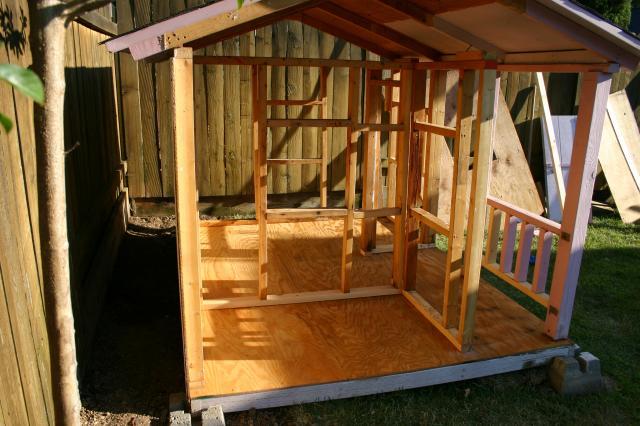
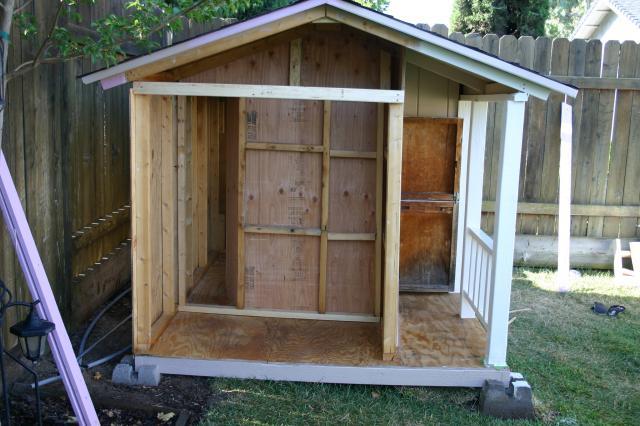
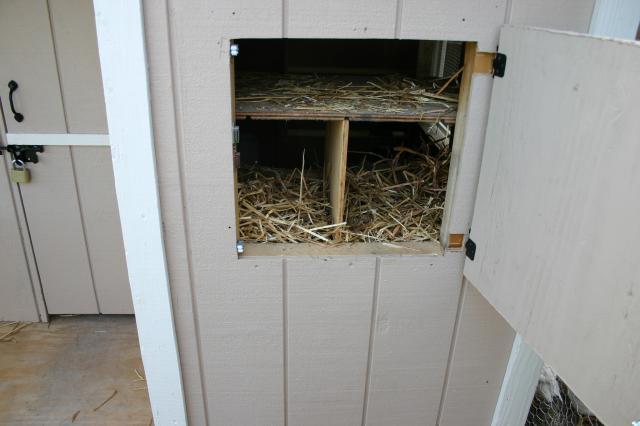
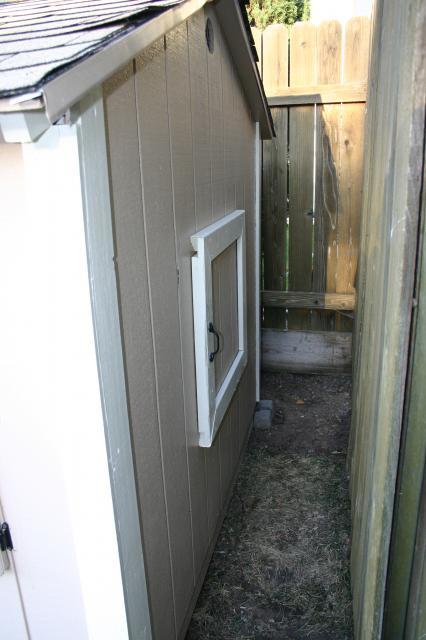
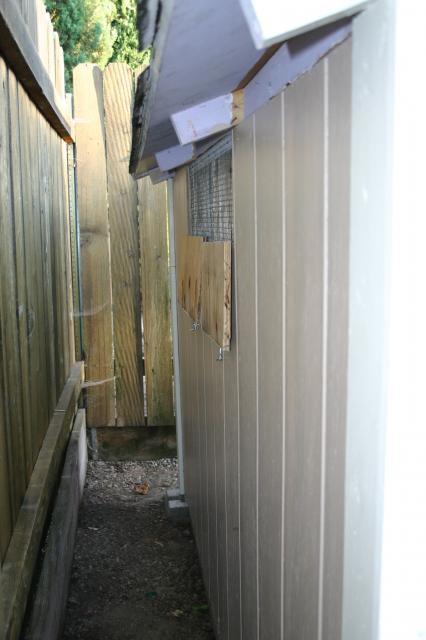
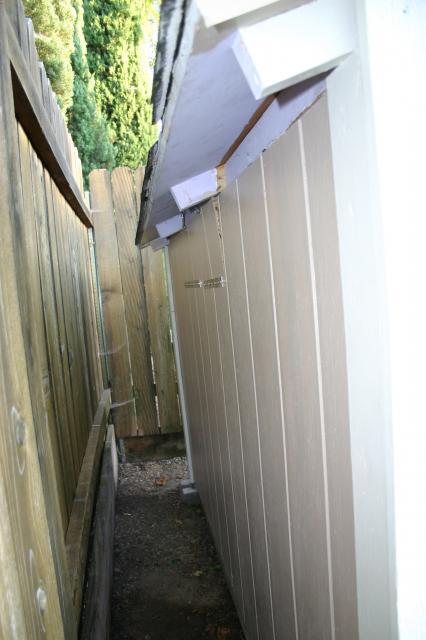
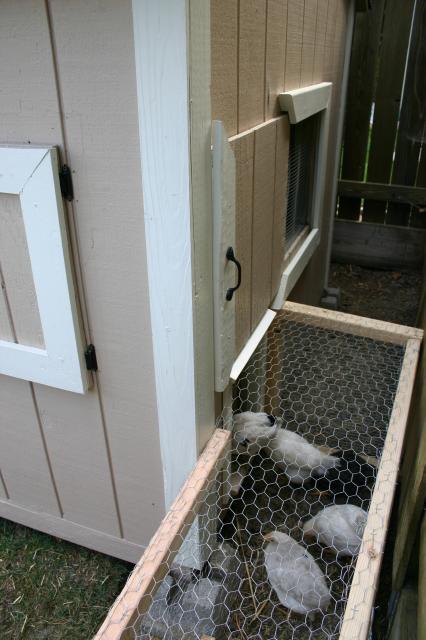
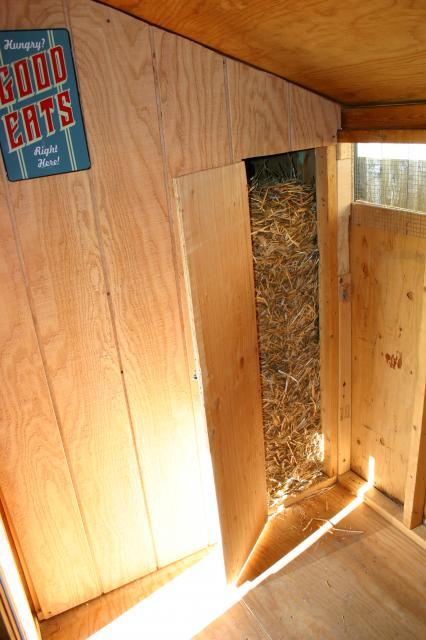
Below, you can see I added an access door from the shed to inside the coop. This was so the straw stored in the shed could be added from inside the coop, not walking it around and bringing it in the front door.
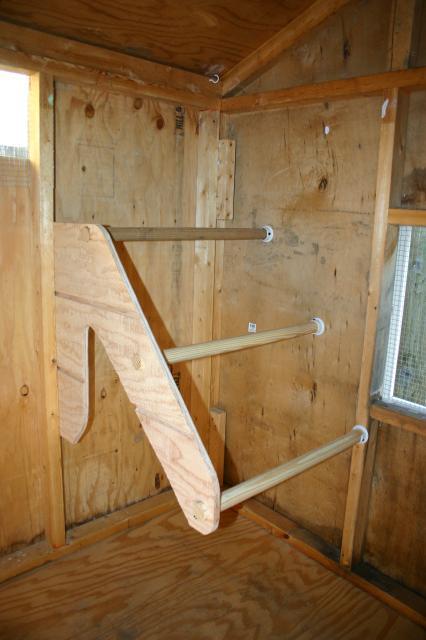
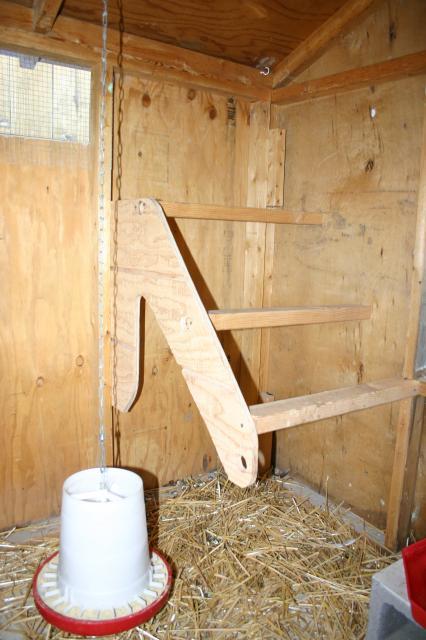
Perches
Electrical
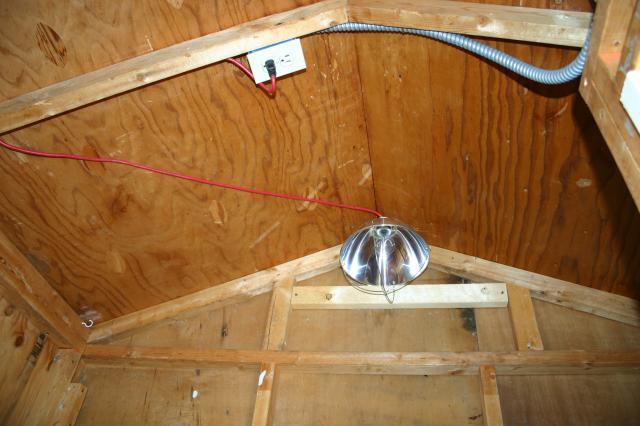
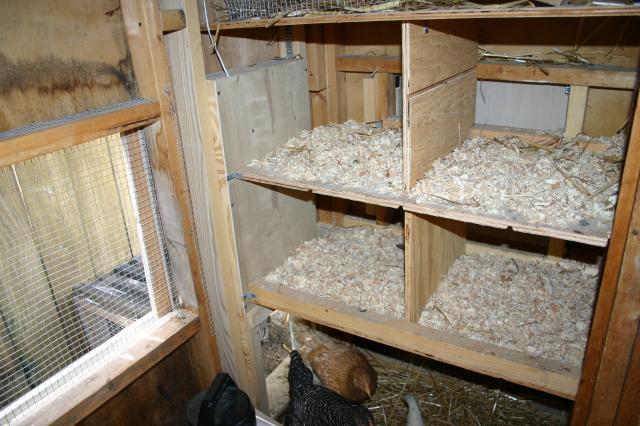
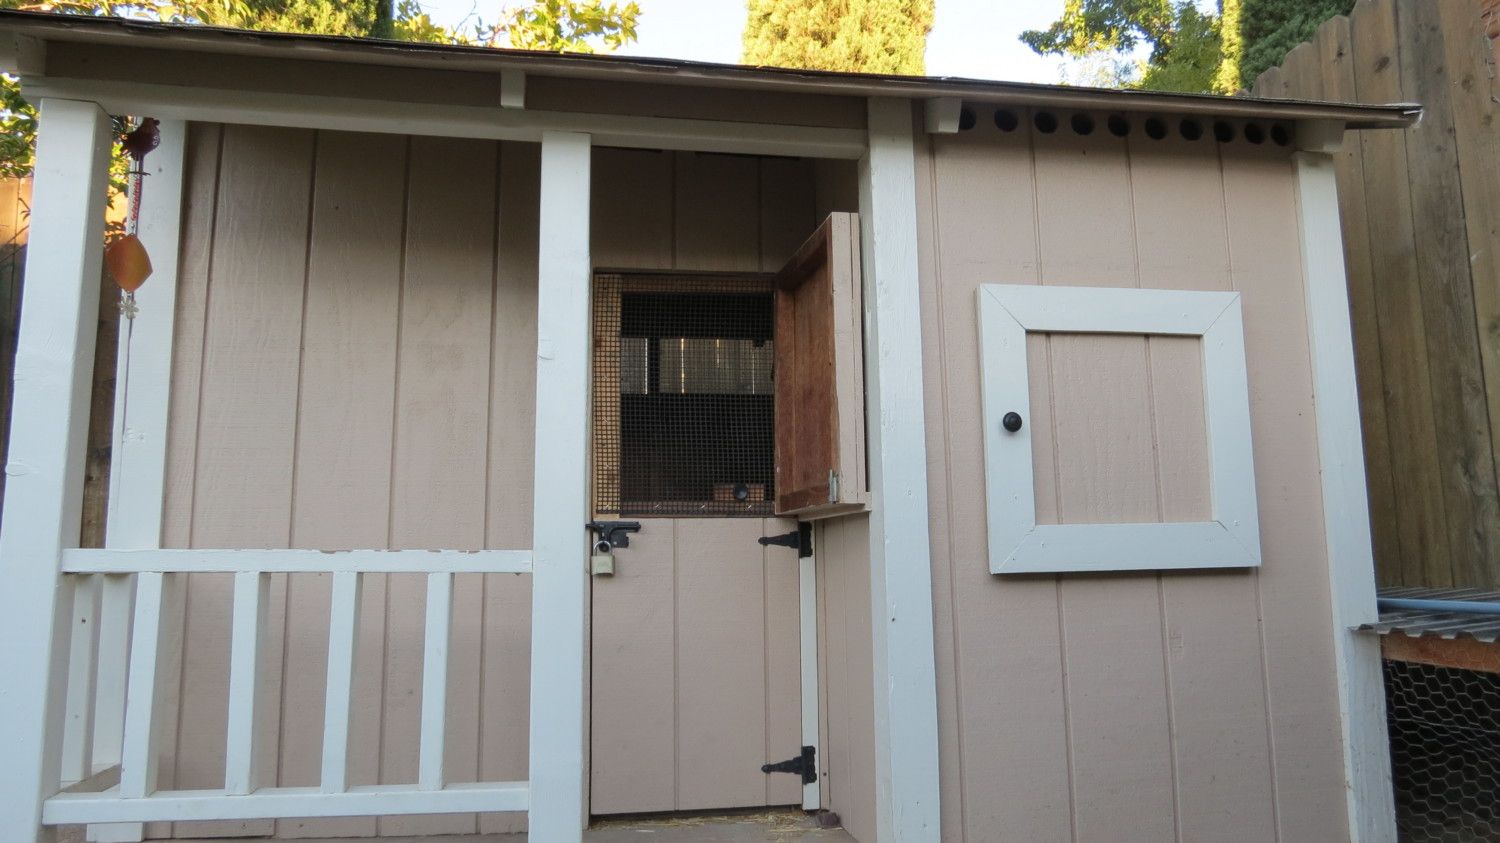
Just about there. The cupboard door on the right is the access to the nesting boxes.


This window will close for the winter.
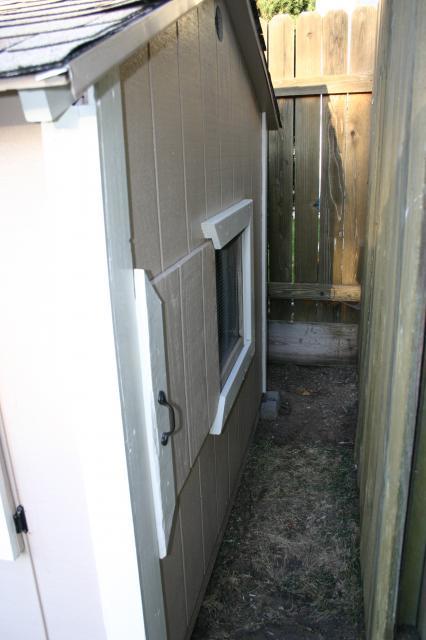
As will these. (edit: after reading a bit about ventilation for the winter, I think these will stay open.
Ignore the original paint color here, I will get around to repainting it eventually.....maybe
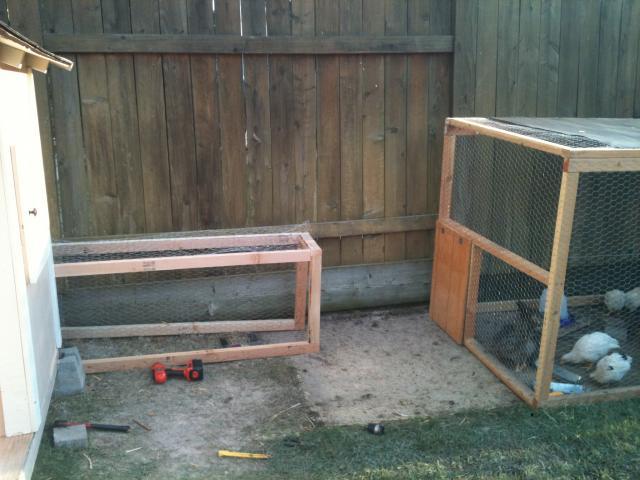
Now all thats left is to build the pen, the run that will attach the two, and add the door for the chickens to get out.
I wanted the pen to be free standing , so I could move it to different places in the yard. So I built it with a flip up "doggie door", that would fit onto the run that was attached to the coop.
This is what I came up with......
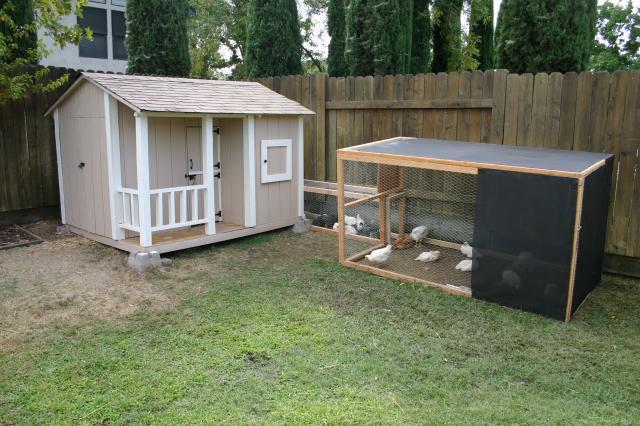
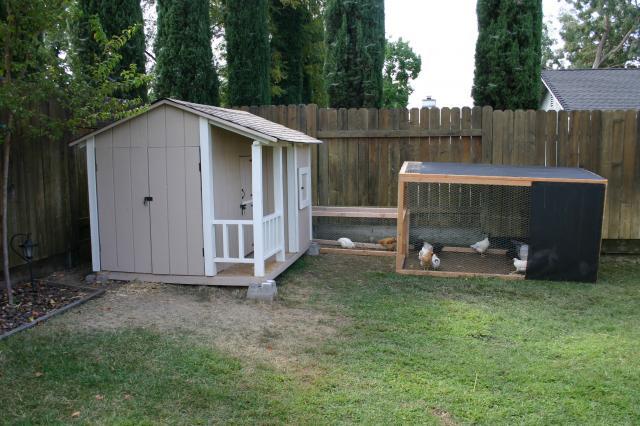
And when everything is attached.......
We quickly learned that getting up every morning to let the chickens out was not practical, and being home before dark so we could put them away wasn't always possible. I decided an automatic door was the only way to go. I looked into what it would cost me to build a sliding one myself, and decided that the cost and labor wasn't worth it to me. So we sprung for the pre-built. After working out some initial timer issues, the door works beautifully. I absolutely love it. Although it is hard to see in this picture, this is where the door and the run connect.
Overall
You can see we put solar screen on one side of the pen. This side gets the setting sun.
In the future, we are going to add corrugated roofing on the pen and run to help keep the sun and rain off. (Edit: Almost done, pics coming)
Storage shed & access door
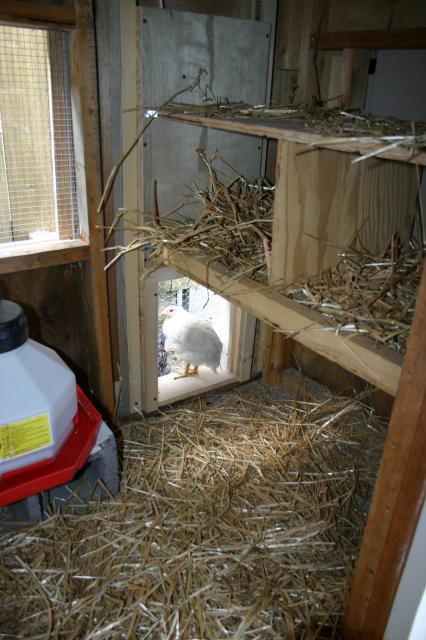
I also plan on adding 2 more nesting boxes on top of these.
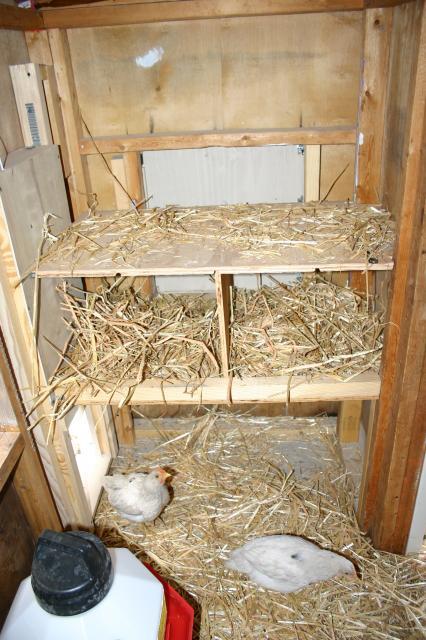
(Edit): Done. There is a 2x2 on the front edge of the top one also, it's just not shown in this pic.
(Edit): Well the girls weren't roosting on the perches, so I decided to swap the closet poles with 2x3's. I put one flat, and the others on end to see which they prefer. Flat won, so I switched them all.
The Chickens
Thanks go to the helpful people in the backyard chickens forum who helped us seperate the girls from the boys. We can't keep any roos where we live, and unfortunately, many of the ones we came to love, turned out to be boys. We have already located good homes for everyone we aren't keeping, which turns out is several, so we plan on adding a few more hens from the feed store.
So the learning experience will continue.
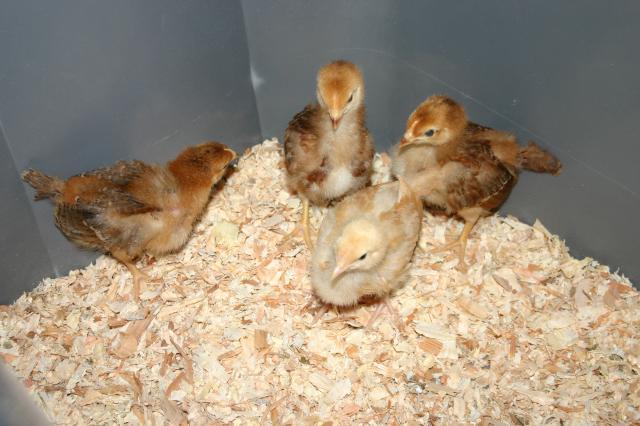
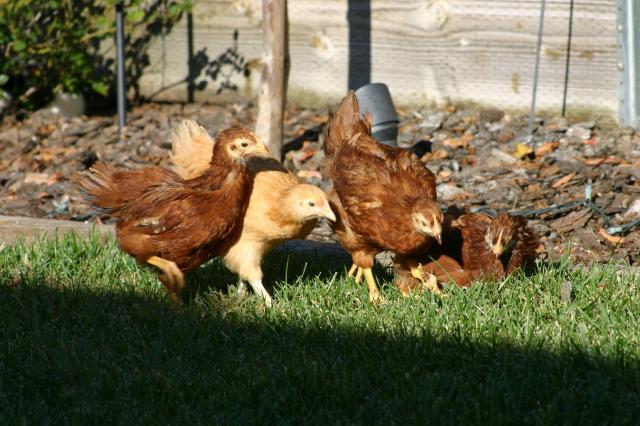
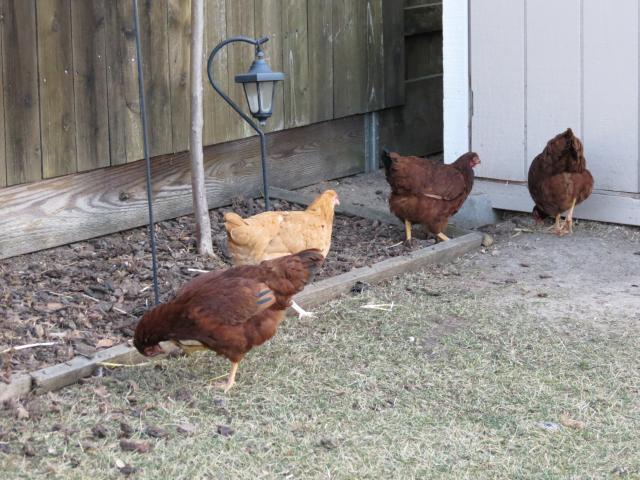
Here are the new additions. 3 Rhode Island Reds & a Buff Orpington. One week old.
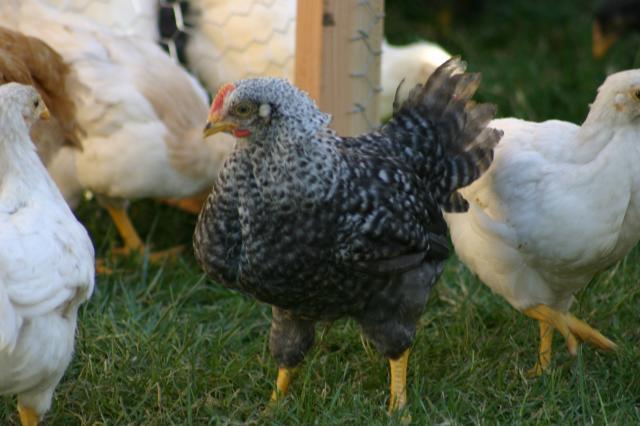
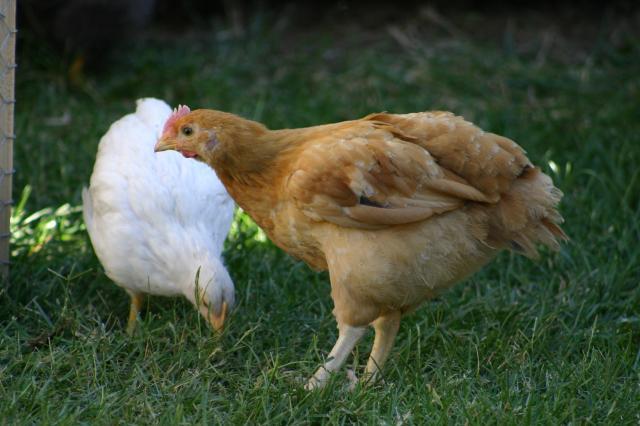
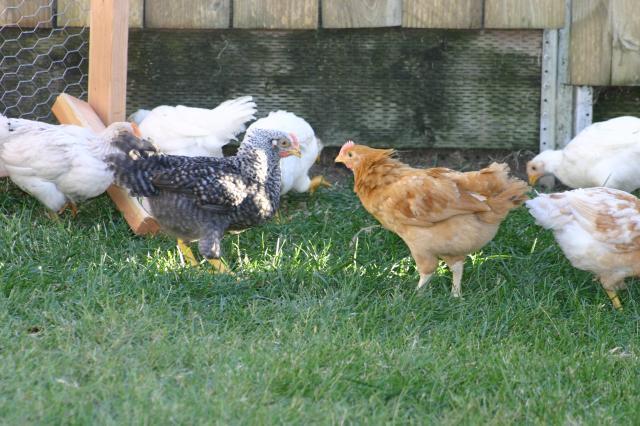
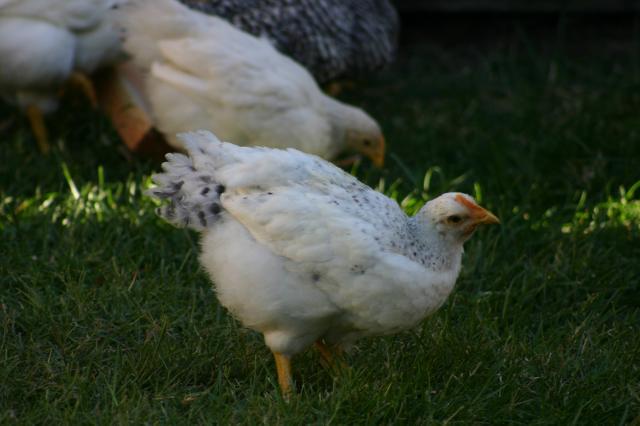
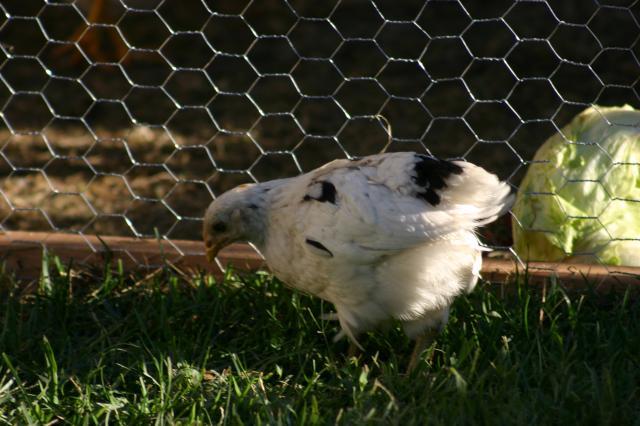
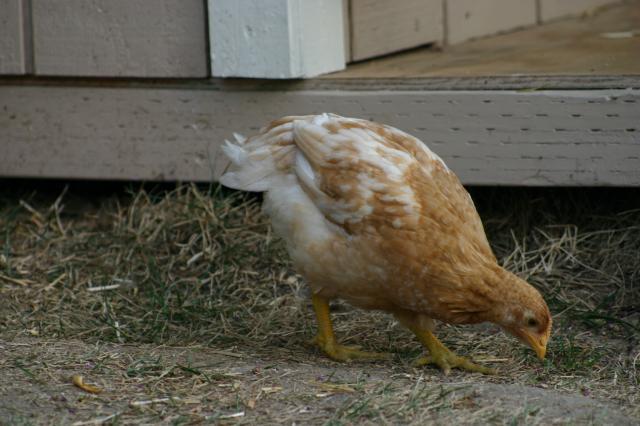
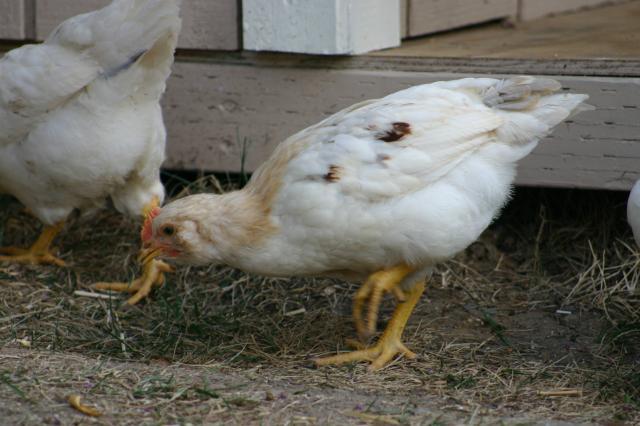
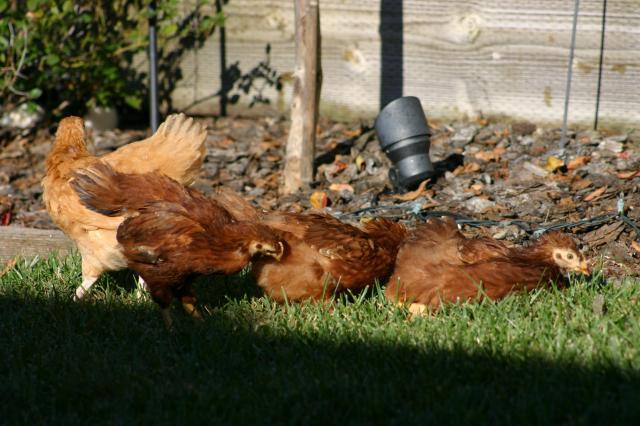
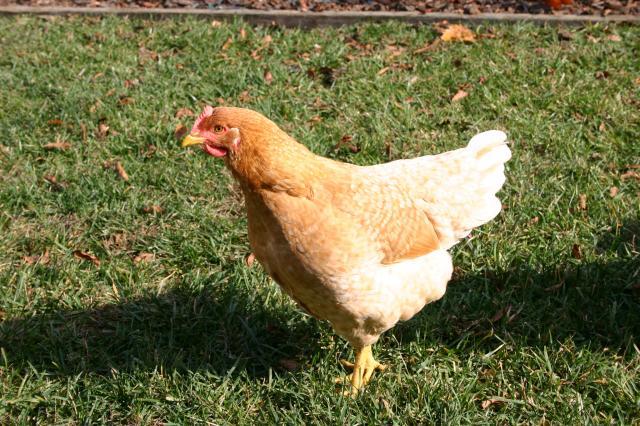
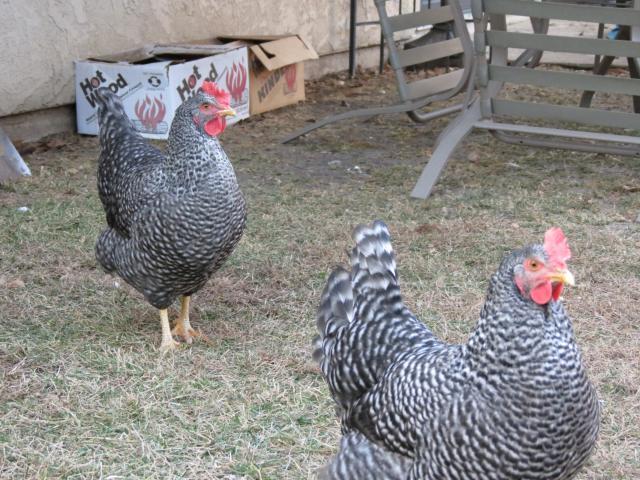
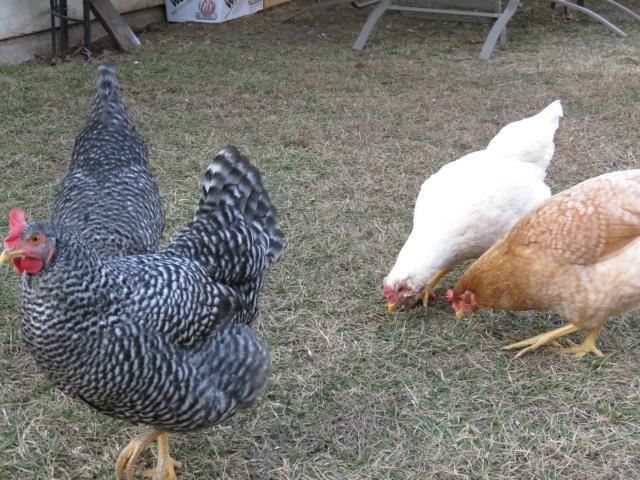
Here they are happily free ranging in the backyard, they are approximately 5 weeks old.

Here are the new additions. 3 Rhode Island Reds & a Buff Orpington. One week old.
Here they are happily free ranging in the backyard, they are approximately 5 weeks old.
The Eggs
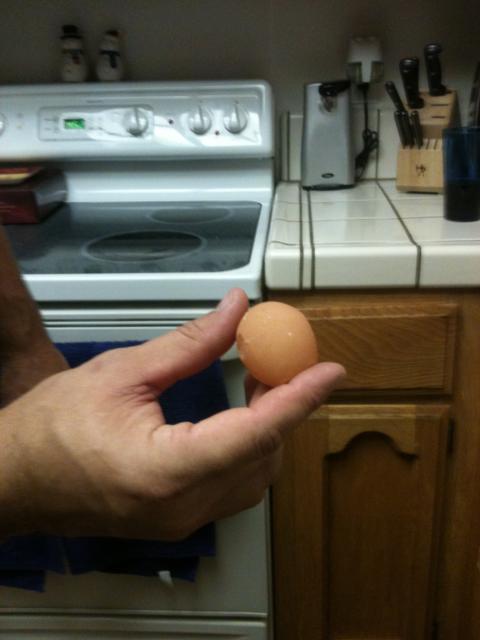
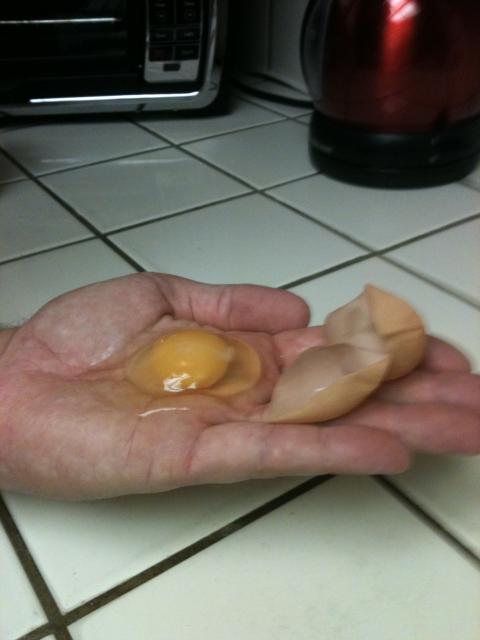
On November 26th we got an unexpected surprise, an egg. Our four oldest girls weren't even 18 weeks old, so we weren't expecting any eggs for another month or so. Our first egg wasn't quite what we expected on the outside, it was soft and leathery, but it looked fine on the inside.
The next day, I cleaned the coop while everyone was free ranging. One of the hens kept coming into the coop, and hopping into the nesting box while it was totally bare. I finally put some sawdust in one of them, put her into it, and left her alone for a while. Ten minutes later her 2nd egg.
This one was a little firmer, but was also cracked.
After that, she started laying perfect little eggs. She has even blessed us with a few double yolkers.
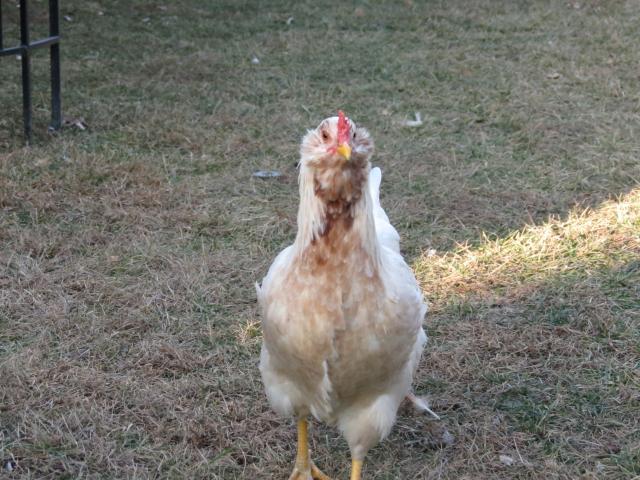
Meet Crystal, our first layer.
Not long after, we started finding 2 eggs a day. Shortly after that we were finding 3. We figured out that the twins had also started laying. Meet Chloe and Zoey, also known as Thing 1 and Thing 2.
Now the only one we were waiting on from the original four, was Tonks.
On Christmas, due to multiple people checking and collecting them at various times throughout the day, we had some confusion on how many eggs were layed. We thought there might have been four, but weren't sure. The next day it was confirmed when I went out in the afternoon to check. Two of the nesting boxes each had 2 eggs.
The youngest four are about 14 weeks old now, so in a couple of months we should have double the egg production.
Update 6-24-12
Well everyone is laying now, and we have a booming egg business.
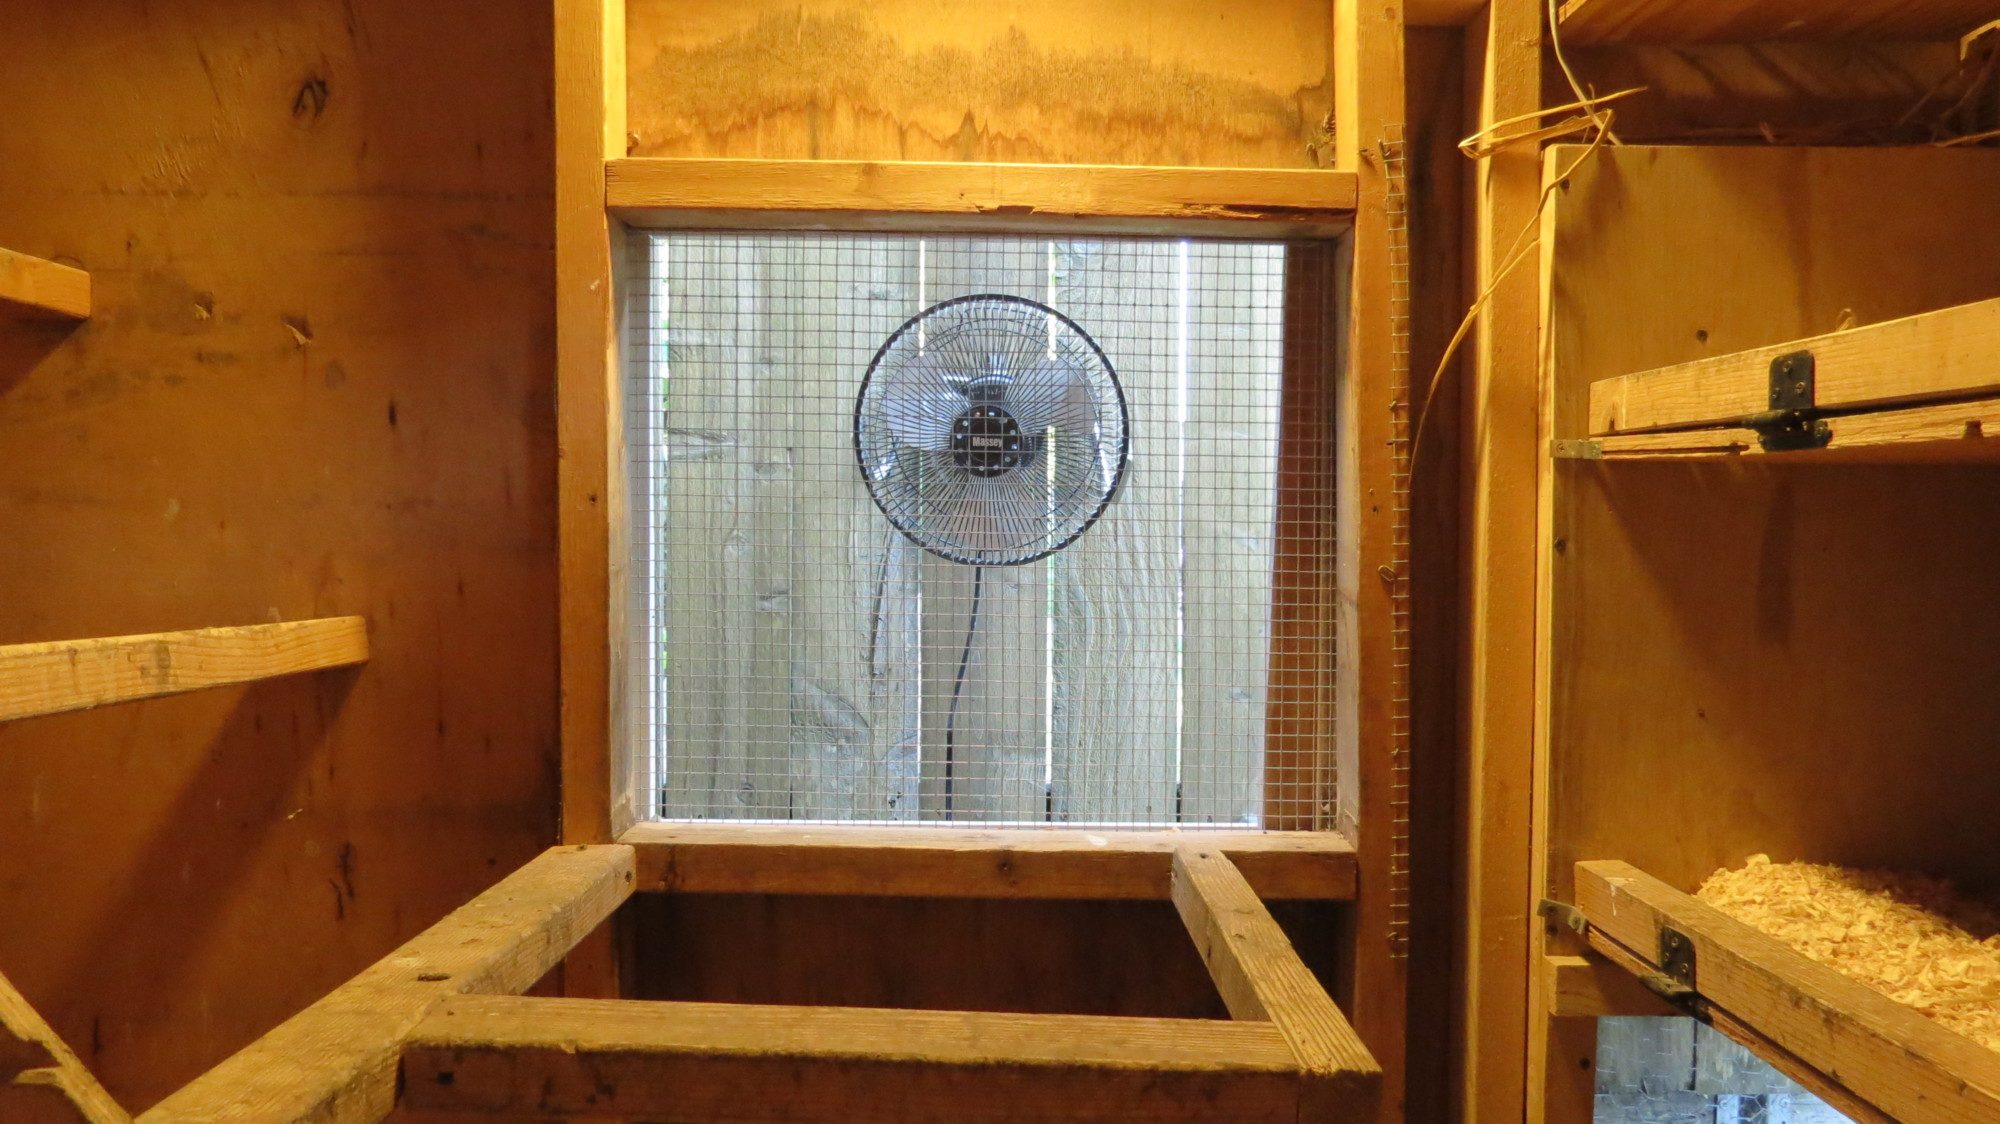
I made a few more changes to the coop. Added more ventilation, and a screen door for the upper portion of the door. It's on hinges and swings into the coop and out of the way so the upper door can still close at night.
Also, more perching area, hinges on the 2x2's so they can be opened out of the way for easy cleaning of the nesting boxes,
and a fan blowing into the coop for circulation on hot days.
Also finished the roof so they will stay dry on rainy days.
Update 8-17-12
Well we lost a chicken a little while back. I went to lock the coop up one night and I found Tonks dead on the floor. We aren't sure what she died from, but she will be missed.
Shortly after that, we decided to give three more chickens a good home. At the feed store we picked up a Silver Laced Wyandotte, and 2 Americauna's. Which means once they start laying, we will have some green eggs.
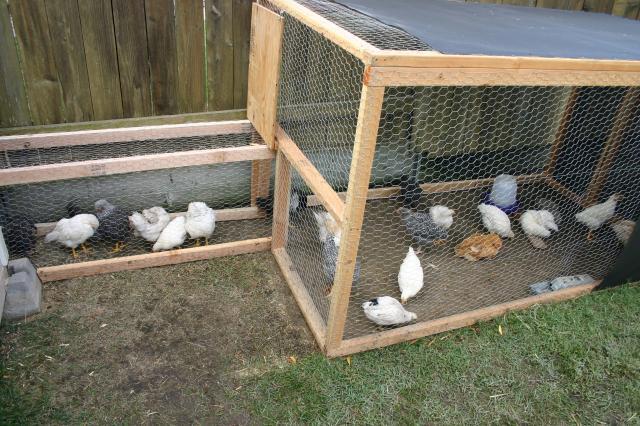
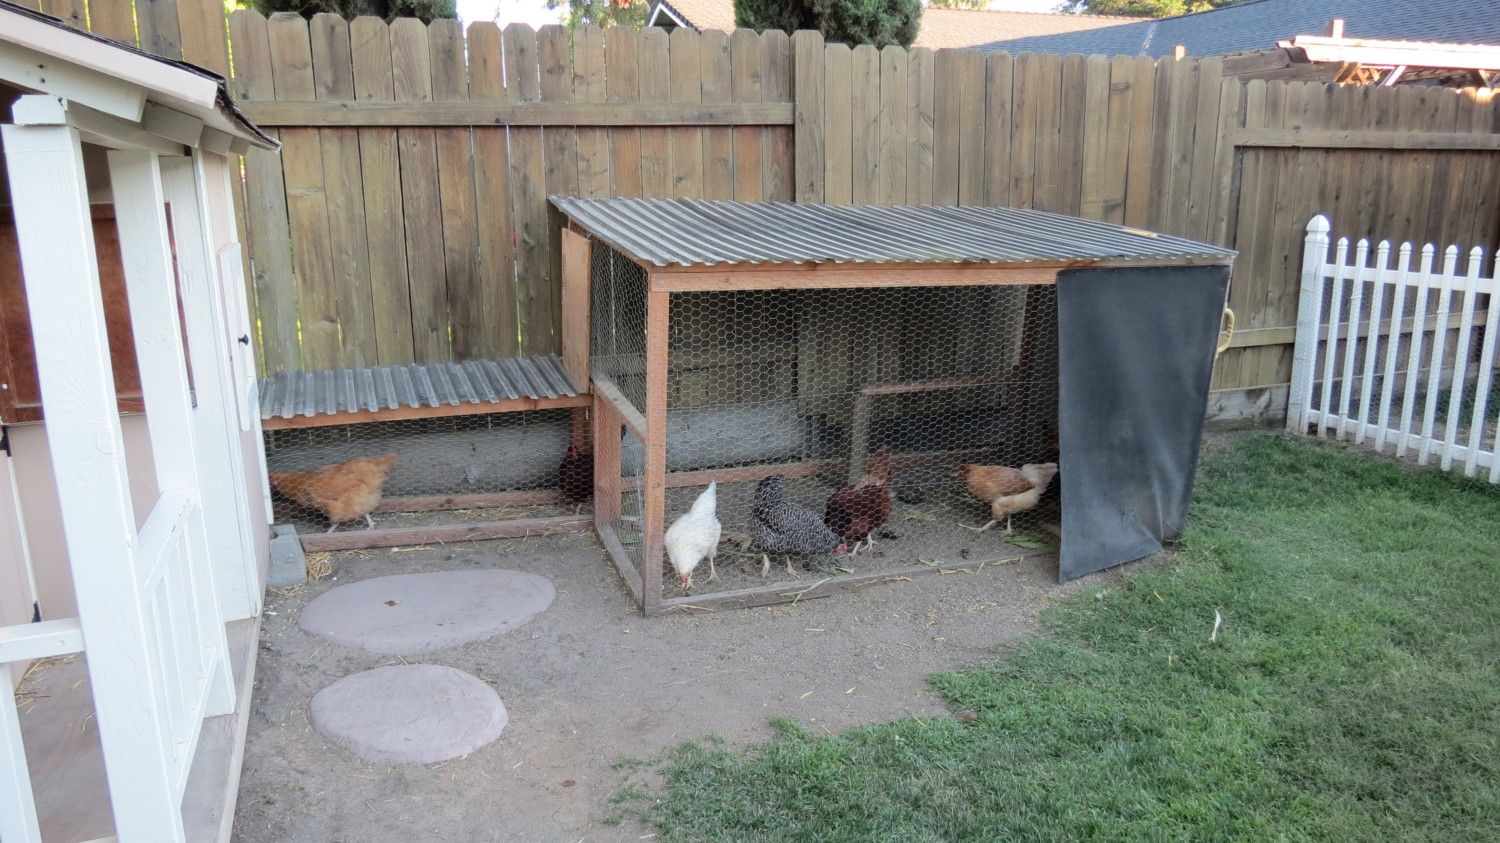
With the addition of three more chickens, I decided to enlarge the pen (pictured above). Construction begins tomorrow ,with pics to come.
8-19-12
Here is the new and improved pen, I still need to put the corrugated roofing on,
On November 26th we got an unexpected surprise, an egg. Our four oldest girls weren't even 18 weeks old, so we weren't expecting any eggs for another month or so. Our first egg wasn't quite what we expected on the outside, it was soft and leathery, but it looked fine on the inside.
The next day, I cleaned the coop while everyone was free ranging. One of the hens kept coming into the coop, and hopping into the nesting box while it was totally bare. I finally put some sawdust in one of them, put her into it, and left her alone for a while. Ten minutes later her 2nd egg.


After that, she started laying perfect little eggs. She has even blessed us with a few double yolkers.
Meet Crystal, our first layer.
Not long after, we started finding 2 eggs a day. Shortly after that we were finding 3. We figured out that the twins had also started laying. Meet Chloe and Zoey, also known as Thing 1 and Thing 2.
Now the only one we were waiting on from the original four, was Tonks.
On Christmas, due to multiple people checking and collecting them at various times throughout the day, we had some confusion on how many eggs were layed. We thought there might have been four, but weren't sure. The next day it was confirmed when I went out in the afternoon to check. Two of the nesting boxes each had 2 eggs.
The youngest four are about 14 weeks old now, so in a couple of months we should have double the egg production.

Update 6-24-12
Well everyone is laying now, and we have a booming egg business.
I made a few more changes to the coop. Added more ventilation, and a screen door for the upper portion of the door. It's on hinges and swings into the coop and out of the way so the upper door can still close at night.
Also, more perching area, hinges on the 2x2's so they can be opened out of the way for easy cleaning of the nesting boxes,
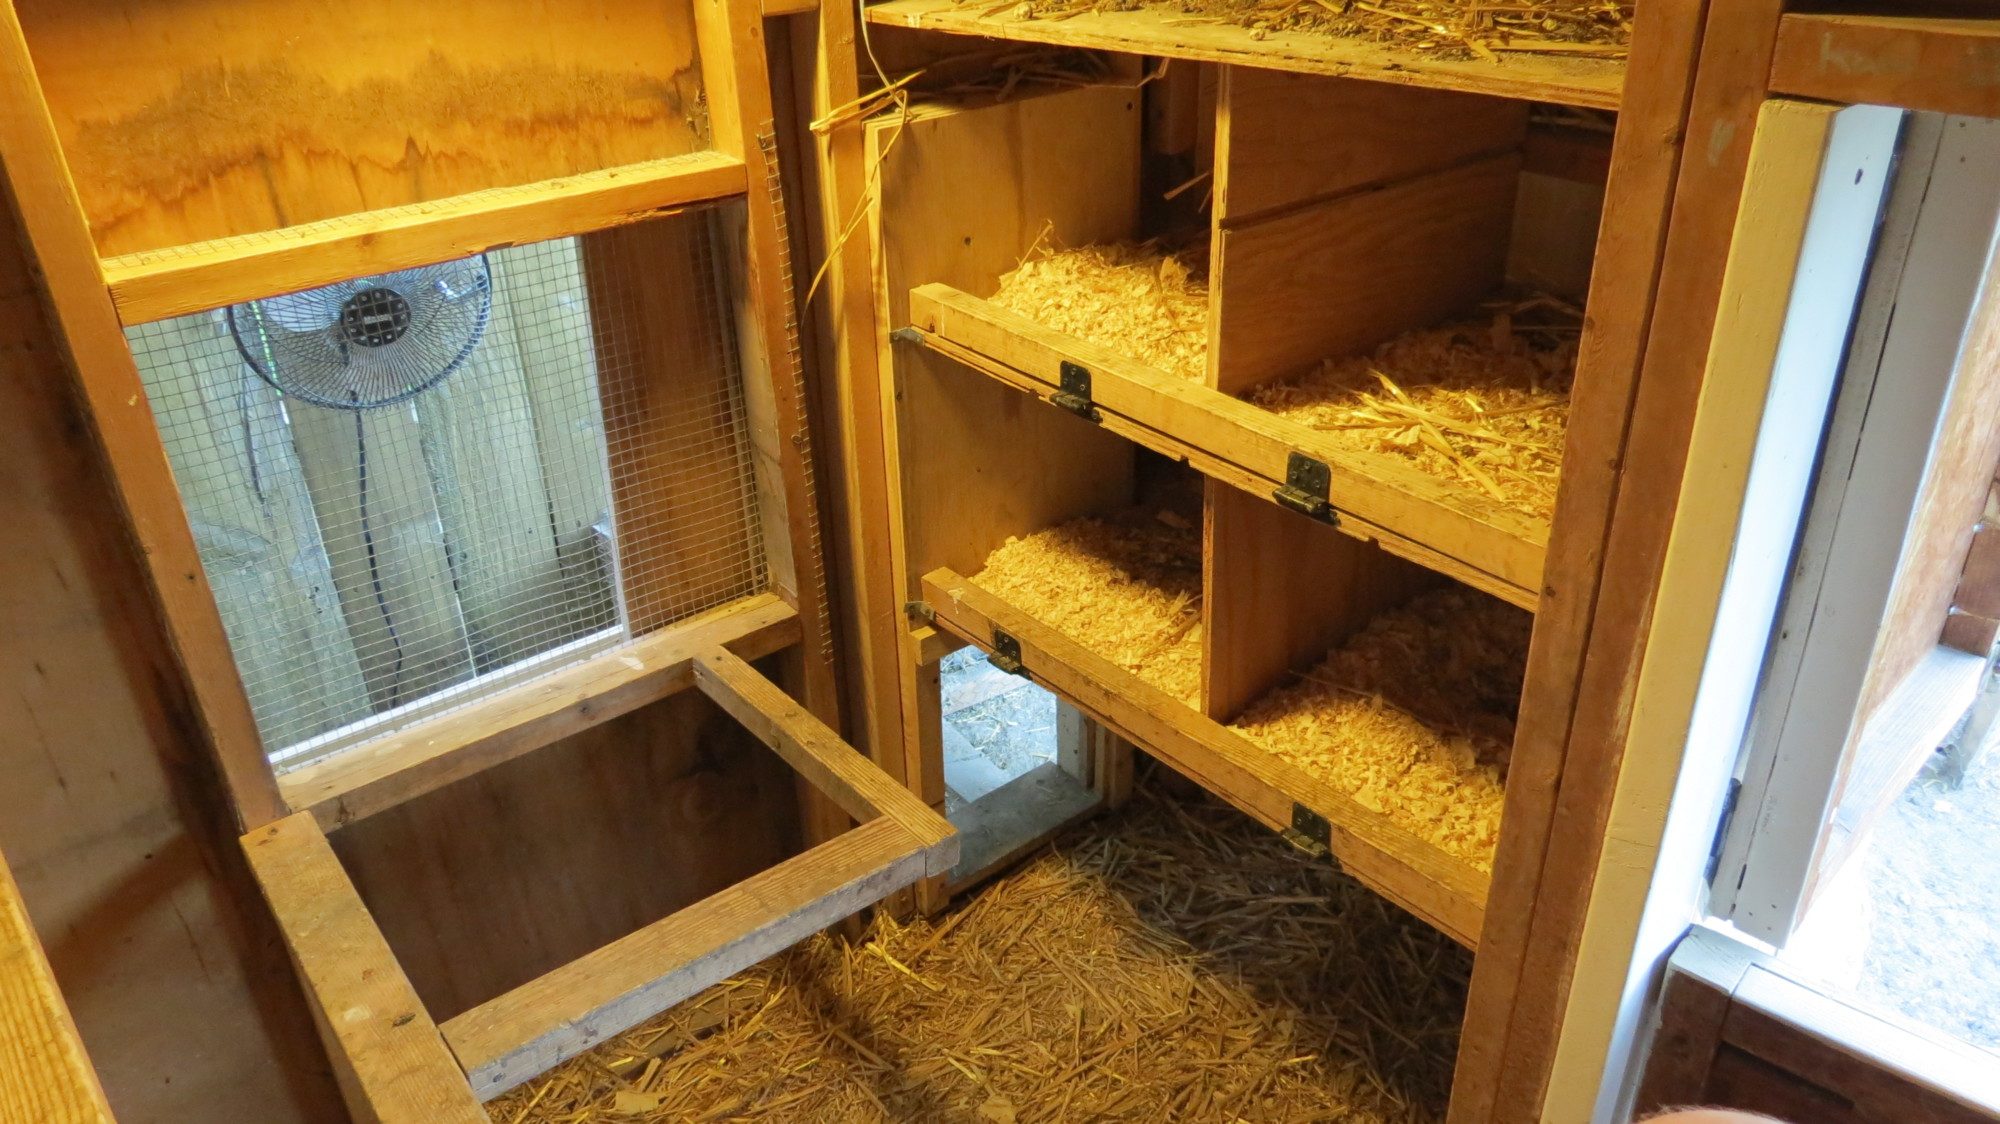
and a fan blowing into the coop for circulation on hot days.
Also finished the roof so they will stay dry on rainy days.
Update 8-17-12
Well we lost a chicken a little while back. I went to lock the coop up one night and I found Tonks dead on the floor. We aren't sure what she died from, but she will be missed.
Shortly after that, we decided to give three more chickens a good home. At the feed store we picked up a Silver Laced Wyandotte, and 2 Americauna's. Which means once they start laying, we will have some green eggs.
With the addition of three more chickens, I decided to enlarge the pen (pictured above). Construction begins tomorrow ,with pics to come.
8-19-12
Here is the new and improved pen, I still need to put the corrugated roofing on,
and the three new editions, approximately 7 weeks old.
8-27-12
More pen improvements coming/under construction
Update (finally)
Sorry I haven't updated in a while.
I finished putting the corrugated roofing on the pen, painted it, put planters in front of it, and added misters for those really hot days.
I also added a way for the chickens to get from the pen into the new garden (which I built in late 2012-early 2013)
Last summer, after the garden was done for the year, I opened the hatch to let them in. Surprisingly, it took them a while to get the nerve up to go thru, but once they did, they had a good time.
Here is the access door.
8-27-12
More pen improvements coming/under construction

Update (finally)
Sorry I haven't updated in a while.

I finished putting the corrugated roofing on the pen, painted it, put planters in front of it, and added misters for those really hot days.
I also added a way for the chickens to get from the pen into the new garden (which I built in late 2012-early 2013)
Last summer, after the garden was done for the year, I opened the hatch to let them in. Surprisingly, it took them a while to get the nerve up to go thru, but once they did, they had a good time.
Here is the access door.
Here they are enjoying the free life
And the finished product, for now..................
Next improvement........... A chicken swing
