Continued from Part I
Part II Microscopy
Learning basic microscopy is not hard and although it does take practice, is worth the effort. It opens up a whole new world to you and is especially fun to do with your kids. Ever look at mushroom or an onion skin under a microscope? It’s fascinating. The more you practice, the more confident you will get at it. I recommend learning how to use your microscope and practice with it. There are quite a few resources online for this.
A very, very brief word on the anatomy of a microscope
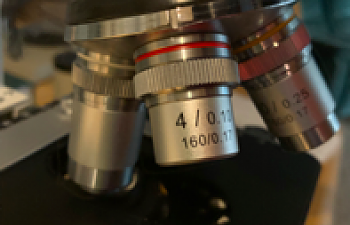
Your microscope has a “stage”, this is a flat surface where you will put your slide. usually has a metal clip that will hold your slide in place. When you use the focus knobs, (the fine and coarse adjustment knobs on the side of the scope), the stage moves up and down. The objectives are the lenses that hang upside down and provide the magnification, and a standard compound microscope usually has four of these that rotate on a round swivel. They rotate so you can focus on the object with one objective, then swivel to the next lens and the object will be in focus at a higher magnification.
Some microscopes come with different strength ocular lenses (eyepieces). For this exercise, use the eyepieces marked “10x”.


Examine the slide first using the 4x objective (lens). This is the smallest lens.
The coarse and fine focus knobs move the stage up and down in a vertical manner, and the stage control knobs move the stage back and forth in a horizontal manner. Start with the 4x objective lens and move the stage up as close to the objective as it will get. Put the slide on the stage of the scope, coverslip-side-up, and turn on the light. Slowly and carefully move the coarse focus knob so the stage moves back down until the slide comes into focus. Sharpen the focus using the fine focus knob and look for bubbles. Bubbles are your friends. They are in the same focal plane as parasite eggs since they, too, float, so they’re a good guide to help you find your way. A good practice when you think you see something on the slide is to move the stage back and forth with the stage control knobs and see if what you are looking at is moving. If it's not, what you are seeing isn't on the slide. If it does, great! Now use the fine focus to hone in on your slide. Practice going back and forth using the stage control knobs, and look at what exists on the different focal planes in that tiny, tiny space between the slide and the cover slip. Under a microscope, it's a lot of real estate. This is why it's important to focus on the bubbles.

Bubbles under the microscope
Focus up and down with the fine adjustment knob. Move the stage around with the stage control knobs until you find one corner of the cover slip. (This is easier said than done and is much of the battle with learning to use the microscope). Focus on the corner, then change objectives (lenses) from 4x to 10x. Slowly move the stage while examining what’s on the slide. As you look, move the slide all the way to the edge of the cover slip, move it over and then go back across the slide until you have examined the entire cover slip.
If you spot something interesting, you can switch to the 40x objective to view it even more closely. You’ll notice it’s a little harder to focus on objects the closer you get to them and that you will need more light. If things on the slide are flowing like a river, which they tend to do, wait a moment and your objects will stop. At 40x, you will begin to see Brownian motion and the movement of live bacteria and other tiny organisms.
If you want to use the highest-power lens you have, (100x), you will need immersion oil, which generally comes with a new microscope, or you can get it online. Do not substitute any other type of oil. Put a drop of optical immersion oil directly on top of your slide and swing the 100x objective into place so it touches the oil. This lens is only meant to view things through oil, and you won’t see anything with this lens without oil. This lens takes a lot of practice to master, but you can see actual bacteria doing the dance of life under there. It’s amazing.
Now when you are done, clean the lens! It will get gunky fast and you won’t be able to see anything with it in the future. You will inevitably get oil on the 40x lens, too, so be sure to clean that off with a lens cloth before you are finished for the day.
Onward to part III!
Part II Microscopy
Learning basic microscopy is not hard and although it does take practice, is worth the effort. It opens up a whole new world to you and is especially fun to do with your kids. Ever look at mushroom or an onion skin under a microscope? It’s fascinating. The more you practice, the more confident you will get at it. I recommend learning how to use your microscope and practice with it. There are quite a few resources online for this.
A very, very brief word on the anatomy of a microscope
Your microscope has a “stage”, this is a flat surface where you will put your slide. usually has a metal clip that will hold your slide in place. When you use the focus knobs, (the fine and coarse adjustment knobs on the side of the scope), the stage moves up and down. The objectives are the lenses that hang upside down and provide the magnification, and a standard compound microscope usually has four of these that rotate on a round swivel. They rotate so you can focus on the object with one objective, then swivel to the next lens and the object will be in focus at a higher magnification.
Some microscopes come with different strength ocular lenses (eyepieces). For this exercise, use the eyepieces marked “10x”.
Examine the slide first using the 4x objective (lens). This is the smallest lens.
The coarse and fine focus knobs move the stage up and down in a vertical manner, and the stage control knobs move the stage back and forth in a horizontal manner. Start with the 4x objective lens and move the stage up as close to the objective as it will get. Put the slide on the stage of the scope, coverslip-side-up, and turn on the light. Slowly and carefully move the coarse focus knob so the stage moves back down until the slide comes into focus. Sharpen the focus using the fine focus knob and look for bubbles. Bubbles are your friends. They are in the same focal plane as parasite eggs since they, too, float, so they’re a good guide to help you find your way. A good practice when you think you see something on the slide is to move the stage back and forth with the stage control knobs and see if what you are looking at is moving. If it's not, what you are seeing isn't on the slide. If it does, great! Now use the fine focus to hone in on your slide. Practice going back and forth using the stage control knobs, and look at what exists on the different focal planes in that tiny, tiny space between the slide and the cover slip. Under a microscope, it's a lot of real estate. This is why it's important to focus on the bubbles.
Bubbles under the microscope
Focus up and down with the fine adjustment knob. Move the stage around with the stage control knobs until you find one corner of the cover slip. (This is easier said than done and is much of the battle with learning to use the microscope). Focus on the corner, then change objectives (lenses) from 4x to 10x. Slowly move the stage while examining what’s on the slide. As you look, move the slide all the way to the edge of the cover slip, move it over and then go back across the slide until you have examined the entire cover slip.
If you spot something interesting, you can switch to the 40x objective to view it even more closely. You’ll notice it’s a little harder to focus on objects the closer you get to them and that you will need more light. If things on the slide are flowing like a river, which they tend to do, wait a moment and your objects will stop. At 40x, you will begin to see Brownian motion and the movement of live bacteria and other tiny organisms.
If you want to use the highest-power lens you have, (100x), you will need immersion oil, which generally comes with a new microscope, or you can get it online. Do not substitute any other type of oil. Put a drop of optical immersion oil directly on top of your slide and swing the 100x objective into place so it touches the oil. This lens is only meant to view things through oil, and you won’t see anything with this lens without oil. This lens takes a lot of practice to master, but you can see actual bacteria doing the dance of life under there. It’s amazing.
Now when you are done, clean the lens! It will get gunky fast and you won’t be able to see anything with it in the future. You will inevitably get oil on the 40x lens, too, so be sure to clean that off with a lens cloth before you are finished for the day.
Onward to part III!