We have a detached 1 car garage next to our attached garage we thought would be perfect for a coop. Shane took a ton of time designing something that would be warm, allow for ventilation, and be cool as hell to look at. Backyardchickens.com was our source for all the information we used and probably couldn't have done it so efficiently had we not found this website.
The Frame is up on the 8x8x8 inside portion of the coop
Used 24in x 32in Hopper style windows for maximum ventilation
Going to use the milk crates for the nesting boxes
Windows in and plywood going up on the inside walls
Also cutting the holes for the exterior windows, vents, and pop door
Nesting box built and insulated using old Styrofoam
Inside of the nesting box, cut the front of the milk crates off leaving a small lip, it will hold 3 crates
Plywood and insulation going up, electricity going in too, more holes to cut!
Putting siding back and j-channel up after framing the exterior windows and pop door and putting in 12x12 attic gable vents
Painting walls exterior latex after 2 coats of Kilz 2
Hopefully this will prove to be a durable combo
Added floor vent for improved ventilation
Primed nesting box, going to paint the inside black
Have wall outlet for water heater and night light
Getting the last bit of trim on the windows and vents
Decided to go with Grape Popsicle for the trim!
Got the concrete floors and blocks sealed with some heavy duty sealer provided by the neighbor, Thanks Greg!
Started working on a corner roost made from closet pole and fresh cut Pear tree branches
Courtney decided to decorate the coop with silhouettes. She is going to make the rooster and T-rex look framed.
Planning on doing a floor lamp and fancy chair too!
Inside all done, and ready for girls first day. The entire floor lined with a tarp for easier cleaning.
Used a tarp as a poop board under the roost too.
Built a ladder from more branches
We had the chandelier laying around from updating our house, suits our ladies perfectly!
Girls first day in the Chateau!
We put a parrot perch tree in the left corner, and the base doubles as a sandbox.
We never thought that 6 or 7 of the 8 ladies would sleep in the tree every night!
They barely use the corner roost.
Now that the inside is done, time to finish the run. It is Roughly 16x8x8, with16in of hardware cloth buried in a trench around the run. Then 320 lbs of concrete was poured in the trench. You can also see the Japanese Maple we're going to plant inside the run.
Trench filled in, door up, tree planted, some more hardware cloth still going up
Girls are out! Put large rocks around the inside and logs for them to play on. Have the plastic on the top, still need to put large rocks around the outside and put up a few boards to hide the staples and washers.
Pop door is done. It can be opened and closed from outside of the coop.
The outside of the coop is done. Used re-purposed fence pickets.
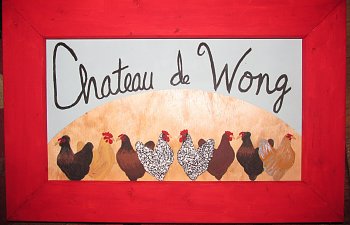
Courtney's signs are awesome! For the door we went with a little portrait of each of our ladies.
Rope for the pop door on the outside of the coop. The black handle at the bottom right is a locking mechanism for the pop door.
Hinges and latch on the outside of nesting box
On the left side there is a reused door chain lock, used to hold the lid open while collecting
Nesting boxes complete!
Used more fresh cut branches as a step
Fence inside a fence. We were lucky enough to buy a house with a small 2nd backyard attached to our small 2nd garage. This serves as a 2nd run when we are home.
View from inside the run.
Our new toy. We freaked out about the humidity/near freezing temperatures dilemma. We hung it a few inches from where they sleep so we could get the most accurate readings.
The display sits on our kitchen table so we can constantly see what's going on out there.
(It was like $20.00 at Lowes!)
Coop and run complete! We hung a swing, put in a fun ladder, a pile of logs, and a place to take dirt baths. They really love cabbage on a string!
In June we got a whole new batch of chickie babies and our sweet little girl turkey Chumbo!