Gardening with Backyard Chickens
Our Small Chicken Coop for 4 chickens
(The Hen House that doubles as a Garden Potting Table)

Our Small Chicken Coop for 4 chickens
(The Hen House that doubles as a Garden Potting Table)


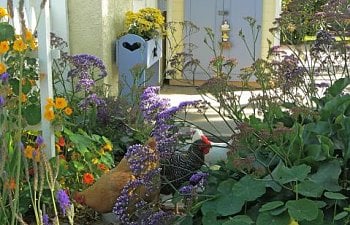
We live in a large urban city in Los Angeles County about 4 miles from the ocean in Southern California. I love to garden and I incorporated the design of the chicken's run into an already existing work bench.
Our chicken coop had to be attractive since we look at the location immediately as we walk out the back door. Also, neighbors would be able to see it slightly over the block wall if they tried. Ventilation was an important consideration in the design, but not really insulation. Our summer temps rarely go over the mid to upper 80's and the winter temps don't often go below the 40's. I located it next to an outlet so I can put a heat lamp inside if necessary. It will get afternoon shade from a large Chinese Elm tree. In designing it, I tried to make it blend in with all the other decorative elements I had created in the yard and garden over the years. The "Lowes playhouse" that many BYC users have converted to coops appealed to me, but I wanted storage for food and supplies to be incorporated within the structure. So, I decided to improvise by designing and building it from scratch myself.
Better diagrams and a detailed cut list can be found in the book Backyard Chickens: Guide to Coops and Tractors, Planning, Building and Real Life Advice.
When BYC updated in winter 2012, my coop page and photo collection here was too large and I had to delete some images. Pictures of my little city garden and edible landscaping can be found at http://hanburyhouse.com, as well as my original extensive coop page with lots of the under construction photos of my coop.
My eight year old daughter is artistic and helped with the project by painting the mural below for the pullets to enjoy. I'm still unsure why it has cats. My son named this painting "chicken nightmares."
My eight year old daughter is artistic and helped with the project by painting the mural below for the pullets to enjoy. I'm still unsure why it has cats. My son named this painting "chicken nightmares."


There is 2 x 4 for a lip on the floor in front of the door and the pop door is raised off the floor. This is so I could do the deep litter bedding and not have it spill out whenever the door opened.

The Run
I used an old work bench for the run. My husband originally wanted the coop on top of the work bench so it would have a smaller foot print, but this was our compromise. I am still able to use it for a potting table this way. Since our house and city lot are so small, things have to do double duty around here or be small, especially in the garden.
I put sand about 2 to 3 inches deep on top of the cement in the run. It is easy on the chicken feet and fun for them to scratch in.

My daughter painted two more murals in the run before I put the sand and chickens in. Each chicken that she painted was a representation of one of ours, including one science project chick that was a rooster and went to a friend and the two that went to new homes at the end of the summer.


There are two doors on the front and one on the end. They have latches at the top and bottom of each door.

Thoughts on what I would change after using it for a while.
1. The exterior yellow paint was left over from when I painted our stucco house 3 years ago. It is a flat paint. If I was purchasing new paint, instead of using leftovers, I would probably have chosen a semi gloss paint for the easier cleaning. The interior is semi gloss and wipes off nicely.
2. I would not have purchased or used OSB (oriented strand board) in the project. I don’t like the chemicals used in the manufacturing of it. It is also very difficult to prime and paint. I was okay with using it in the coop because my neighbors were throwing it out. Using it kept it out of a land fill. I only have OSB in on the roof area.
3. We started out with 6 chickens in it. The interior of the coop was fine for 6, but the run is a bit small for that number of Large Fowl chickens to be confined to most of the day. The chickens were allowed a lot more time to forage in the yard than we planned as a result. With our new flock, we have 5 bantams and the are more content in the amount of space between the coop and run.
4. After summer, I made canvas covers for the windows to help cut down on early morning sunlight getting in. The chickens wake up way too early in the middle of summer and want out.
I salvaged for free the following+ a few other things I can't recall:
door
hinges
door handles
framing wood
OSB
plywood
3 latches
wooden grooved curtain rods (roosts)
supports under roosts - they were feet from a discarded trellis
vinyl floor adhesive
roof underlayment
string
some trim
some of the screws and washers
primer
brushes
cans of paint
acrylic paints
locking cup hook
and the decorative chicken in window.

It was painted to sort of match the coop.
Materials purchased from two different Habitat for Humanity Restores, one in Garden Grove and one in Santa Ana:
$17.00 siding (actually beadboard turned around)
$10.00 2 cabinet doors
$12.00 trim
$3.00 window cover (1 more narrower cabinet door that opens over the south facing window.)
_______
$42.00
Materials purchased new:
$17.85 3 boxes of screws
$1.99 washers
$7.96 2 more latches
$15.00 hardware cloth
$8.00 aluminum screening
$3.19 plexiglass panel for pop door
$35.64 vinyl flooring
$29.96 shingles
$24.95 more primer (it will be used in many more projects)
______
$144.54
This is a really old BYC page. If you would like to see the most current photos of my coop and garden, visit Hanbury House.