Forgive the formatting. This article, like the coop, is a work in progress.

- View from the Children's Bedroom -
My wife and I had talked about chickens for a couple of years but city ordinance would not allow us to keep enough to make it worth it. After her mother offered to let us use their place nearby (not in city limits) we decided to order the chickens. By decided I mean I got home and my wife showed me the chickens she had ordered.

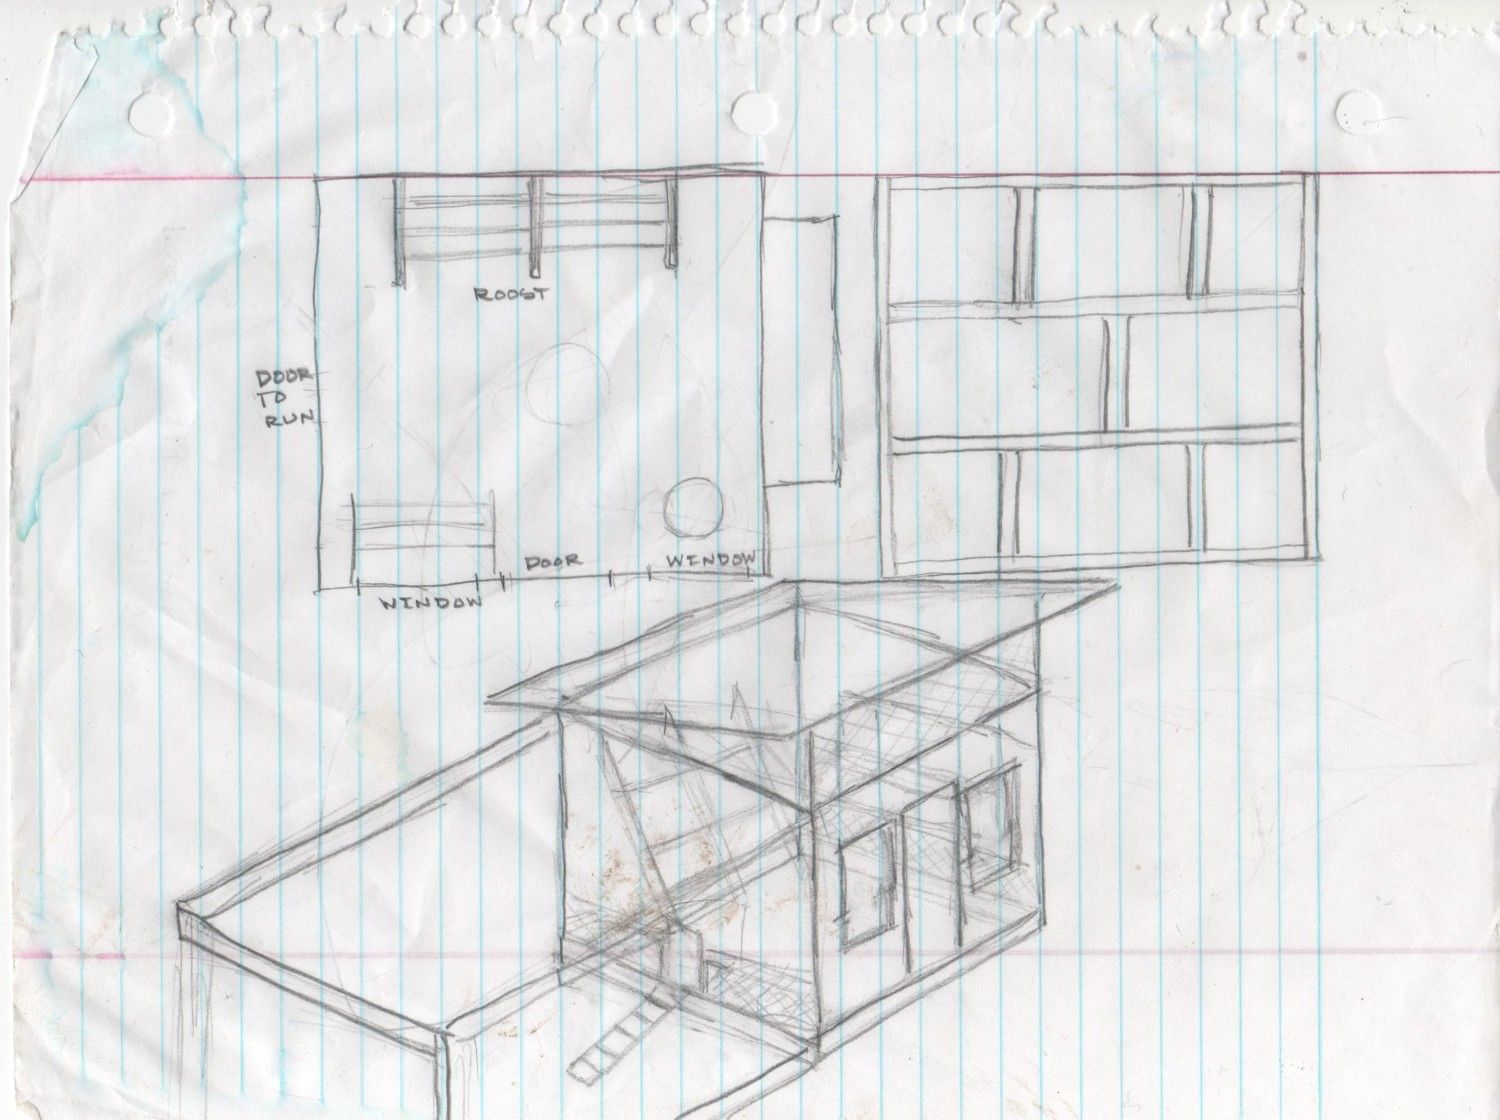
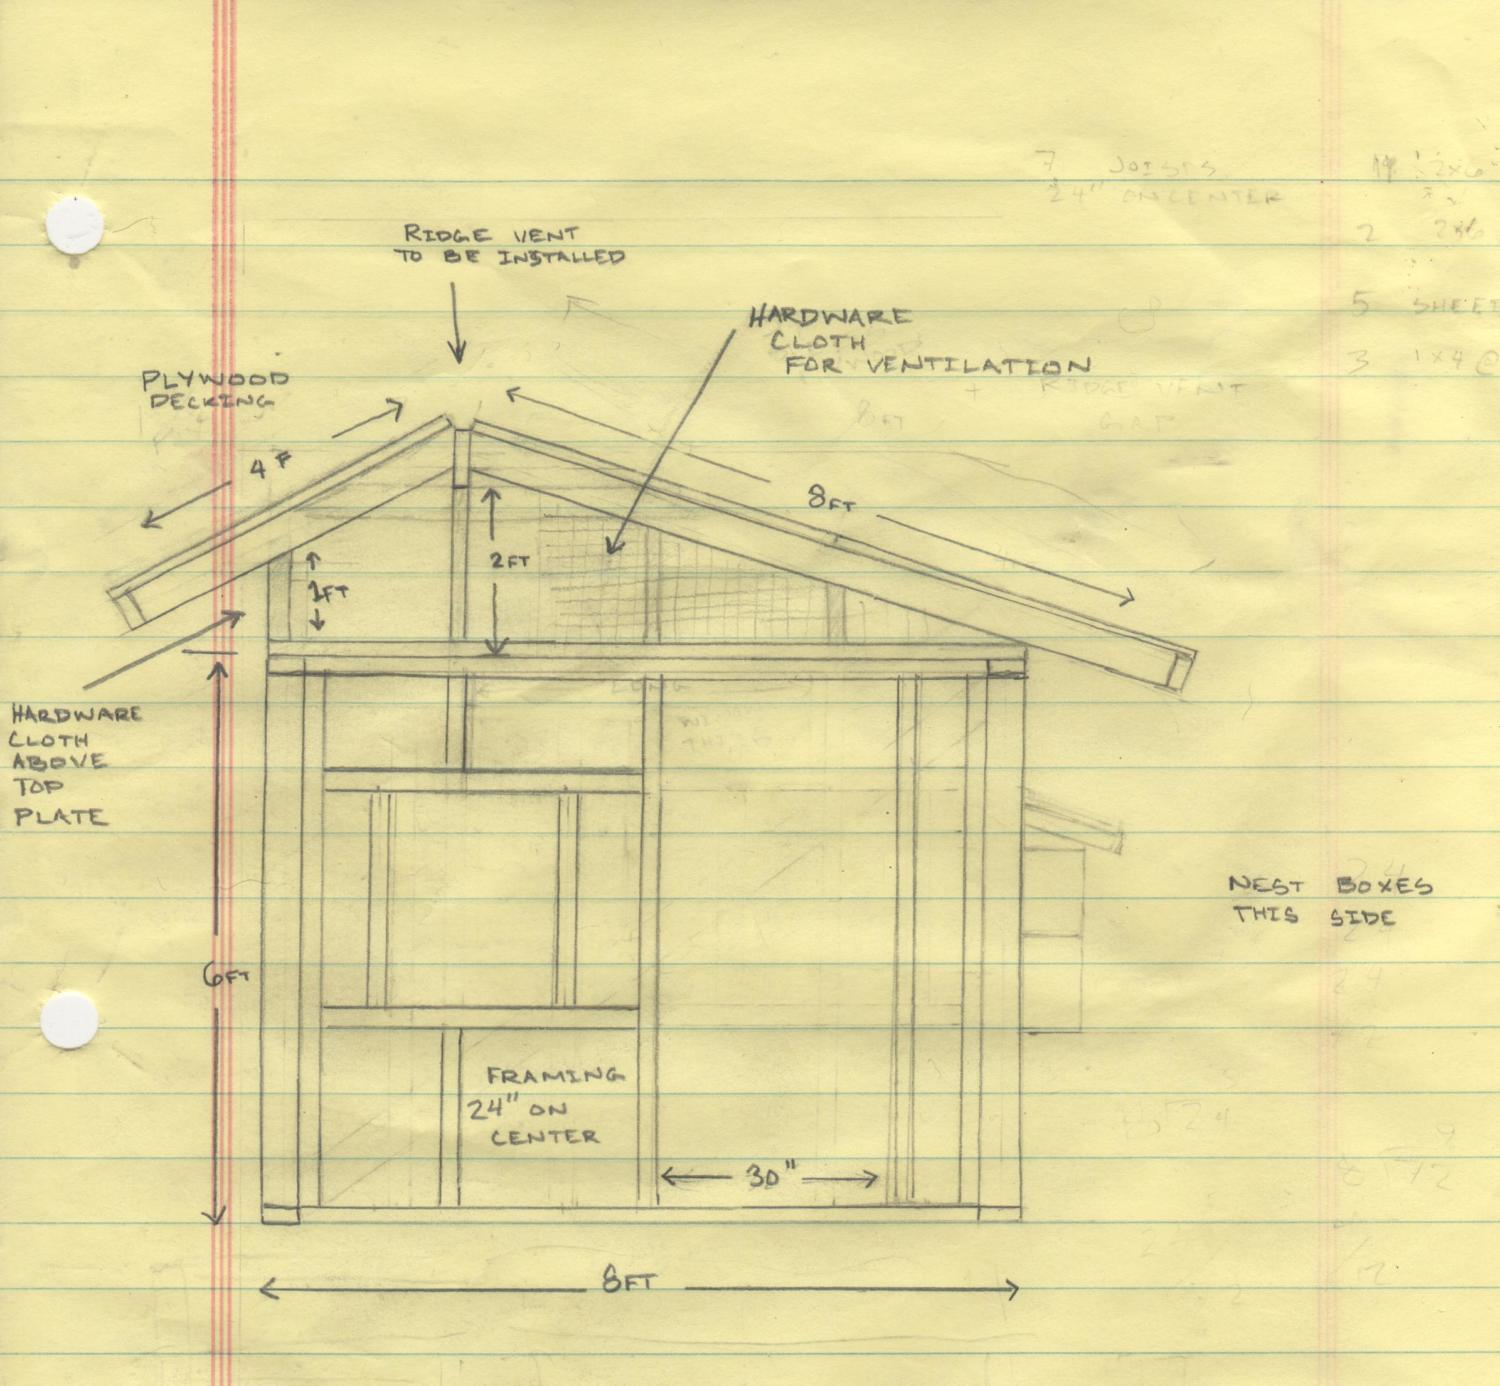
I drew out the floor plans as well as a basic framing idea for the floor. I really wasn't sure about how many floor joists I would need for something this size. This first design shows ventilation on the bottom. My thought was the air would flow from top to bottom. I couldn't figure out how to make this shed water. My wife's father pointed out the hardware cloth on the bottom would be harder to secure against predators. The more I looked at it the more I wanted more ventilation. While I didn't have to consider keeping out cold air I did have to worry about rain. We don't get rain very often in Texas but when we get rain it can be severe. I wanted lots of overhang on my eaves. That made me decide to go with a different layout for the roof. I had an idea in my head but needed to see it so I did this.
- Early Chicken Coop Sketch -
-Cardboard Mock-up-
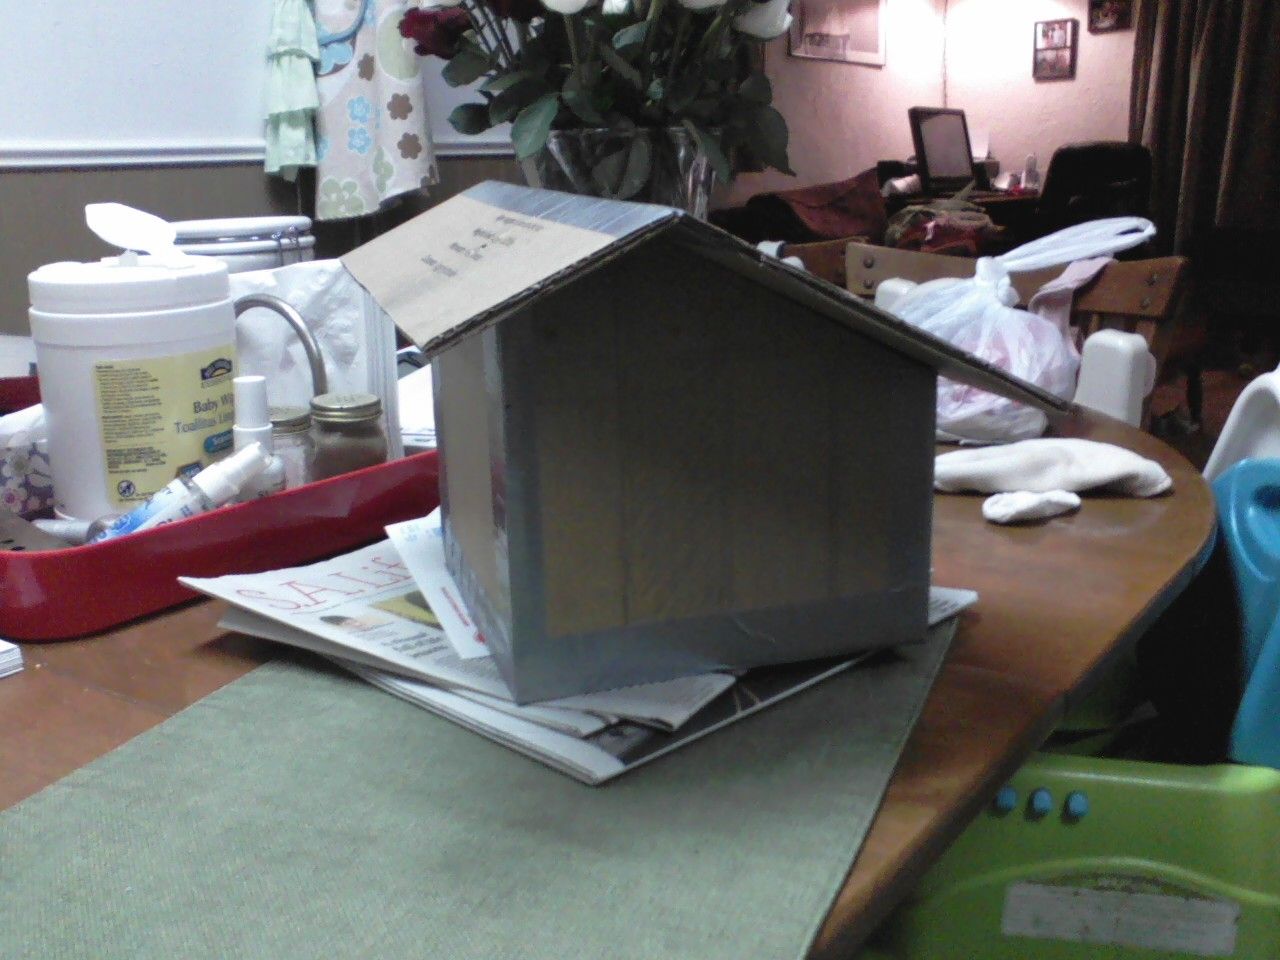
The wife thought I was being ridiculous and I was. It was a little more complicated than I had time for but I really wanted a peaked roof to be able to add ventilation on the ends. The more I read on this site the more I thought I needed to open the coop up. I would have gone with an open air design but it did not seem as secure. As I said, father in-law pointed out the drawbacks to hardware cloth. The coop was going to be hidden behind a work shop in a neighborhood known for foxes and raccoons. I didn't want to risk something getting into it without being noticed. After tinkering on a paint application the cardboard mock up turned into this... along with a dozen other hand drawn sketches.
Both renditions were helpful in their own way. This one was easier to modify.
. - Final Drawing -

In the end I came up with this.
- Penny saying hi! -
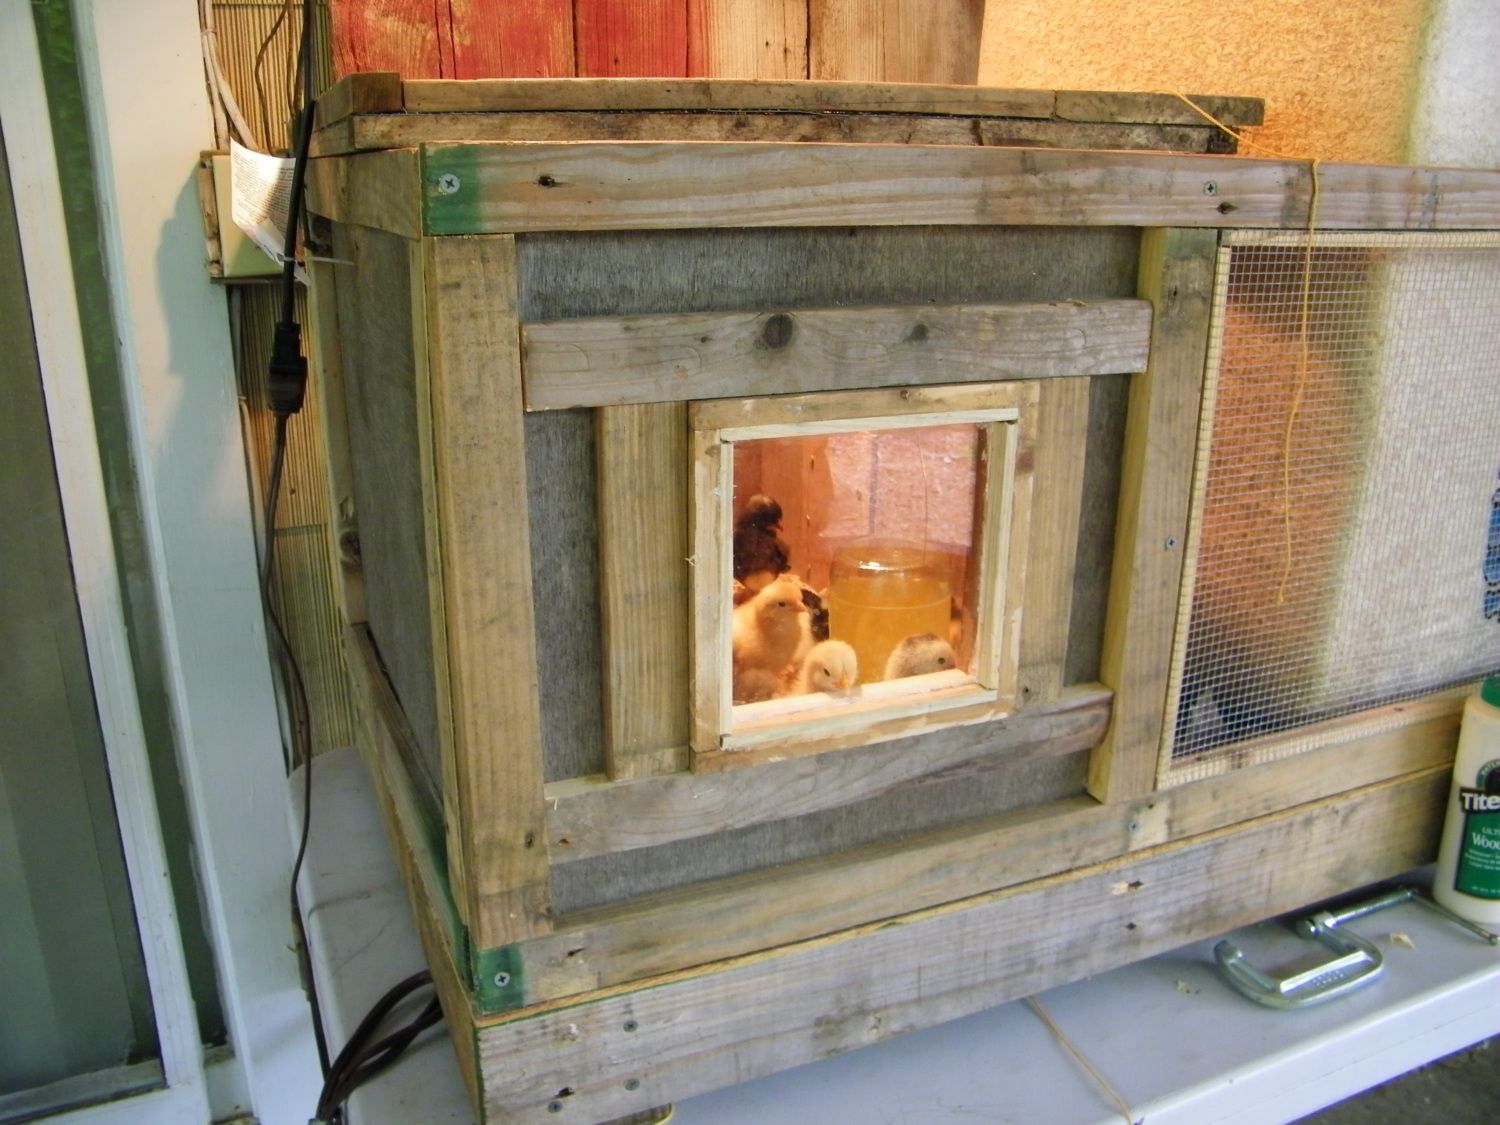
They seemed to like it. The idea was for the chicks to have a small warmer area when they were little and then I would allow them into the "run" as they grew. I then built a stand for the brooder to put it at eye level for the kids... and the dogs.

- Finished Brooder - - Schatzi inspecting my work-
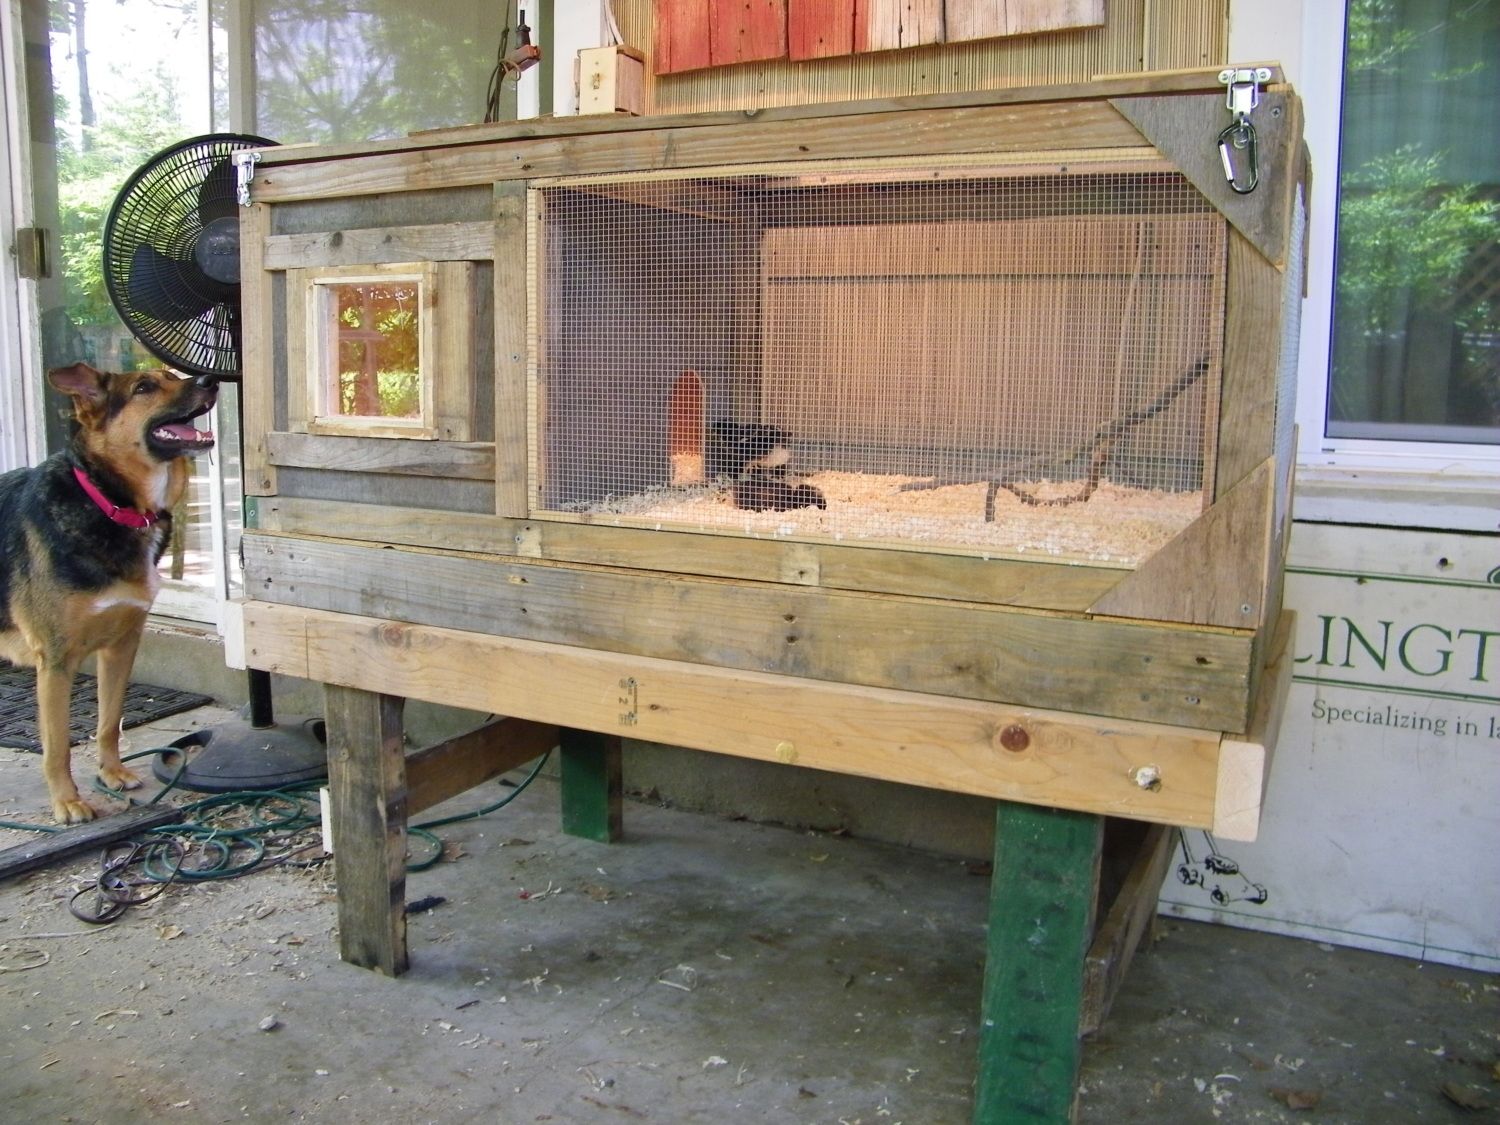
The heat lamp didn't last very long. It was already pretty warm out. At this point the coop was just more and more drawing and plans. The chicks grew faster than I anticipated so the brooder got relocated and remodeled.
-Brooder turned coop w/run -
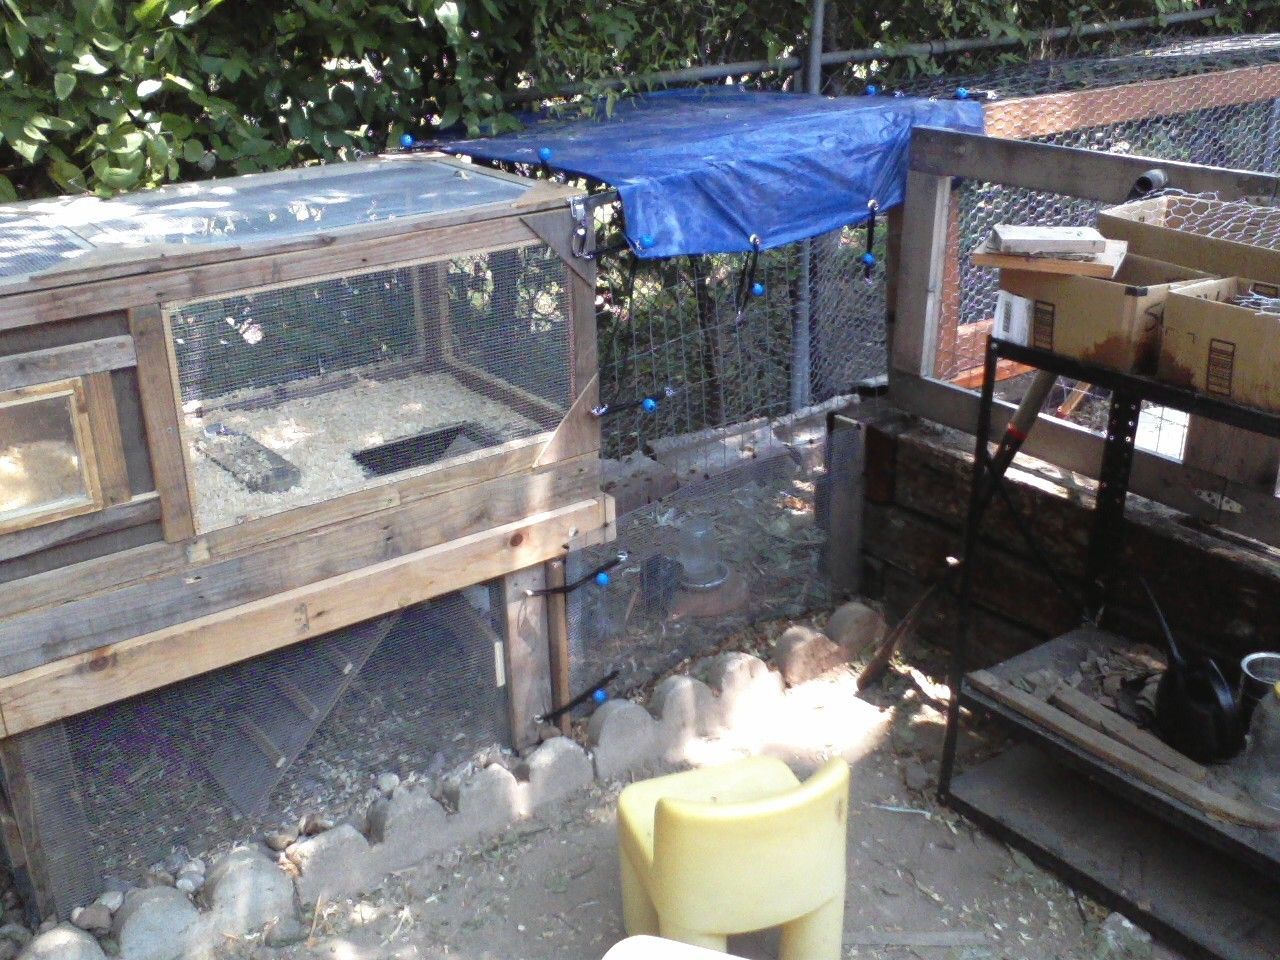
I utilized the space between our backyard fence and our vegetable garden. I plan on going back and changing the floor so that the door can be opened and closed to accommodate new chicks as they grow. This is where our flock is now. I'm a little worried the city might have something to say about our chickens. They were supposed to have been moved by now. I guess I better start the coop.
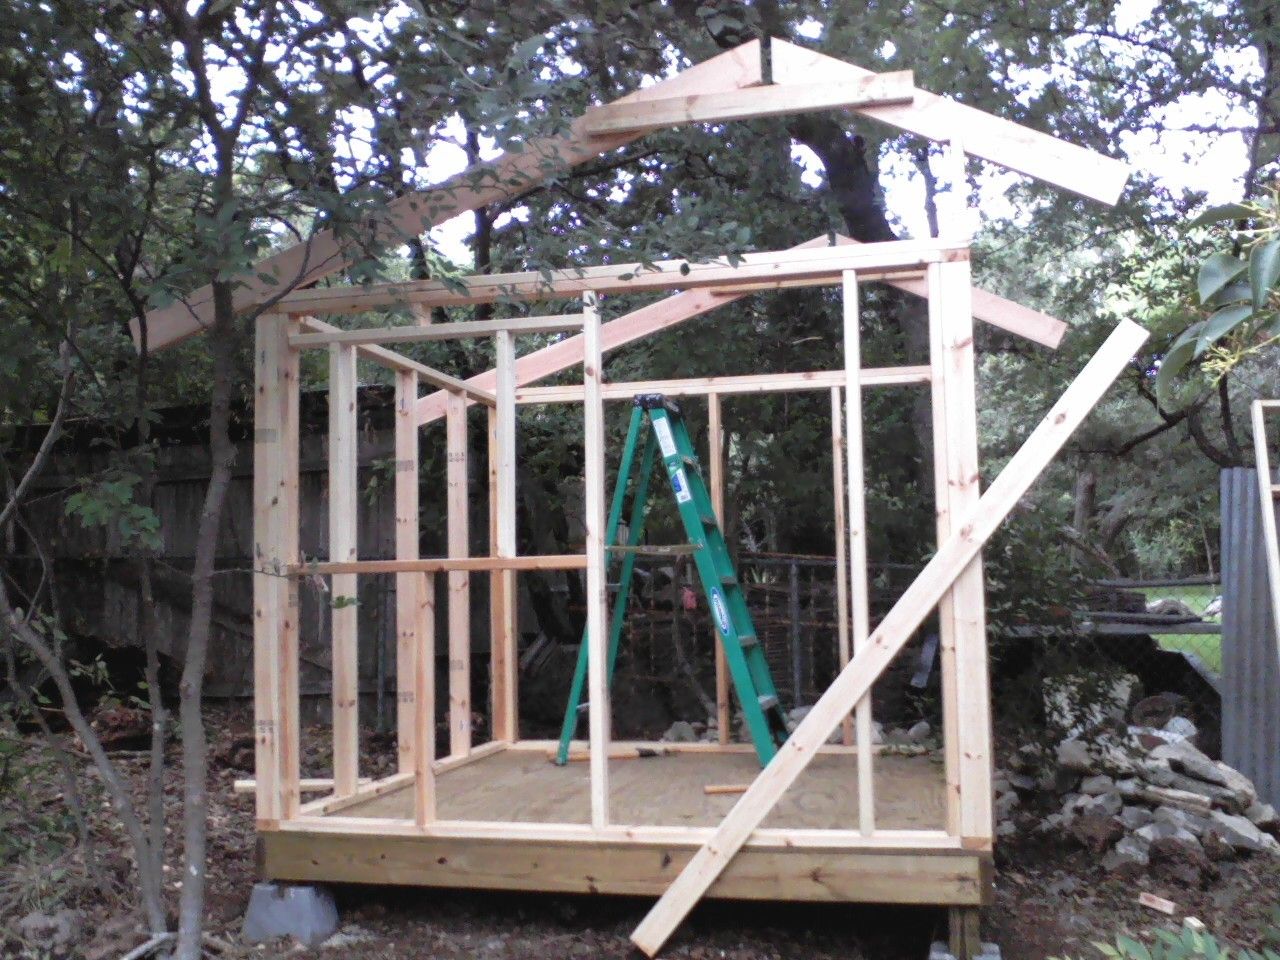
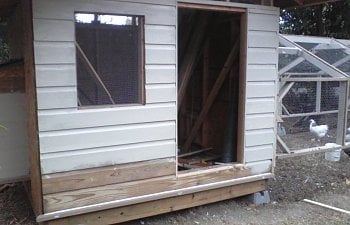
It turned out a little bigger than I thought. Unfortunately I did not take pictures of the floor during the build. I used 2x6 treated lumber 16" on center with joist hangers. The frame was built on a flat surface and then moved to the current location. I had already dug holes for my concrete blocks which were placed in approximate positions. I filled the holes with gravel to assist in leveling the blocks. I set 4x4 piers in the blocks and used a level to mount the frame at the correct height. The concrete blocks and piers were adjusted . The egg boxes will be on the left, the run on the right, and there will be a "chicken yard" extending from the front right corner to where where this picture was taken from. The "yard" will be where we can let the chickens out so the kids can play with them and the chickens can roam around as long as we can keep an eye on them. Originally the "yard" was going to surround the entire coop but this set up will allow us to access the eggs without too much trouble. Those paying attention will notice the layout is actually opposite of what is depicted in the original plans. We decided to flip-flop the design in order to better hide the structure behind the existing workshop. I wasn't sure how it was going to turn out in the end. We might not want to be able to see the eye-sore chicken coop from the house.

I'm planning on using sand for the floor which I read about in article on this site. https://www.backyardchickens.com/a/using-sand-in-your-chicken-coop For this reason I wasn't concerned about the chickens getting into the treated plywood floor. I did however want something strong enough to hold the weight of the sand. Here's another angle of the framing and the rafters going in.
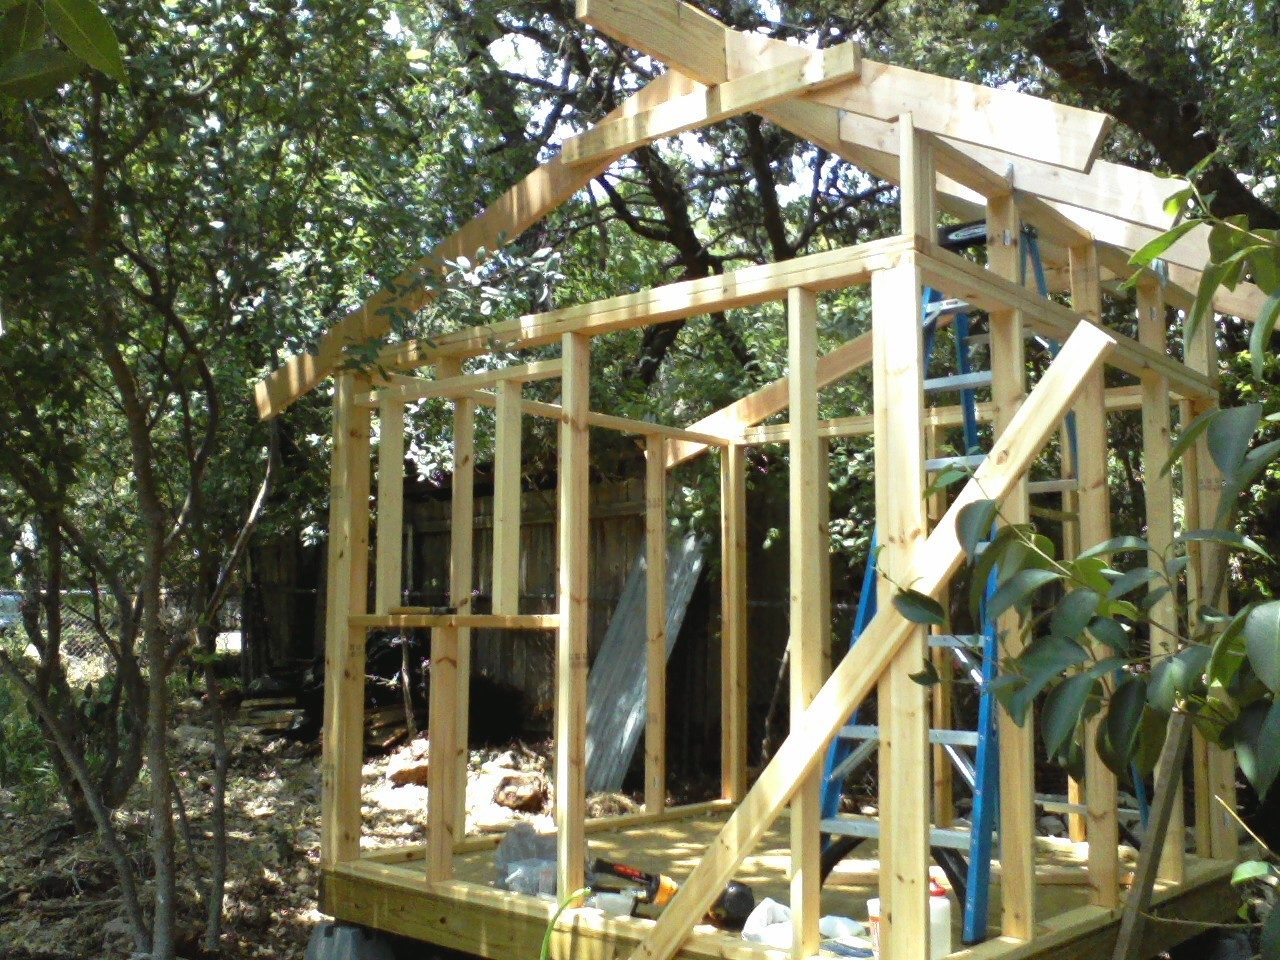
Everything above the top plate will be left open and covered with hardware cloth. The rafters are 2x6 with a 2x8 ridge beam... probably overkill. I kept thinking that this structure should be sturdy enough to convert into a shed in case my wife and I ever moved somewhere our chickens could join us.

I wanted enough overhang on the eaves to keep everything dry with the open ventilation above the top plate. Ignore the extra bird's beaks. I got carried away and miscounted. I'm still trying to decide what to use for siding. The original plan was to scrounge materials from the smoke house that I knocked down to make room for the coop. The coop quickly outgrew that possibility. I'm just hoping to get creative and keep costs down for the rest of the materials. This is where it stands now.
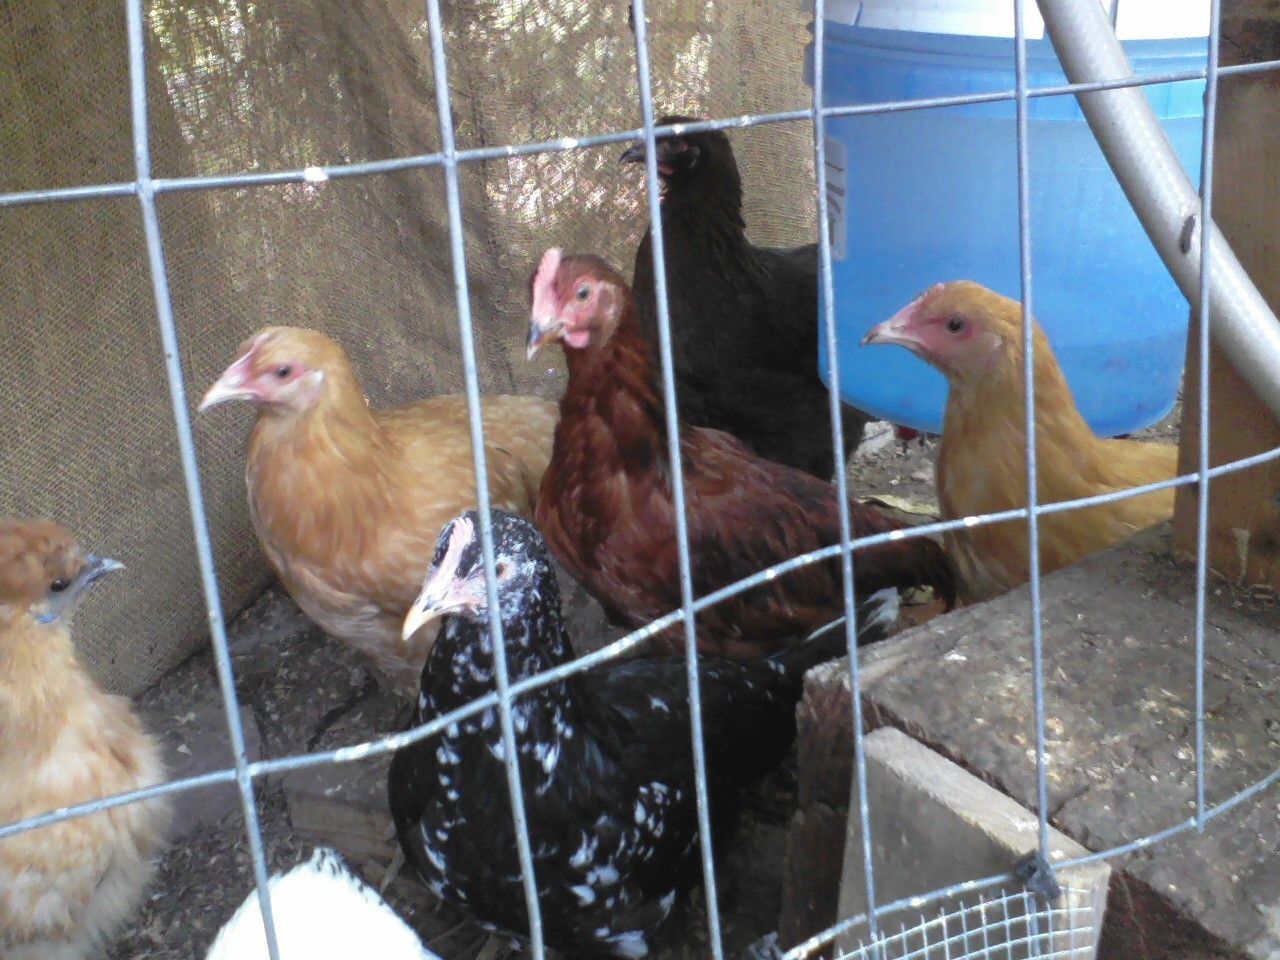
Here's a shot of some of our girls and the boy that was supposed to be a girl. They're patiently waiting on their new home. I'm looking forward to getting this finished and extremely grateful for backyard chickens to help give me ideas and keep me on track. My wife laughs at me because everything I start turns into a new hobby/obsession. We recently purchased a pop-up camper (her idea again) which has started a competing hobby and cause to join a different forum. I'm having too much fun.
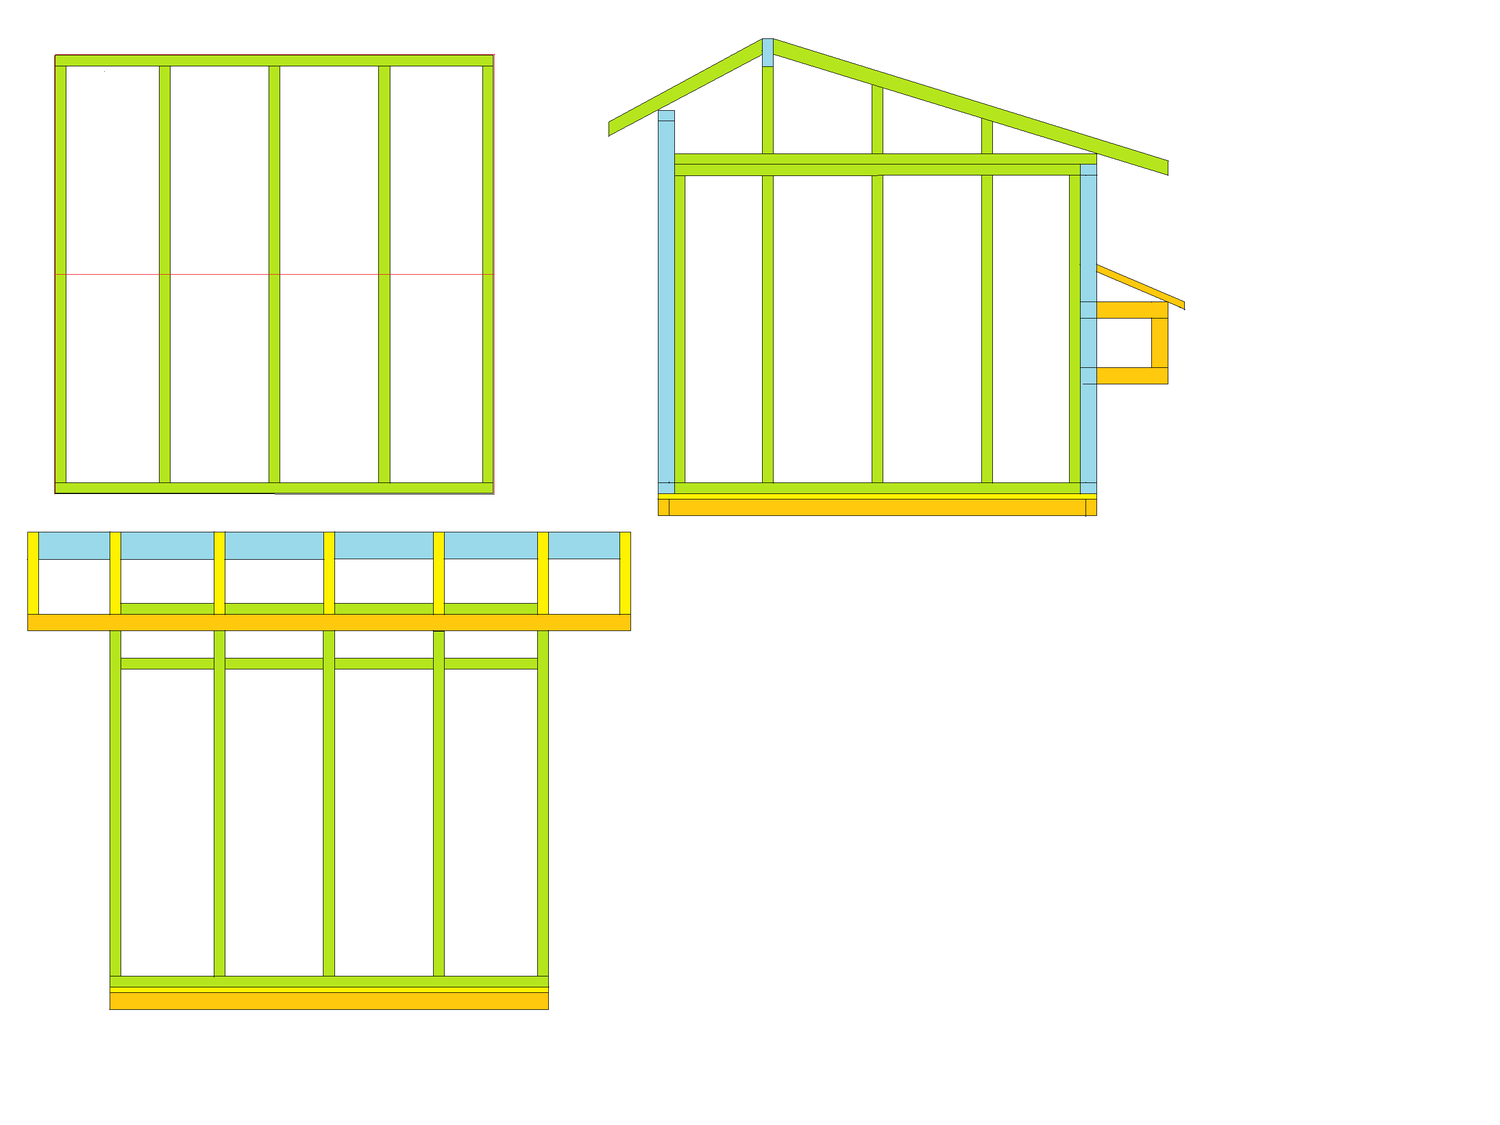
One of the problems I've found with taking so long on this project is it gives me time to over think things. The Google SketchUp designs on BYC inspired me so I figured I would try my hand at it. Here's what I came up with.
I was having difficulty planning the nest boxes so this worked out. Unfortunately I found my self using the plan as a guide line instead of a plan and then having to re-work stuff. It got me off on the right foot though. Here is a few pictures of the process.
Originally there were going to be two rows of four boxes that would sit perfectly between the existing studs. I changed my mind (again) and went with larger boxes which required re-framing the wall (again).
I found that one thing would hinge upon another so I had to move on to the hardware cloth vents before I could put on siding before I could roof the nest boxes. The hardware cloth was a lot more difficult than anticipated. Note to self: next time wear gloves.
I used felt nails to hold the hardware cloth on. The plan is to go back with 1 x 2 furring strips and cover all the orange nails. That should make it pretty difficult for anything to get in. Before I went on to the next wall I realized I had yet to frame the chicken door.
In spite of my wife's warnings I went with a guillotine style door. (There's a childhood story here about a malfunctioning door and dead chicken). I'm convinced I can make it work though. I know there are easier ways to do this but I cut a slot in the horizontal 2 x 4 and added 1x 2 furring strips to act as a track for the sliding door. The door in the OSB sheathing will be cut after it is attached to the frame. I'm still not sure what I'm going to do about siding at this point.
In the end I decided to paint the OSB and come back later with siding when finances allow. For some reason I jumped ahead and started the run.
I made four individual 3x8 frames and attached them to 2x4 "legs" for the run. The "legs" are cut from treated lumber and were set on pre-fabricated concrete piers just like the coop. I laid out my "roof" profile on a piece of OSB and fabricated my rafter frames before attaching them to the wall frames of the run. The entire run is going to be about 8x 16 feet.
The rafters at the halfway point got sandwiched between the sets of 3x8 wall frames along with the "legs." I showed this to my father as he was helping me at this point and he said, "Well... I guess you can do that." I was trying to avoid the overhang you typically get with setting the rafters on the top plate of a wall. I also add rafters along the wall of the coop in order to have something to attach the chicken wire to. The ground slopes away from the coop so the idea is to build this up with all the rocks that are in the area. It will then get covered with gravel and sand. Hopefully this will prevent mucky messes.
I'm thinking my chicken door came out too small. I may have to go back and fix that. After the wall sections and rafters are attached I built a separate frame for the front. Then the whole thing got painted.
I dug up way too many rocks inside and outside the run to use on the skirt. Long pieces of 2 foot wide chicken wire were tacked along the lower horizontal beam and buried in all the rock and rubble. I ran into a few rocks that were too large to remove from the run area without damaging the frame (I couldn't lift them). They got to stay. The chickens now have some rock shaped perches.
I stretched 4 foot wide chicken wire from the lowest horizontal beam over the top of the run and tacked it down with felt nails. I then followed up with painted furring strips tacked along the frame with a trim nailer to ensure the wire didn't get pulled off. I'm also putting in gravel which will be covered with sand. If you look really close in this photo you might be able to see the nice neighbor who we think complained to Code Compliance about the structure. We honestly thought it was compliant but now we're being told otherwise. Wish I would have known this three months ago.
I'm glad I didn't confront the sweet older lady next door. As it turns out the issue came directly from an over eager Compliance Officer who happened to be working in the back easement on an unrelated project. Looks like I'll be spending next week taking this thing apart and moving it.
I wish I had taken pictures of the process of dismantling my coop but it was a little stressfull and I was too busy trying to coordinate my help. I trimmed back all the OSB sheathing that overlapped the floor and top plate of the roof section. The roof was cut in half using a sawzall and lifted in two pieces from the walls. The walls were pre drilled for lag screws and then pulled apart while keeping the sheathing intact. I wound up removing the roof decking after getting it to the ground becaue it was just two heavy. I would recomend all buildings this size being built to dismantle cause you never know when you might need to move it.

Yes, I'm actually smiling. There goes half the lawn.
Oh, so many things I would have done different from the beginning. Portability would have been planned into the whole thing if I had only known. I put lag screws in it this time because I'm crazy enough to want to move this puppy again if the wife and I ever move onto some acreage. Hey, at least I don't have to dig up anymore rocks in the new location.
I spliced the cut ridge beam and other roof supports and re-attached the decking. More roofing felt was added. Since there was no rush to get the chickens to the other property now I went ahead and added siding. The siding came from the old shed/smoke house I had torn down at my father-in-law's. Some of it was pretty damaged. A few of the pieces had actually not been used on that building but stored nearby.
After finishing the wall facing the run I attached the run and staked the chicken wire to the ground using landscape staples. The landscape staples proved inadequate for keeping my dogs out but I plan on going back with gravel and rocks around the bottom.
Because I was working on a somewhat level surface now I had to raise the height of run in relation to the coop. I can walk down the center of the run without stooping but I'm continually forgetting I can't step to the right or left of center. The 2x4 to the head is a good reminder. Down the road I hope to add course sand to the run but the existing dirt will have to do for now. Part of the run will be covered as well so the food can be kept in the run.
I added siding (of sorts) to the nesting boxes so I could add the doors. I'm painting as I go so it looks a little odd against the unfinished OSB. Unfortunately I did not take very many pictures during the "process" of adding the siding and trimming it out. We found out the hard way that there was still urgency to getting the chickens moved into their new digs. They started picking on eachother in their cramped quarters. At this point I was just doing the minimum amount of work needed to get doors on the coop and the birds moved.
Just before I finished the coop we bought two more Light Brahmas (we lost one along the way for unknown reason) and they were quarantined in the finished chicken run. I built a door from a 2x2 frame sandwiched between plywood and OSB for the front of the coop. I cut mortise slots in the door frame for the hinges. I added roosts to the interior of the coop but I wasn't sure how high to go and how to space them. We moved the girls (and one boy) into their new home at this point.
The trial and error of modifying the coop to suit the birds has been interesting. I added a third lower roost to encourage all of the birds to sleep on the roosts. Our bantam decided she still can't fly that high and is sleeping on the edge of one of the nesting boxes. Then again, this may be due to her being picked on excessively. She may just be looking for a break. I purchased some ceramic eggs and placed them in the nest boxes to show the hens where to lay and they took right to it. We only had one egg out in the run on the first day.