After much searching on the web for designs I liked, I finally decided to build my own backyard coop. It was a good thing too, because the girls were getting way too big for the dog crate we were temporarily keeping them in. Part of this coop started life as an old homemde "dog box" that fit inside the bed of a compact pickup truck. This was left over from years ago when I deer hunted and it was no longer being used. The treated lumber was holding up well so I decided to make some use of it. The lower portion underneath the coop is the old dog box. I just started framing from there. I had no plans, but I did have a vision of what I wanted and I went from there. So, of course I made some errors and got frustrated a time or two but in the end it was worth it.
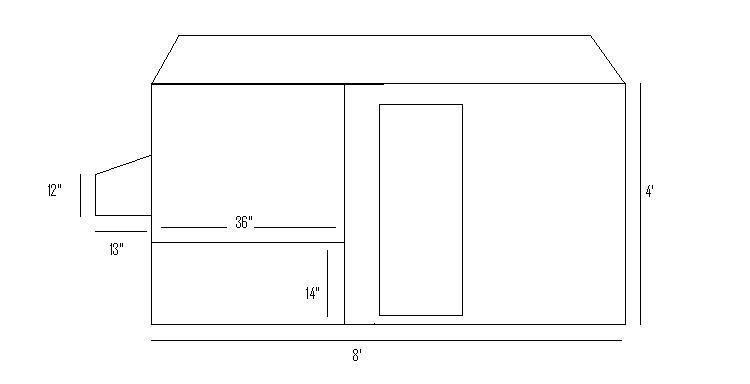
This is the basic design drawing.
(The opening underneath the coop is 14 inches but was framed with 2x4 lumber so the head space is 20inches for the girls. )

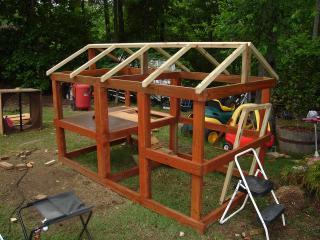
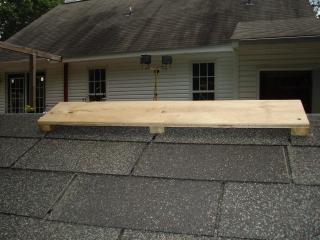
This is the initial frame under way and partially stained. The general dimensions are 8 feet long and just over 4 feet deep.
This is my helper / supervisor double checking my measurements. "measure twice, cut once Dad".
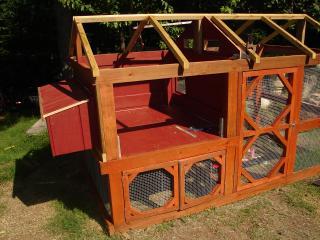
Well on our way now. As you can see, the front doors to the run area are on and all the hardware cloth has been installed. Oh yeh, and the nest box is coming along nicely.
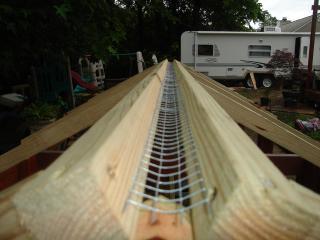
Here is a shot of the roof ridge area with hardware cloth installed so no critters get in.
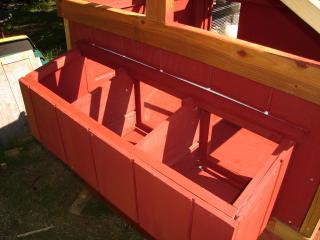
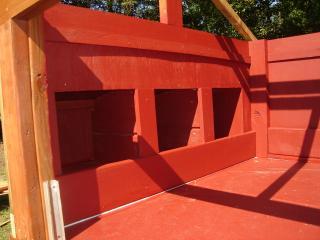
These are shots of the nest boxes from the top and from the inside of the coop.
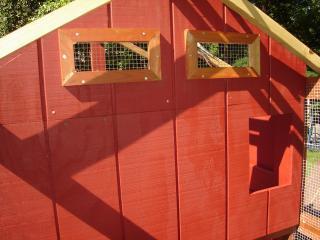
This is the interior main wall that houses two framed windows and the "pop door" opening for the coop. The window frames are routered with a 1/4 inch slot at the rear so I can unscrew one side and sllide in a piece of plexiglass in come winter time.
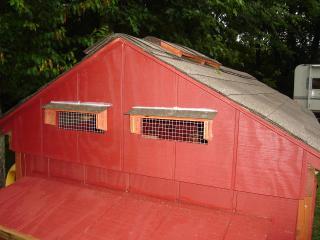
The other end of the coop section also has two windows for cross ventilation. They are covered with some "awnings" made out of 3/8 plywood and roofing shingles. The white stuff is some clear caulking that has not cured yet.
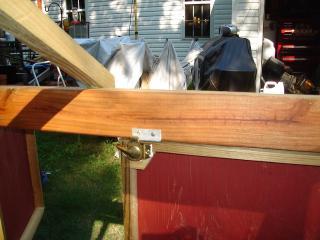
The front of the coop has two "clean out" doors. I re-purposed an old window latch to lock one side. The other door then overlaps the locked one when closed.
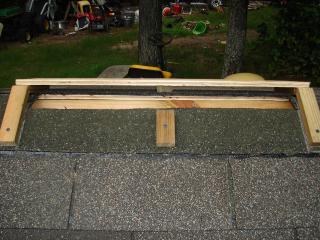
I looked at all the local home improvement stores and could not find a ridge vent that I liked so I decided to make my own. I actually ended up being glad I did not use a prefab one. I framed the vent over the ridge and then cut the shingles off in that section. The vent is 2 feet long and should supply plenty of ventilation for the heat to escape.
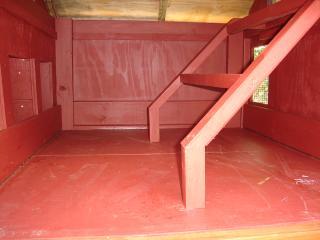
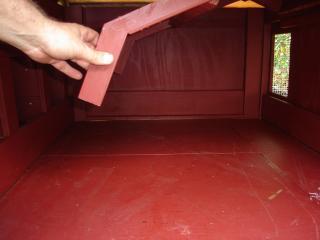
Here is the roost on the inside of the coop. I mounted it up top with hinges for easier cleaning.
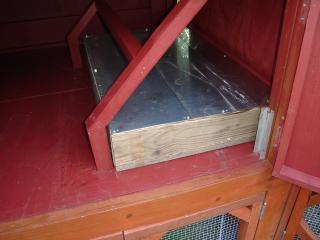
Near the end (after all my "tile red" paint was used up), I decided to build a "poop board" to place underneath the roost to make cleaning up a little easier ( why yes that is stainless steel). My hope is that the pine shavings last a little longer in the coop's interior since most of the soiling should land here.
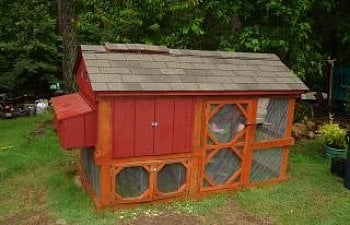
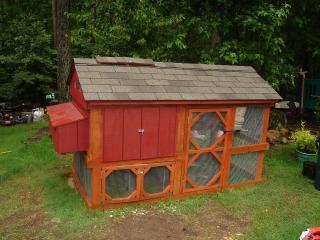
The finished product! Well, almost, It is about 95% done. I still have a few trim details that I want to attend to and the entrance ramp is only a temporary version until I decide how I want the final product. Now, if I had only built it where I wanted it. It is now quite heavy and moving it will likely require some muscle. I plan to add a "lift" system to raise it up on wheels so I can pull it with the garden tractor, but that will have to wait. I am still working out those details "in my head".
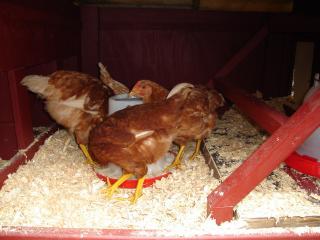
The girls are having a house warming party and seem to be quite happy with their new accomidations.
This is the basic design drawing.
(The opening underneath the coop is 14 inches but was framed with 2x4 lumber so the head space is 20inches for the girls. )
This is the initial frame under way and partially stained. The general dimensions are 8 feet long and just over 4 feet deep.
This is my helper / supervisor double checking my measurements. "measure twice, cut once Dad".

Well on our way now. As you can see, the front doors to the run area are on and all the hardware cloth has been installed. Oh yeh, and the nest box is coming along nicely.
Here is a shot of the roof ridge area with hardware cloth installed so no critters get in.
These are shots of the nest boxes from the top and from the inside of the coop.
This is the interior main wall that houses two framed windows and the "pop door" opening for the coop. The window frames are routered with a 1/4 inch slot at the rear so I can unscrew one side and sllide in a piece of plexiglass in come winter time.

The other end of the coop section also has two windows for cross ventilation. They are covered with some "awnings" made out of 3/8 plywood and roofing shingles. The white stuff is some clear caulking that has not cured yet.
The front of the coop has two "clean out" doors. I re-purposed an old window latch to lock one side. The other door then overlaps the locked one when closed.
I looked at all the local home improvement stores and could not find a ridge vent that I liked so I decided to make my own. I actually ended up being glad I did not use a prefab one. I framed the vent over the ridge and then cut the shingles off in that section. The vent is 2 feet long and should supply plenty of ventilation for the heat to escape.

Here is the roost on the inside of the coop. I mounted it up top with hinges for easier cleaning.
Near the end (after all my "tile red" paint was used up), I decided to build a "poop board" to place underneath the roost to make cleaning up a little easier ( why yes that is stainless steel). My hope is that the pine shavings last a little longer in the coop's interior since most of the soiling should land here.
The finished product! Well, almost, It is about 95% done. I still have a few trim details that I want to attend to and the entrance ramp is only a temporary version until I decide how I want the final product. Now, if I had only built it where I wanted it. It is now quite heavy and moving it will likely require some muscle. I plan to add a "lift" system to raise it up on wheels so I can pull it with the garden tractor, but that will have to wait. I am still working out those details "in my head".
The girls are having a house warming party and seem to be quite happy with their new accomidations.