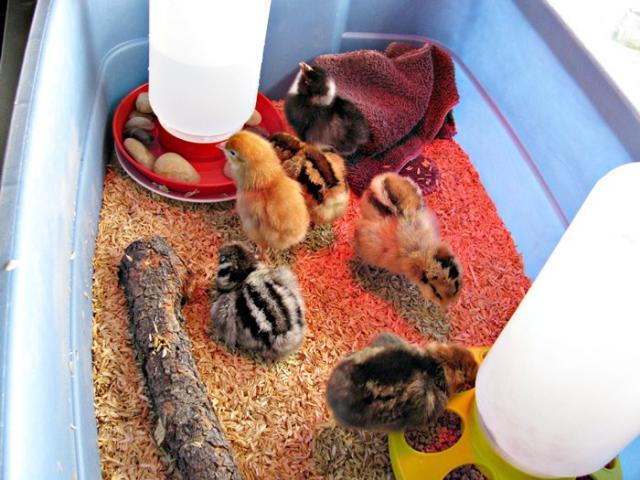
The chicks arrive! The local grange store had them all in one bin, unfortunately, so what I THINK I have here is a Gold Sex-Linked, a Black Sex-Linked, a Silver Wyandotte, an Ameraucana and ... maybe two other Ameraucanas. Who knows? The store didn't and neither did I. Since these are my first chickens, I don't particularly care what they are.

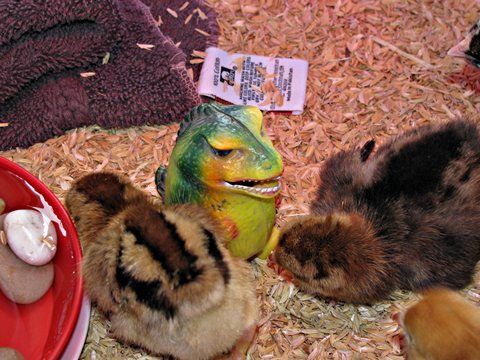
Although I think there is something wrong with the little yellow and green one - I included a closeup.. His fellow flock mates peck him something fierce!
(I actually took it out because I have no idea how toxic that paint might be.)
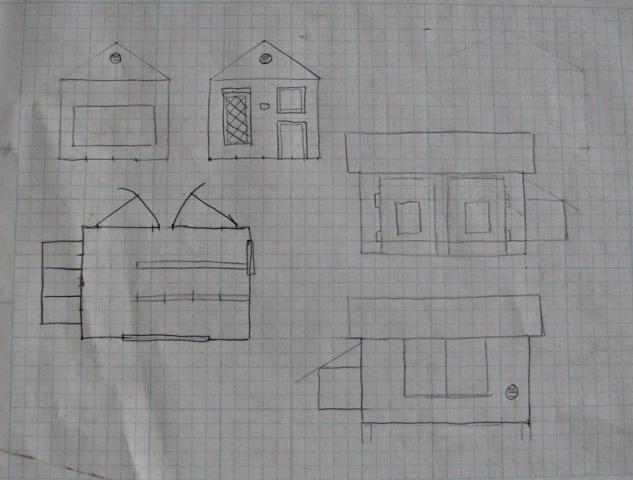
My original design was a large walk-in with a storage area that the spouse costed out at about $875 to build. Reason won the day and we decided to start with a much smaller design and see what we think of this hobby. We can always build the larger one later and use the one being built now as a brooder/backup.
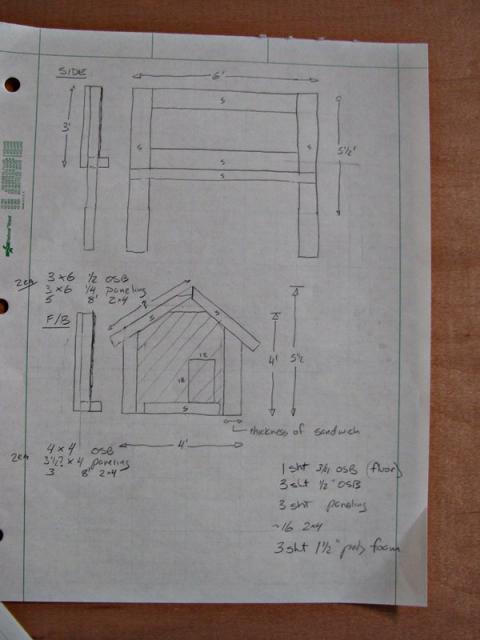
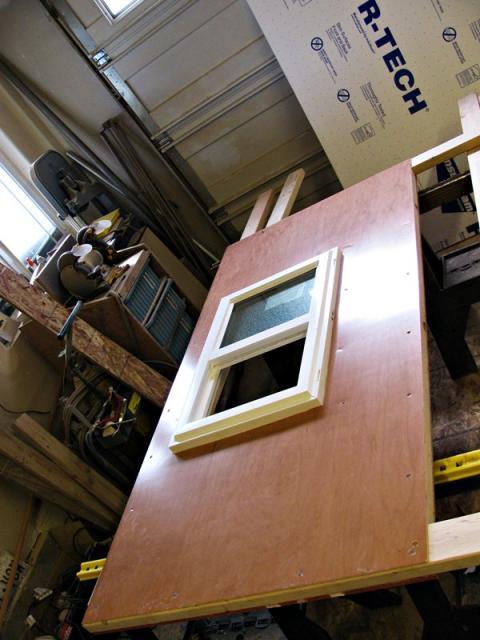
A quick look at the plans - a basic 4' x 6' box, on 2.5' stilts. The roof peak is another 1.5' high. The dimensions are set so that the coop can be built in the garage and carried out to the final site by our Mahindra tractor (hanging from the front bucket lift). The spouse currently guesstimates coop construction total cost at around $225, not included the hardware cloth-screened run. He decided to build it using an insulated SIP technology - it gets cold here in the winter and even spring and fall nights are quite chilly. Steve went off to town day before yesterday and came with some surprising finds - the interior will be maple veneer plywood because it was cheap. Additionally we found a brand new, low E dual pane slider for cheap as well. It's about 3' long and 2' high, and the glass is slightly frosted (for, say, a bathroom installation).
Clean-out doors on one long side, window on the other, nest boxes at the back. Two 4" round ridge vents high and one 4" vent low. Chicken pop door, small plexiglass/lexan window (fixed) and a home-made lexan or plexi screened vent window on the last wall.
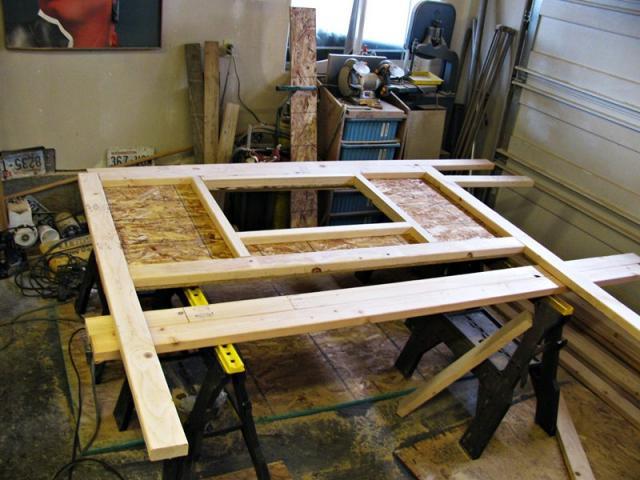
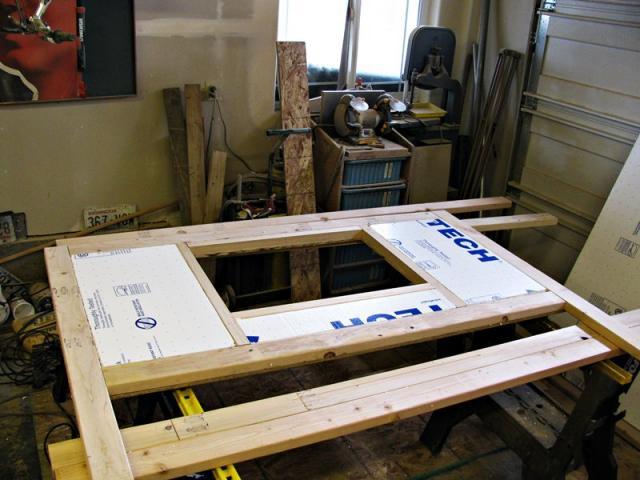
A quick look at the first wall going together -
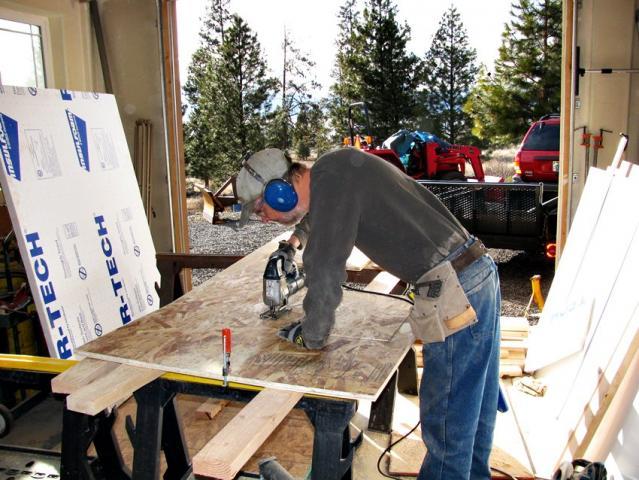
First up, it's Steve! Everyone say hi to the coop builder.
Steve's basic SIP construction sketch:
Step one is to layout the outside panel, cut the window-sized hole in it (the window will be mounted inside-out - with the drain holes plugged and new ones drilled) so the slider operates from outside. Frame up the inside, glue the foam (low VOC glue, please),
Frame up the inside,
cut the 1.5" foam to fit,
install the window, install the inner maple plywood skin panel.Again, the window is mounted "inside out" so it can be operated from outside.
Viola! Wall #1 of 4 walls and two roof halves done!
More pics (and a better layout sketch) coming!
Although I think there is something wrong with the little yellow and green one - I included a closeup.. His fellow flock mates peck him something fierce!
(I actually took it out because I have no idea how toxic that paint might be.)
My original design was a large walk-in with a storage area that the spouse costed out at about $875 to build. Reason won the day and we decided to start with a much smaller design and see what we think of this hobby. We can always build the larger one later and use the one being built now as a brooder/backup.
A quick look at the plans - a basic 4' x 6' box, on 2.5' stilts. The roof peak is another 1.5' high. The dimensions are set so that the coop can be built in the garage and carried out to the final site by our Mahindra tractor (hanging from the front bucket lift). The spouse currently guesstimates coop construction total cost at around $225, not included the hardware cloth-screened run. He decided to build it using an insulated SIP technology - it gets cold here in the winter and even spring and fall nights are quite chilly. Steve went off to town day before yesterday and came with some surprising finds - the interior will be maple veneer plywood because it was cheap. Additionally we found a brand new, low E dual pane slider for cheap as well. It's about 3' long and 2' high, and the glass is slightly frosted (for, say, a bathroom installation).
Clean-out doors on one long side, window on the other, nest boxes at the back. Two 4" round ridge vents high and one 4" vent low. Chicken pop door, small plexiglass/lexan window (fixed) and a home-made lexan or plexi screened vent window on the last wall.
A quick look at the first wall going together -
First up, it's Steve! Everyone say hi to the coop builder.
Steve's basic SIP construction sketch:
Step one is to layout the outside panel, cut the window-sized hole in it (the window will be mounted inside-out - with the drain holes plugged and new ones drilled) so the slider operates from outside. Frame up the inside, glue the foam (low VOC glue, please),

Frame up the inside,
cut the 1.5" foam to fit,
install the window, install the inner maple plywood skin panel.Again, the window is mounted "inside out" so it can be operated from outside.
Viola! Wall #1 of 4 walls and two roof halves done!
More pics (and a better layout sketch) coming!