Recently I hatched 11 chicks. 11 chicks call for a new coop. Unfortunately it is winter here in Northern PA. That means it's COLD! The chicks won't stop growing, so I have to start building. After doing some quick math calculations, I figured that 4 x 8 would be big enough. I am planning on haveing them free range most of the time. I built this knowning I did have a whole lot of random scrap wood, and I wanted it to look nice. I ended up buying most of the materials for it. I chose the 4 x 8 x 8 to reduce waste of lumber. Since 2 x 4's come in 8 foot sections, i chose them to reduce waste there. Any plywood/OSB comes in 4 x 8 foot pieces. I could easily have made it an 8 x 8 with my guidelines I set, but that would have cost more.
After writing up the plans and thinking over it for a week, we went to the lumber store and made some purchases. Over $200 dollars this has cost so far. I will have a price write up later down the page. After getting the lumber, I went right to work. I did have chicks waiting to get in you know.
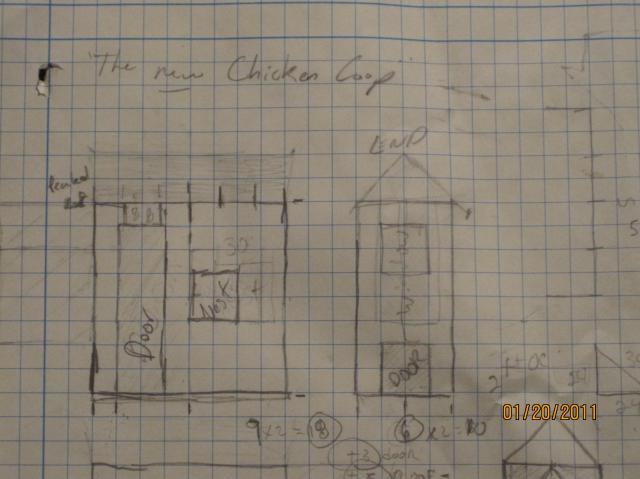
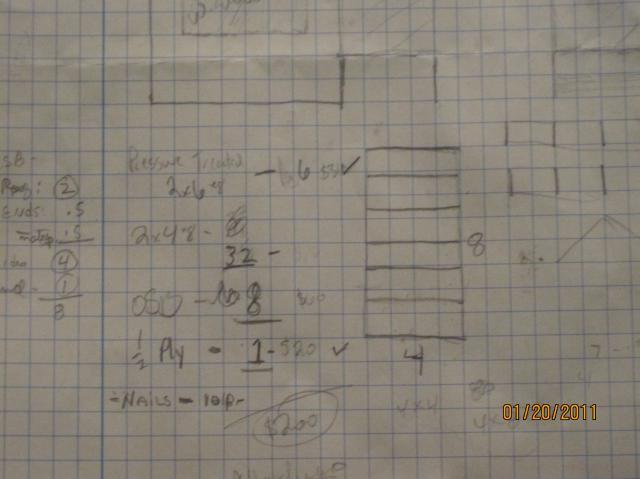
The Plans:
I don't have a fancy pants scanner, so I took the picture of the plans in 2 shots...

Groundbreaking:
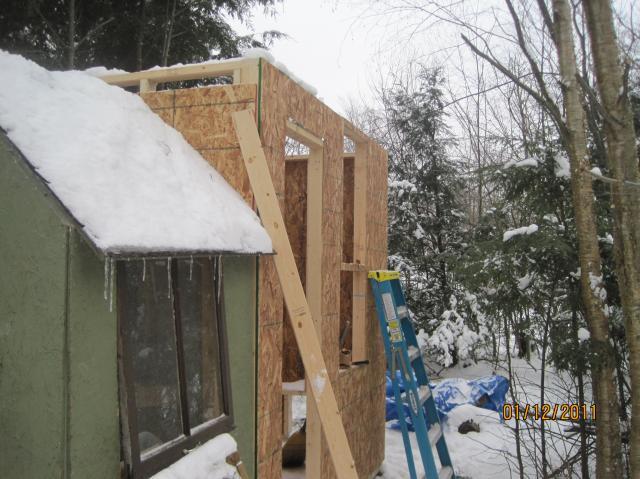
Starting in Mid January, I quickly leveled up my 4x4 base posts to get the framing for the floor done. I also had to jack the existing coop up a few inches, there was a bad lean on it. I wanted to make everything as sqaure as possible. Completely these tasks took a few hours. Unfortunately, it gets dark at 5 pm here. My day was over. However, the next day I got the wall framing done, and started the OSB. Over the course of working 1 hour a day for the next week, I get the rest of the OSB hung.
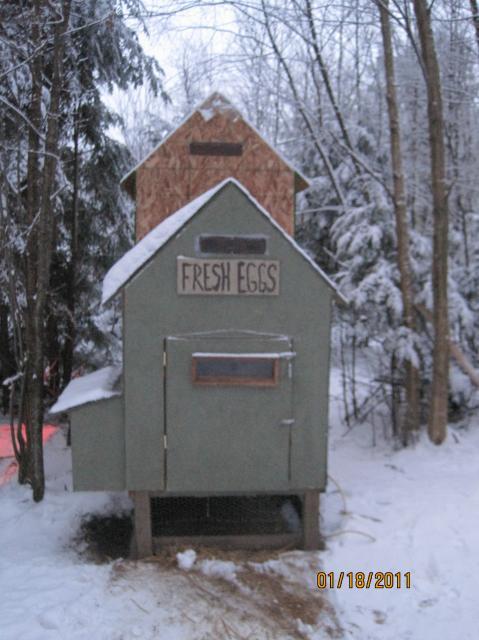
The coop you see behind the frame of the floor is my existing 4x4 coop. I needed a bigger coop so I made the addition.
Where the new addition is going used to be the run for the older chickens. However, I am letting them free range for now. I put the ramp in the door as you see just as a temporary thing.
Framing/OSB:
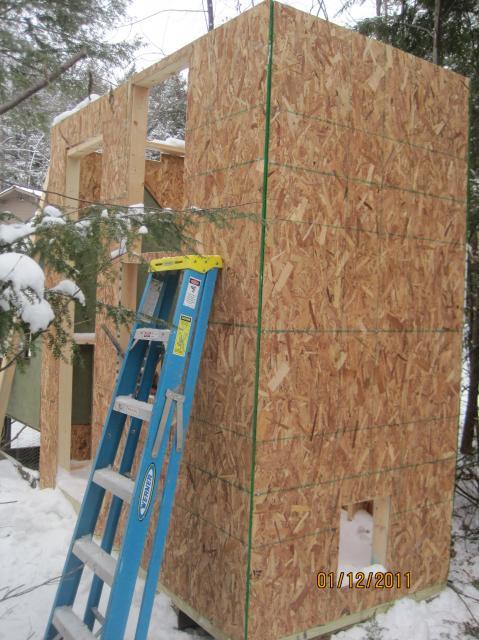
Here it is with the OSB all up. The front, or side really. What you see is the opening for the door, nest box, and window.
Another view: The back with the pop door
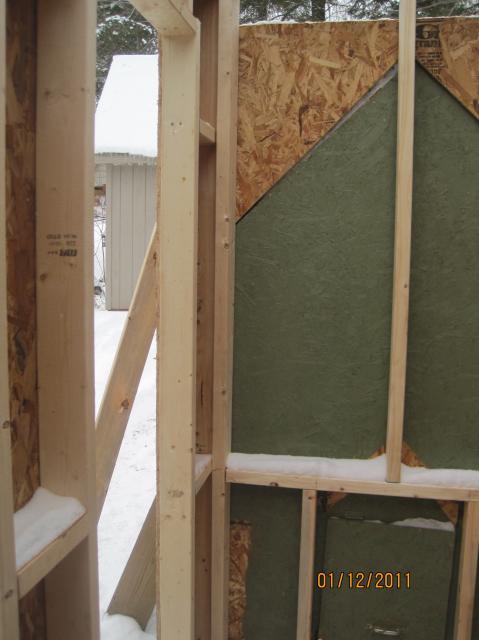
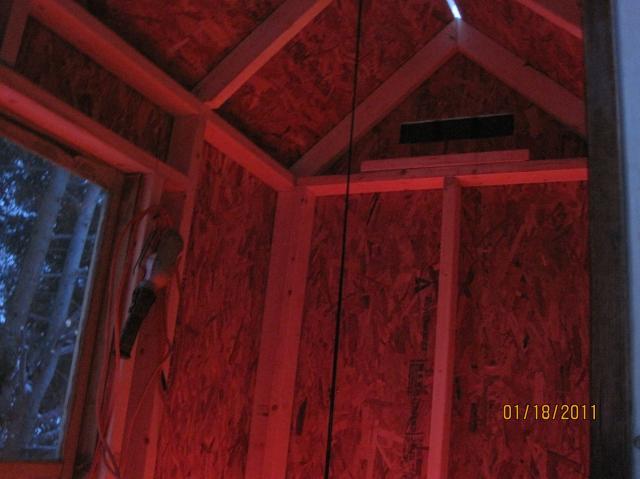
Inside shot. The OSB piece that has the triangle cut out, the one where it meets the painted section: is not attached. I was using that as an example that failed.
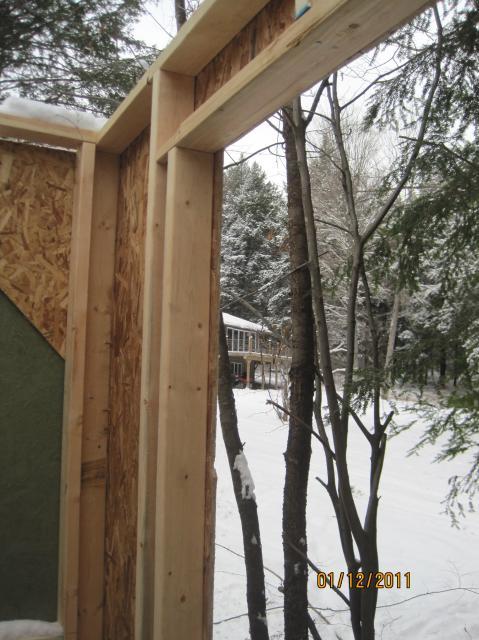
Inside shot looking out the big 3 x 5 window cut out
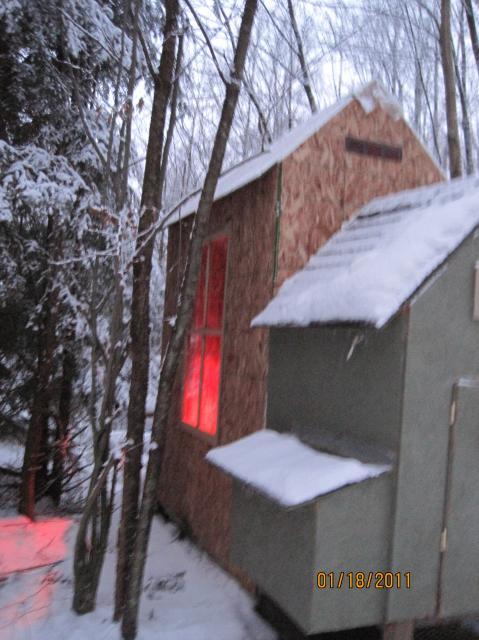
Roof/Finishing Touches:
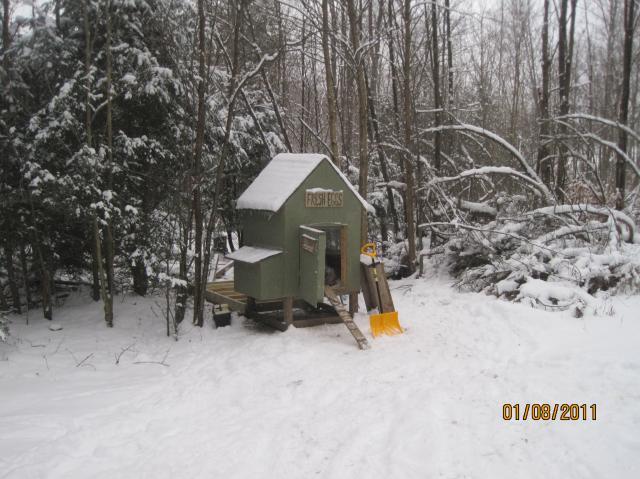
The dummy I am forgot to take pictures of the rafters before I put the sheathing up. I guess I was in a rush. Because most days in Northern PA's January is a high of 20 something, I have to wait to put up the shingles and paint it. Hopefully a nice day will come up in March. For now I put plastic on the ridge to prevent snow from falling in.
I have yet to put in roosts
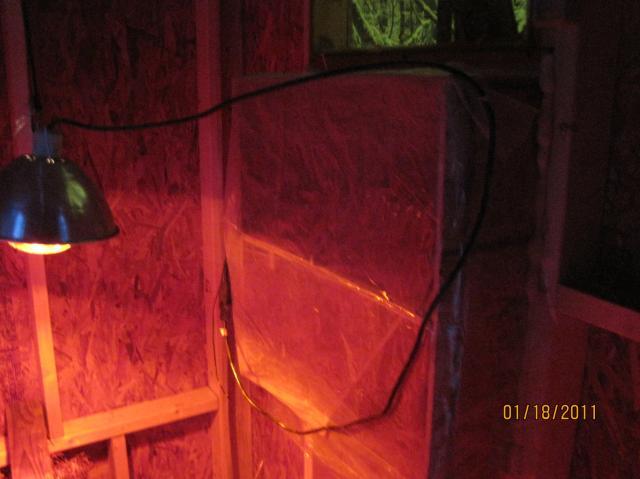
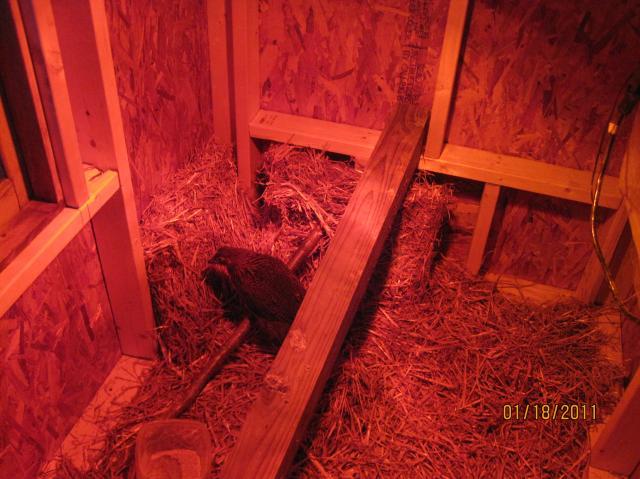
Nestbox: Outside looking in. Right now I have an extension cord running in. I plan to wire it soon. The box is covered with plastic on the inside for now to keep out drafts/ discourage chickens from making a mess in there.
Right now he/she is the only one in here. My other 10 are not old enough to be out in the cold yet. That explains why I didn't rush to put the roosts in lol.
I hope this has given you ideas or inspired you to build
After writing up the plans and thinking over it for a week, we went to the lumber store and made some purchases. Over $200 dollars this has cost so far. I will have a price write up later down the page. After getting the lumber, I went right to work. I did have chicks waiting to get in you know.
The Plans:
I don't have a fancy pants scanner, so I took the picture of the plans in 2 shots...
Groundbreaking:
Starting in Mid January, I quickly leveled up my 4x4 base posts to get the framing for the floor done. I also had to jack the existing coop up a few inches, there was a bad lean on it. I wanted to make everything as sqaure as possible. Completely these tasks took a few hours. Unfortunately, it gets dark at 5 pm here. My day was over. However, the next day I got the wall framing done, and started the OSB. Over the course of working 1 hour a day for the next week, I get the rest of the OSB hung.
The coop you see behind the frame of the floor is my existing 4x4 coop. I needed a bigger coop so I made the addition.
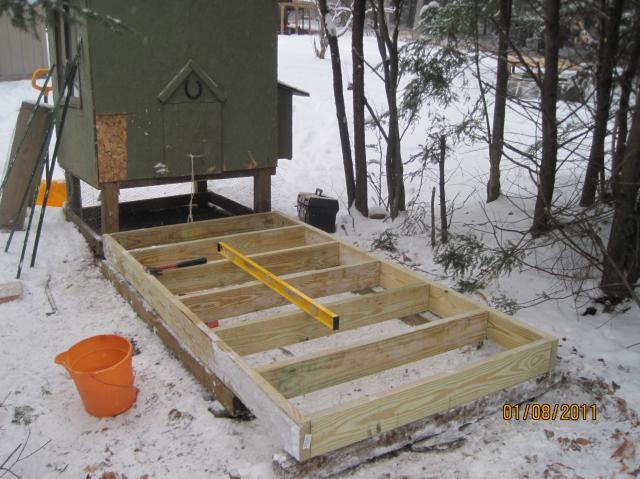
Where the new addition is going used to be the run for the older chickens. However, I am letting them free range for now. I put the ramp in the door as you see just as a temporary thing.

Framing/OSB:
Here it is with the OSB all up. The front, or side really. What you see is the opening for the door, nest box, and window.
Another view: The back with the pop door
Inside shot. The OSB piece that has the triangle cut out, the one where it meets the painted section: is not attached. I was using that as an example that failed.
Inside shot looking out the big 3 x 5 window cut out
Roof/Finishing Touches:
The dummy I am forgot to take pictures of the rafters before I put the sheathing up. I guess I was in a rush. Because most days in Northern PA's January is a high of 20 something, I have to wait to put up the shingles and paint it. Hopefully a nice day will come up in March. For now I put plastic on the ridge to prevent snow from falling in.

I have yet to put in roosts
Nestbox: Outside looking in. Right now I have an extension cord running in. I plan to wire it soon. The box is covered with plastic on the inside for now to keep out drafts/ discourage chickens from making a mess in there.

Right now he/she is the only one in here. My other 10 are not old enough to be out in the cold yet. That explains why I didn't rush to put the roosts in lol.
I hope this has given you ideas or inspired you to build
