Updates & Enhancements
Welcome to the Updates & Enhancements section! I will utilize this page to post all the updates and enhancements to my coop and run.
Project: Brooding House (multiple additions) **No longer use in the coop. This was a temporary solution while Cruella was in the mood to brood!**
Timeframe(s): Aug-Oct 2022
Description: Around the beginning of August our hen, Cruella, decided she wanted to be a momma! I wasn't ready to get into brooding, but figured, no time is better than now especially since she would do it naturally. I kept finding her in the nesting boxes. Sometimes she would be in the same one for a couple days and others she would "forget" which box she was in and would switch boxes. After a couple of days with her switching, I had no idea what eggs where which so I threw them away (well, gave them to the hens to eat). I put a little sharpie dot on the eggs she would sit on so I knew which ones were hers. In the meantime, I knew it was wrong to keep her in the nesting box as it could create bad habits. In a pinch, I built a separate brooder box for her. It worked okay, but she kept making a mess by knocking over her water and food. I took expanded onto the brooder as a temporary solution until I could build something (that I thought would be) more permanent in the coop. I forgot to take a picture of this addition, but it's okay. After the chicks were born, I realized I needed a bigger setup that could accommodate the chicks on one side and brooding on the other side (as I want to keep brooding now!). So, I pulled everything out and built a new setup. The new setup is working well for the most part, however, some of the hens are sleeping on the poop board which then poop falls into the new area. This spring, I will completely pull it out and think of a new design.
Curella ending up hatching 3 chicks. The fourth chick was unfortunately not strong enough to break out of the shell. On October 8th, two baby chicks were killed by our recently new barn cat. I had temporary fencing around the coop and run to let my flock outside. I guess this time, two of the baby chicks wandered too close to the end of the fence and the cat got it. This was a big lesson learned for me and after that day, I put in the permanent fencing!
Here are some pictures of this update.
First iteration of brooder for Curella

There is no wall on the right side since it will be up against the coop wall.
Curella's first night sitting on the eggs in her new brooder!
First baby chick hatched! Sept 12

Momma and the baby.
I never found the second shell, but this is the shell from baby chick 3! Sept 13
In this picture, you can see the first extension to the brooder I made. I just added some T1-11 siding to the front.
Momma and her babies!
Fourth chick trying to hatch.

The rest of the flock is patiently waiting!
Unfortunately, baby chick 4 wasn't strong enough to break out of the shell.
Cleaned out the coop to make room to build the new brooder and chick living quarters. The babies are checking out the space before I begin.
Ms. Nosy hen is inspecting my work! I made the frame out of 2x4's then put up T1-11 siding for the walls.
Momma in her new space keeping the baby chicks warm!
I added two top doors on under the roost bar. This gives me access to the feeder and water. This side of the area is for after the chicks are hatched.
This side, under the nesting box, is the brooding area. If I have another hen that is broody, I will put her in here so she can hatch baby chicks while having plenty of space for food and water. This area has a door that swings open in the front, and a food/water access area from the top
Momma and the one baby chick left after the cat killed the other two
It might be hard to tell, but the baby chick is sleep under momma (on her left side)!
Project: Gravity Feeder
Timeframe(s): September 2022
Description: I was looking for a more efficient and effective way to feed the chickens, especially during the cold winter months (without having to come outside every day to make sure they have food). My "Chick-Nic-Table" (that my wife bought for them) is awesome. The only downside, is it holds very little feed. I looked around online for all kinds of feeders. I wasn't a big fan of the already made ones. I kept gravitating towards the DIY feeds. Now, for those who have searched online for "DIY Chicken Feeders", you know there are hundreds (might have exaggerated a little!), of different ones folks have made over the years. The difficult part was finding one that would fit my (and the chicken's) needs, while working in the space I have for it.
While looking online, I happen to come across a fellow BYC member, @Gailens who posted an Article on their awesome chicken coop build with an amazing gravity feeder! I reached out to @Gailens to compliment him on his awesome build and asked if he would provide more information/dimensions on how to build the feeder as I wanted to build one for my chickens. He was kind enough to reply and answered all my questions! I was ecstatic!
I made some slight modifications to the size and to the front panel of the box to fit my needs. One thing I definitely wanted, was a way to see when I start to run low on chicken feed. Instead of using full wood on the front, I added some braces, and installed a plexiglass window. It's very sturdy and has no issues holding the weight of the feed. In total, the feed holds 200lbs of chicken feed (4x 50lb bags)! No moisture or mildew issues. I clean the feeder each time before adding another 200lbs, but removing the screws and using the shop vac. This is to make sure I have no stale food caught int he corners/cracks. Very simple and easy cleaning process.
Here are the pictures of the build!
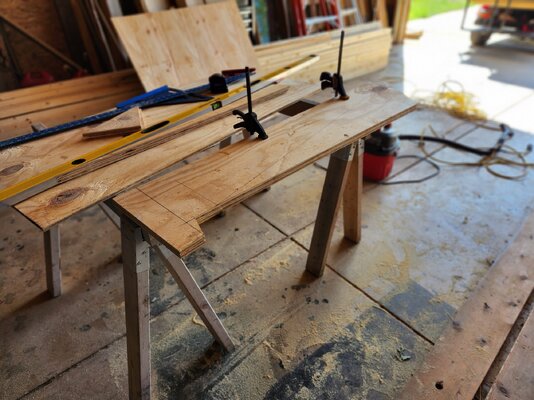
I used left over plywood.
The sides of the feeder are roughly 54" in length.
The width of the feeder is 2'.
You can see I put braces along the insides of the feeder, across the top, front, and back (which cannot be seen. I should have taken a picture of it). I angled the board at the bottom to so when the feed flows down, it doesn't bunch of in the back.
I added around 1x1 along the top of the angled board to keep pieces of the feed from falling in the back.
AH, here is the brace in the back! I did take a picture!
I used two hinges on the top door to open and close. I cut it a little longer so it overlaps over top of the front board to provide coverage.
I added additional braces in the front for both the board and plexiglass.
Then, I painted it white!
For the front, I cut 6 holes (equally spaced apart - as best as I could) so multiple chickens can eat at once!
I started with a few screws in the plexiglass to see how it would hold. I know I would need more, but I wanted to find out if I needed additional bracing.
I ended up adding additional bracing for the plexiglass and used heavier duty screws. I pre-drilled all my holes first, this way I had less of a chance damaging the glass.
Here is 200lbs of chicken feed! It roughly lasts me three months before I have to clean and refill. I love it!
Project: Brooding House (multiple additions) **No longer use in the coop. This was a temporary solution while Cruella was in the mood to brood!**
Timeframe(s): Aug-Oct 2022
Description: Around the beginning of August our hen, Cruella, decided she wanted to be a momma! I wasn't ready to get into brooding, but figured, no time is better than now especially since she would do it naturally. I kept finding her in the nesting boxes. Sometimes she would be in the same one for a couple days and others she would "forget" which box she was in and would switch boxes. After a couple of days with her switching, I had no idea what eggs where which so I threw them away (well, gave them to the hens to eat). I put a little sharpie dot on the eggs she would sit on so I knew which ones were hers. In the meantime, I knew it was wrong to keep her in the nesting box as it could create bad habits. In a pinch, I built a separate brooder box for her. It worked okay, but she kept making a mess by knocking over her water and food. I took expanded onto the brooder as a temporary solution until I could build something (that I thought would be) more permanent in the coop. I forgot to take a picture of this addition, but it's okay. After the chicks were born, I realized I needed a bigger setup that could accommodate the chicks on one side and brooding on the other side (as I want to keep brooding now!). So, I pulled everything out and built a new setup. The new setup is working well for the most part, however, some of the hens are sleeping on the poop board which then poop falls into the new area. This spring, I will completely pull it out and think of a new design.
Curella ending up hatching 3 chicks. The fourth chick was unfortunately not strong enough to break out of the shell.
On October 8th, two baby chicks were killed by our recently new barn cat. I had temporary fencing around the coop and run to let my flock outside. I guess this time, two of the baby chicks wandered too close to the end of the fence and the cat got it. This was a big lesson learned for me and after that day, I put in the permanent fencing!- Chick 1 hatched September 12
- Chick 2 hatched September 12
- Chick 3 hatched September 13
Here are some pictures of this update.
First iteration of brooder for Curella
There is no wall on the right side since it will be up against the coop wall.
Curella's first night sitting on the eggs in her new brooder!
First baby chick hatched! Sept 12
Momma and the baby.
I never found the second shell, but this is the shell from baby chick 3! Sept 13
In this picture, you can see the first extension to the brooder I made. I just added some T1-11 siding to the front.
Momma and her babies!
Fourth chick trying to hatch.
The rest of the flock is patiently waiting!
Unfortunately, baby chick 4 wasn't strong enough to break out of the shell.
Cleaned out the coop to make room to build the new brooder and chick living quarters. The babies are checking out the space before I begin.
Ms. Nosy hen is inspecting my work! I made the frame out of 2x4's then put up T1-11 siding for the walls.
Momma in her new space keeping the baby chicks warm!
I added two top doors on under the roost bar. This gives me access to the feeder and water. This side of the area is for after the chicks are hatched.
This side, under the nesting box, is the brooding area. If I have another hen that is broody, I will put her in here so she can hatch baby chicks while having plenty of space for food and water. This area has a door that swings open in the front, and a food/water access area from the top
Momma and the one baby chick left after the cat killed the other two
It might be hard to tell, but the baby chick is sleep under momma (on her left side)!
Project: Gravity Feeder
Timeframe(s): September 2022
Description: I was looking for a more efficient and effective way to feed the chickens, especially during the cold winter months (without having to come outside every day to make sure they have food). My "Chick-Nic-Table" (that my wife bought for them) is awesome. The only downside, is it holds very little feed. I looked around online for all kinds of feeders. I wasn't a big fan of the already made ones. I kept gravitating towards the DIY feeds. Now, for those who have searched online for "DIY Chicken Feeders", you know there are hundreds (might have exaggerated a little!), of different ones folks have made over the years. The difficult part was finding one that would fit my (and the chicken's) needs, while working in the space I have for it.
While looking online, I happen to come across a fellow BYC member, @Gailens who posted an Article on their awesome chicken coop build with an amazing gravity feeder! I reached out to @Gailens to compliment him on his awesome build and asked if he would provide more information/dimensions on how to build the feeder as I wanted to build one for my chickens. He was kind enough to reply and answered all my questions! I was ecstatic!
I made some slight modifications to the size and to the front panel of the box to fit my needs. One thing I definitely wanted, was a way to see when I start to run low on chicken feed. Instead of using full wood on the front, I added some braces, and installed a plexiglass window. It's very sturdy and has no issues holding the weight of the feed. In total, the feed holds 200lbs of chicken feed (4x 50lb bags)! No moisture or mildew issues. I clean the feeder each time before adding another 200lbs, but removing the screws and using the shop vac. This is to make sure I have no stale food caught int he corners/cracks. Very simple and easy cleaning process.
Here are the pictures of the build!
I used left over plywood.
The sides of the feeder are roughly 54" in length.
The width of the feeder is 2'.
You can see I put braces along the insides of the feeder, across the top, front, and back (which cannot be seen. I should have taken a picture of it). I angled the board at the bottom to so when the feed flows down, it doesn't bunch of in the back.
I added around 1x1 along the top of the angled board to keep pieces of the feed from falling in the back.
AH, here is the brace in the back! I did take a picture!
I used two hinges on the top door to open and close. I cut it a little longer so it overlaps over top of the front board to provide coverage.
I added additional braces in the front for both the board and plexiglass.
Then, I painted it white!
For the front, I cut 6 holes (equally spaced apart - as best as I could) so multiple chickens can eat at once!
I started with a few screws in the plexiglass to see how it would hold. I know I would need more, but I wanted to find out if I needed additional bracing.
I ended up adding additional bracing for the plexiglass and used heavier duty screws. I pre-drilled all my holes first, this way I had less of a chance damaging the glass.
Here is 200lbs of chicken feed! It roughly lasts me three months before I have to clean and refill. I love it!