FREE Blue Cochin Eggs .......Contest

PeepsInc

Songster
10 Years
Jun 18, 2009
1,218
22
163
NY Tri State region
I hope I posted this in the proper forum. My apologize if it's not.
I have a black Cochin hen with a Blue Roo that I purchase 3 weeks ago. I have no idea what roo she was with before I got her. So I ate the first 3 eggs, & put the next 7 eggs I got from her in my bator. There all fertile, & forming nicely.
wink.png


I asked my neighbors if they would want the chicks if I hatched them. Every body said "No Thanks".... So I want to give the rest of her fertile eggs away to someone that maybe cant afford to buy hatching eggs. Everyone is welcome to enter the contest tho!
......................................................................................................
OK the contest is..... I want to see your best design for a home maid incubator, & you have to be able to build it for under $10.
If you don't have a camera, You can simply explain how it's built & works. PRIZE 4+ what ever eggs she lays before contest end.
prize can only be sent to the US only
........................................................................................................
I thought this might help some folks out that maybe cant afford a bator,but wanted to try hatching eggs.
I'm thinking about going hiking in the Appalachian Mountains for a few days. I'll pick the winner when I get back.

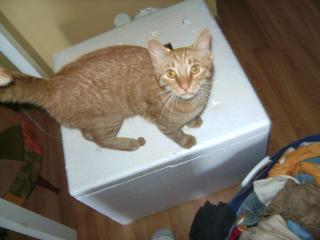
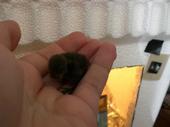
Here's some pics of the Hen Roo & Eggs
34651_picture_1145.jpg


34651_picture_1154.jpg


34651_picture_1163.jpg
 
Im taking 2 inch dow bluecore insulation and cutting to a size i can have room for a homemade egg turner (was given the foam insulation) and glue the panels together with polyurthane glue. I took a 250 watt fishtank heater removed the heating element and attached to a light bulb (works great)

fishtank heater $2
foam given to me from a construction site Free
light bace $1
wiring for everything 3 computer cords $1
bulbs $1.50
so $5.50 for it if ya dont have the foam or cant get its another couple bucks for a foam cooler

all this stuff i got was from a thrift store
 
Last edited:
Hello,
I'm not the one who built the incubator, it was my 13 year old daughter. I haven't told her yet that i am entering her into this contest but i will , it's just that i am currently out of state.
Shoebox Incubator:
Large Shoebox ( Like the ones were you get your big winter boots ect. just the regular big shoeboxes).
Free
Hardware Cloth ( husband is a Contractor and always has some so she got some from him.) - free
Thermometer and Humidity mometer sorry i forgot the name( not digital) 50 cents at thrift store.
Roll of Duct Tape - $4.00.
A 60 watt light bulb (2 of them just incase one died during incubation came in 4pack) - about $5.00
Extention cord ( Also got a used one from her father ) - free
Light bulb Socket ( Also got it from her father) - free
Small bowl or something that can hold water - free

Well she took the shoe box and on the inside she put 2 coats of duct tape so the hardware cloth wouldn't accidently poke thru the shoebox , and she also coated the bottom part of the box twice also.
Then if i remember well she cut a small hole that was the perfect size for the Thermometer and then on the inside of the box put 3 coats of duct tape on top of the thermometer so you can see the Thermometer on the outside of the box and not let any air get thru. Then length wise of the box she folded some hardware cloth and shaped it so it would not touch the ground and that there was enough room to put a light bulb under. Then she made a tight fitting hole for the light bulb. Then she put the light bulb in the socket and plugged it in and she ran it for 2 days and also put a little water in it in a little bowl and it held a solid temp of 99.5 all she had to do was check on it every day and if the temp ever creeped up a little she would just open the box just a crack then put it back down when it went back down to 99.4.


Thanks for making this contest!

Best Wishes,
Nicole
 
well my grandfather has a homemade incubator made from a Japanese Hibachi grill!!! He got it in korea, took it home and converted it into incubator with 2 molded plastic sheets and a light bulb with socket and wiring job

asked him and he said the plastic sheet's cost him 50 cent's..."back in the day" lol and the light bulb and socket he got from his garage when he got home. Wish i had pictures but i don't. He doesn't get around too much anymore...and if i were to receive the prize eggs for best bator in this thread...well that would make a WONDERFUL surprise for my papaw. My hen's are not old enough to lay yet. Hope i win!!
big_smile.png
 
Super nice of you to offer this!

I made a bator for a buck! I used some things I had around the house, that I had paid for at some point, but it's been so long that I don't remember when. I got a styrofoam box from work, and I cut a round hole in the back for a little canister uplight. I searched the house for an appropriate bulb, robbing different wattages from closets and vanities, before I settled on a 23 watt energy saver "swirly" bulb. Since I've had a bad experience in the past with a heat source vs styrofoam, I protected the top and opposite side with Al foil. I bored holes in the top and sides of the box with an apple corer, and these help regulate temperature. I plug and unplug them with cotton balls! For humidity, I first placed a plastic screen on the bottom to aid in air circulation. This is the kind of light diffuser that comes on big commercial florescent fixtures. My work was remodeling a room, so I salvaged it from the trash and cut it down to size. Over the screen, I lined the box with sponges, and I finished it off with rubber shelf liner. I didn't want any of the eggs to take direct heat, so I filled two bottles with water and placed them directly in front of the light. They help dissipate and regulate the heat. To add water, I cut a nasal cannula (a tube used to deliver oxygen to patients) and threaded it through a hole. A squirt bottle fits right in the end. I didn't put a window in this incubator -- the temperature stays much steadier without one. I haven't tried it as a hatcher yet, but I think I can put an eyeball up to a vent hole and see what's going on inside. To moniter the temp/RH, I couldn't have gotten luckier. A rummage sale had a weather station with remote sensor for a DOLLAR! I don't even have to get out of bed to see how it's doing in there. It has the time, a hi/low readout, even an alarm. The finishing touch, what every good incubator needs, is Macaroni, the guard cat. When I was using the homemade incubator with the window, he was also the broody cat. That's how I knew that the window was letting out too much heat! Thanks for letting me share!
31816_chicken_076.jpg

31816_chicken_078.jpg

31816_when_can_i_eat_them.jpg
 
I was lucky enough to receive a real incubator as a graduation present back in June, but before then I had been drawing up plans to build an incubator out of a 10-gallon fish tank with a cracked bottom.

I'm still planning on building this over the fall to use as a hatcher next spring!

Materials:
- 10 gallon fish tank with cracked bottom and no lid (given to me for free)
- Sheet-foam insulation (free, small chunk left over from building my house)
- 1 sheet of plywood (free, left over from building my house)
- About 1/4 gallon of paint (free, left over from painting my duck pen, but was originally purchased half-off from the mis-tinted rack)
- Set of small hinges (about $2)
- EITHER an old fish tank heater (free, found while cleaning out my grandparent's garage) OR a lamp socket/cord kit and 60 W light bulbs (about $6 for the kit, and $1 for a pack of bulbs at the dollar store)

TOTAL: About $9, if you have as much junk as I do laying around the house! Cheaper if you have even MORE junk than me at hand!
big_smile.png
The hinges could be salvaged from a thrift store find, and my neighbor insists he could deconstruct a cheap thrift-store lamp to install as a heating element. In theory, this project could be done for free.

My initial idea was to enclose the fish tank as tightly as possible in a painted plywood box with a fancy little picture window in the front. The top of the plywood box would mimic a fish-tank lid, hinged in the middle (see diagram), with access in the front and ventilation holes drilled in the back. The sheet foam insulation would be cut to fit the bottom of the tank, and would serve as the egg holder - I'd indent it with a heated spoon to make perfect little egg-sized cradles. I was playing with the idea of deconstructing an old fish-tank heater to use as a heating element - but a lamp socket/cord kit from the hardware store (or salvaged old lamp!) could easily be installed into the top of the plywood as well, and I could use a regular old lightbulb (or two) for heat.

Let's see - did I cover everything? My family has a background in carpentry and a plethora of tools in the garage, so the plywood box, with it's pretty picture window, might be a little advanced for some incubator-builders. I'll have to remember to post pictures in the incubating forum once I finally finish this thing!

My diagram really stinks, but it gives a basic idea of the appearance I'm going for - I want it to be something that can sit on the counter without being an eyesore.

3790358476_c95f54eb43_o.jpg


EDIT: Grrr! I forgot to mention the digital thermometer/hygrometer with a remote sensor that my mom was going to throw out because the plastic part surrounding the screen is cracked - it works perfectly (checked against 2 other thermometers and the home thermostat) and was free!
 
Last edited by a moderator:
I would like to enter this contest.. I made it at the end of last year. I hope that is not to long ago.. (Lets see if I remember how to post pictures) LOL.... Please bear with me. Trying to figure out the picture thing.. Be done soon..

Ok I figured it out..

1 styro-foam cooler (FREE- My uncle went camping & was going to throw it away.)
3 night lights (Total $3)
1 bar that would hold all 3 night lights (cost $1)
1 extension cord ($1)
No slip lining (Free-left over pieces from other project)
Wire floor (Free-Left over from husbands project)
1 piece of plastic for front door and window ($1-was on a picture frame bought at the dollar store)
Pieces of tape from existing roll at home- But originally from dollar store, dont know if you count this.
Pair of nuts and bolt (Free-Laying around house as extras)
Thermomater (Free- found it left behind at work)

Total $6.00


Here is my home-made bator all up and running. It had to be watched closely for temperature spikes or humidy spikes. So it sat by my computer.. Great place for them to be. Because I also hand turned them.. If it wasnt for the outside weather deciding to really warm up for a few days. The temperature problem wouldnt have been a problem. The clear front wasnt just a window.. I taped it on at the bottom of it, making it a door.. And held it closed with pieces of margerine tub attached to a screw. That way I would just turn the strip of plastic tub piece to the side. Then I could open the door. Putting the door on the side made it so less warm air escaped when the eggs were being turned. Note: This incubator did work, but it would have worked better if I put a thermostat in it..
15515_homemadebator.jpg


I cut a piece of egg carton lid to fit in the bottom of the incubator.. And I used the no slip lining to keep the eggs from rolling into each other.. I cut out egg size holes in one layer.. Second layer stayed solid.. Kept the eggs right where I wanted them to be..
15515_bator2.jpg


All the eggies in their completely warmed up bator..
15515_bator3.jpg


Yay.. It worked.. The first to hatch...
15515_bator4.jpg


The cute fluffy butt all dried off.. Isnt it just the cutest little button quail.. Well maybe that is just my view since it is the first bird I have ever hatched..
15515_fluffy-butt.jpg


Later I want to add a fan to it. The neighbor is going to upgrade their computer soon. And I will get the fan out of it.. And I have an unused cell phone charging cord laying around to convert it.. Also Free..

Thank you for doing this fun contest...
 
Last edited:
My incubator I made for 10 bucks and the only thing I bought was a wafer thermostat heater had to buy it off my brother wouldn't give it to me for free >.<. I have only used this to hatch Lizard and snake eggs but shouldn't be too hard to hatch birds in it either.

Materials are 1 wafer heater thermostat one thermometer got mine from a guy down the road throwing out reptile stuff. one Styrofoam cooler I used a fish shipping box from the pet store I work at. And some heating tape my dad had some so I "borrowed" some of his. and a hydrometer from one of my old lizard tanks.


step one poke a hole through the lid of the Styrofoam cooler and attach the thermostat heater on the inside connect the heat tape to the thermostat terminals. add another hole for a thermometer, so you can check the temps without opening the top use a rubber band wrapped a few times around the thermometer to create a flange.

step 2 plug in the thermometer and wait half an hour and check the temp then adjust the thermostat to the desired temp. to add humidity use a jar lid of water with a sponge in it.

So far I've hatched 20 leopard geckos, 8 pilot black snakes, 40 Lepidodactylus lugubris or mourning geckos, and 10 green anoles.

and would love to try some chickens next.
 

New posts New threads Active threads

Back
Top Bottom