• giveaway ENDS SOON! Cutest Baby Fowl Photo Contest: Win a Brinsea Maxi 24 EX Connect CLICK HERE!

Hen house and run finished "UPDATED"

bills

Songster
12 Years
Jan 4, 2008
475
11
141
vancouver island
Finally got the project finished!
smile.png
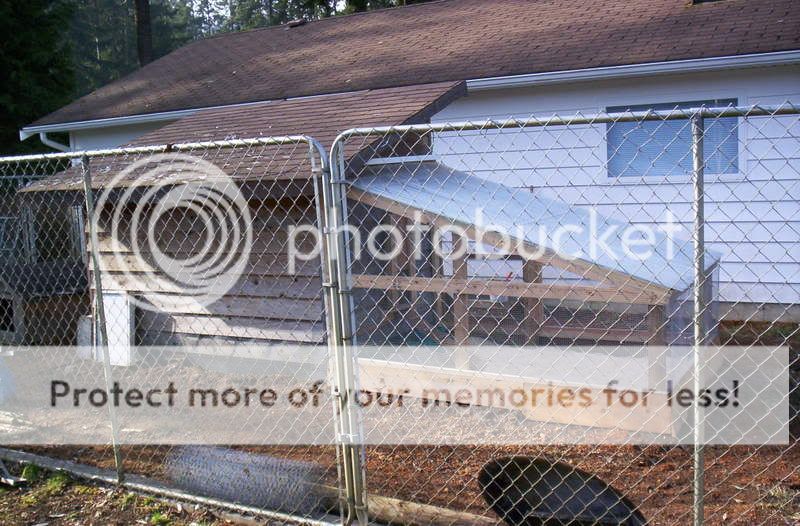
UPDATE I have had the hens since mid February, and they seem to be enjoying this coop and run design. I have had it tested by snow, monsoon rains, and hurricane like winds, and it has sailed through it all. The run stays nice and dry, thanks to the bottom splashboards, and they kept the snow from blowing into the run, and the wind is less on the birds. The clear plastic run roof, has worked out good as the birds get plenty of light, and are shaded by a large tree so they don't overheat on the sunny days. Predators to date seem to be foiled the hardware cloth, and having buried it around both the run and house, has prevented mice and rats as well. Plus it keeps the chickens from tunnelling out
smile.png
I never realised they could dig such big holes!

Anyway, for any newbies to the forum, maybe you could borrow some ideas from my design.
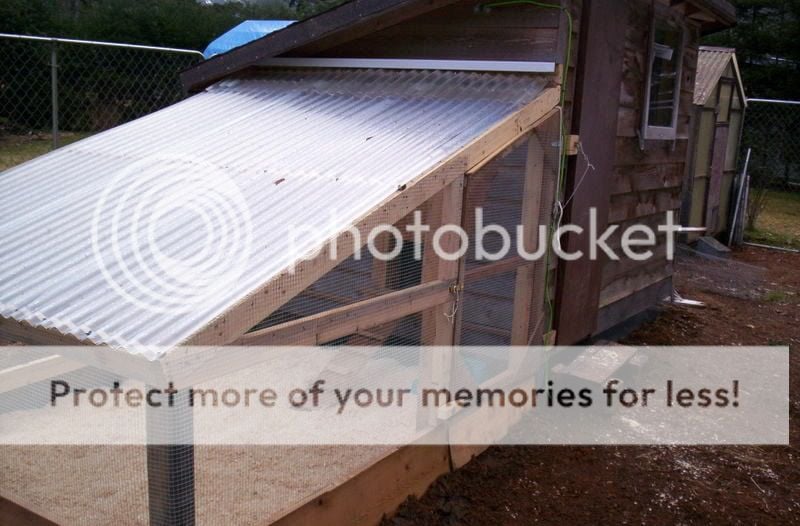


100_0420.jpg

A run within a run!
100_0416.jpg

100_0417.jpg
Example of buried hardware cloth around coop, and run. one foot deep.
100_0418.jpg

Milk box nests containing golf balls, so the birds can get the hint!
100_0419.jpg

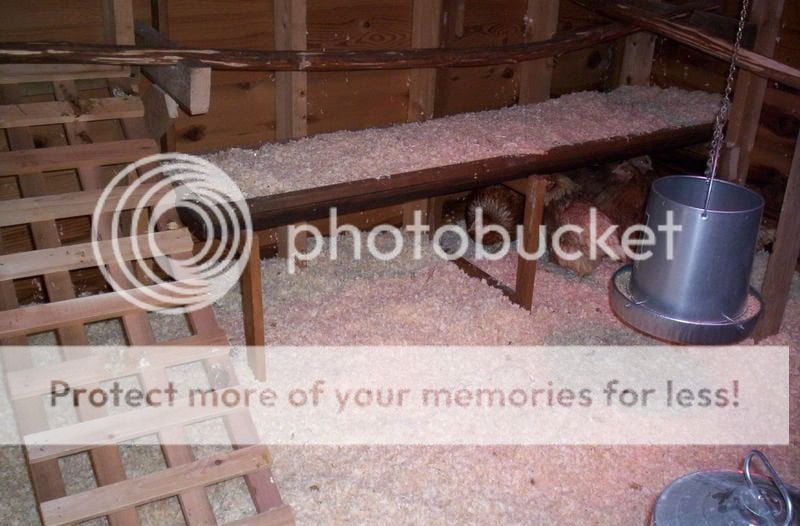
Roost, ladder, and dropping board.

The birds are a little camera shy still.
smile.png
 
Last edited:
nice new coop! the only thing i might be worried about is birds sitting on the top of that hanging feeder.

hope you get eggs soon.
smile.png
 
Last edited:
Nice looking coop. I really like the clear roofing you put over the run area. I may steal your idea, but I wonder if it would make it hot on the birds in the summer. The ladder to the roost is a good idea too. Hope your chickens enjoy their new place.
 
Quote:
Yes, I wired the hen house with a powerbar, and wired a dimmer switch so I can control the heat lamp, as well as a light bulb timer, so I can ensure the birds are getting the right number of hours of light. The power may be handy in the future for shop vacuming, during a major clean up too.

Chick-n-law, I wondered about the greenhouse effect the clear plastic may have, and will have to monitor the situation. There is a large tree that when in leaf should cast some good shade, but if that fails, I plan on fastening a dark tarp over the run for those sunny days.

Mosier, I did have a problem with one bird roosting on the waterer, but I simply moved him to the roost, and haven't had a problem since. I have some tin planter bases, that I may make a makeshift cover for the feeder. You never know a bird may try getting up there when they get older.
smile.png
 
Quote:
I made the run six foot by eight foot, same size exactly as the coop. This made the job simple, as I could use 8' long 2x4's, except for the two running on the angle of the roof, in which case I used ten foot 2x4's, with a tad cut off. Being six foot wide I could use the coop as the back wall, to fasten things to. ( You don't need the mesh screening at this wall either) The plastic roof panels come 26" wide by 8' long. This allows for some overlap on each panel to prevent leaking, so three panels did the trick to cover the six foot width. As the roof is at an angle it is slightly longer than eight feet, so I cut an additional roof panel in three sections to use across the top to fill in the gap.

If someone was to use this plan, they could plan it to allow for just using the three eight foot panels to cover the roof, but would have to shorten the length of the run by about a foot. I should have realized that the angle would make things a tad longer at the roof line to begin with, and I could have saved the price of one roof panel.
roll.png
I suppose a person could simply use a piece of scrap plywood to fill in the gap. The plastic panels cost around $18 CND each.

Forty feet of four foot wide hardware cloth was needed for the run, plus an additional thirty feet of the two foot wide hardware cloth to go completely around the coop, as mentioned, buried one foot. The hardware cloth extends across the roof, under the plastic, which gives it additional support, as well as making it predator proof. The angle at the roof line, allows one to cut the upper side panel mesh, which leaves you with a mirror image for fastening to the opposite side.

I placed sections of beveled cedar siding around the bottom of the run, as a splash board for the rainy days, to help keep the run dry. As well it blocks the wind a bit to stop the shavings from blowing around, and keeps the birds a tad more comfortable.

The dropping board has a formica top, for easy cleaning, although some linoleum would work as well. Most of the droppings fall into the shavings which I simply scoop up every morning, and add shavings as needed.

Building materials for run. (keep in mind the back wall is fastened to the hen house, so no screen used there)

4- 26"x8' corogated plastic roof panels
7- 6' 2x4's
2- 10' 2x4's
4- 8' 2x4's
1- 6' 4x4 (cut in half these are used for the upright supports at the low end of the roof)
4- ripple strips to fasten roofing to, it gives additional support to the plastic.
3- 8' 2x2's for run door
4- 6' 10" wide beveled cedar siding
2- hinges
1- padlock hasp
1lb- fence staples
1 lb- 3-1/2" outdoor screws (easier to fix mistakes then using nails:))
40- 1-1/2'roofing screws (they have a rubber washer to prevent leaking)
4- bricks- to rest upright supports on at mid point, and lower end of roof. (I put a bit of duroid roofing over the bricks to stop water wicking into the uprights resting on them) You could bury the uprights, but use treated lumber for this.
Approx cost in total with new materials $200 CND I'm sure that in the US it costs much less for the same material, perhaps as much as 30-40% less.

I hope somebody might find this useful.
smile.png
 

New posts New threads Active threads

Back
Top Bottom