Okay, I've made many styles of feeders and by far this is the simplist and easiest I have ever made.
Materials: Plastic gutter (10ft) from Lowe's Hardware $5.69
3 inch PVC lengths of your choice, ours are about 2.5 ft up to 4 ft and use as many as you like, ours came from our local Habitat for Humanity and only cost us $1 per tube.
PVC caps if desired, we opted for them but they are not required
Plastic gutter end caps $1.81 per
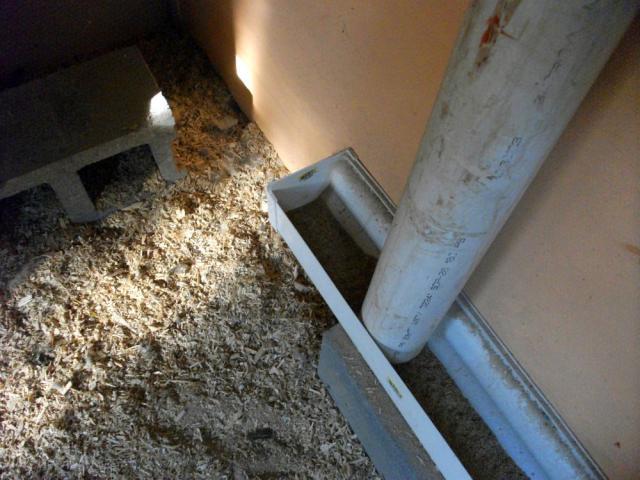
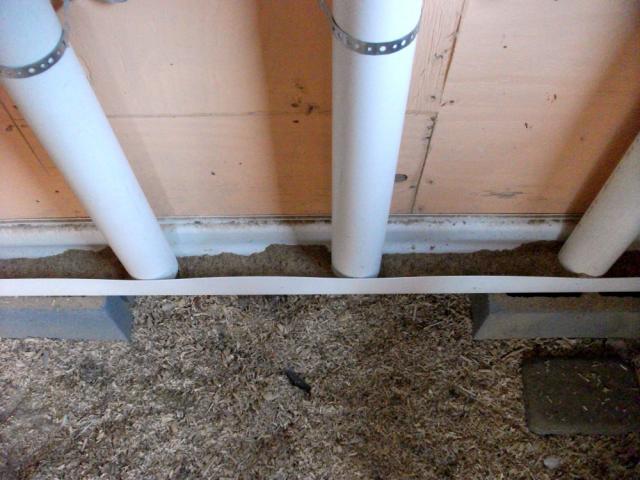
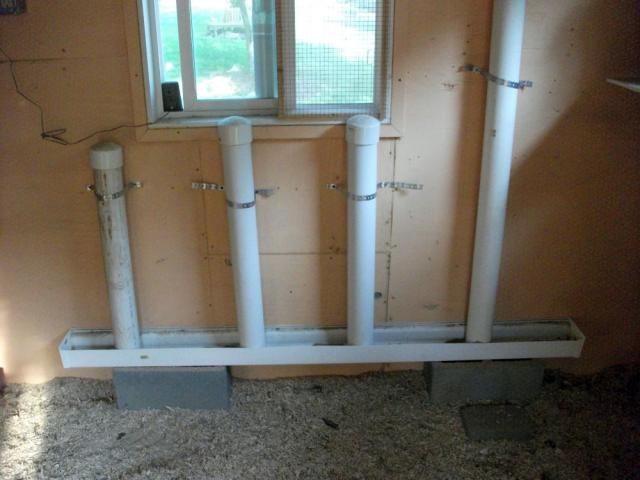
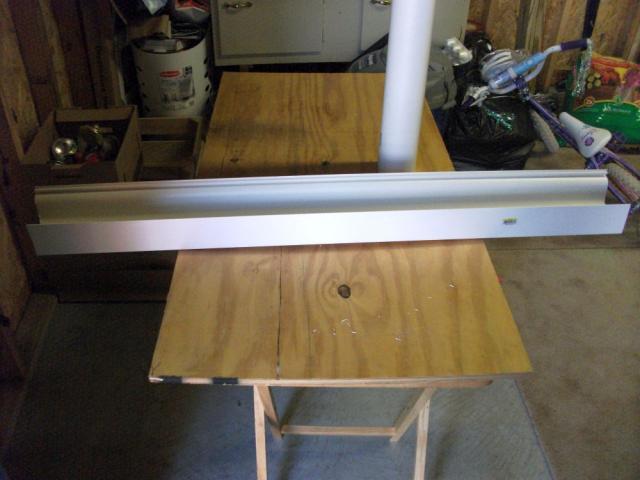
I cut the gutter to fit on the space we had available which ended up being 6ft and used 4 tubes spread out withing the gutter. I glued the end caps to the gutter with Liquid Nails. I attached the gutter with screws to the wall at the height of the birds backs.
Why did I make this type of feeder?
1) It attaches to the wall, no more feeders out in the open, makes great use of space.
2) ZERO waste, which everyone complains about with most PVC feeders, the gutter is about 3 inches deep and the birds cannot scratch out nor can they rake the feed out with their beaks, so no waste, and they know where the feed comes out and will spread along the entire gutter for you.
3) I can feed 12 birds at one time
4) I have a undersized EE that can now eat with the big girls, I added a small stepping stone.
5) Cheap, I've got less than $12 in it and still have enough left to make another 4 ft feeder if needed.
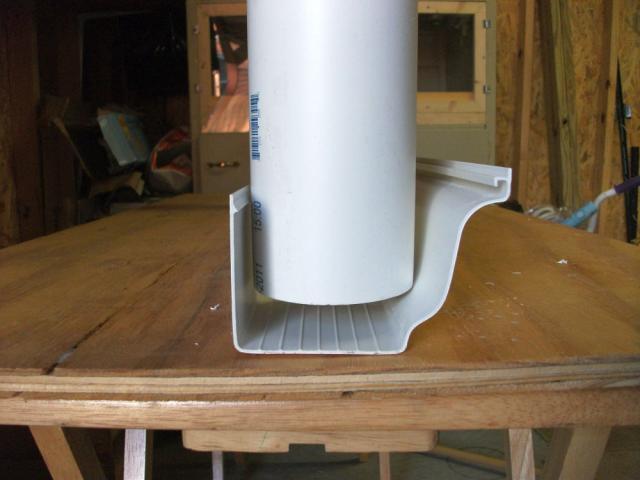
Right now I'm using crumbles, I will be switching to pellets soon and will insert a screw about 1 inch above the bottom of the gutter so the tubes will rest at 1.5 inches to allow enough space for the pellets. If anyone has questions please feel free to ask, this is the absolute best feeder I've ever done!

close up showing the height of the tube from the bottom of the gutter, allows enough space for the feed to dispurse.
Materials: Plastic gutter (10ft) from Lowe's Hardware $5.69
3 inch PVC lengths of your choice, ours are about 2.5 ft up to 4 ft and use as many as you like, ours came from our local Habitat for Humanity and only cost us $1 per tube.
PVC caps if desired, we opted for them but they are not required
Plastic gutter end caps $1.81 per
I cut the gutter to fit on the space we had available which ended up being 6ft and used 4 tubes spread out withing the gutter. I glued the end caps to the gutter with Liquid Nails. I attached the gutter with screws to the wall at the height of the birds backs.
Why did I make this type of feeder?
1) It attaches to the wall, no more feeders out in the open, makes great use of space.
2) ZERO waste, which everyone complains about with most PVC feeders, the gutter is about 3 inches deep and the birds cannot scratch out nor can they rake the feed out with their beaks, so no waste, and they know where the feed comes out and will spread along the entire gutter for you.
3) I can feed 12 birds at one time
4) I have a undersized EE that can now eat with the big girls, I added a small stepping stone.
5) Cheap, I've got less than $12 in it and still have enough left to make another 4 ft feeder if needed.
Right now I'm using crumbles, I will be switching to pellets soon and will insert a screw about 1 inch above the bottom of the gutter so the tubes will rest at 1.5 inches to allow enough space for the pellets. If anyone has questions please feel free to ask, this is the absolute best feeder I've ever done!
close up showing the height of the tube from the bottom of the gutter, allows enough space for the feed to dispurse.