Ok, so we started from scratch and decided to put a coop on the side of our exsisting 110 year old barn without screwing up the historical look too much. We used about 12 different coop designs we found others posted online and melded it into our own concept. We tore down an old shed down the road and tried to harvest as much recycled material as we could for budgets sake. We knew this was going to set us back some bucks. Lets begin shall we?

Site prep, leveling the surface and burning out the poison ivy.
We spent a good deal of time doing math on how to use old and new lumber together.
things taking shape
Now I am feeling it coming together and looking forward to getting the girls in where its safe
dramatic change in plans! Halfway into construction, decided to completely change the roof design to being a shed roof so the snow/rain would run away from what will be a future dog run.
Here you can plainly see that we broke down to buy new dimension lumber for the roof construction. It was just too darn hard piecing together old reclaimed material for this. Note the recycled sheathing on the hen house.
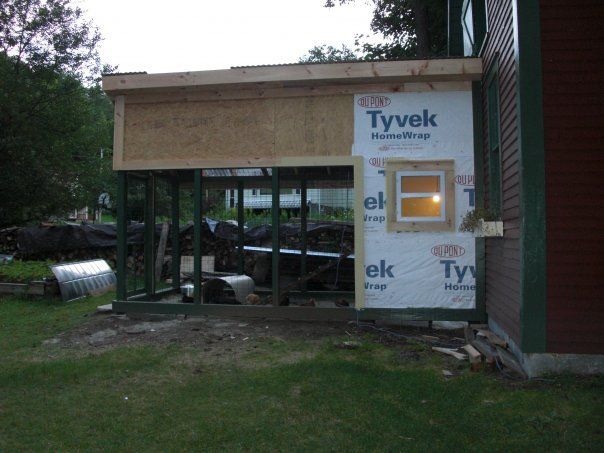
New tin roof with two panels that act as skylights in the run. We opted to paint the posts now so we can stable up wire mesh and move the girls in now while we still continue construction.
Dear Wife stapling wire mesh across the entire footprint to prevent predators from digging in. This was a pain in the butt, but I do sleep soundly knowing that it would take even a bear some time to get in here. In the warmer months, the birds sleep out here up in the run safe and sound.
I have to give credit to the folks who make this Little Giant Ladder for making this project sooo much easier! Here we are wrapping the hen house in Tyveck left over from another job I had done.
We are going to use the "deep litter method" so we lined the floor and 6 inches up the wall with store bought linoleum. Ya just can't find any used worth re-using.
Girls first night in the new digs! They still go out during the day so I can keep working with out them under foot.
Left over yellow paint and a nice hood light makes things feel homey
Bought new siding so it will match the old barn siding as close as possible.
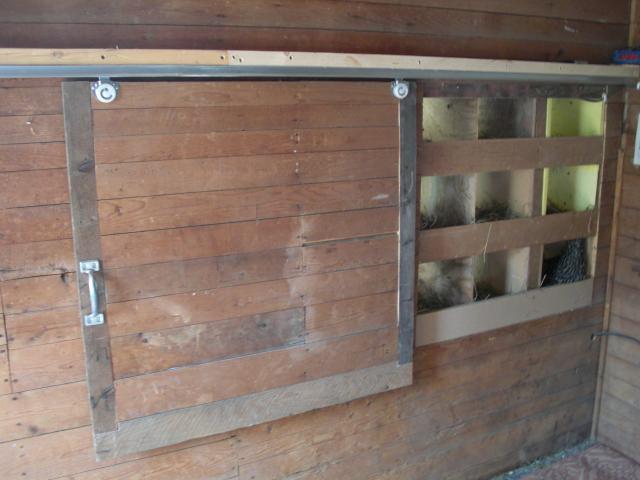
We cut through the barn wall and installed what we are most proud of. We reused the indoor siding and built this sliding door on an old closet rail system to retrieve the eggs.
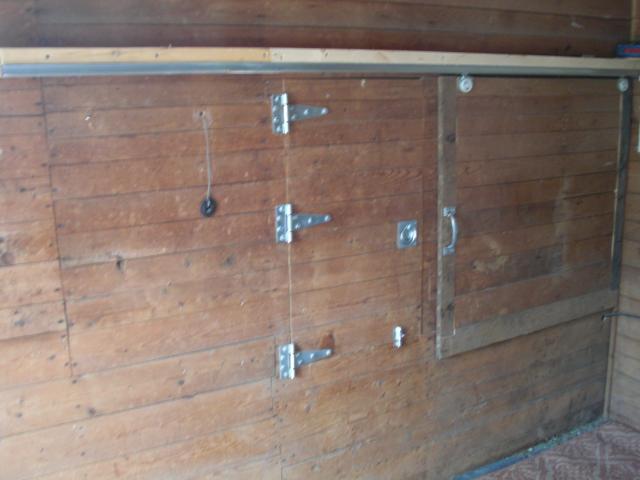
Just to the left of the slider is this Feed/Cleanout door. We built the hopper to hold 2 different types of feed with a bin for grit and oyster shells. The plexisglass really isn't needed, but it does help maintaining food quantities. Even with 18 birds, I only have to tend to this every other week. Do note the HEAVY DUTY hinges we used to accommodate the weight of this door when fully loaded. There is also a pulley system in here to open and close the pop door.
Birds eye view of the boxes and feeder from inside the hen house.
Interior of the run. The dust bath area is great! We load it with DE and wood ash and its a nice cool spot in the summer months.
Finished Product. Several things we would do slightly different, but this thing is now nearly a self contained egg laying machine that seems to compliment the old barn just fine.

Site prep, leveling the surface and burning out the poison ivy.

We spent a good deal of time doing math on how to use old and new lumber together.

things taking shape

Now I am feeling it coming together and looking forward to getting the girls in where its safe

dramatic change in plans! Halfway into construction, decided to completely change the roof design to being a shed roof so the snow/rain would run away from what will be a future dog run.
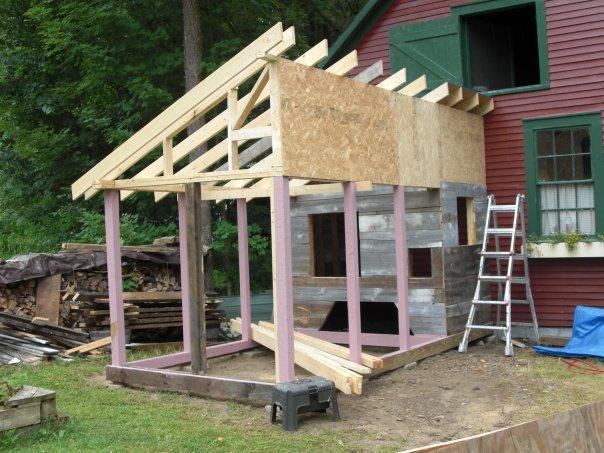
Here you can plainly see that we broke down to buy new dimension lumber for the roof construction. It was just too darn hard piecing together old reclaimed material for this. Note the recycled sheathing on the hen house.

New tin roof with two panels that act as skylights in the run. We opted to paint the posts now so we can stable up wire mesh and move the girls in now while we still continue construction.

Dear Wife stapling wire mesh across the entire footprint to prevent predators from digging in. This was a pain in the butt, but I do sleep soundly knowing that it would take even a bear some time to get in here. In the warmer months, the birds sleep out here up in the run safe and sound.

I have to give credit to the folks who make this Little Giant Ladder for making this project sooo much easier! Here we are wrapping the hen house in Tyveck left over from another job I had done.

We are going to use the "deep litter method" so we lined the floor and 6 inches up the wall with store bought linoleum. Ya just can't find any used worth re-using.
Girls first night in the new digs! They still go out during the day so I can keep working with out them under foot.

Left over yellow paint and a nice hood light makes things feel homey

Bought new siding so it will match the old barn siding as close as possible.
We cut through the barn wall and installed what we are most proud of. We reused the indoor siding and built this sliding door on an old closet rail system to retrieve the eggs.

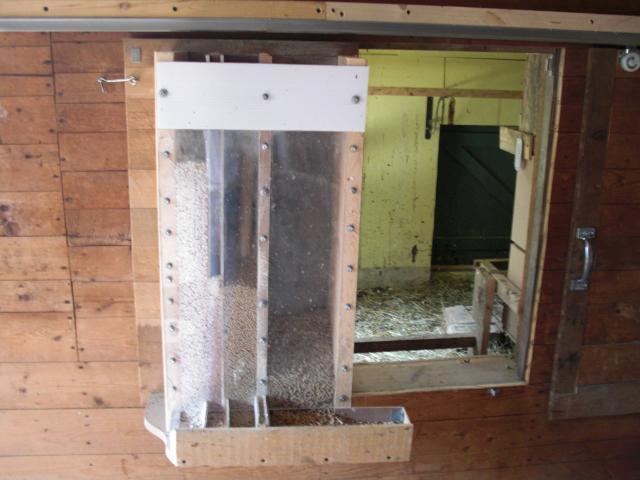
Just to the left of the slider is this Feed/Cleanout door. We built the hopper to hold 2 different types of feed with a bin for grit and oyster shells. The plexisglass really isn't needed, but it does help maintaining food quantities. Even with 18 birds, I only have to tend to this every other week. Do note the HEAVY DUTY hinges we used to accommodate the weight of this door when fully loaded. There is also a pulley system in here to open and close the pop door.
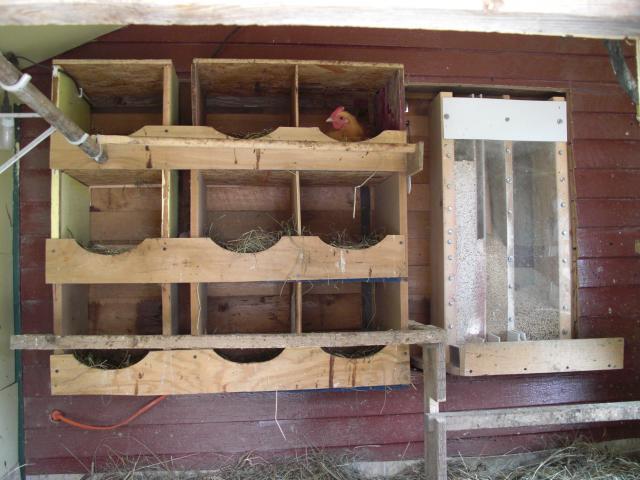
Birds eye view of the boxes and feeder from inside the hen house.

Interior of the run. The dust bath area is great! We load it with DE and wood ash and its a nice cool spot in the summer months.

Finished Product. Several things we would do slightly different, but this thing is now nearly a self contained egg laying machine that seems to compliment the old barn just fine.


