*UPDATED* Building a new coop - New pics on Page 8

We have a poop board and semi-deep litter method. I put paper (newspaper sometimes, but the brown paper lining inside a lot of feed sacks holds up a lot better) and maybe 2" of shavings on the poop board so I don't have to clean it too often, maybe every other week. We had 19 birds in there up until about a week ago, and it worked great with that number (two 8' long roosts over the poop board). The paper helps - makes it easy to roll and clean up and so far it's composting along with the shavings fine.

I clean out my litter more than I need to really because I like it for the compost pile. I clean it maybe every other month. I add fresh shavings every few weeks to keep it fluffy and clean looking - I hate seeing all the little feathers in there making it look dirty, but I can sit down in it and not get dirty from it - the hens really do a good job of keeping their house tidy in case company comes over. I have expect them to be drinking tea in the corner one of these afternoons.
 
Quote:
You could probably also push it to 30 or so, most likely, especially with some of these design ideas that maintain open space on the floor everywhere. It seems the 4 sq ft is much more critical in a small coop with 4 or 5 chickens than in a larger one. On the other hand, if they will stay in the coop for really long periods, like weeks, a much smaller number is a whole lot better. The 4 sq ft is usually coupled with 10 sq ft in the run, but if the run has 3' of snow and they refuse to leave the coop, you then have some crowded conditions. I don't know whether you plan to have a run that is partly covered -- if this has been discussed here, sorry, I missed it. Just another thing to think about.
 
Quote:
The run isn't going to be covered, but I might put something in the center to give them shade and a place to run and hide if need be. I figured it wouldn't be a problem to go up to 25 since they were being given such a large run (70 sq ft per bird). Thanks for the info.
 
Well, it took a while to get the building because of weather and schedules, but I finally got it here and got it leveled.

79085_coop1.jpg


I have a lot of work to do, but I have begun the process and will try to update as I am able to get more done. I am working on it after work until dark, so it is taking a while. The left half of the west wall is about half complete. I am going to frame in a door to the right of the window next.

79085_coop2.jpg


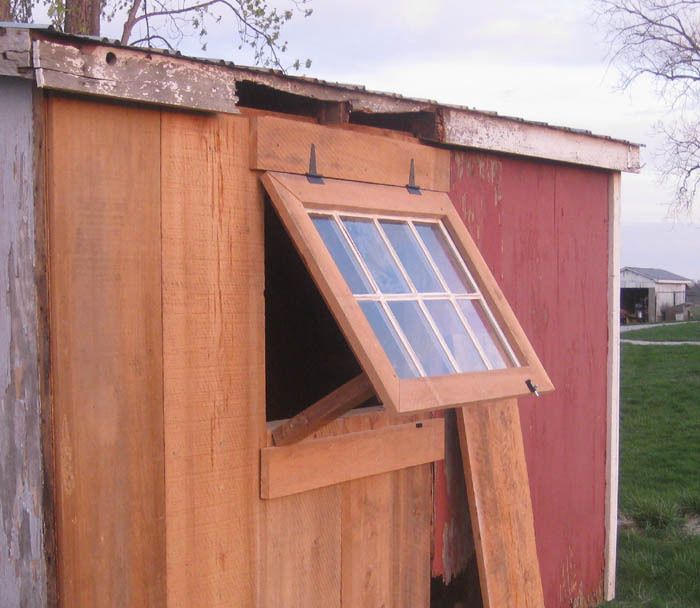
I completed the window tonight and I am very happy how it turned out. I'll put hardware cloth in behind the window so it can be left propped opened for ventilation most of the time.

79085_coop3.jpg
 
Man o man, where do you get that lumber? Wow, is it cedar or what? And a full 5 or 6 quarter! That stuff has an R value of it's own. Your chickens will be awful proud of their building, and you should be also.
bow.gif
 
Quote:
It is Cypress. I am very excited to be using it. The trees were cut off my grandfather's property years ago and the lumber sat for years in his building. He passed away about 5 years ago and I decided that I wanted to use it to side my coop. The building was originally built by my grandfather for my aunt's greenhouse business, but had outlived it's purpose. The framing, floor, and roof were still in great shape so all I am doing is adding new siding and changing the design to fit my needs for a coop. I really want it to look sharp when I am done.
 
Last edited:
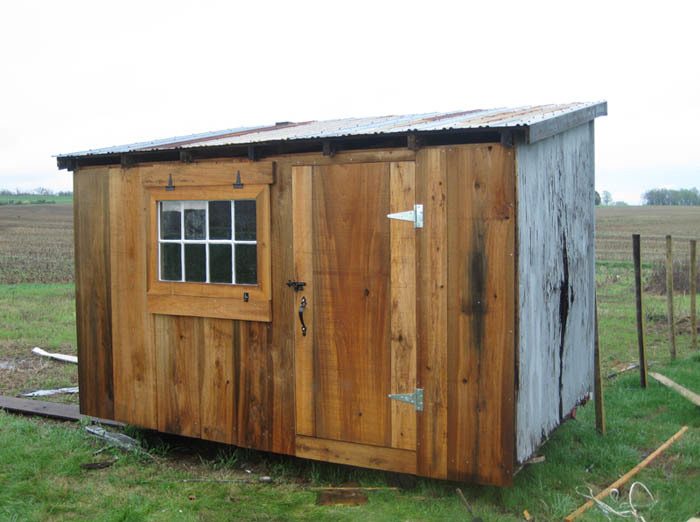
I wasn't able to work on my coop as much as I wanted this week because I had to work on my truck, but I did get the front of it pretty close to being finished. I still have to add a fascia board and some small boards along the seams. As you can see, it has been raining, so the wood is wet. Once I complete the whole building, I plan on sealing the wood.

I still have to redo the other three sides and work on the inside, but I am pleased with the progress so far. I figure I have at least 4 weeks before the chickens will need to be in it.

79085_coop4.jpg


79085_coop5.jpg
 

New posts New threads Active threads

Back
Top Bottom