- Sep 19, 2008
- 17
- 3
- 24
Last winter after about the third time of waking up in the middle of the night not remembering if I closed the coop door or not I decided I had to have an automated door. The nearest power was 500 feet away beyond 25 rows of grapes and a gravel parking lot. I considered solar but the expense and the fact that my coop is well shaded made that difficult. It was then I remembered I had an 11/2 inch irrigation supply line under 60 psi within 50 feet of my coop. After some tinkering around I came up with a very reliable automatic door. The photos show it in stages of construction.
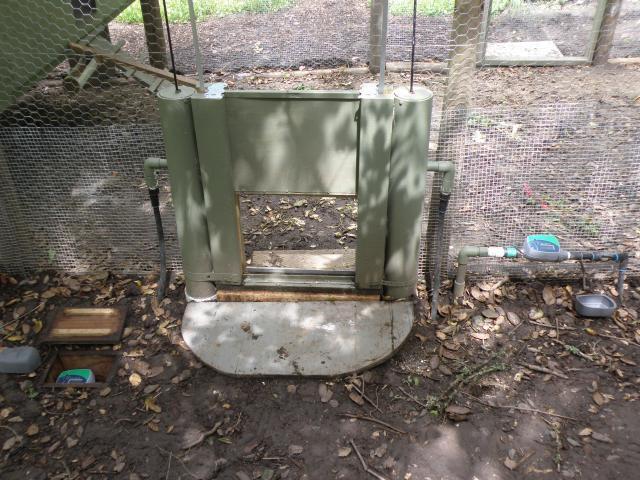
The door by itself. It consists of a piece of hardware cloth sandwitched between two aluminum window frames and covered with aluminum flashing. The floats just fit inside 4 inch pvc and have more than enough buoyancy to lift the door.

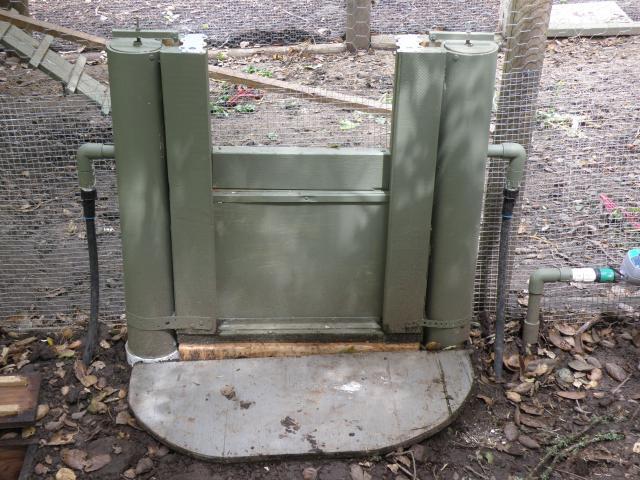
The 4 inch pvv float chambers and the supply line with the solenoid valve. I don't have a photo of the drain valve but it is installed just beyond the 4 inch T. The door slides up and down in a 2x4 grooved frame that also supports the float chambers. The little elbows coming off the sides are to allow over flow as it's impossible to time the fill to just fill the chambers.
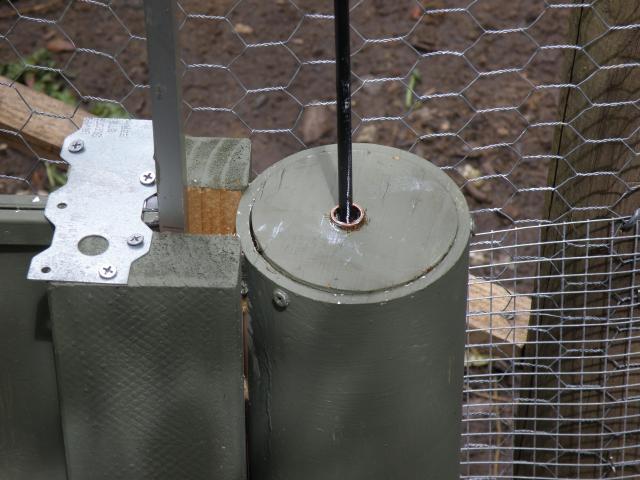
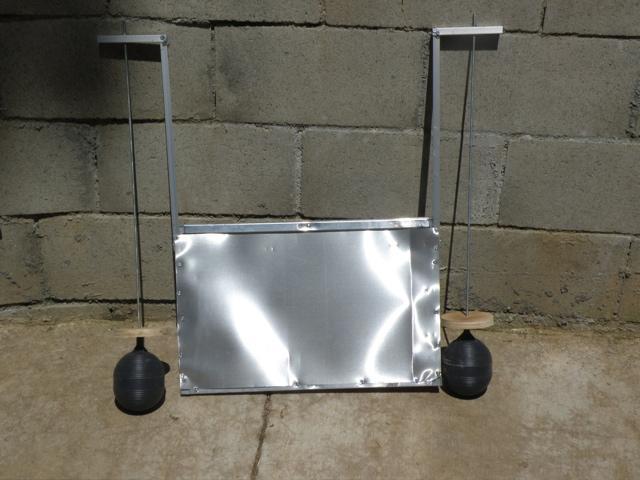
The two parts together. The wood discs just above the floats fit in the top of each cylinder and provide a guide for the roods to move in.
I use a standard irrigation solenoid valve to fill the system and float up the door but a special valve is required to empty the system and close the door as there is virtually no pressure to operate a solenoid valve. Both valves are battery operated and manually timed according to the hours of daylight. I find I have to change the times about once a month. I like my hens to out at dawn and want the door closed soon after they roost.
The door by itself. It consists of a piece of hardware cloth sandwitched between two aluminum window frames and covered with aluminum flashing. The floats just fit inside 4 inch pvc and have more than enough buoyancy to lift the door.
The 4 inch pvv float chambers and the supply line with the solenoid valve. I don't have a photo of the drain valve but it is installed just beyond the 4 inch T. The door slides up and down in a 2x4 grooved frame that also supports the float chambers. The little elbows coming off the sides are to allow over flow as it's impossible to time the fill to just fill the chambers.

The two parts together. The wood discs just above the floats fit in the top of each cylinder and provide a guide for the roods to move in.

I use a standard irrigation solenoid valve to fill the system and float up the door but a special valve is required to empty the system and close the door as there is virtually no pressure to operate a solenoid valve. Both valves are battery operated and manually timed according to the hours of daylight. I find I have to change the times about once a month. I like my hens to out at dawn and want the door closed soon after they roost.