This is my first hatch, and my first hatching thread! It's sort of an experiment and the odds are stacked against me because:
1) I have no hatching experience,
2) most of my eggs have traveled very far - 2620 miles from CA to MA!
3) the breeder messed up my first order and had to re-send the remaining eggs, so the first batch had to sit around and age while I waited.... and
4) all I have is a finicky still air styrofoam incubator, which has required a lot of fiddling and experimentation to get it to work.
However, I spent all of last summer building this coop

and my kids have been waiting for this moment for a year, so I'm committed to making it work! I've spent this past year reading about chickens, coops, incubation and everything, and educating myself, so I'm approaching this armed with knowledge and willing to problem-solve along the way. I want to document the process very well, first because I like this kind of thing and second, to help anybody else in my situation with information, lessons learned, and pictures.
The Incubator
I'm using a still air Little Giant incubator with an auto turner. I borrowed it from a local farm. I ran it empty for several days before I set the eggs, and found the lack of a fan to be a huge obstacle. The difference between the warmest and the coldest spot inside was 5 degrees! I had three different calibrated probe thermometers in three different parts of the incubator (I taped the probes to the tops of fake eggs, to get a more accurate reading since the recommendation is to measure at the top of the egg), and I moved them every couple of hours, so I could document the temperature everywhere. About half the slots were useless - either too hot or too cold, and the temperature in each slot was changing over time as well. I don't know how people pull it off with still air incubators! Somebody on BYC gave me the great idea of buying a mini handheld fan and sticking it in there (easier than hooking up a computer fan, and cheaper and faster than ordering a fan from the incubator manufacturer). I did, and that made all the difference!!! The temperature evened out completely throughout the entire incubator. The temperature was steady and even for 14 hours before I put the eggs in.
Here's my setup:
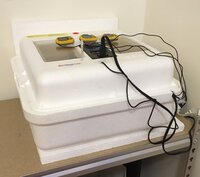
I put a sheet of styrofoam (left over from packaging) underneath it and behind it for better insulation.
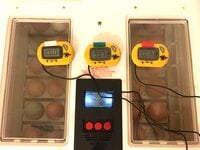
I still have the 3 thermometers in there, because I want to know what's going on. One has its probe placed directly under the heating element, one as far away from it as possible, and one in the middle. Before I put the eggs in, all three read the same temperature. After I put them in (it's been 8 hours now) they never went back to reading the same, probably because the eggs are obstructing the air flow somewhat, but the difference between them isn't big enough to be a problem. The two probes closer to the heat read the same, and the one that's different is way out in the farthest corner. I color coded the probes and the displays so I know which is which. I cut flat probe-holding rectangles out of clear plastic to tape the probes to, so they can sit at the tops of the eggs, like the thermometer probe that comes with the incubator.
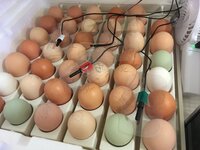
Here's the little fan. Not a lot of room in there, it barely fits between the turner and the wall (note: the humidity reads low in this photo because I had the lid all the way open and lost some humidity. It's back up to 40% now).
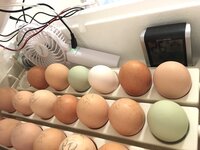
I taped all the thermometer cords together with the auto turner's cord, so they would fit snugly in the notch and stay together. Otherwise, every time I opened the lid, the cords would get separated and shift all over the place and out of the notch, and I'd lose time (and warmth and humidity) trying to line them up and tuck them back into the notch.
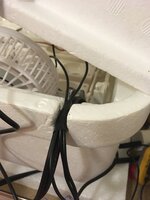
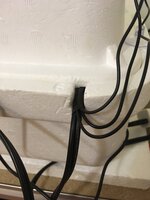
Adding the fan's cord to that bundle made it too thick and the lid wouldn't close all the way, so I took out one of the red vent plugs and fed the fan's cord through there. I then taped over it to close it back up (the incubator has other, smaller vent holes that stay permanently open to let fresh air in, but you can open or close the bigger vent holes with the red plugs).
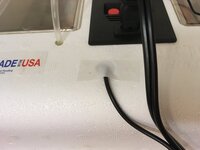
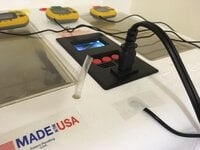
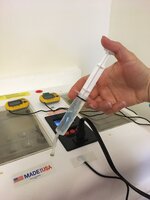
Another great idea I found on BYC was for how to add water without opening the lid. I fed a piece of flexible fish tank piping through one of the permanent vent holes and down into the water tray. I add water as needed via a syringe:
Before using it, I salt tested my hygrometer. I also tested all three thermometers against two high quality digital cooking thermometers and a medical thermometer, and all were accurate (within a fraction of a degree).
The Eggs
Today I set the eggs. There are 41 of them, and they come from three different sources (and only half of them are to be mine). The lady who let me borrow the farm incubator also gave me 19 eggs of hers to hatch for her. The cool green ones are hers Her eggs are the only ones not labeled in pencil, so I'll know which ones they are. At lockdown, I'll put a low cardboard barrier between her eggs and mine, so I can keep track of which chicks are mine and which are hers.
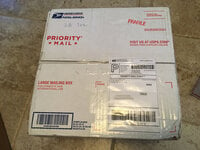
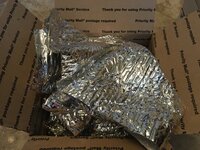
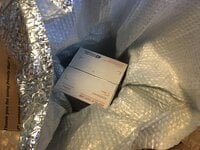
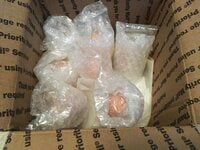
My eggs came from two family farms. One set is Silver Laced Barnevelders, and they shipped from Blue House Farm in NC. I ordered 4 eggs and she sent me 7. Saskia has been great - answers questions quickly over facebook messenger, gave me tips on egg storage etc. The eggs were packaged very well. Two had hairline cracks, but only visible when candled, and the air cells look good (some a bit jiggly, but none saddled or detached). Here's what her package looked like:
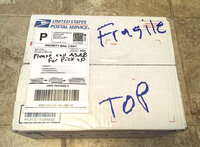
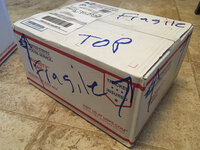
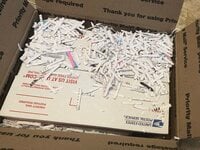
The second set of eggs is all Orpingtons - Silver Laced, Partridge, and Lemon Cuckoo. They came from Papa's Poultry in CA. I ordered 8, and he sent me 15. He forgot the Lemons the first time around, but was very quick to respond and shipped them the same day I contacted him about it. Aside from that mess up, he was also quick to respond on facebook messenger, answered questions and was easy to work with. His eggs were also packaged well. No cracks, not even hairline cracks, but out of the 15 there were 2 saddled air cells and 3 completely detached air cells (but the poor things flew from coast to coast, so I guess that was to be expected). I'm glad he sent all the extras. He went even further in his packaging and wrote "fragile", "top" and arrows all over the boxes, and "Please call ASAP for pick up" and my phone number on top of the box. By comparison, Saskia at Blue House Farm only had a stamp that said "fragile"... Could've used some more labeling to make it obvious to the postal workers. Nobody called me for either of Papa's boxes though, despite the note on both boxes and me calling the post office beforehand to ask them to call me... Oh well. Here's what his boxes looked like (I only took pictures of one, because they looked the same).
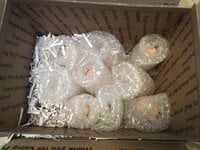
I let the eggs rest fat end up in the basement at around 60 degrees. Because of the delay with the messed up order, and waiting for my lifesaving fan to arrive, I had to set the eggs later than I'd wanted - on the 5th day after they were shipped (3rd day after the first box arrived). The night before I set them, I brought them upstairs so they could warm up to room temperature overnight. After I was sure the incubator was maintaining proper temperature, I opened the lid all the way up, waited for it to cool down some, and then set the eggs. Don't know if this is proper procedure, but I read about temperature shock, and wanted the eggs to warm up slower. The thermometers read 73 degrees when I closed the lid, and it took the incubator about an hour and a half to get back up to 100. So hopefully that was better on the eggs than sticking them straight into a hot incubator.
I also unplugged the auto turner and will keep it unplugged for the first week. I read that somewhere about shipped eggs, especially eggs with air cell issues.
(Edit: the different recommendations on how long to wait before turning shipped eggs have been confusing (I've read about 7 days, 5 days, 3 days, 1 day and right away, all on BYC!), but it seems like more people favor turning early. So I plugged the turner back in after 1 full day of no turning).
And here are all the beauties, finally cooking! It has now been 9 hours since they went in (yes I've been composing this post for a while...) and so far, so good. Temperature has been between 99 and 100 degrees, humidity at 40%. Lucky for them I'm home all day now, so I can check on them every 5 minutes!

And here's what they should look like all grown up:

I'm forever grateful to the BYC community for answering my questions leading up to this experiment, and for giving me so many great ideas that have ultimately saved the day. I'll keep updating this thread in case somebody else finds it helpful and can benefit from the pictures, ideas and information. And I will also ask questions as they come up, because... well, I've never done this before! Thanks for reading if you got this far!
1) I have no hatching experience,
2) most of my eggs have traveled very far - 2620 miles from CA to MA!
3) the breeder messed up my first order and had to re-send the remaining eggs, so the first batch had to sit around and age while I waited.... and
4) all I have is a finicky still air styrofoam incubator, which has required a lot of fiddling and experimentation to get it to work.
However, I spent all of last summer building this coop

and my kids have been waiting for this moment for a year, so I'm committed to making it work! I've spent this past year reading about chickens, coops, incubation and everything, and educating myself, so I'm approaching this armed with knowledge and willing to problem-solve along the way. I want to document the process very well, first because I like this kind of thing
 and second, to help anybody else in my situation with information, lessons learned, and pictures.
The Incubator
I'm using a still air Little Giant incubator with an auto turner. I borrowed it from a local farm. I ran it empty for several days before I set the eggs, and found the lack of a fan to be a huge obstacle. The difference between the warmest and the coldest spot inside was 5 degrees! I had three different calibrated probe thermometers in three different parts of the incubator (I taped the probes to the tops of fake eggs, to get a more accurate reading since the recommendation is to measure at the top of the egg), and I moved them every couple of hours, so I could document the temperature everywhere. About half the slots were useless - either too hot or too cold, and the temperature in each slot was changing over time as well. I don't know how people pull it off with still air incubators! Somebody on BYC gave me the great idea of buying a mini handheld fan and sticking it in there (easier than hooking up a computer fan, and cheaper and faster than ordering a fan from the incubator manufacturer). I did, and that made all the difference!!! The temperature evened out completely throughout the entire incubator. The temperature was steady and even for 14 hours before I put the eggs in.
Here's my setup:

I put a sheet of styrofoam (left over from packaging) underneath it and behind it for better insulation.

I still have the 3 thermometers in there, because I want to know what's going on. One has its probe placed directly under the heating element, one as far away from it as possible, and one in the middle. Before I put the eggs in, all three read the same temperature. After I put them in (it's been 8 hours now) they never went back to reading the same, probably because the eggs are obstructing the air flow somewhat, but the difference between them isn't big enough to be a problem. The two probes closer to the heat read the same, and the one that's different is way out in the farthest corner. I color coded the probes and the displays so I know which is which. I cut flat probe-holding rectangles out of clear plastic to tape the probes to, so they can sit at the tops of the eggs, like the thermometer probe that comes with the incubator.

Here's the little fan. Not a lot of room in there, it barely fits between the turner and the wall (note: the humidity reads low in this photo because I had the lid all the way open and lost some humidity. It's back up to 40% now).

I taped all the thermometer cords together with the auto turner's cord, so they would fit snugly in the notch and stay together. Otherwise, every time I opened the lid, the cords would get separated and shift all over the place and out of the notch, and I'd lose time (and warmth and humidity) trying to line them up and tuck them back into the notch.


Adding the fan's cord to that bundle made it too thick and the lid wouldn't close all the way, so I took out one of the red vent plugs and fed the fan's cord through there. I then taped over it to close it back up (the incubator has other, smaller vent holes that stay permanently open to let fresh air in, but you can open or close the bigger vent holes with the red plugs).

Another great idea I found on BYC was for how to add water without opening the lid. I fed a piece of flexible fish tank piping through one of the permanent vent holes and down into the water tray. I add water as needed via a syringe:


Before using it, I salt tested my hygrometer. I also tested all three thermometers against two high quality digital cooking thermometers and a medical thermometer, and all were accurate (within a fraction of a degree).
The Eggs
Today I set the eggs. There are 41 of them, and they come from three different sources (and only half of them are to be mine). The lady who let me borrow the farm incubator also gave me 19 eggs of hers to hatch for her. The cool green ones are hers
 Her eggs are the only ones not labeled in pencil, so I'll know which ones they are. At lockdown, I'll put a low cardboard barrier between her eggs and mine, so I can keep track of which chicks are mine and which are hers.
My eggs came from two family farms. One set is Silver Laced Barnevelders, and they shipped from Blue House Farm in NC. I ordered 4 eggs and she sent me 7. Saskia has been great - answers questions quickly over facebook messenger, gave me tips on egg storage etc. The eggs were packaged very well. Two had hairline cracks, but only visible when candled, and the air cells look good (some a bit jiggly, but none saddled or detached). Here's what her package looked like:


The second set of eggs is all Orpingtons - Silver Laced, Partridge, and Lemon Cuckoo. They came from Papa's Poultry in CA. I ordered 8, and he sent me 15. He forgot the Lemons the first time around, but was very quick to respond and shipped them the same day I contacted him about it. Aside from that mess up, he was also quick to respond on facebook messenger, answered questions and was easy to work with. His eggs were also packaged well. No cracks, not even hairline cracks, but out of the 15 there were 2 saddled air cells and 3 completely detached air cells (but the poor things flew from coast to coast, so I guess that was to be expected). I'm glad he sent all the extras. He went even further in his packaging and wrote "fragile", "top" and arrows all over the boxes, and "Please call ASAP for pick up" and my phone number on top of the box. By comparison, Saskia at Blue House Farm only had a stamp that said "fragile"... Could've used some more labeling to make it obvious to the postal workers. Nobody called me for either of Papa's boxes though, despite the note on both boxes and me calling the post office beforehand to ask them to call me... Oh well. Here's what his boxes looked like (I only took pictures of one, because they looked the same).


I let the eggs rest fat end up in the basement at around 60 degrees. Because of the delay with the messed up order, and waiting for my lifesaving fan to arrive, I had to set the eggs later than I'd wanted - on the 5th day after they were shipped (3rd day after the first box arrived). The night before I set them, I brought them upstairs so they could warm up to room temperature overnight. After I was sure the incubator was maintaining proper temperature, I opened the lid all the way up, waited for it to cool down some, and then set the eggs. Don't know if this is proper procedure, but I read about temperature shock, and wanted the eggs to warm up slower. The thermometers read 73 degrees when I closed the lid, and it took the incubator about an hour and a half to get back up to 100. So hopefully that was better on the eggs than sticking them straight into a hot incubator.
I also unplugged the auto turner and will keep it unplugged for the first week. I read that somewhere about shipped eggs, especially eggs with air cell issues.
(Edit: the different recommendations on how long to wait before turning shipped eggs have been confusing (I've read about 7 days, 5 days, 3 days, 1 day and right away, all on BYC!), but it seems like more people favor turning early. So I plugged the turner back in after 1 full day of no turning).
And here are all the beauties, finally cooking! It has now been 9 hours since they went in (yes I've been composing this post for a while...) and so far, so good. Temperature has been between 99 and 100 degrees, humidity at 40%. Lucky for them I'm home all day now, so I can check on them every 5 minutes!

And here's what they should look like all grown up:
I'm forever grateful to the BYC community for answering my questions leading up to this experiment, and for giving me so many great ideas that have ultimately saved the day. I'll keep updating this thread in case somebody else finds it helpful and can benefit from the pictures, ideas and information. And I will also ask questions as they come up, because... well, I've never done this before! Thanks for reading if you got this far!
Last edited:


