• giveaway ENDS SOON! Cutest Baby Fowl Photo Contest: Win a Brinsea Maxi 24 EX Connect CLICK HERE!

BROODER thread! Post pics of your brooders!

Quote:
I duz beeleeve its fer F-U-N...mixed with sheer challenge fer the human beast..... the need to conquer 'n divide
lol.png


I'm enjoyin' sittin' here lookin' at all the inventiveness!!
THANKS for sharing!!!
 
4hooves&featheredfriends :

I have been so impressed by all of the brooders and learned so much that I have been looking around the house for potential victims - the dog kennel that we are still using, the hope chest that holds only boots and shoes - but then finally I found it ....

http://i194.photobucket.com/albums/z279/3HorseGal/P1070011.jpg

So this is the desk, (60" X 34") that my husband cannot stand and seems to gather stuff all over it and around it. He keeps threatening to chuck it!

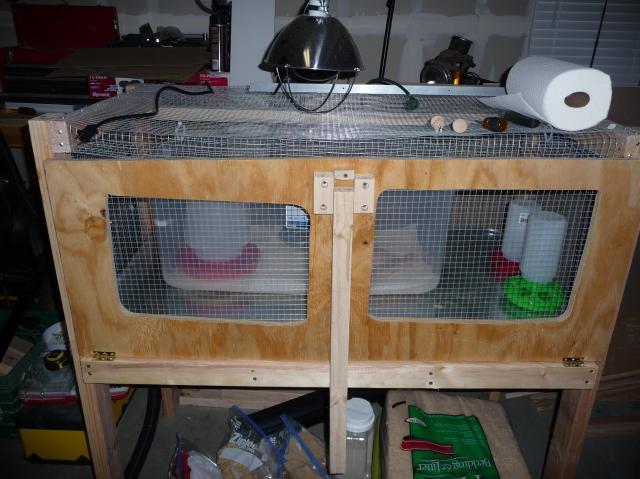
I am going to remove the drawers, close in the back of the desk (screen or solid?)- then the entire front will be screened in where the drawers were, the center section would be the door and add a bottom. The grand plan would be that the brooder will have a tray(s) that I can slide out.

Am I totally nuts? OK so it would be a lot cheaper to buy a Rubbermaid container - but wouldn't this be deluxe?

Yar, but yer my kinda nuts!
lol.png


I can totally see the finished brooder.
celebrate.gif


will ya post pictures, or have ya already?​
 
Mine's done
woot.gif
The DH came through for me again on my "special" requests
bow.gif
We took out 2 of the nesting boxes (we have 5 hens and they only EVER use the one on the left) and built a brooder in their place. It's so nice to be able to have them out in the coop with the rest of the chickens but in their own special area. Hope everyone likes it
fl.gif


Outside view with the egg door open...nesting box on the left, babies on the right
26147_img_9796.jpg


Cute view from inside the coop looking out the egg door at my DH and daughter
26147_img_9804.jpg


Inside the coop view
26147_img_9798.jpg
 
I was just going to use a tub, then I realized I had enough left over scraps from the coop build to build a brooder. It's pretty ruff, I threw it together in a couple hours. I think it will get the job done though.

49390_p1040651.jpg


Ending up getting a tub anyways so I can keep the draft out for the first couple weeks until they outgrow the tub.

49390_p1040654.jpg


The cool thing is the tub fits perfectly inside of the wooden brooder so I didn't need to build a special lid for the tub.

Chicks supposed to be here this friday! Can't wait
jumpy.gif
 
My free brooder "duplex" - I got the box from my local warehouse club store. The base is cardboard lined with plastic, covered with pine shavings. I can move the chicks to one side while cleaning the other, and as they grow older and bigger, I can remove the divider and give them the whole apartment! The box is 24" deep and 39 x 50. Plenty of room for lots of babies! Thanks to another member for suggesting the watermelon/cantaloupe/orange box! It will be covered with wire soon - after chicks arrive. The heat lamp is on a "yardarm" I made from 2x4's. The cord is run through conduit straps and held in place with a clamp so it can be lowered or raised to adjust the temperature.

46193_20100312_2.jpg


46193_20100312_4.jpg
 
Here's our brooder. This is the whole McMurray shipment, but we only had 12 in here temporarily. We had a brooder set up in the mudroom, but because of a really cold spring, we just couldn't get it warm enough in there, even with the heat lamp.

So the girls ended up in our master bathtub:

46029_img_4660.jpg


I lucked out with just the right sized cardboard boxes that I cut up so that it lined the tub and protected both the tub and the chicks from each other. Then I put about 1 inch of shavings on the boxes, and paper towels on top of the shavings for the first couple of days. To suspend the heat lamp, we used an old tension rod that we could raise or lower depending on how cold or hot the chicks got. The great thing about the cardboard is that I could cut little holes in it to suspend some small branches as a "starter roost." They took to it well, and it stayed in place great.
 

New posts New threads Active threads

Back
Top Bottom