Consolidated Kansas

Quote:
Quote:
Thank you for the compliments. Shucks, I don't think of myself as a master builder or anything. Just doin' what makes sense, but I love building things — always have.

Ivywoods, sorry to hear that poultry barn is on hold. I know how excited you were talking about it. Your plans sound awesome. Can't wait to see some progress on it.

Hawkeye, If you are concerned about nest-box longevity, may I suggest using 3/4-inch plywood and covering that with tarpaper and then some kind of exterior siding? I know it sounds like overkill and maybe a bit expensive, but you won't have to worry about the elements for a very, very long time.

Quote:
Come on over and I'll show you several styles, some of which I made myself! It'll be okay!

I was going to volunteer you Chooks, but decided I better not speak for you. I'm glad you offered since you both are so close.
thumbsup.gif
 
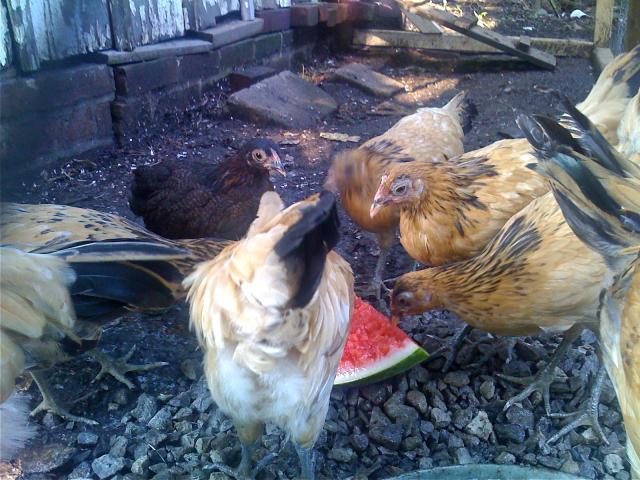
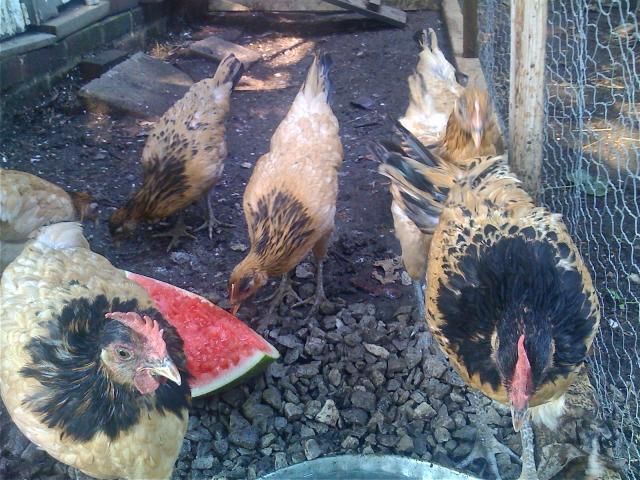
Ivywoods — I snapped some pics of your offspring this morning. They all are doing great and enjoy devouring watermelon. They all seem very docile and I can pick anyone of them up without too much squawking. My favorite is Brownie — the BPW. She just goes limp when I hold her.

Keep in mind that they are in a temporary pen. I'll get 'em out of there before summer's end.
smile.png


82123_browniehens.jpg


Here are my two roos. Uno (first one hatched) is on the left and Sugar is on the right. (We thought Sugar was a pullet – LOL)

82123_roos.jpg


Here's a nice mug of Sugar.

82123_sugarchicken.jpg
 
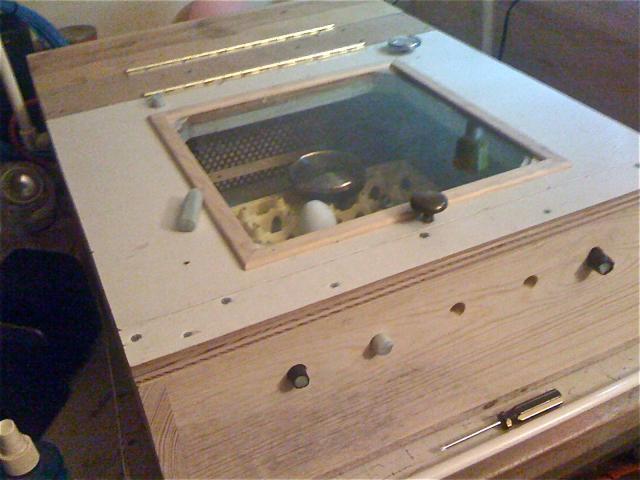
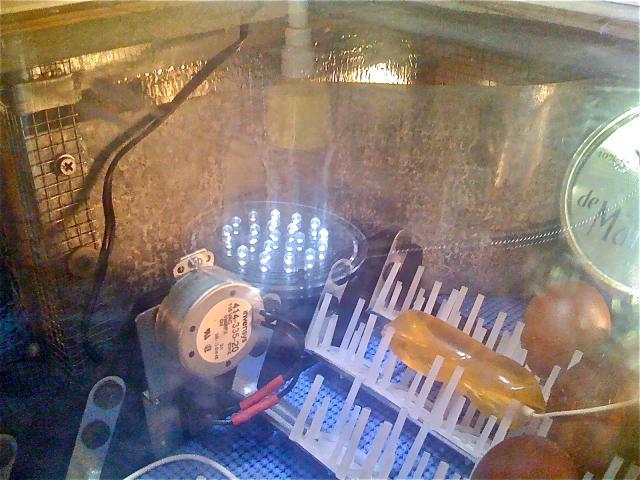
Speaking of incubators ... I built another one, but a tad smaller. This one is really tight and keeps the heat in real well. It hardly waivers more than three-tenths of a degree. I use it as my hatcher.

82123_newbator.jpg


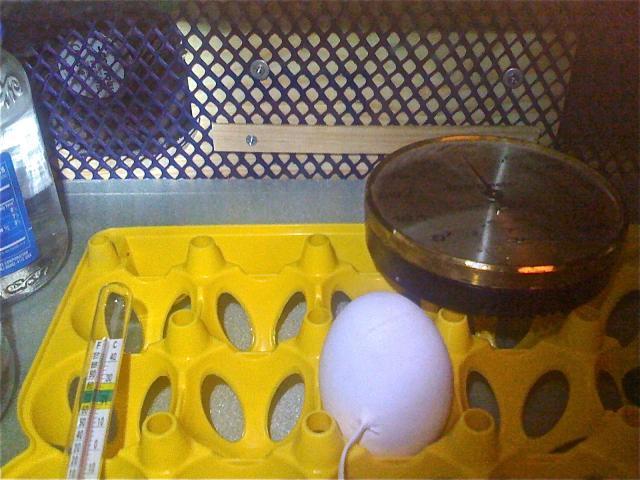
Here's a pic of the inside

82123_inside_new_bator.jpg


I went back and made some modifications to my first bator. I discovered on my first hatch that the air blowing from the PC fan was drying out my eggs way to fast. I put in a piece of 6-inch galvanized flashing to divert air around the egg turner. I'm thinking this is one of the reasons Ivywood's BCM eggs didn't fair too well. I also think my thermometer was off a degree or two.
hmm.png


82123_bigbatormode.jpg


Here a close-up of the vent end.

82123_firstbatorvent.jpg


Here are both of my bators next to each other sitting on my drafting table.

82123_my2bators.jpg


Notice my egg cam set-up. I'm sitting right next to it typing and gazing over at the temps.
 
Loralee, I think you said you were building your nest boxes on the outside of your coop. If that is the case I would build a 2X4 frame for support and places to put your hinges. If you put them on the inside of your coop you can build them about any way, and just make a hinged door to open for access. When I built my nest boxes I built a 1x bottom frame for each row of boxes, attached it to the wall and then built the individual boxes with plywood. Mine however are inside the coop.
If you haven't built your walls yet I have a suggestion. If you are still planning on a pitched roof a 5 foot height is plenty for the side walls. Your pitched roof will allow for plenty of walking around room. I have exterior walls and with the pitch the center is 8 foot tall. I doubt you need it that tall in the middle. I have never hit my head on the ceiling and I am 5'7" and my DH is 6'. I do however have a shorter door and have to duck a little to get in. On other houses with an angled roof I have the tall part at 7 feet and the short side at 5 feet. Again no problem of height. You don't normally walk right along side the exterior wall anyway.
As far as the deep litter method. It is recommended over a year's time that it become about 6" deep. I think mine gets a little deeper. Just remember what ever you do, if the litter gets wet remove it and replace it. I have had spots here and there that I've shoveled out, then I just move the other litter around to fill in what has been removed, and place another layer of clean litter on top. I use my litter as garden compost on my flower beds. I also have a large pile of it I intended to use on the veggie garden that never got started this year.
I don't see that was a great loss since I couldn't have kept it going in this heat.
 
Quote:
I already made my walls 6 foot- I thought about it and it would give me a bit more room for both the windows, doors, etc. I was getting kind of squeezed on space. OH and I found a great set of pictures that showed the boxes being framed out of 2X4's and I'm going to do it that way.

GeoKan- thanks for your input on wrapping it in tarpaper. I'd rather be overkill than be regretting a rotting box.

Renee- thanks for the link. I actually read that a couple of days ago when I was browsing your articles. I love your writing!

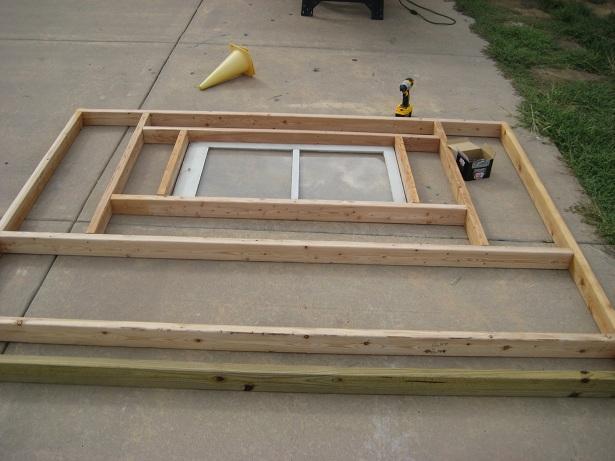
This is what I have accomplished this morning. I have more pics on my BYC Page, but this is the general idea, here. I still haven't cut the vertical boards to support the long horizontal boards. But it's getting there. It's taking a lot longer than I thought! I figured one wall would be done and over with. HA. I love how I continue to over estimate my own abilities. I have had to re-cut boards, re-do spaces... and of course, the morning would not be complete without dropping a nice heavy 2X4 on my foot. I now have a bruise and a bit of a limp.
hmm.png
Anyway, not to worry I am listening to you all and trying to incorporate your ideas and take your advice to heart. I appreciate all your advice!! Right now I am stuck. I need to screw in a board that is too tight for my drill. So I'm not sure what to do. I'm going to ask my DH what he thinks.

96635_img_3121.jpg
 
Last edited:
Quote:
I already made my walls 6 foot- I thought about it and it would give me a bit more room for both the windows, doors, etc. I was getting kind of squeezed on space. OH and I found a great set of pictures that showed the boxes being framed out of 2X4's and I'm going to do it that way.

GeoKan- thanks for your input on wrapping it in tarpaper. I'd rather be overkill than be regretting a rotting box.

Renee- thanks for the link. I actually read that a couple of days ago when I was browsing your articles. I love your writing!

This is what I have accomplished this morning. I have more pics on my BYC Page, but this is the general idea, here. I still haven't cut the vertical boards to support the long horizontal boards. But it's getting there. It's taking a lot longer than I thought! I figured one wall would be done and over with. HA. I love how I continue to over estimate my own abilities. I have had to re-cut boards, re-do spaces... and of course, the morning would not be complete without dropping a nice heavy 2X4 on my foot. I now have a bruise and a bit of a limp.
hmm.png
Anyway, not to worry I am listening to you all and trying to incorporate your ideas and take your advice to heart. I appreciate all your advice!! Right now I am stuck. I need to screw in a board that is too tight for my drill. So I'm not sure what to do. I'm going to ask my DH what he thinks.

https://www.backyardchickens.com/forum/uploads/96635_img_3121.jpg

There is an adapter you can get to make a bend- I don't remember what it's called. You can have the drill facing one way and drill a totally different angle. Someone help me out here...no ADD meds or coffee yet today...
 
You can angle the screw and get it in where you need it. You might need a longer screw. There are adapters that will let you get in a tight spot but they are pricy. I have a little portable drill that has an adjustable angle head, but even with that I often don't have room. Drill a pilot hole to get your started and toenail the screw in at an angle and it should work just fine.
Your wall looks great though. I don't think I would have installed the window until I had the wall in place to prevent breakage but then I can be a klutz sometimes.
You're going to end up being a master carpenter!
 
Quote:
Hey Chooks, I think it's called an angle drill driver attachment. You can find some fairly cheap, but I don't have one. I just go at it at an angle and hope for the best. You could, however, angle a pilot hole through the first board, place your screw and drive it in. I usually just pilot the other end at an angle like "toenailing" to secure the boards in place.

LOL, Chicken Danz beat me to the reply.
 
My bad. I went to your page and it does look like you haven't installed your window yet. You are really thinking this out. I love your dinner bell by the way!
 

New posts New threads Active threads

Back
Top Bottom