We moved here last year and spent last summer building our first veggie garden... (its 8 ft high with 6ft tall wire fencing & all the posts are concreted in 2 ft deep & we drug the driftwood up from the creek across from our house)
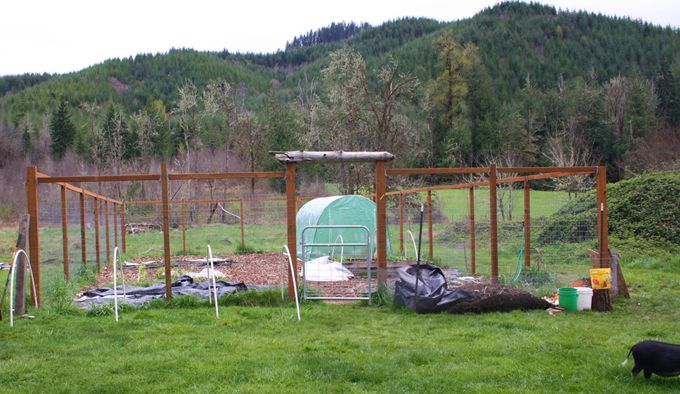
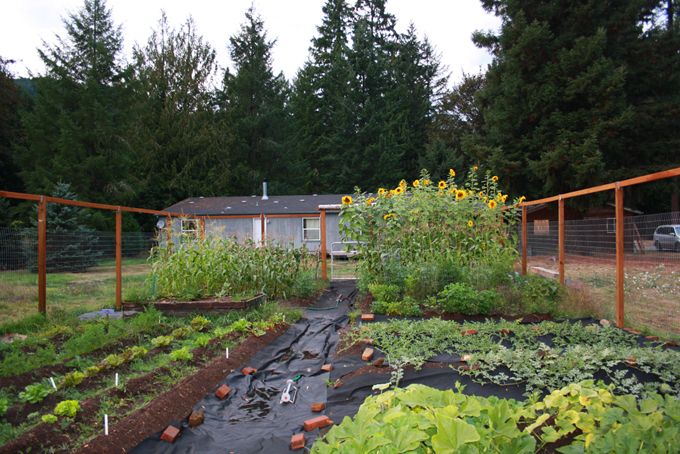
It looks much nicer in the summer...
We decided that at 35ft x 60ft, we needed to double the size this year, so we decided to put the coop & the open run directly in the center of the 2 gardens. The open run will be 12ft x 60ft & the new part of the garden will be 40ft x 60ft
We will have 2 gates in the run opening to either side of the garden so that in the fall & winter we can open them up to the chickens & they can fertilize them for us & help keep the grass & weeds down.
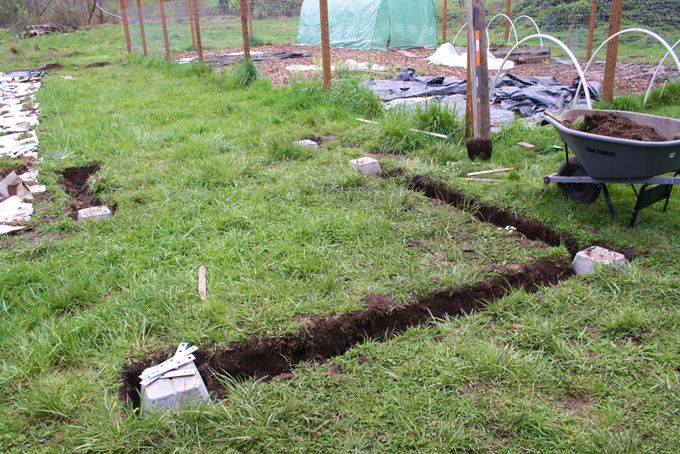
We started by digging a trench around the base & setting in pier blocks...
We enlisted the help of a neighbor who has been a builder & contractor for 30+ yrs.
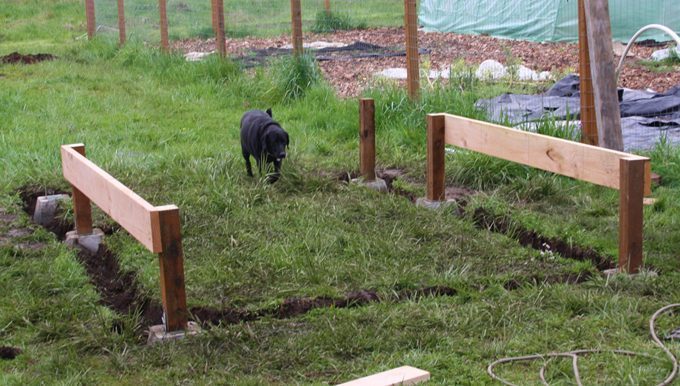
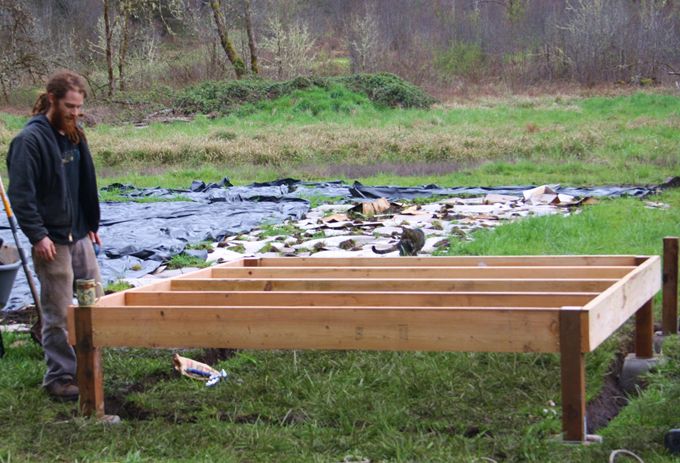
They set the posts & framed in the floor about 14in off the ground (leaving about 20in under the coop for a shaded area for the chickens) This is our dog Marley checking it out...
Then they braced the floor...(the plastic covered area will be the new 1/2 of the garden & will match the other side)
We stapled in 1/2 in hardware cloth around the base & 12in down into the trench (that is filled with water because its Oregon & we have to build in the rain!) They used some scrap black 2x2s across the bottom of the floor & posts for extra support for the chicken wire & lattice....
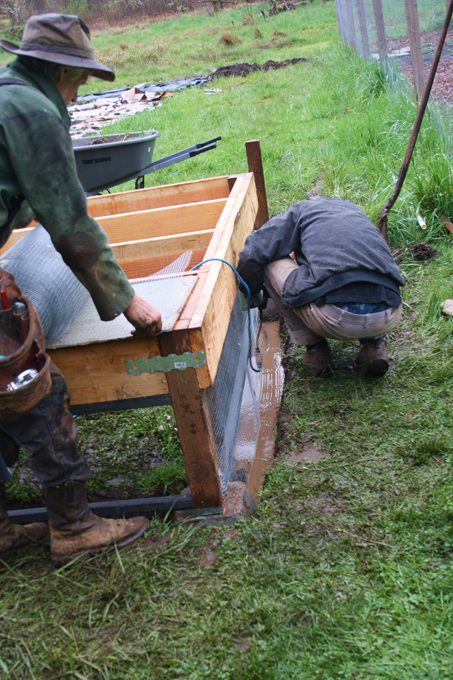
We filled in the trench with gravel on either side for extra protection against digging.
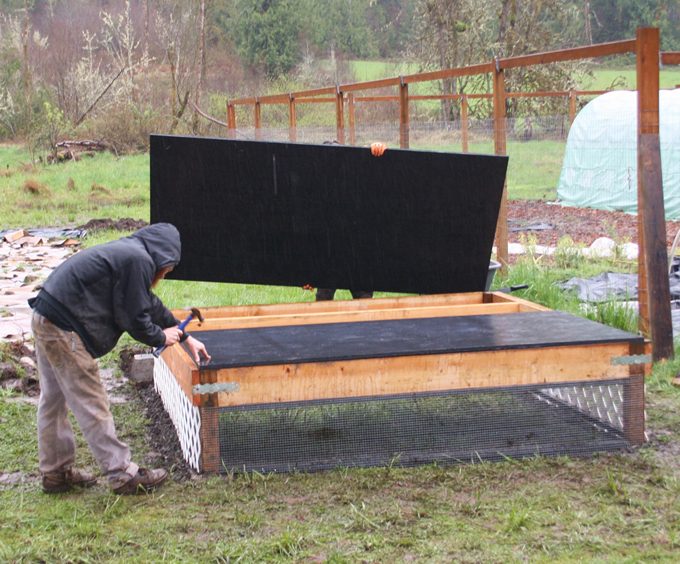
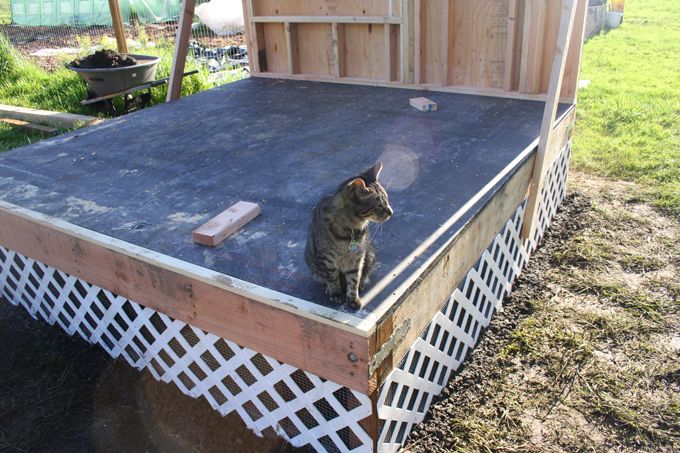
Then came the floor made out of heavy plywood that we stained with left over black wood stain (so that it would hold up while we built the rest of the coop mostly in the wonderful Oregon rain, if you look closely you can see the raindrops) It was really coming down that day....these guys are troopers!
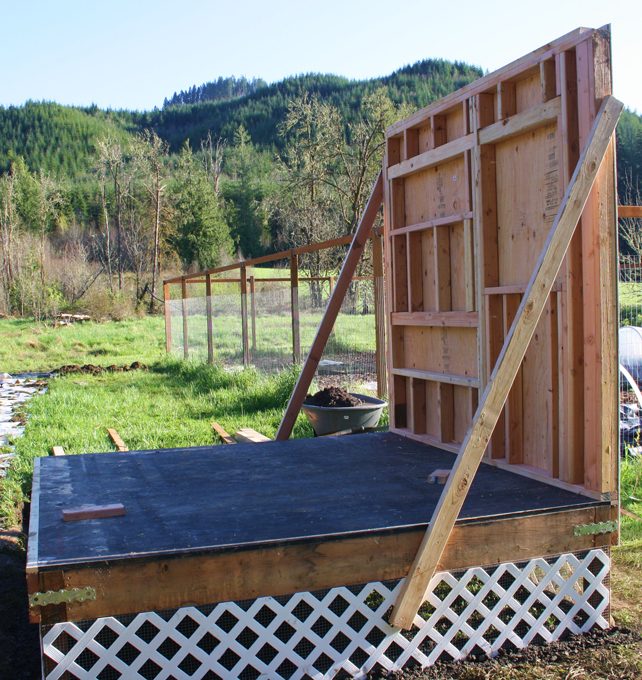
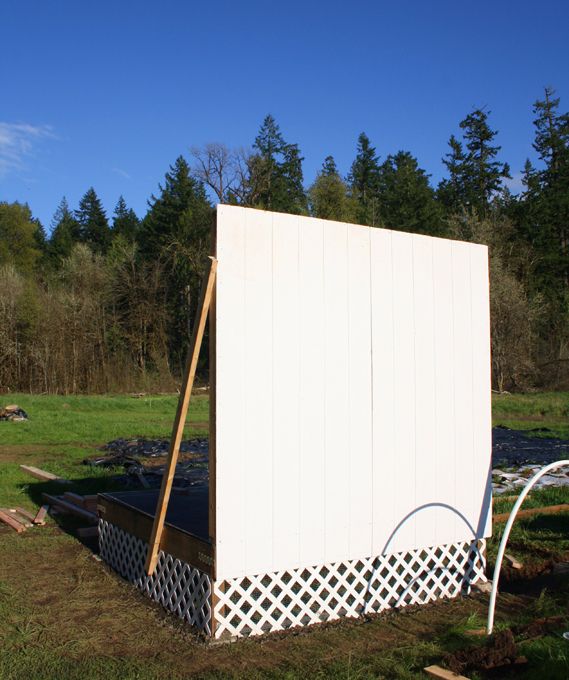
Then came the first wall. They put on the primed siding before raising it & securing it in place with braces...
The sun was out sometimes...
This is our cat "Thing", he always has to supervise any project...I think he approves so far")
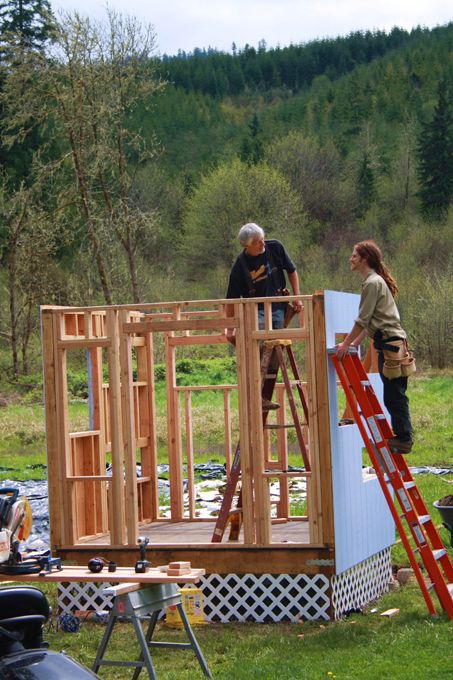
They cut all the boards for the 2nd wall at the same time as the first so that they would match up perfectly. Devon built the second wall & we raised it, leveled it & secured it into place...

Then Devon cut out all the openings with a jig saw. The front and top back openings are for windows, and the bottom openings are for the nesting boxes, which will be on the outside of the coop for easy access...

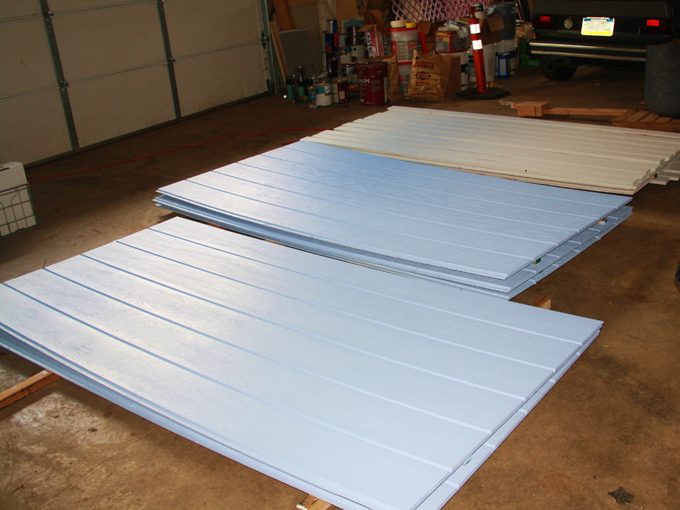
After seeing the first two walls go up, I decided to paint the rest of the siding & trim before they put it up, once its finished I will
go back & fill the nail holes & just touch up over them...
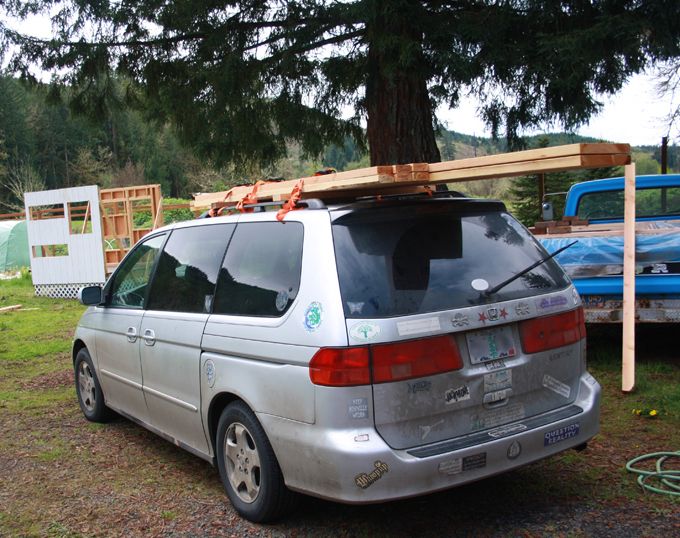
We hauled almost all the lumber on our work van...she may look like a soccer mom van, but shes a workhorse! The nearest hardware store is almost an hour away through the mountains & she made it every time hauling thousands of pounds of 2x4s, 1x4s, 4x4s, 4x6s, plywood, roofing, you name it... Thats why this year, we got a new one & now our old girl can get as messy
as any old work truck...(the truck beside her wouldn't make that trip so its our wood-gettin-up-the-road-around-the-house truck, we used it to keep the wood in the bed & covered it with plastic to keep it close & dry)
After another trip to town for more 2x4s, they framed up the front & back walls....
Oh & sometime in between there, when it wasn't raining, I put on the first coat of paint on the 2 side walls....
The door will be in the center with opening windows on either side, in the back is another long opening for a window and the chicken door that will lead out into the closed in coop. They put up 4x4 posts in the back (also on pier blocks) for the closed in run & attached it to the coop with 4x6s across the top.
This is our pig, Miss Kitty, checking it out in the rain...

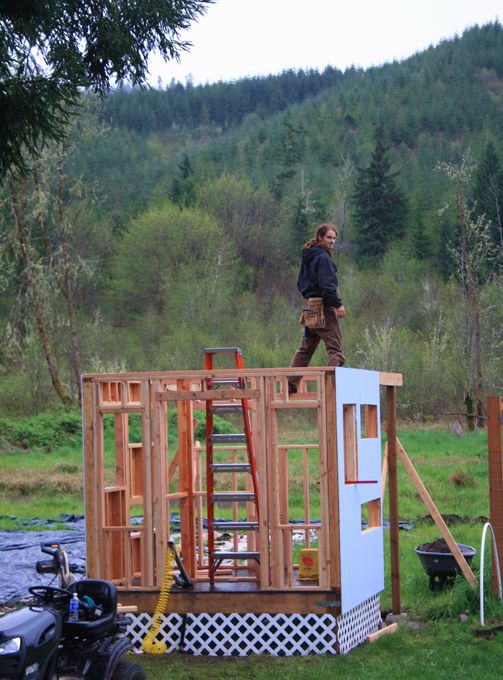
And here is Devon enjoying the mountain view after a long hard day of work....
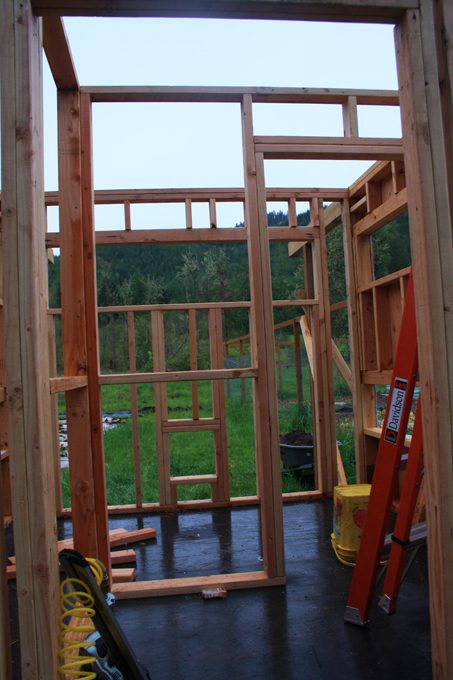
Devon framed up the inside walls which will be our little foyer/storage area....
And then came the hard part....the ROOF...dun dun duuunn...
Before designing this coop Devon & I spent countless hours looking through all the coops on BYC & picking out the things we liked best and adding them to our design. When it came to the roof, we absoluetly loved the 2 with scooped roofs, so I modified
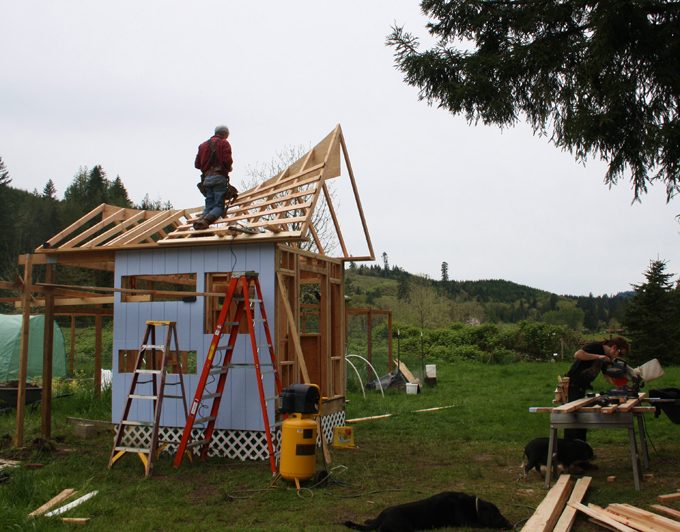
that idea to fit our coop. I decided to make the peak taller in the front (6ft off the ceiling) for extra storage space, and shorter (3ft off the ceiling) in the back (over the closed in run) so that it wouldn't shade the garden as much. Over all the roof is about 14ft long. The scoop is actually 3 seperate sections cut out of a piece of 1/2in plywood. I used Google Scketchup to design & caculate the scoop as well as each angle of the rafters, and yes every single rafter has 2 different angles (one on top & one on bottom) that are not whole angles, so it was a bit of a challenge! I also used it to measure between the top & bottom angles in order to get them as close to perfect as possible...I then drew out every angle on the 2x4s and the guys cut & re-cut till they all fit perfectly.Then they took (WET) 1x4s and attached them across the roof, leaving a space open for the skylights. Here are the guys working on the roof & our other dog Digi loungin & Miss Kitty helping out her daddy on the saw
Here is the roof from the front, it overhangs the front of the coop by 1 1/2 ft (that will be closed in for extra storage space) to
protect the door from the rain. The roof also overhangs along the sides 8in & we will attach gutters along the sides to catch rainwater for the chickens...
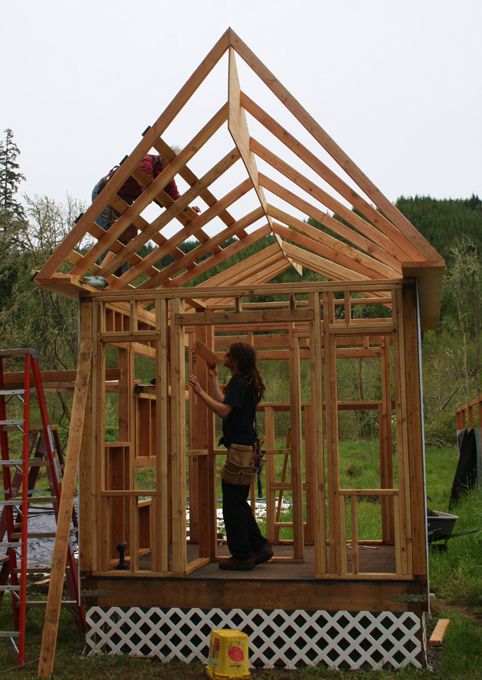
Devon had to cut the top slats with a jig saw to make them fit the swoop....
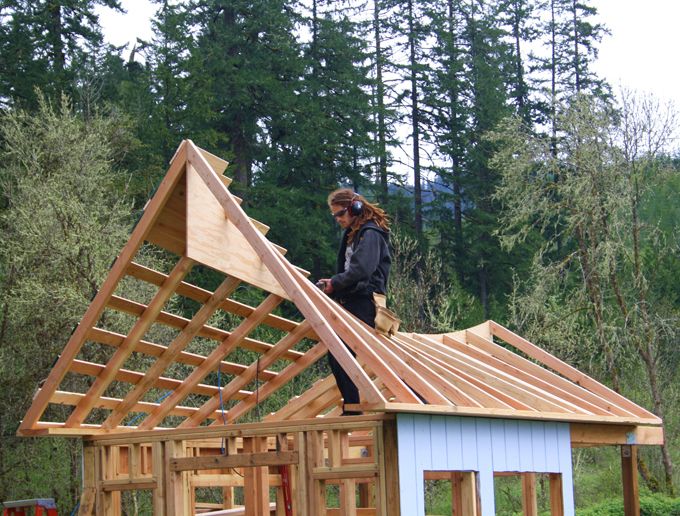

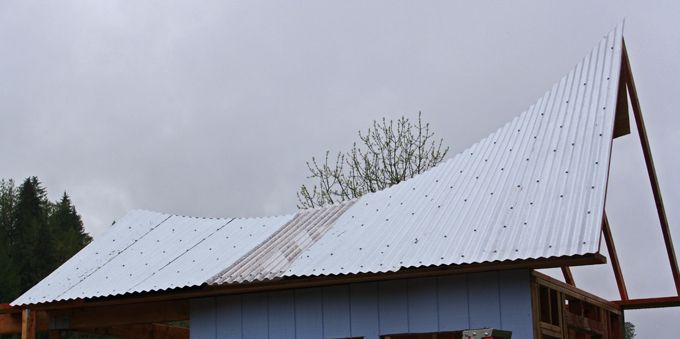
Then they attached the roofing material & the metal & skylight to the first 1/2...

And here is the first 1/2 of the roof with skylight...they still need to cut the metal straight across the bottom...
So as of yesterday (May 5th) this is what we have done so far...
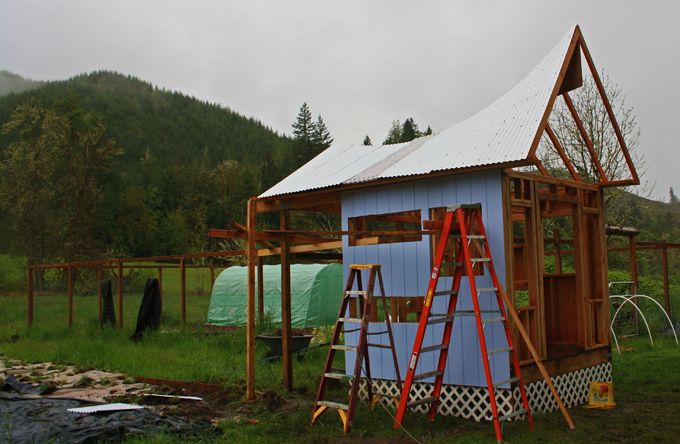
We did put the slats across the other 1/2 of the roof yesterday everning (I even learned how to use the saw & helped by cutting all the 1x4s!) I also put the second coat of paint on the outside walls today & Devon framed in some of the windows...More pics to come soon!
We are disagreeing on if we need inside walls or not, Devon says no, I say it will make cleaning easier & cut down on drafts, not to mention it will look nicer, what do yall think?....also, any suggestions on flooring material?
I accidentally posted this twice (I kept getting a message saying there was a problem uploading it, and to try again) If someone could tell me how to delete this post & keep the other one (with the poll) open, I'd be very grateful!
It looks much nicer in the summer...
We decided that at 35ft x 60ft, we needed to double the size this year, so we decided to put the coop & the open run directly in the center of the 2 gardens. The open run will be 12ft x 60ft & the new part of the garden will be 40ft x 60ft
We will have 2 gates in the run opening to either side of the garden so that in the fall & winter we can open them up to the chickens & they can fertilize them for us & help keep the grass & weeds down.
We started by digging a trench around the base & setting in pier blocks...
We enlisted the help of a neighbor who has been a builder & contractor for 30+ yrs.
They set the posts & framed in the floor about 14in off the ground (leaving about 20in under the coop for a shaded area for the chickens) This is our dog Marley checking it out...
Then they braced the floor...(the plastic covered area will be the new 1/2 of the garden & will match the other side)
We stapled in 1/2 in hardware cloth around the base & 12in down into the trench (that is filled with water because its Oregon & we have to build in the rain!) They used some scrap black 2x2s across the bottom of the floor & posts for extra support for the chicken wire & lattice....
We filled in the trench with gravel on either side for extra protection against digging.
Then came the floor made out of heavy plywood that we stained with left over black wood stain (so that it would hold up while we built the rest of the coop mostly in the wonderful Oregon rain, if you look closely you can see the raindrops) It was really coming down that day....these guys are troopers!
Then came the first wall. They put on the primed siding before raising it & securing it in place with braces...
The sun was out sometimes...
This is our cat "Thing", he always has to supervise any project...I think he approves so far
They cut all the boards for the 2nd wall at the same time as the first so that they would match up perfectly. Devon built the second wall & we raised it, leveled it & secured it into place...
Then Devon cut out all the openings with a jig saw. The front and top back openings are for windows, and the bottom openings are for the nesting boxes, which will be on the outside of the coop for easy access...
After seeing the first two walls go up, I decided to paint the rest of the siding & trim before they put it up, once its finished I will
go back & fill the nail holes & just touch up over them...
We hauled almost all the lumber on our work van...she may look like a soccer mom van, but shes a workhorse! The nearest hardware store is almost an hour away through the mountains & she made it every time hauling thousands of pounds of 2x4s, 1x4s, 4x4s, 4x6s, plywood, roofing, you name it... Thats why this year, we got a new one & now our old girl can get as messy
as any old work truck...(the truck beside her wouldn't make that trip so its our wood-gettin-up-the-road-around-the-house truck, we used it to keep the wood in the bed & covered it with plastic to keep it close & dry)
After another trip to town for more 2x4s, they framed up the front & back walls....
Oh & sometime in between there, when it wasn't raining, I put on the first coat of paint on the 2 side walls....
The door will be in the center with opening windows on either side, in the back is another long opening for a window and the chicken door that will lead out into the closed in coop. They put up 4x4 posts in the back (also on pier blocks) for the closed in run & attached it to the coop with 4x6s across the top.
This is our pig, Miss Kitty, checking it out in the rain...
And here is Devon enjoying the mountain view after a long hard day of work....
Devon framed up the inside walls which will be our little foyer/storage area....
And then came the hard part....the ROOF...dun dun duuunn...
Before designing this coop Devon & I spent countless hours looking through all the coops on BYC & picking out the things we liked best and adding them to our design. When it came to the roof, we absoluetly loved the 2 with scooped roofs, so I modified
that idea to fit our coop. I decided to make the peak taller in the front (6ft off the ceiling) for extra storage space, and shorter (3ft off the ceiling) in the back (over the closed in run) so that it wouldn't shade the garden as much. Over all the roof is about 14ft long. The scoop is actually 3 seperate sections cut out of a piece of 1/2in plywood. I used Google Scketchup to design & caculate the scoop as well as each angle of the rafters, and yes every single rafter has 2 different angles (one on top & one on bottom) that are not whole angles, so it was a bit of a challenge! I also used it to measure between the top & bottom angles in order to get them as close to perfect as possible...I then drew out every angle on the 2x4s and the guys cut & re-cut till they all fit perfectly.Then they took (WET) 1x4s and attached them across the roof, leaving a space open for the skylights. Here are the guys working on the roof & our other dog Digi loungin & Miss Kitty helping out her daddy on the saw
Here is the roof from the front, it overhangs the front of the coop by 1 1/2 ft (that will be closed in for extra storage space) to
protect the door from the rain. The roof also overhangs along the sides 8in & we will attach gutters along the sides to catch rainwater for the chickens...
Devon had to cut the top slats with a jig saw to make them fit the swoop....
Then they attached the roofing material & the metal & skylight to the first 1/2...
And here is the first 1/2 of the roof with skylight...they still need to cut the metal straight across the bottom...
So as of yesterday (May 5th) this is what we have done so far...
We did put the slats across the other 1/2 of the roof yesterday everning (I even learned how to use the saw & helped by cutting all the 1x4s!) I also put the second coat of paint on the outside walls today & Devon framed in some of the windows...More pics to come soon!
We are disagreeing on if we need inside walls or not, Devon says no, I say it will make cleaning easier & cut down on drafts, not to mention it will look nicer, what do yall think?....also, any suggestions on flooring material?
I accidentally posted this twice (I kept getting a message saying there was a problem uploading it, and to try again) If someone could tell me how to delete this post & keep the other one (with the poll) open, I'd be very grateful!
Last edited: