Finally! Almost Done! THIS WEEKEND! Pics!

kestrel42

In the Brooder
8 Years
Mar 7, 2011
30
0
22
Portland, Oregon
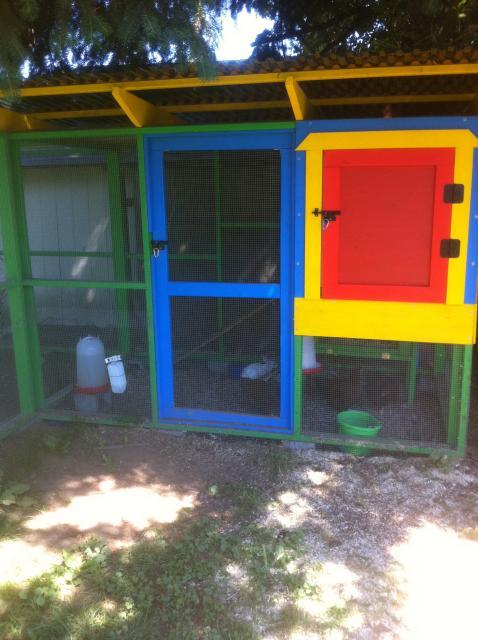
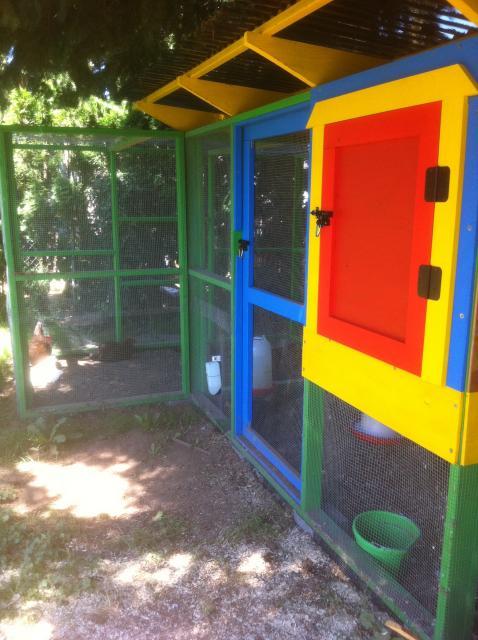
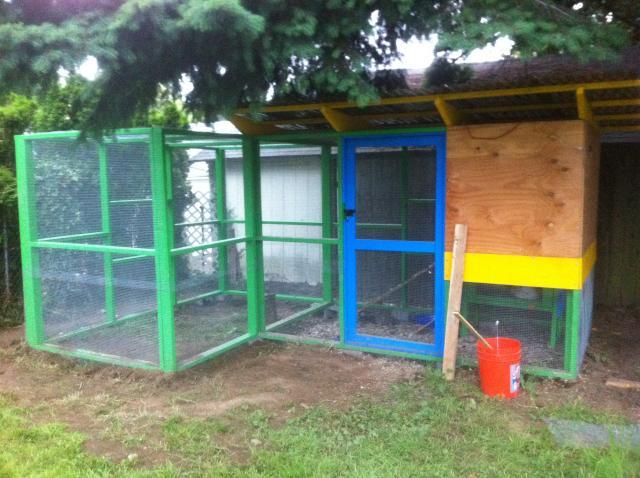
The 5 month odyssey is finally coming to a conclusion in the next couple of days! Last weekend I turned the plain sheet of plywood on the coop into a nice size external access door (I made it up as I went along, with a lot of help from pictures you all have shared). This weekend I have a nice start on the external nest box. I can't believe that before I started this project I had never used a circular saw, and here I am designing and building on the fly. Now I am so handy that my VERY handy friends are way impressed with what I've built (with a bit of help from the not-handy Hubby). I just gotta say "THANKS" to everyone here. Even when I haven't posted, I have learned so much from all of you. During this build process, a neighbor of mine who has chickens has come over a few times and seen my coop. I could tell she thought I was going a bit too far in building so carefully, enclosing everything with hardware cloth secured with poultry staples, digging in the cloth 18" down around the run, securing all the doors with latches and locks. Her coop was simply a light frame of wood with a bit of poultry wire zip-tied to it-so you can see how she would have thought mine was a bit much. However, in the time I've been building she has lost 5 chickens (two mature, three chicks) and all three ducks to some predator (coon I'd guess) and one of her remaining chicks lost half a wing as well. She mentioned the other day that maybe I had the right idea in building a secure coop...and I told her to come here for ideas, because I've learned so much from you all!

81934_img_0341.jpg

81934_img_0342.jpg
 
That's neat. Is that a lattice top are is there another top under that one? One more question is the other run the same coop? Is this just one coop? I'd like to see more pictures of the inside different angles. I might steal your plans. I like wide open coops I live in a very hot place. Thanks I know I asked more than one more question sorry.
 
I love the colors you chose! I have a similarly designed coop, although not as opened at the top. I really like how your run turns a corner. I'm wondering if I could make an add on like that...hmmm. Great job!
smile.png
 
My blog details the build in all it's phases, except for the new access door I built last weekend and the next box I'm working on, but I have a lot of pictures to show each phase of the build. The roof on the main run IS an open design, with hardware cloth and a roof of SunTuf panels to keep the rain/snow out. Even the coop itself is open at the top (w/ hardware cloth) for good ventilation, and the angle of the roof panels prevents downdrafts so they get the ventilation w/o getting too cold in the winter. The second run comes out at an angle (L-shape) and has only the hardware cloth roof, so the chickens (and bunny) can enjoy some sun if they want. The coop/run is located right under a big fir tree, so the main run is shaded all day and the sun run gets 2 hours of direct sunlight in the summer in the late morning but is bright and yet out of direct sun the rest of the day (it will get even more light in winter when the hazelnut tree to the south loses it's leaves). Yes, both runs are really one big run. We built the main run first with a temp hardware cloth cover on the left side, then when we had the time (and weather) to build the second we attached to the first to make one big run. This was my idea
smile.png
. The original plans call for a basic rectangular coop roughly 10'x6', but I wanted a larger coop. The area I have wasn't long enough to build a long 20'x6', so I just had to make it turn a corner-easy, just modified the dimensions of one wall that builds out of the existing 6', and the other three were the same as the first set. When I set the original coop up I used square blocks at the corners and in the middle of the long walls to set the frame on a foundation off the ground (to prevent wood rot). On the left side of the coop, though, I used two long blocks in anticipation of needing them to support the new run as well. So the blocks looked weird sticking out until I built the second part of the run, but it saved time having to add and level more blocks when we built the second part. If any of my explanation makes sense!

Maybe this older picture will help?
81934_img_0322.jpg
 
Quote:
OK thanks I forgot about looking at your BY page. Cool !! I want to build this exact cage to raise Quail in. I think the design would be ideal for Quail.
 

New posts New threads Active threads

Back
Top Bottom