Ran a temporary extension cord for power out to the coop. Moved the coop camera, chicken door and thermometer from the "test bench" into the coop!
Wireless camera doesn't work now.
.
X10 remote open/close chicken door doesn't work now either.
Thermometer is hung crooked.
The new "No Trespassing" sign looks great (IMHO).
SUPPER's READY! RATS!
After supper it's getting dark quick! Found a looooong Ethernet cable, wired the camera direct, nope still doesn't work
Chicken Door closed when I plugged it into the extension cord so I know I got power...mmm...found the problem
You see people my age wear progressive lenses (young talk for tri focal) glasses. I plugged the power into the camera in the audio port instead of the power port. Camera works now!
Changed the permissions so viewers can now pan & tilt the camera. http://66.249.232.196 Username: visitor, password: coop (works with FireFox browser, IE if Active-X is enabled).
Trouble shooting the chicken door and straightening the thermometer will have to wait till tomorrow
Cut the hole in the wall and temporary installed the chicken door.
Thermometer is now straight.
Still can't get the chicken door to open/close automatically. Exact same setup and extension cord that I used when it was on my "test bench". Puzzlement. I'm using a electrical receipt at the other end of the shop...distance limitations?
Got the box for the overhead light switch mounted.
Dark and cold out. Time to stop. I've got till the middle of May when the BOs arrive.
oh I love that your are logging your progress on here! I even got my mom interested by reading her your progress, i didn't think she was listening so i started reading it to myself and she said "well what happened next?" and she wanted to see your webcam so we are going to figure that out next
I secured he chick door to the studs and temporally installed the outside trim. I want to take of the trim off when I paint the coop. Then when I reinstalled the trim I'll caulk around it so rain water does not follow a siding groove down and leak back into the coop.
I don't know what automatic chicken door is the best. I decided on the one offered by automaticchickencoopdoor.com My only concern was how much I would have to customize the outside trim which was included with the door. Their installation video showed 1/2" plywood and my coop is 3/4" barn siding. No problem, trim was designed to fit varying thicknesses of siding.
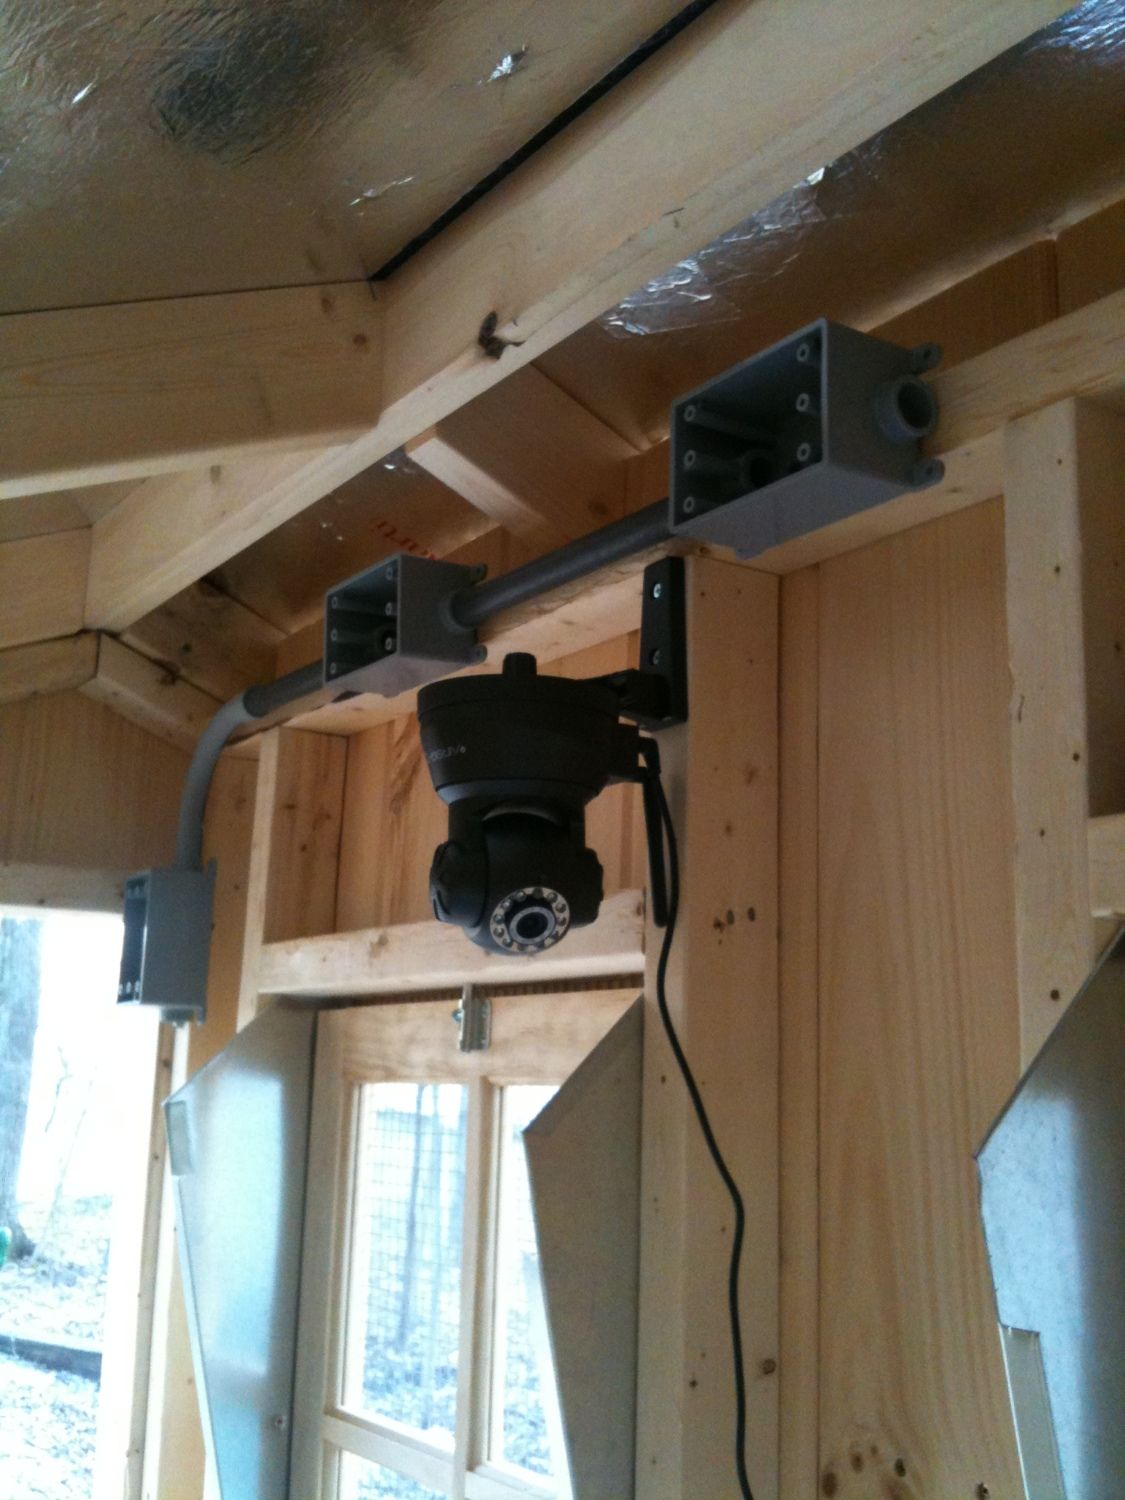
Then I moved on to the electrical. I decided to use PVC conduit to help prevent any of the chickens from becoming “Kentucky Fried”.
The gray box on the left will be the X10 light switch. I can control the lights from inside our house, let the computer control or manually flip them on/off.
Also from the left box a conduit will run down thru the floor. This will go back to my shop and will be the electrical feed for the coop.
The gray box above the window will one of the two coop light fixtures.
Gray box to the right of the camera will be a electrical receipt for the camera. I’m figuring higher the better, less chance the chickens can reach it to unplug surveillance for any great escape attempts.
The second light fixture above the other window. Then X10 electrical outlet to power the chicken door. I may put another outlet down further for a heated waterer, wide screen high definition flat screen TV or what ever else the ladies may require.
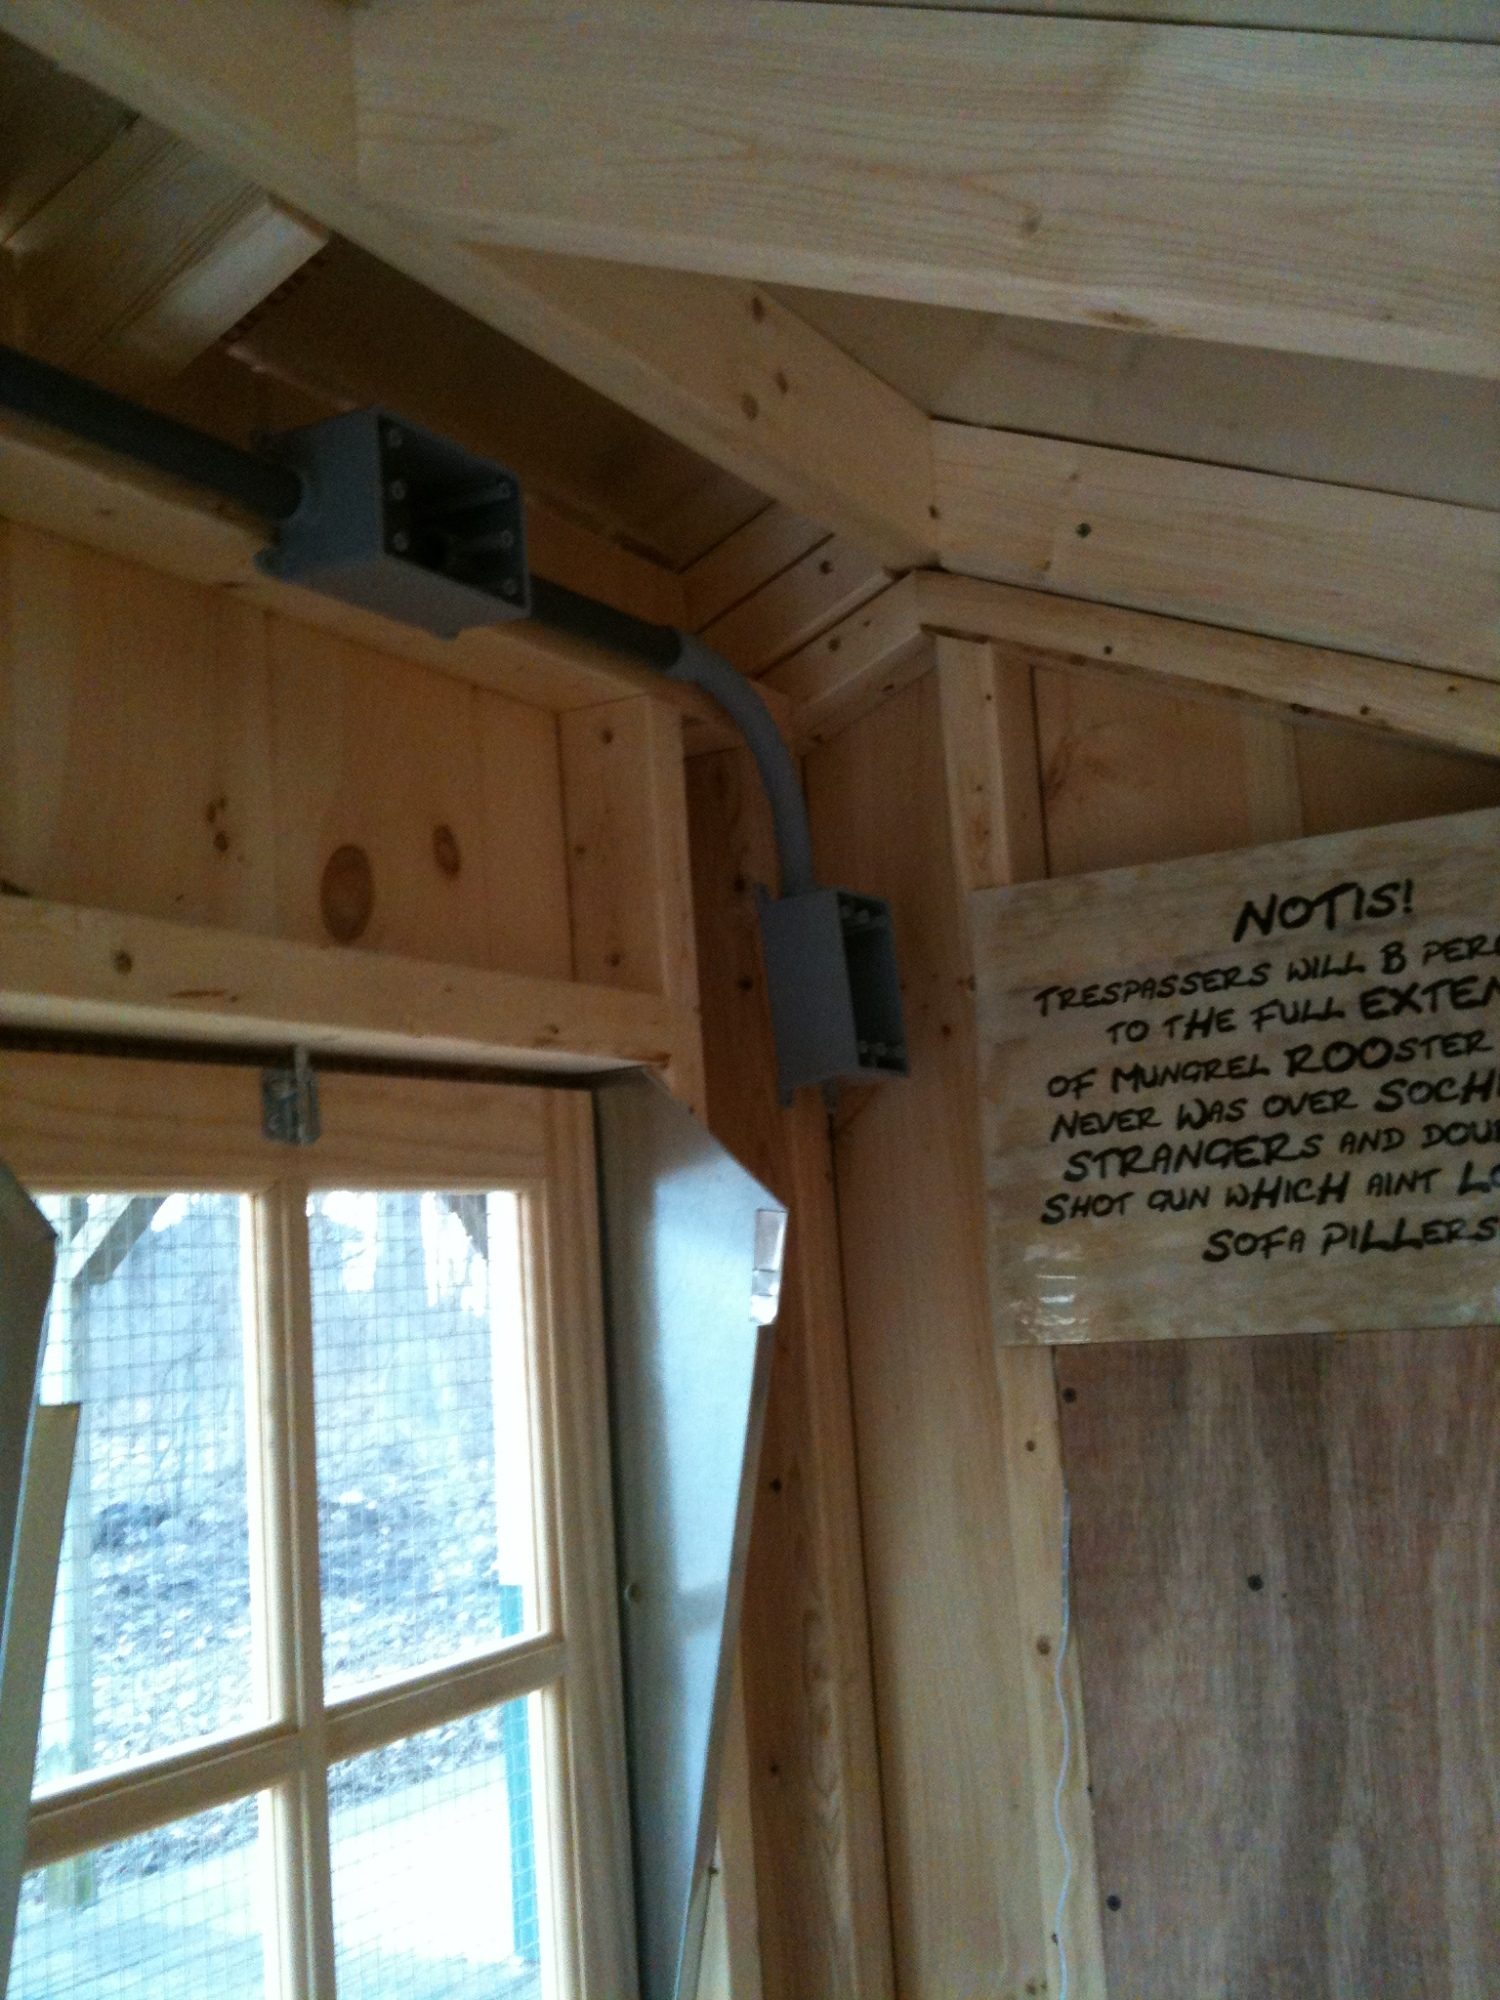
I've read in the chicken ranching business there are only 3 rules. Ventilation, ventilation and ventilation. Just above the electrical conduit you see a little outside light shining in? About a 1/4"” gap to allow fresh air. I can also open both front windows, back wall behind the roosting bars is a 4 foot by 8” screened vent that can be open/closed AND I added a roof ridge vent. Plus in warmer weather when drafts will not be as much as a problem the floor (under the roosting bars) opens up (screened) to allow more ventilation and let the chicken’s night business to fall on through.
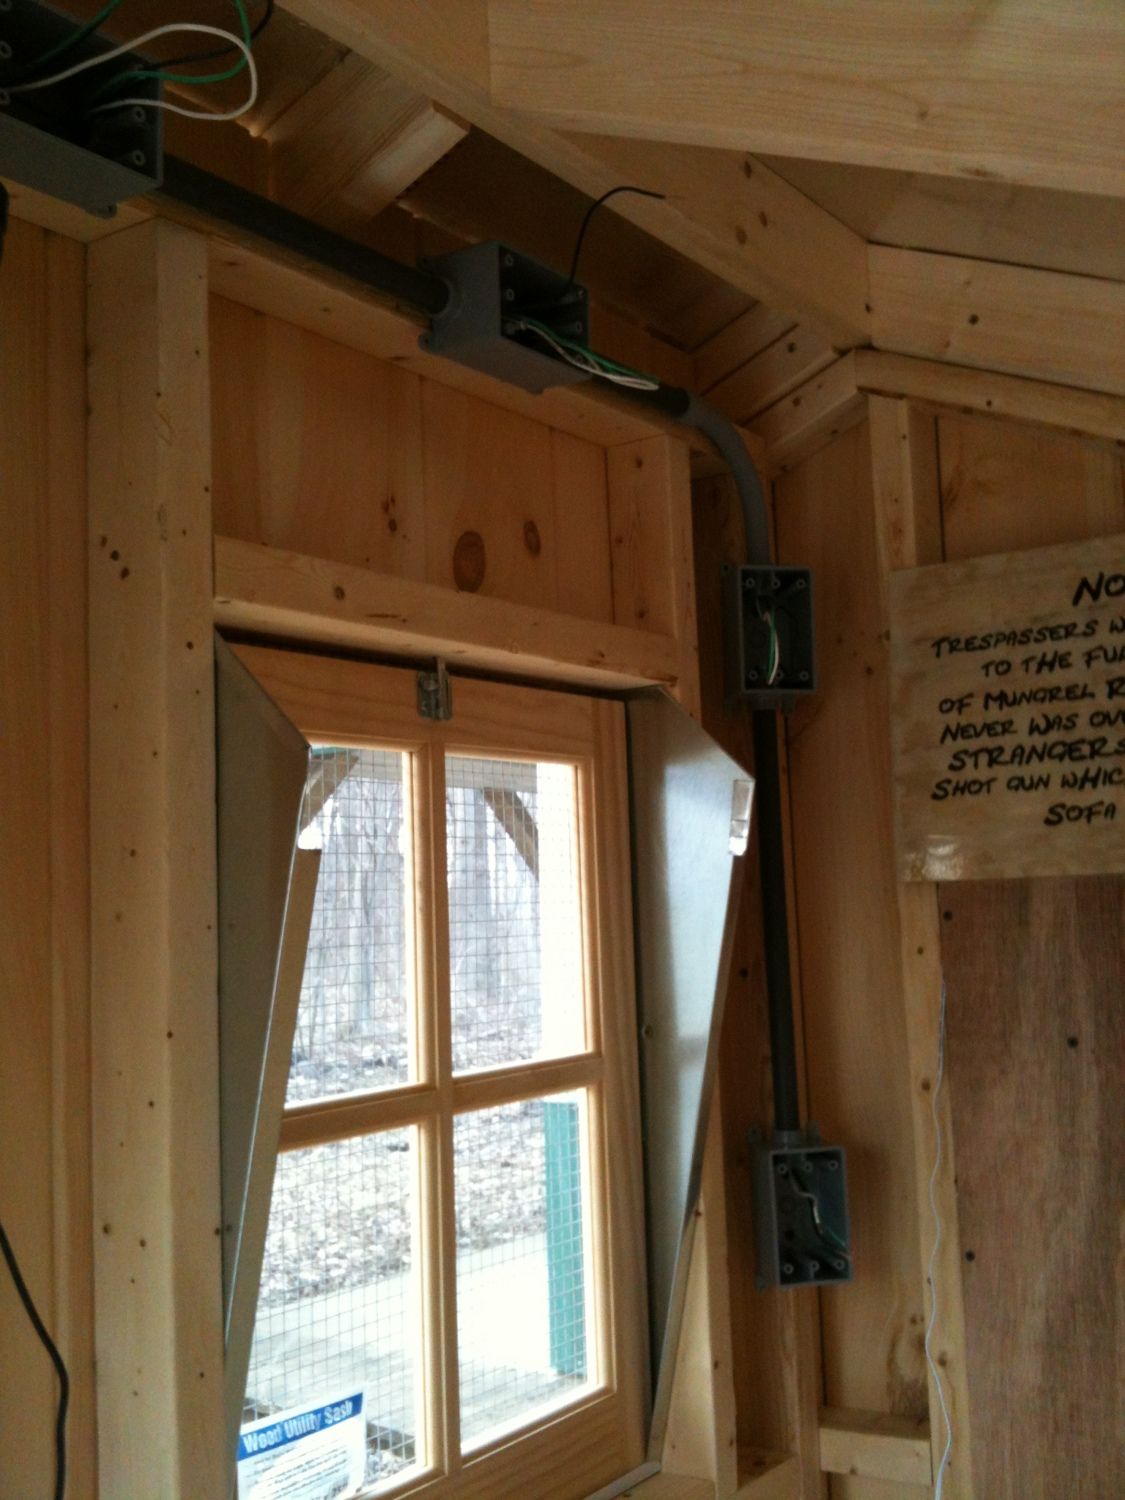
Tomorrow night I'll pull the wring in the conduit, wire in the electric receipts, light fixtures and light switch.
Then it's waiting for the ground to dry out so I can move the coop to it's final resting place.
Got the wiring pulled through. 2 circuits, one for the lights and the second for the receipts. Used 14 gage solid copper, largest draw will be the waterer heater.
I did add a second receipt in the corner. Mounted both of them at a 45 degree angle to make it easier on me.
The PVC boxes have "ears" on each of the 4 corners for mounting. I didn't use them. Instead I drilled two holes through the backs so I could mount them on the 1 1/2" of the studs.
1/2" PVC conduit was left over from another project, thought I had some receipts laying around too, couldn't find them. Hate to buy stuff if I don't need to.
Weatherman is calling for dry and "warm" temperatures the rest of the week. If the ground drys out then perhaps I can get the coop winched back where it belongs this Saturday.
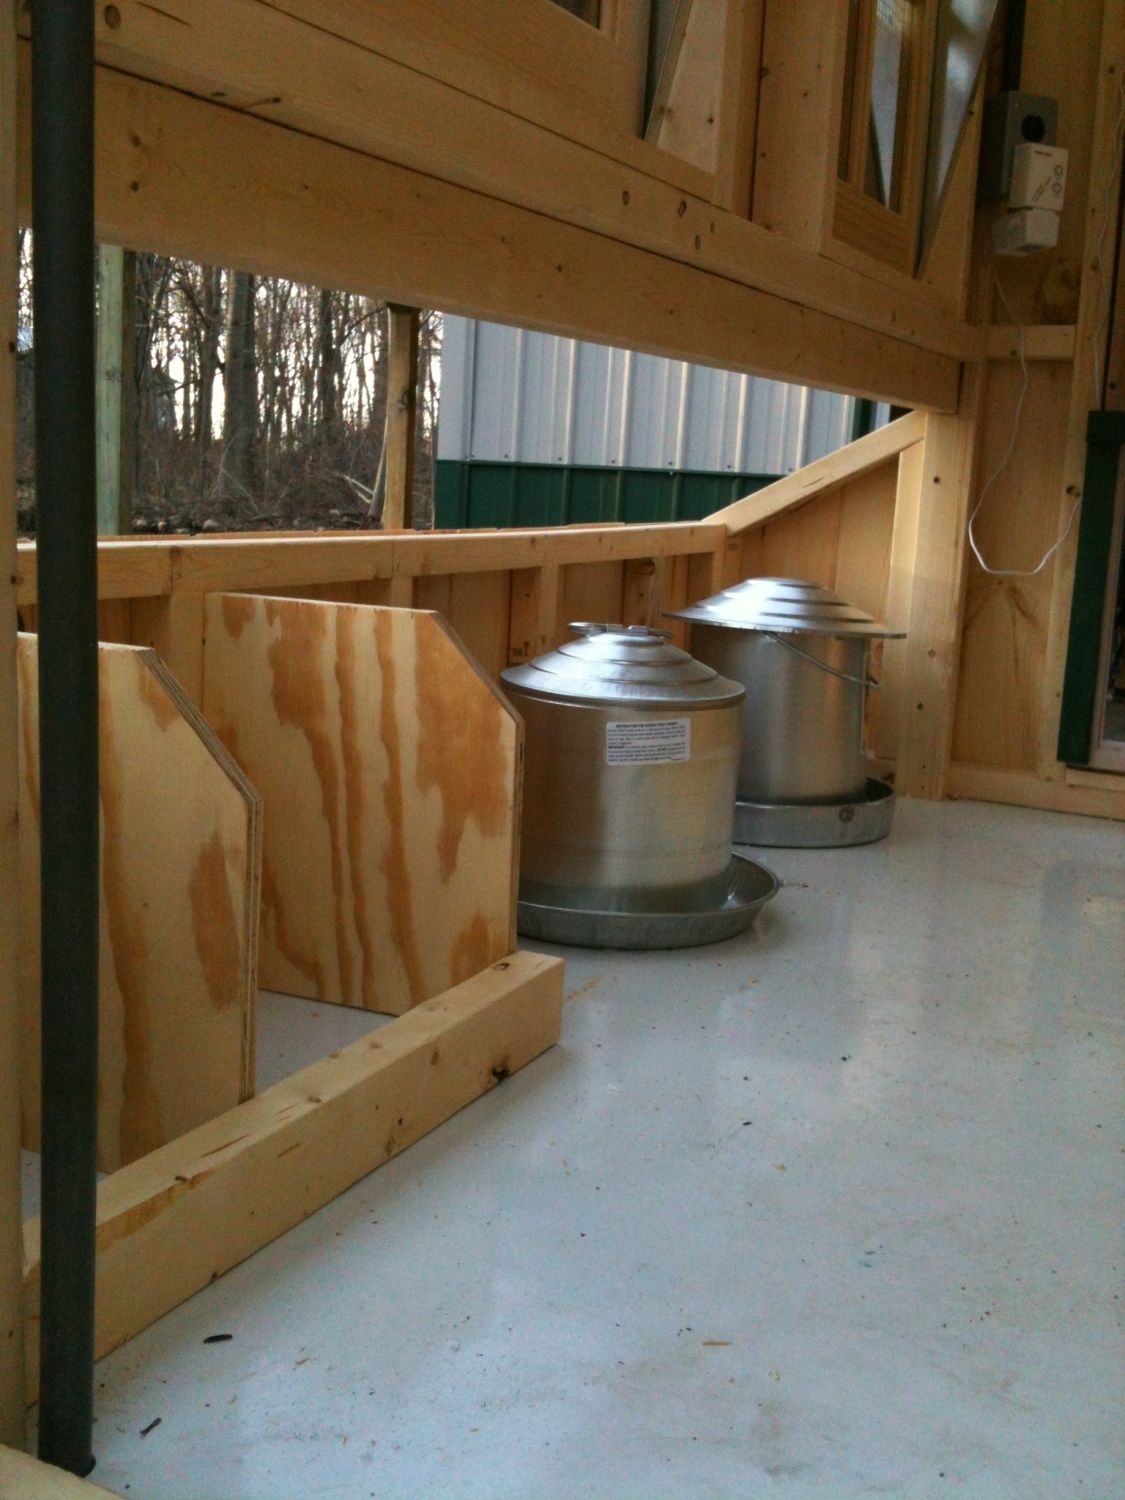
Removed the "extra" 4 next boxes. Now I can move the feeder and waterer out of the main coop and have access to them from the nesting box access door. Now 2 nesting boxes left are in the low traffic area of the coop, by the peole door.
Next project is to figure out how to make a wood feeder that is installed semi-permanently and can be filled by just lifting the nesting box lid.
Unfornutately the waterer does not fit though the nesting box lid. But it does allow me to slide it over to the people door. Maybe home made waterer with a invert easy to exchange rubber bladder....


 What's this on her keel bone - and what should I do about it?


 Vent gleet/prolapse/abscess? What am I missing