I used a non-working console TV skeleton for my foundation. 1/4" tempered glass for the front, 1/4" insulation sheets wrapped in tablecloth for the inside walls, half of an interior door packed with insulation for the back door which is hinged on one side and closes with pressure latches on the other. I added a piece of tubing leading form outside the bator down into the water reservoir so I can add water without opening the bator door. There is heat tape lining the bottom and 2 100 watt light bulbs as supplemental heat. The light bulbs are wired to one another and then to a dimmer switch which I have had good luck with. I will, however, be adding a thermostat for next hatching season. There is a small personal fan next to the light bulbs. I have 2 large bricks in the bottom along with 2 large bottles of water as heat sinks.
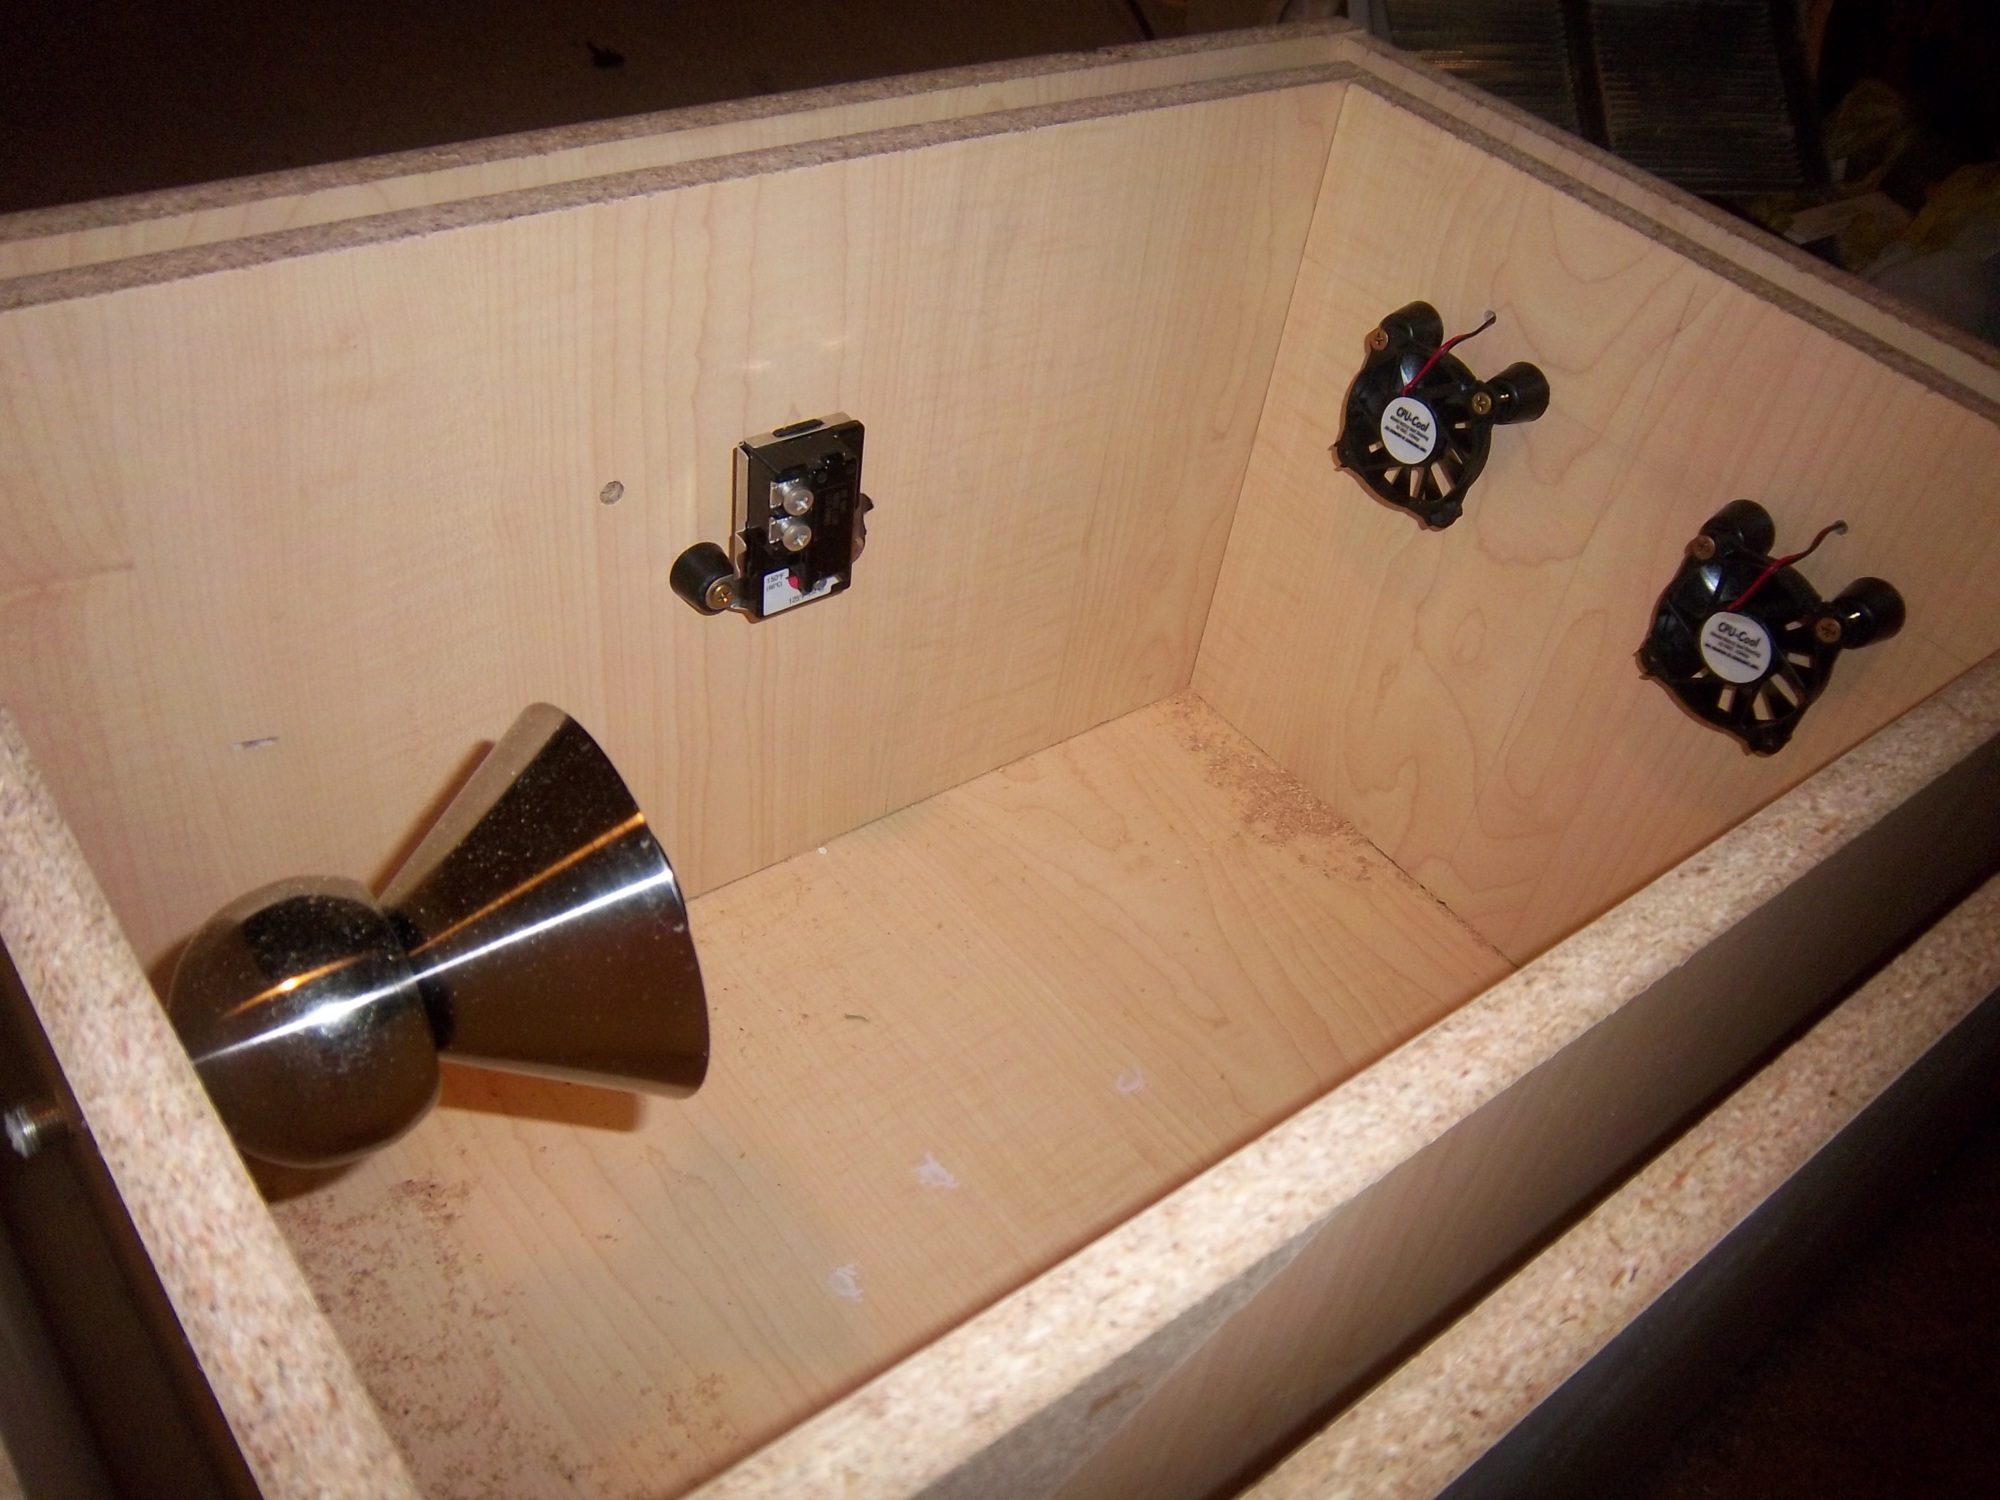
My husband and I ventured into DIY Incubator territory when we received 2 Khaki Campbell eggs that were incubated most of the way. We were told that we could finish their incubation with a heat lamp but my husband and I were really unsatisfied with the temperature fluctuations. We ended up throwing together an incubator out of some cheap cull lumber from home depot; using the bulb, water heater thermostat, and cpu fan combo. One egg didn't make it but the other survived, despite coming from a cracked egg (we had to band-aid it together).
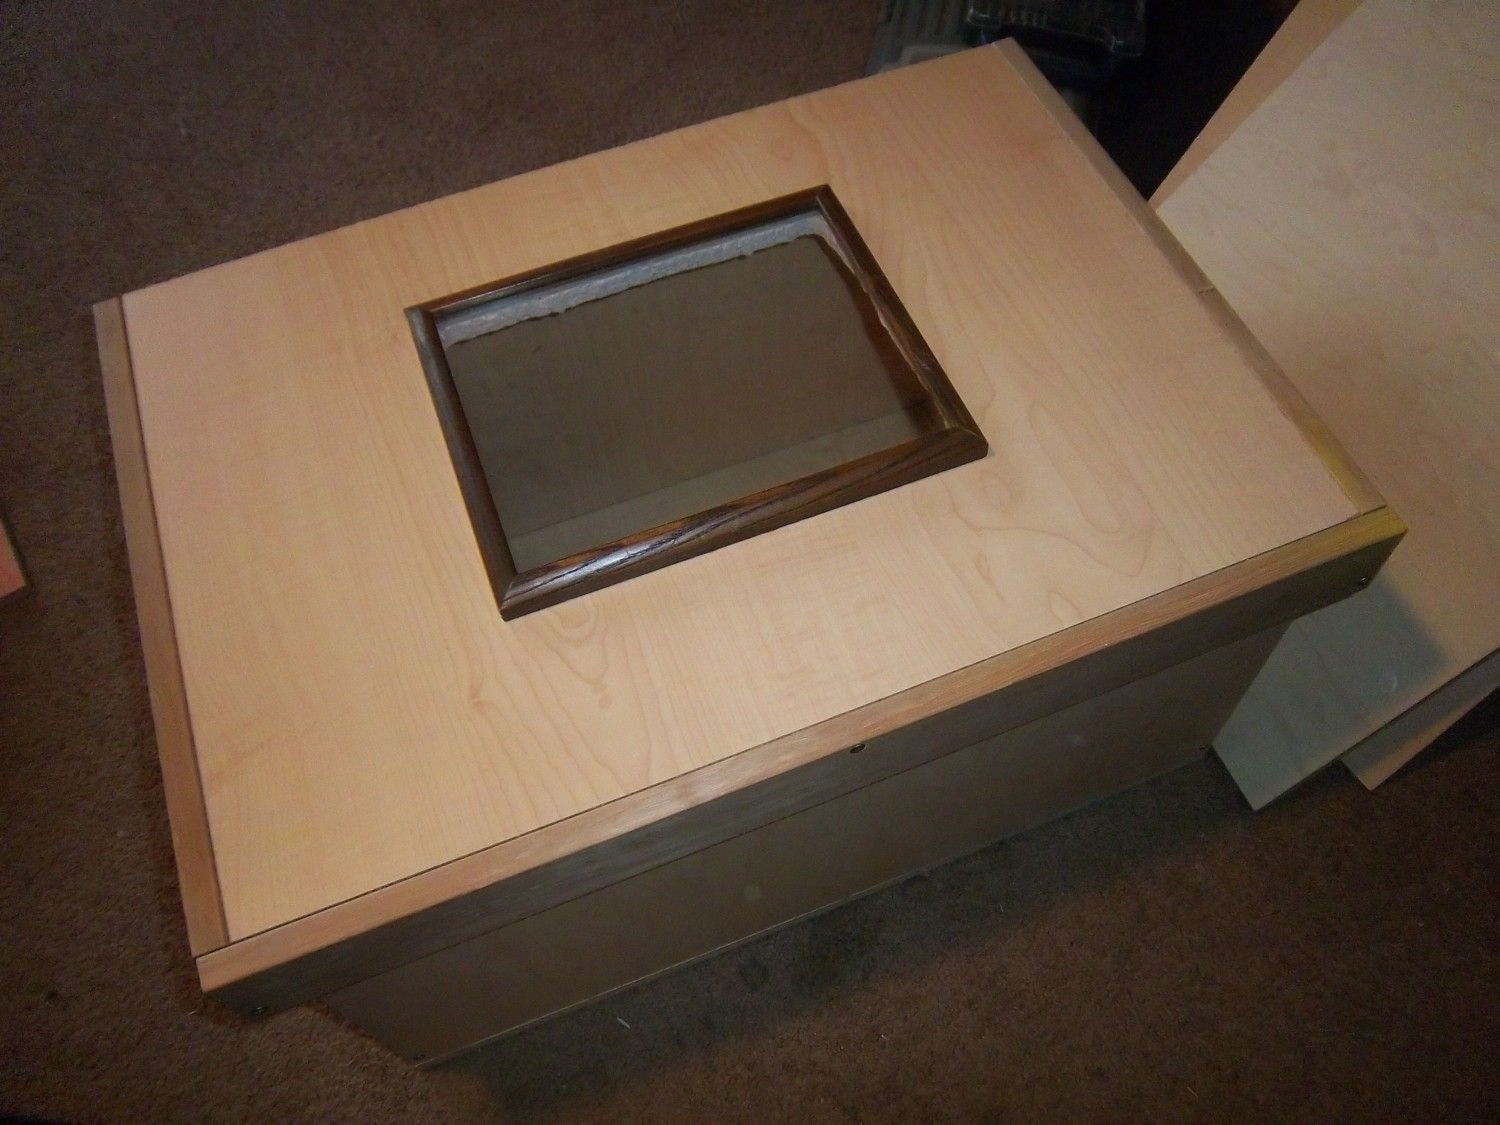
We dubbed the duckling Baby (creative, I know) and the incubator Egg Box 360. Here are some pics -
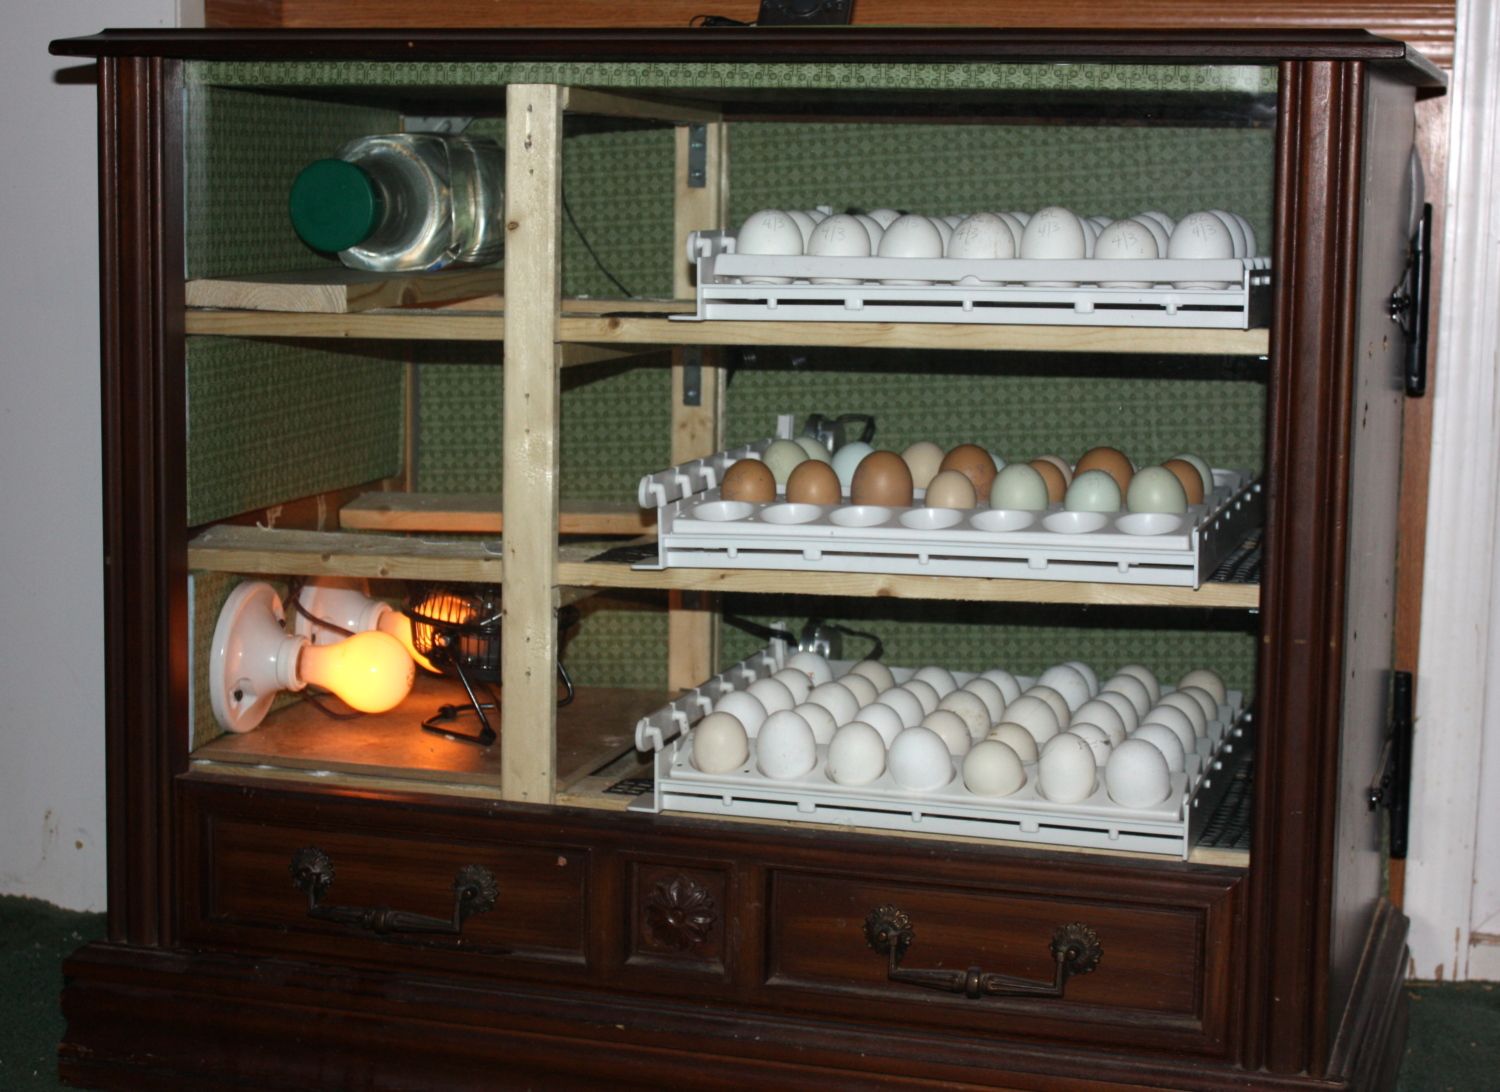
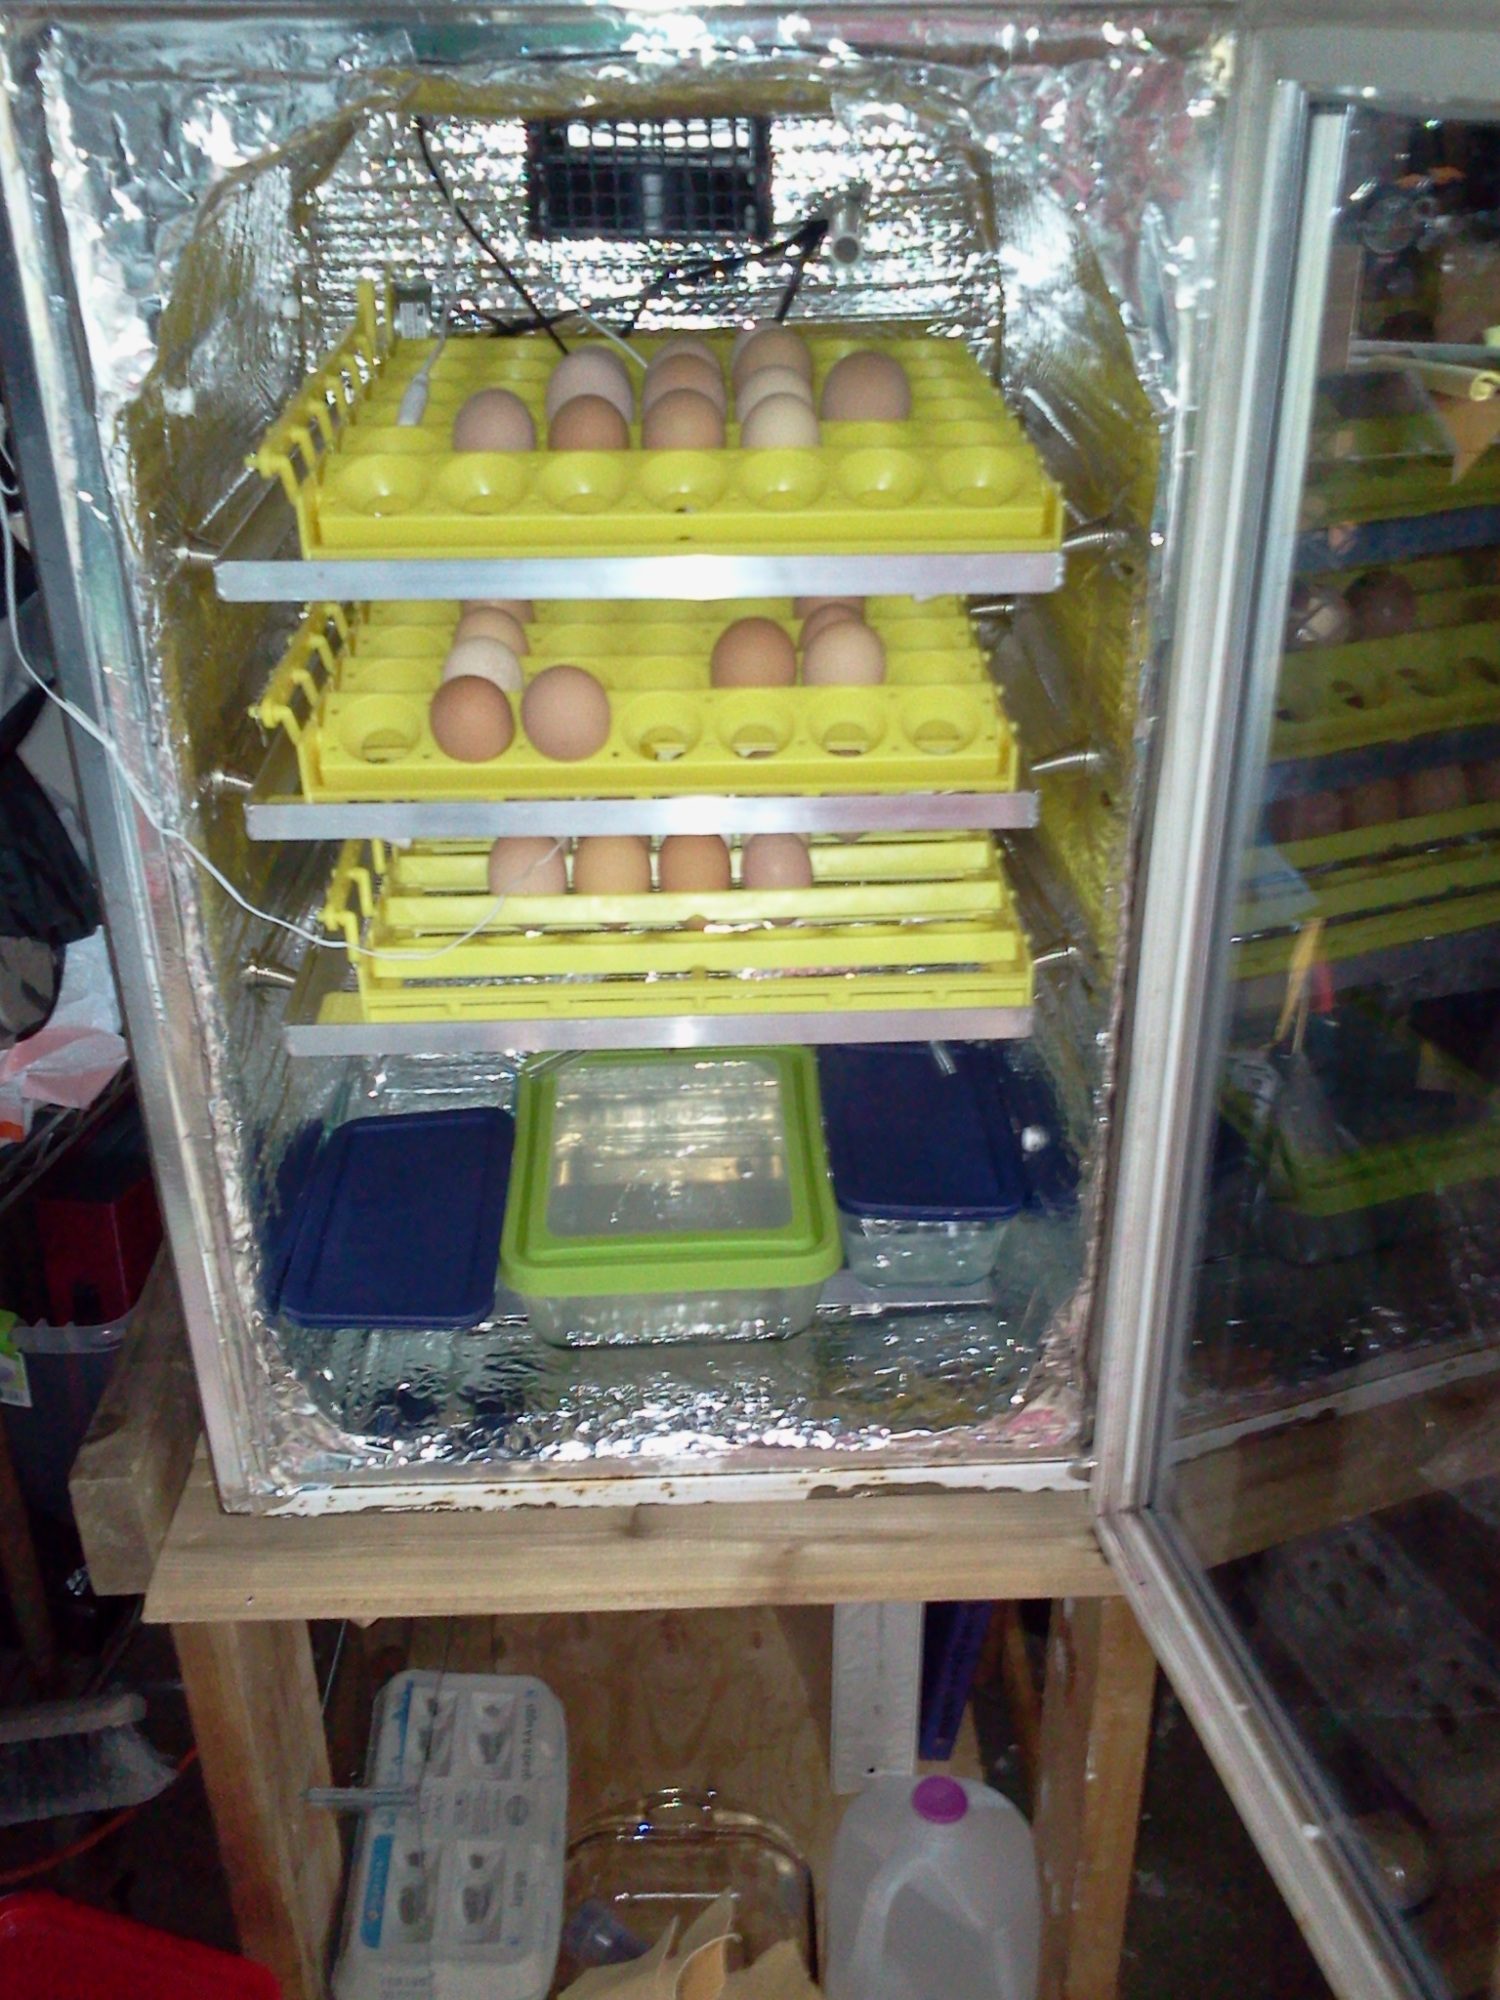
This is my wine fridge incubator. It holds 3 standard auto turners at 42 eggs each so capable of 126 eggs. I have 35 RIR eggs in there now as a test hatch and after candling at 11 days I have about 75% with action going on. It holds temp and humidity very well and I have outside fill tubes to fill water resevoirs at bottom from outside without opening door. I am going to add stronger shelf holders as with the larger eggs I have found the existing holders sagging some. I have 3" tall plexi and glass walls that go around the shelfs and screen on the bottom for lockdown and the hatching once I remove the turners.
I did not for a moment consider a store-bought incubator. Once I browsed through the home-made incubators, I was absolutely determined to build my own. Someone mentioned the ugly styrofoam boxes. Those ugly styrofoam incubators have successfully hatched millions of eggs. They just weren't for me.
Mine is made out of a discarded cabinet. It is made in such a way that I can partially dismantle it to enable me to change components. It would take a little time but, I might take it apart to take some photos of my build. The unusual (ugly?) parts of my incubator, like my turner and air ducts, are my favorite parts. My build was not especially cheap ($120.00). But, for an incubator this size, I would have paid at least triple the costs.
I used two 100 watt halogen spots for heat sources. Initially, I considered a water-heater thermostat for it's super low price, but went with a wafer-type for it's accuracy. For air circulation, I bought two of these $10.00 fans http://www.surpluscenter.com/item.asp?item=16-1365&catname=electric Could have maybe heated with one bulb and circulated air with one fan. I just liked the idea of having another component for backup in case of failure.
My box is insulated very well and where there is glass, it's doubled. I wanted more than one area of glass so my grandchildren could witness the whole process. Use an easy-to-clean surface in your egg-holding area.
Thank you, it is a lot more pleasing to the eye than I had originally planned. I tried to find an old ice chest first but no thrift/second hand stores had any, so I went with the cull lumber. We did a box within a box so that the wiring wouldn't be exposed to the eggs/chicks or the exterior of the incubator. The internal configuration of the light and the thermostat are actually a bit different than pictured. We had to adjust the two closer together to have it cycle on and off quickly enough to maintain a steady temperature. The light is now on a bendable arm and the thermostat's back faces outward toward the light. Initially this made adjusting the thermostat's dial difficult, having to unscrew it from the wall every time we needed to change it. We solved that problem by adding a capped hole in the incubator's walls so that it was easy to adjust the dial with a screw driver without lifting the lid and unscrewing the thermostat from the box.
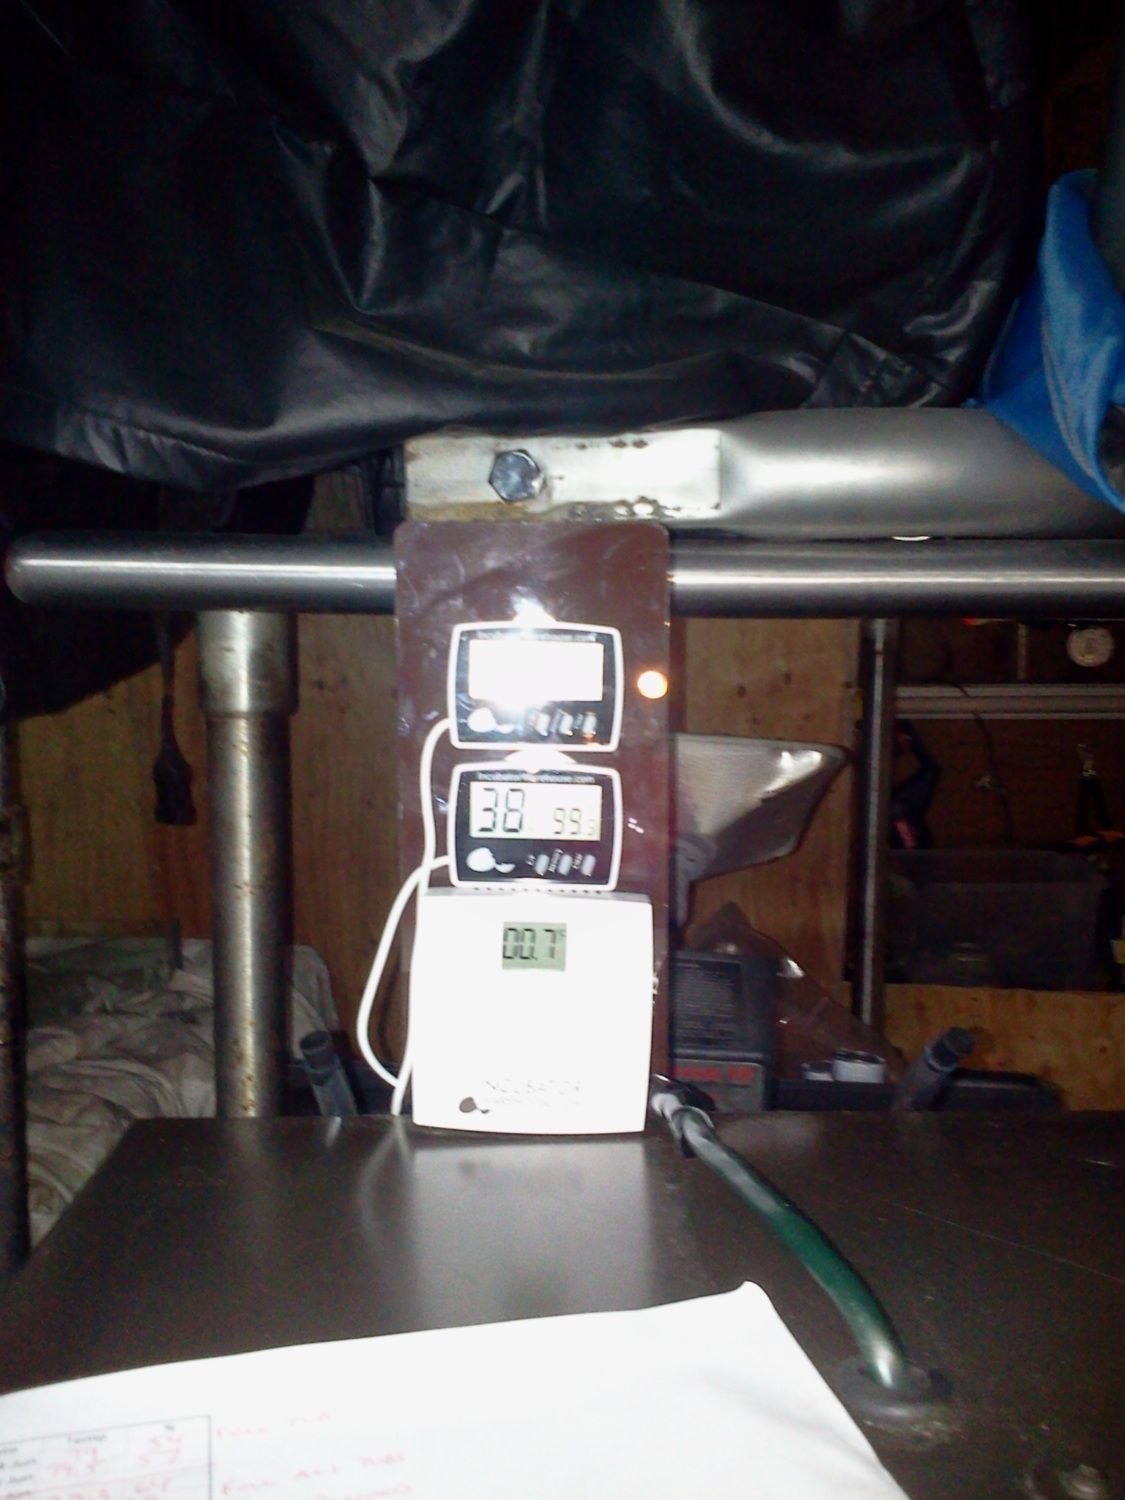
Before we made all of these adjustments the temperature cycle was erratic at best, with an inconsistent 10 minute cycle between on and off, with a difference of 6-8 degrees between (not acceptable). After the changes we have managed to keep target temperatures perfectly, with on/off cycling at 30 seconds.
I appreciate your offer very much and should anything go wrong (again) I will ask your advice. It took a lot of trial and error to get it to work as it is now. When we first built it we were very worried that something had been left out of the how to-s, everyone else's DIY incubator seemed to be running on some voodoo that ours didn't possess. The biggest key in the end it seemed was the proximity of the light to the waterheater's waifer and a heat sink (a large jar of water in this case) directly underneath the thermostat.
Thank you, it is a lot more pleasing to the eye than I had originally planned. I tried to find an old ice chest first but no thrift/second hand stores had any, so I went with the cull lumber. We did a box within a box so that the wiring wouldn't be exposed to the eggs/chicks or the exterior of the incubator. The internal configuration of the light and the thermostat are actually a bit different than pictured. We had to adjust the two closer together to have it cycle on and off quickly enough to maintain a steady temperature. The light is now on a bendable arm and the thermostat's back faces outward toward the light. Initially this made adjusting the thermostat's dial difficult, having to unscrew it from the wall every time we needed to change it. We solved that problem by adding a capped hole in the incubator's walls so that it was easy to adjust the dial with a screw driver without lifting the lid and unscrewing the thermostat from the box.
Before we made all of these adjustments the temperature cycle was erratic at best, with an inconsistent 10 minute cycle between on and off, with a difference of 6-8 degrees between (not acceptable). After the changes we have managed to keep target temperatures perfectly, with on/off cycling at 30 seconds.
I appreciate your offer very much and should anything go wrong (again) I will ask your advice. It took a lot of trial and error to get it to work as it is now. When we first built it we were very worried that something had been left out of the how to-s, everyone else's DIY incubator seemed to be running on some voodoo that ours didn't possess. The biggest key in the end it seemed was the proximity of the light to the waterheater's waifer and a heat sink (a large jar of water in this case) directly underneath the thermostat.
Thank you for replying, I had the same problem about 2 years ago, when I first tried my hand at building a fridge incubator. It looked really bad, and I just really didn't know what to do. So I scrapped the idea, and went to a cooler. The cooler incubator worked great, but it must have possessed the incubator voodoo, because after I see the old pictures of it now, I realize that the placement of the thermostat goes against everything I swear by today.
Good Luck with your incubator, and I hope you get great hatches out of it!
") Good job!
Good job!