- Thread starter
- #11
Tried to post this last night and my computer kept crashing. Hopefully a night's rest has fixed it.
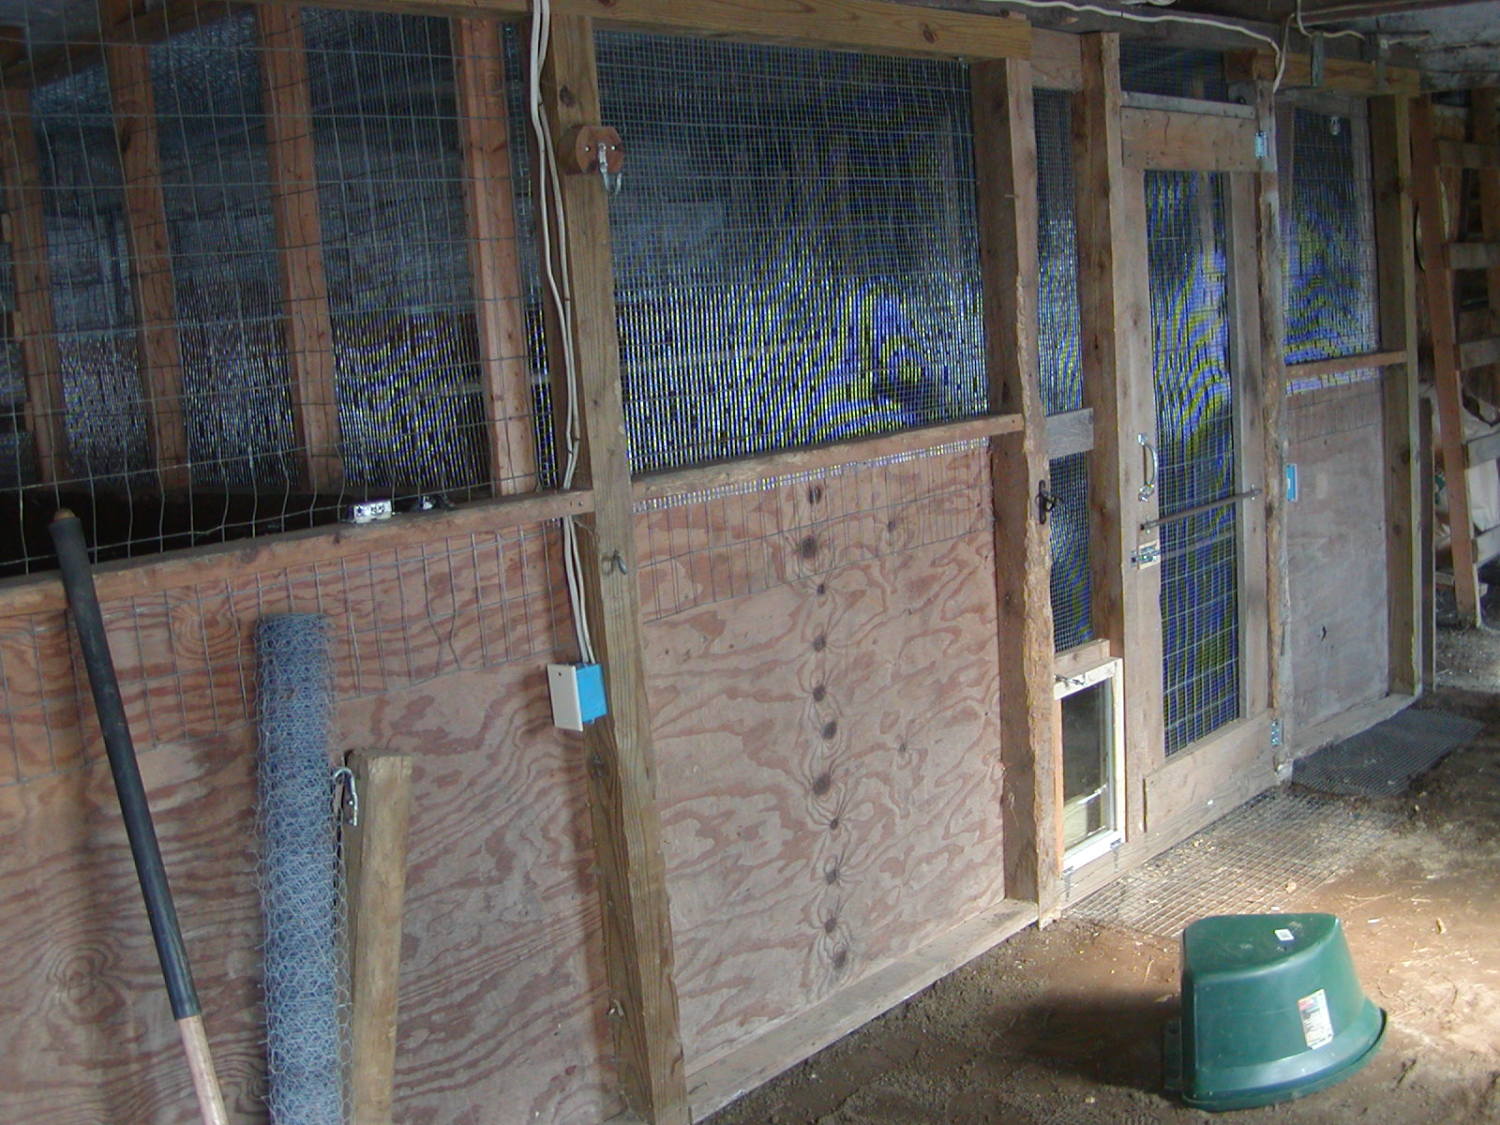
All done except the nest boxes (they'll go on the front left wall) but the girls don't need them for another 4 or 5 months. I'm good as long as predators don't start carrying Phillips head screw drivers.
First - the mantra (which I needed to repeat to my OCD self on occasion):
"It is a chicken coop converted from a beat up old horse stall inside an old, OLD barn.
The chickens won't know all the other chickens live at the Ritz.
The neighbors won't look over and call a realtor."
OK, with that in mind, here it is:
The coop goes from the post on the left with the outlet to the post on the right by the ladder. 12' wide, 9.5' deep (if you ignore the back wall that seriously leans in). I found the grain feeder I took out to be a great stool") .
.

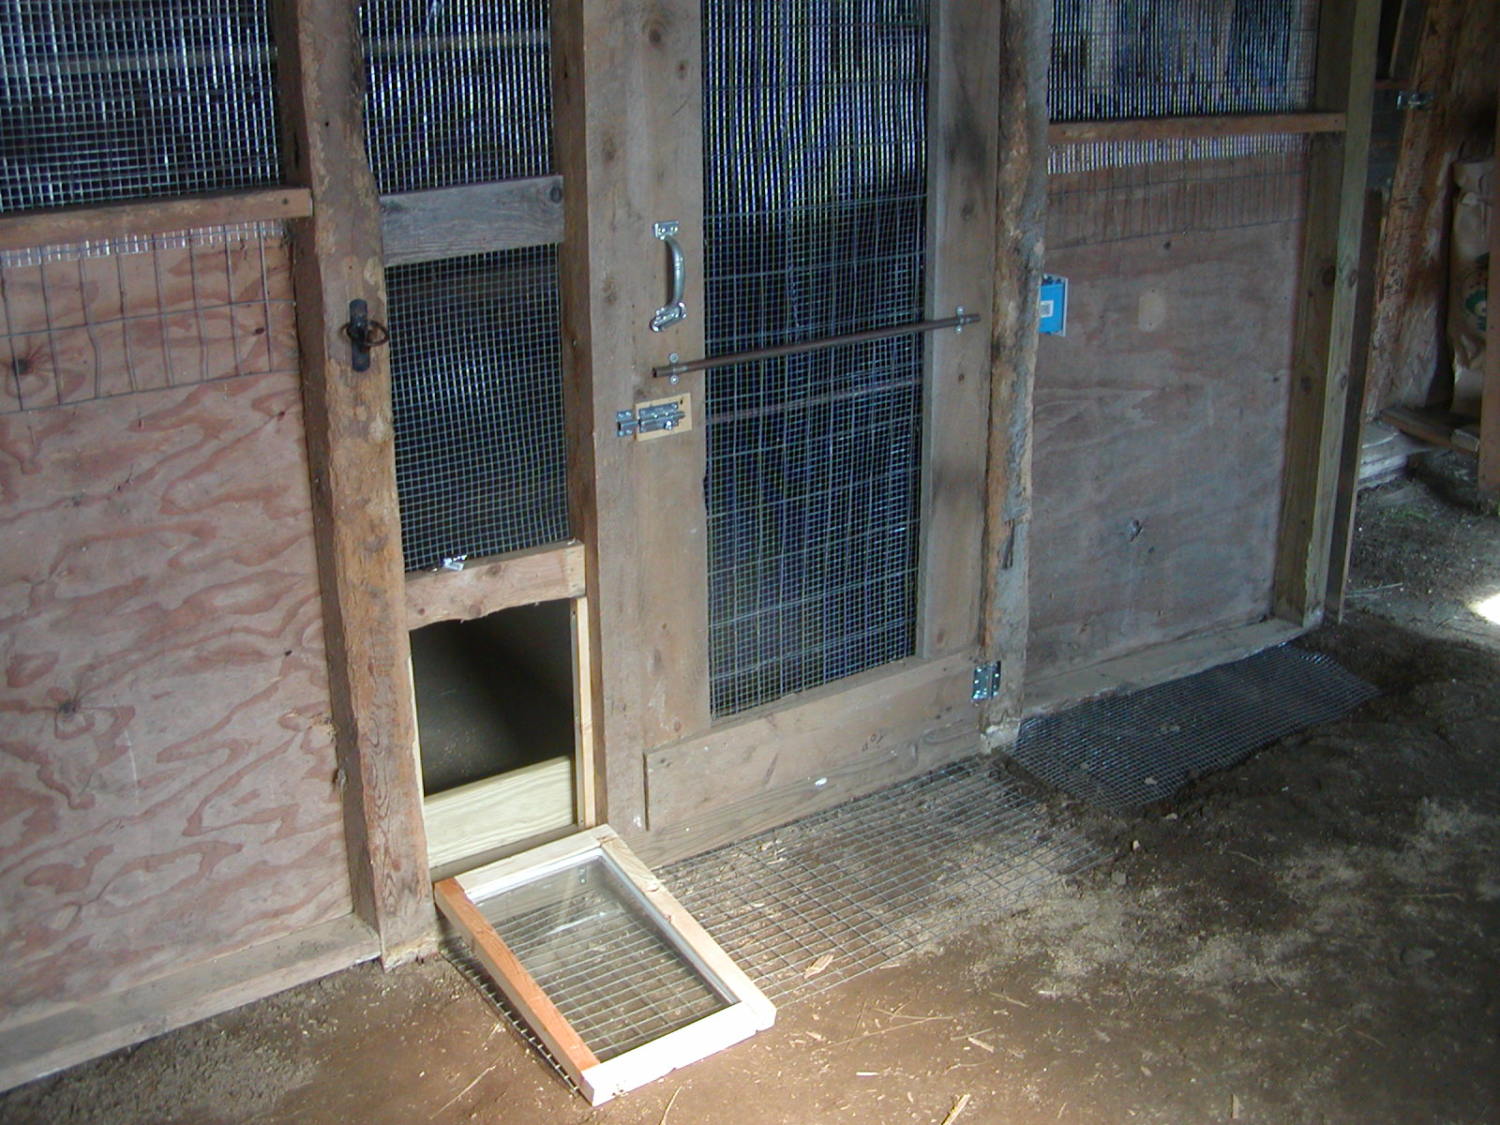
I need to put a couple of slats on their glass chicken door, I doubt they want to slide down it.
Or if they do, they probably don't want to try to slide UP it.
It was FREE - the prior owners of the house apparently ordered a number of insulated window "inserts" that they never used.
Since they don't match ANY window in the house, I figure they were meant as fixed windows rather than 'repair parts'.
I just needed to make a wooden frame for it. My chickens have a REAL insulated glass door with a brass catch (
the only 'fancy' things in the place ). The hasp is brass only because they didn't have a plain nickle one.
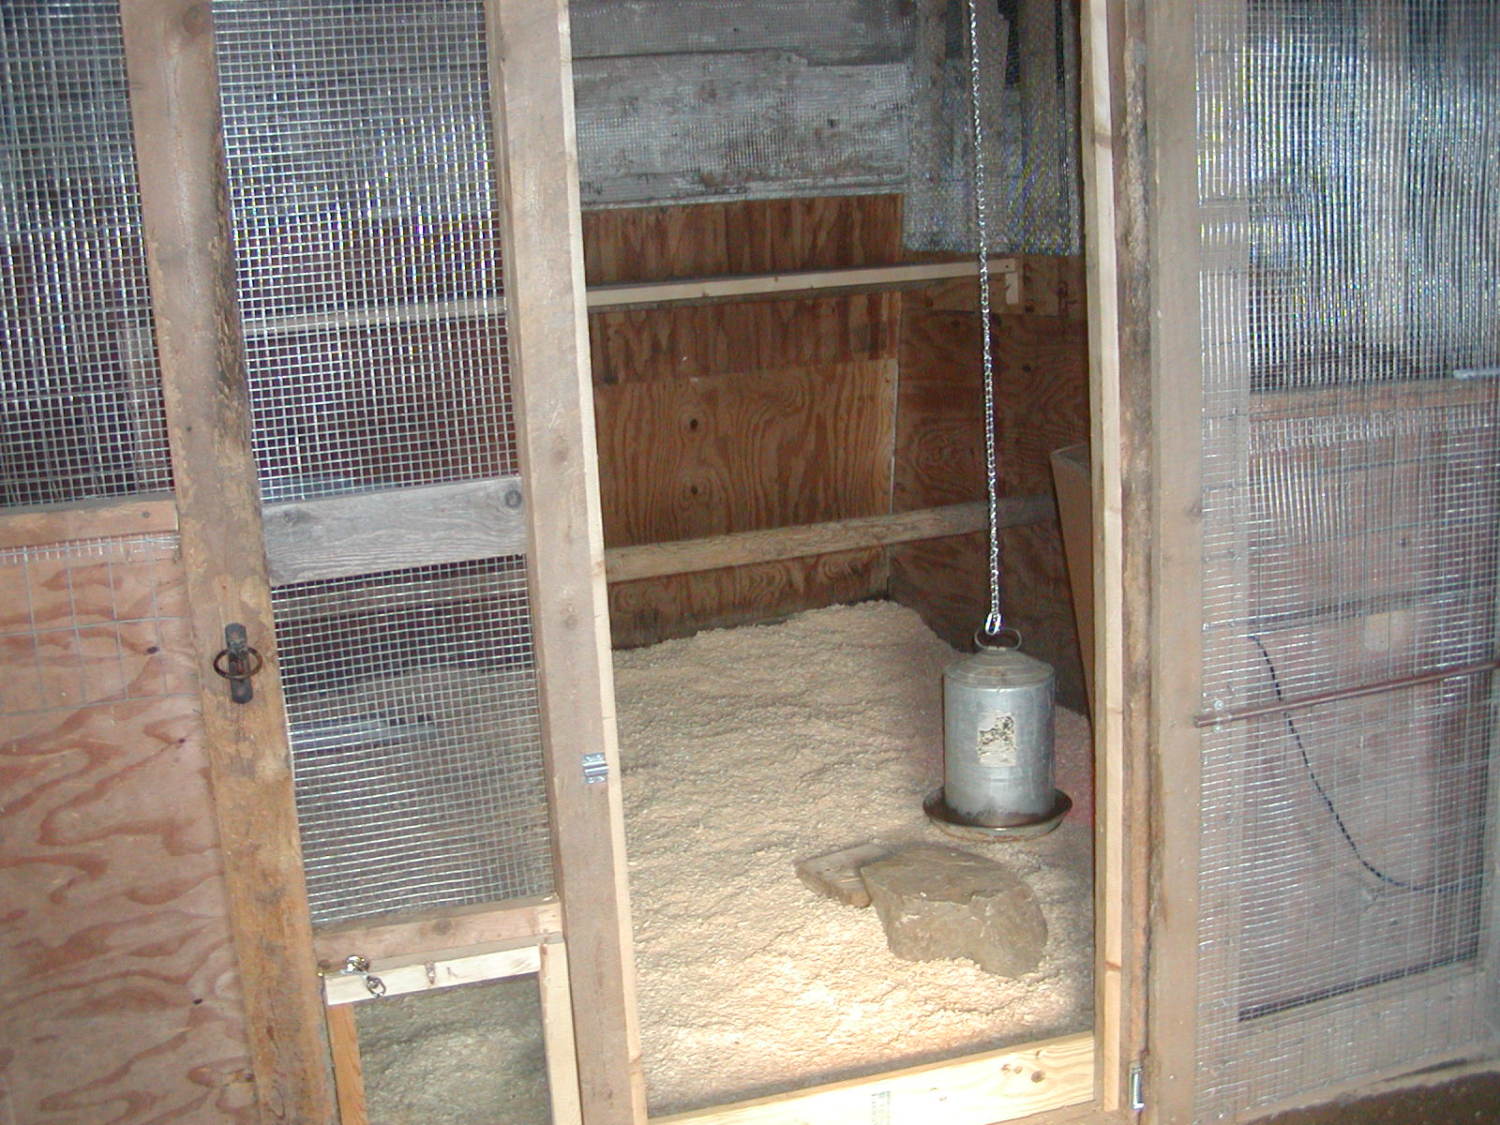
The board inside the chicken door is for deep litter.
[computer crashed - creating as a text file to cut and paste into the forum so I don't keep losing it!!]
I also found a 4" slide bolt at the co-op that has a hole in the end to keep it closed. I'm using a carabiner.
Can't move the door 1/4" now! I'll find another use for the hasp that didn't hold the door tight.
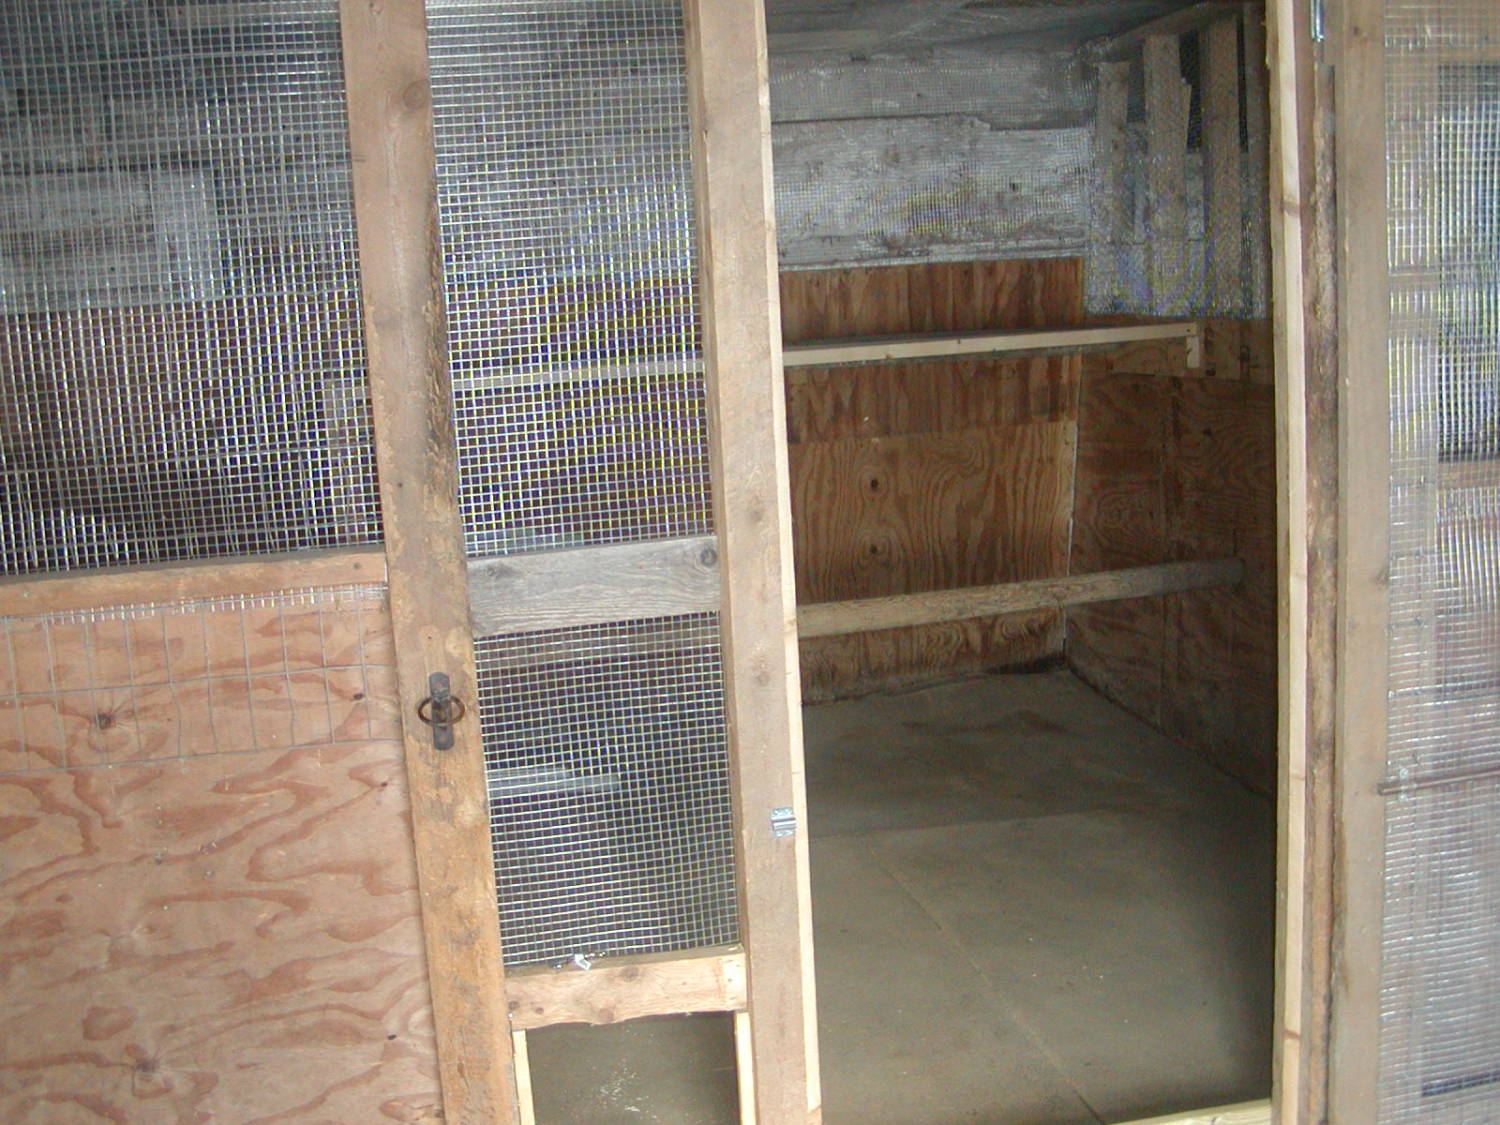
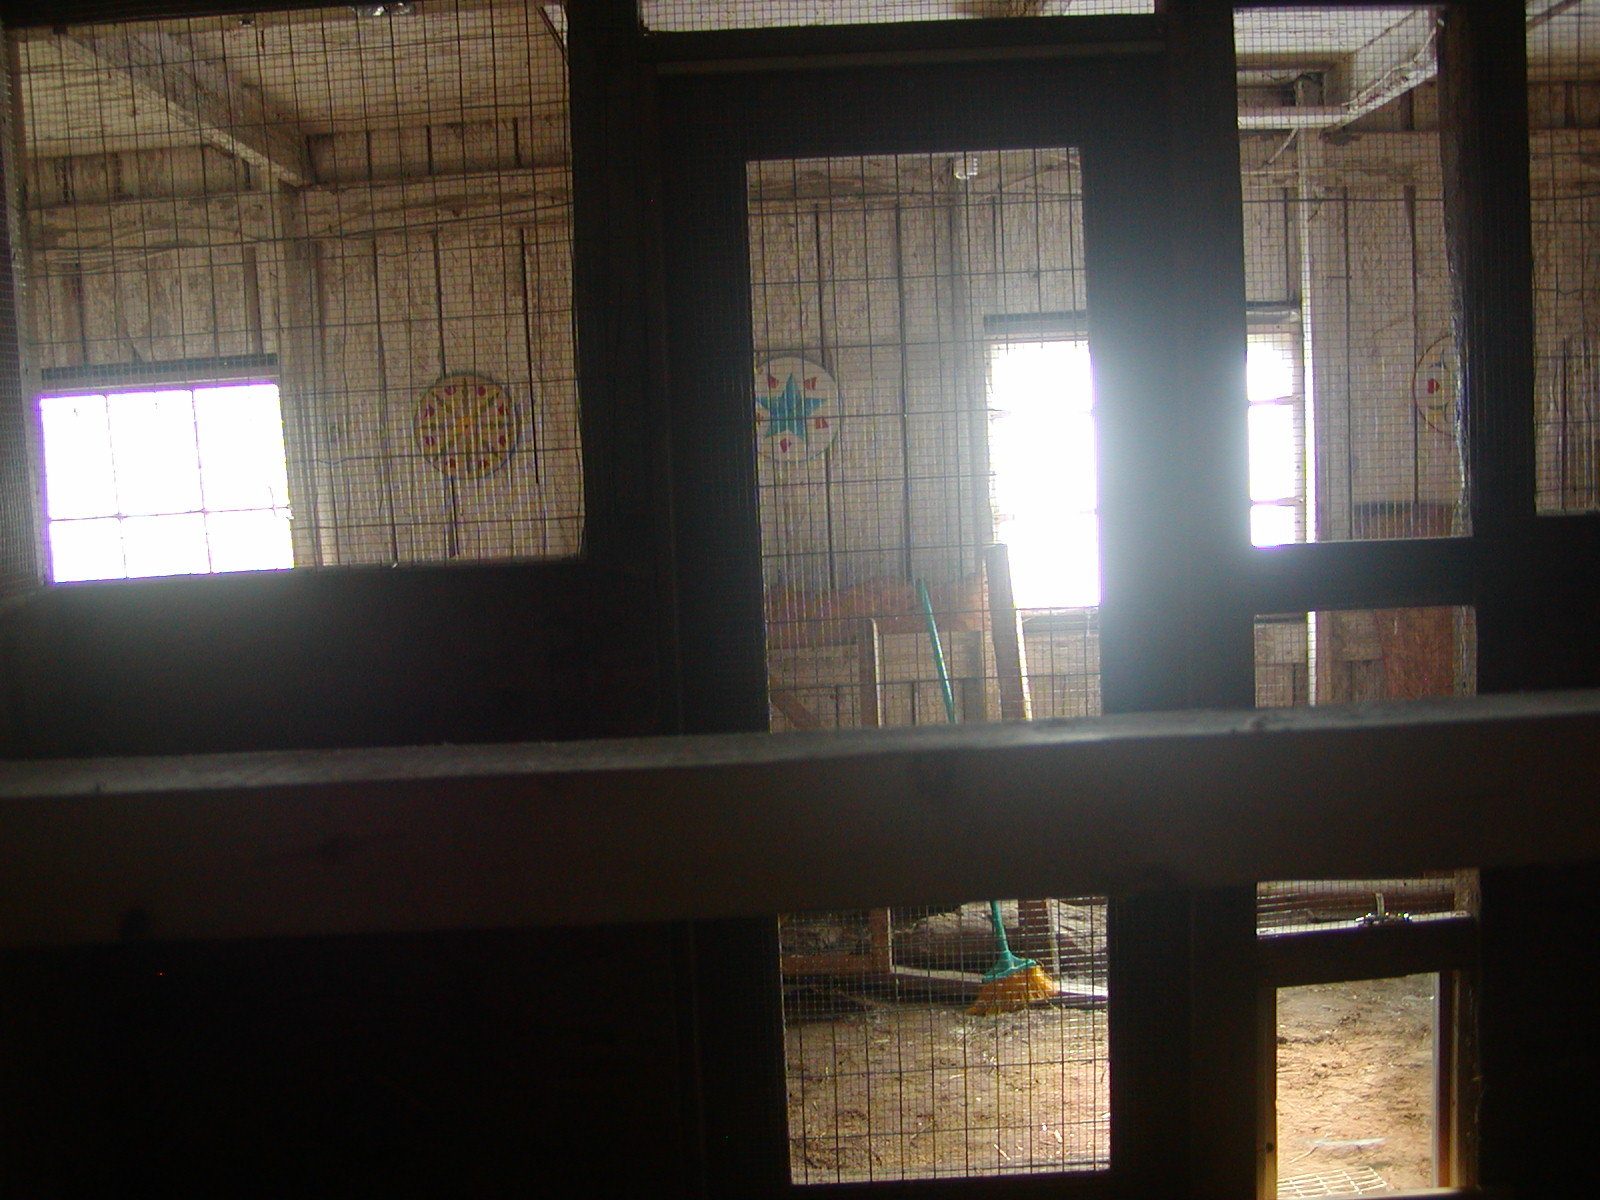
There is hardware cloth on the left of the door as well, I just hadn't covered the rest yet.
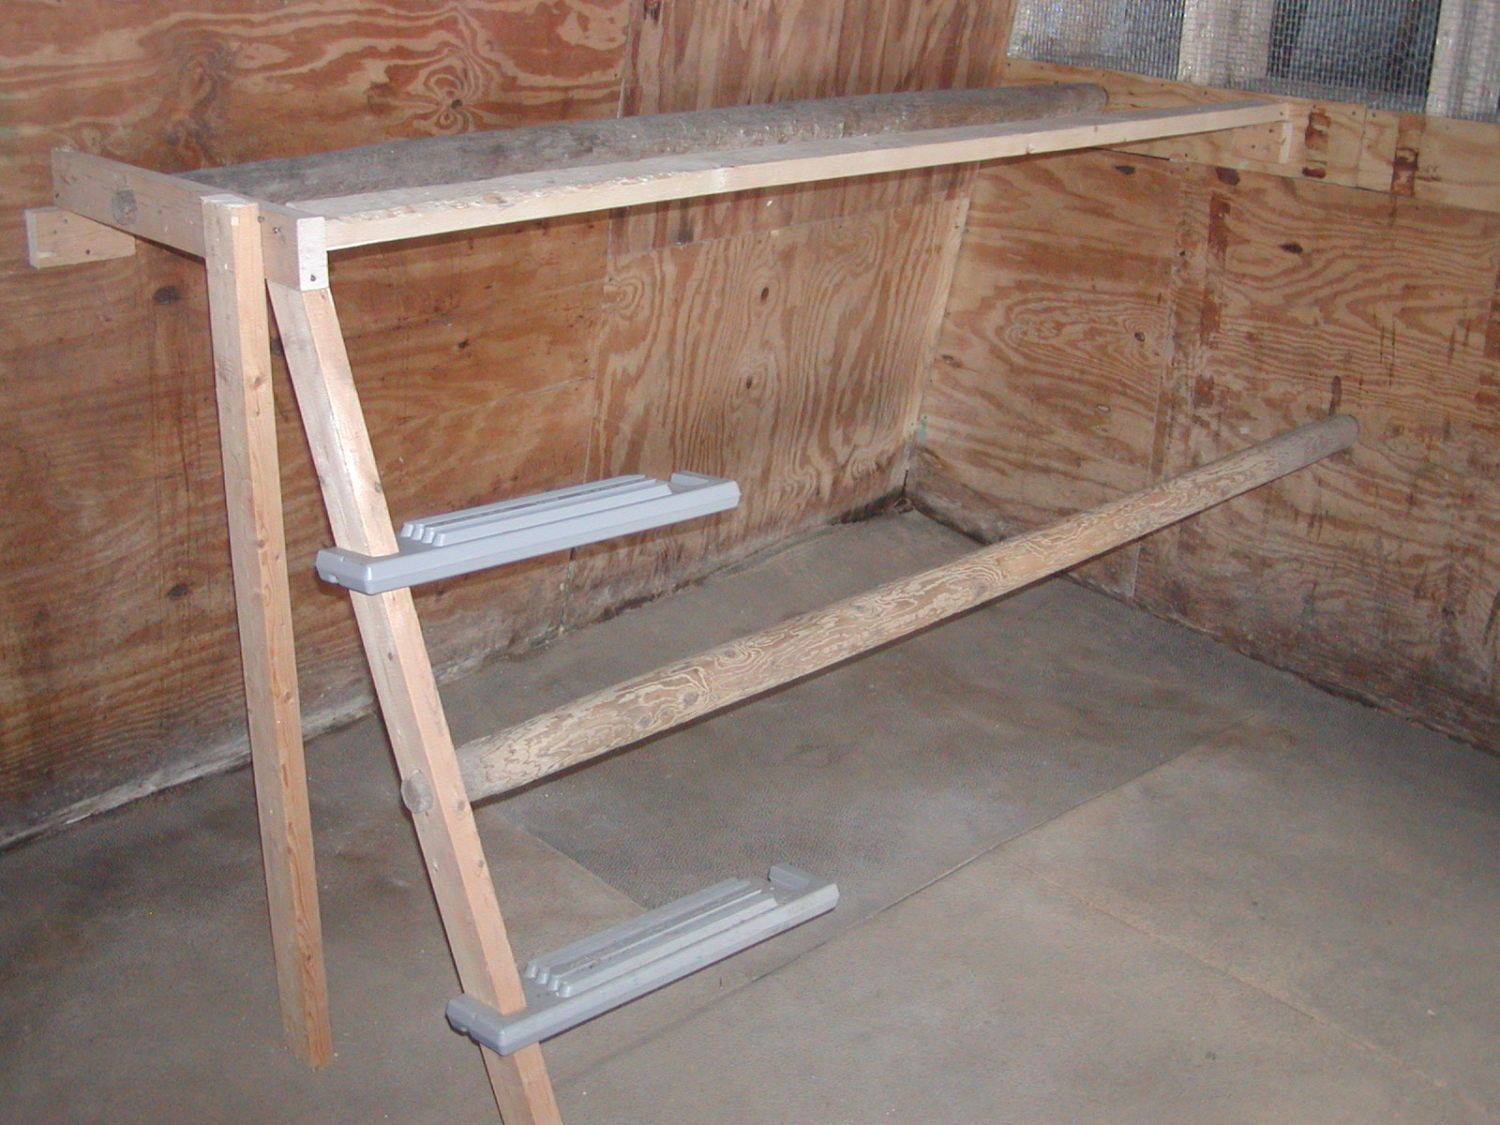
Roosts - two at 4' - 12" and 30" from the back wall so they can't pick at each other (you learn SO much reading BYC!!) and one at 2', 9" forward of the top roost.
There is one round fence rail roost and one 2x4 on the flat at the 4' level. "Scientific" experiment to see which the birds prefer. If *I* were a chicken, I think I'd prefer the round ones.
The rails were FREE, they were in the prior owner's prior (and unusable) coop in the small barn with the leaky roof. There are also plastic pool ladder steps at 1' and 3' so the kids can get up. I'll take them out assuming the adult birds can jump/flap 2'. With 12 birds and 16' of roost at 4', no one has to sit on a low roost unless they want to. The plastic steps were FREE! A friend brought some cordwood (FREE!) he isn't going to use and threw the steps in as a bonus. I think there might be some FREE! eggs in his future, but not for 4 or 5 months.
Chickens can't read, right???
The "birds' eye view"
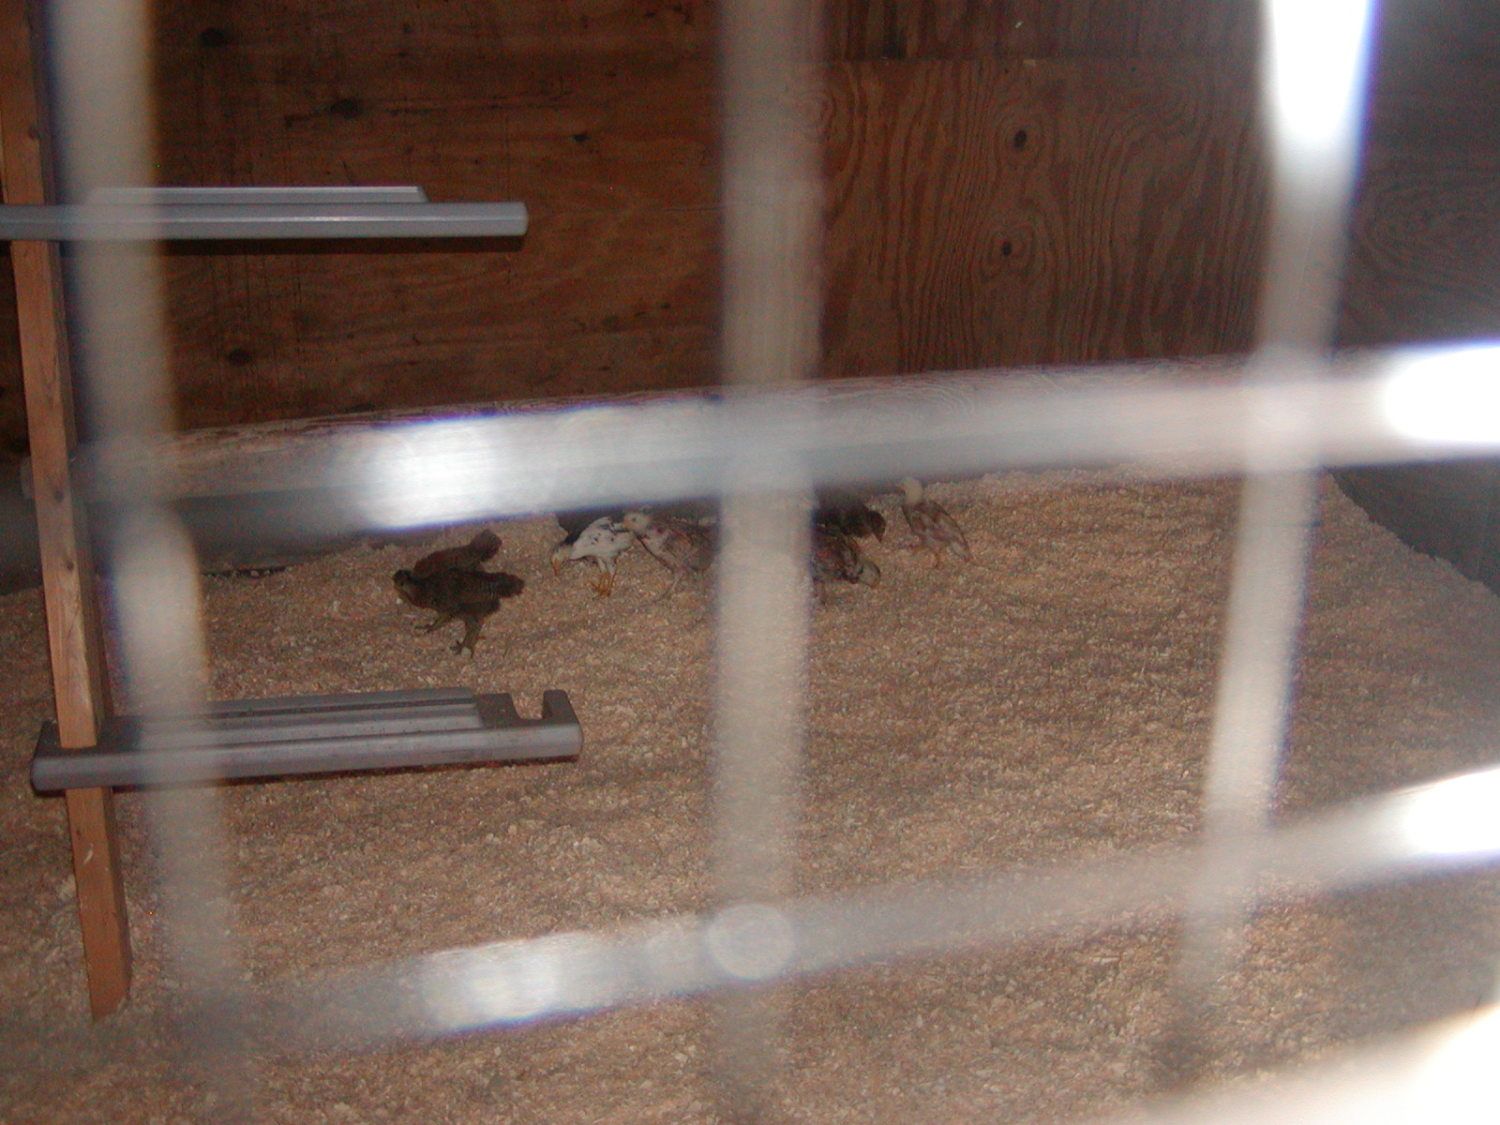
Ready for chicks. I put the waterer from the brooder on the wood block next to the rock under the big waterer when the chicks went in (in case they can't figure out what it is). I saw one small chick on the rock leaning WAY down to drink out of the familiar lower waterer. The reddish Ameraucana (or EE who knows) did drink out of the big one.
The big cardboard box on end in the front right is the "heated area". I moved the heat lamp and thermostat from the brooder. I went out to say goodnight to the chicks and they were all ... in a PIG PILE in the far right corner under the roosts. I try, I really do. The box cost about $90 but it included a 100' roll of 1/2" hardware cloth FREE! Hmmm, maybe I got that backwards. In any case, I used about 90' of the wire encasing every inch of the old stall except the plywood parts.
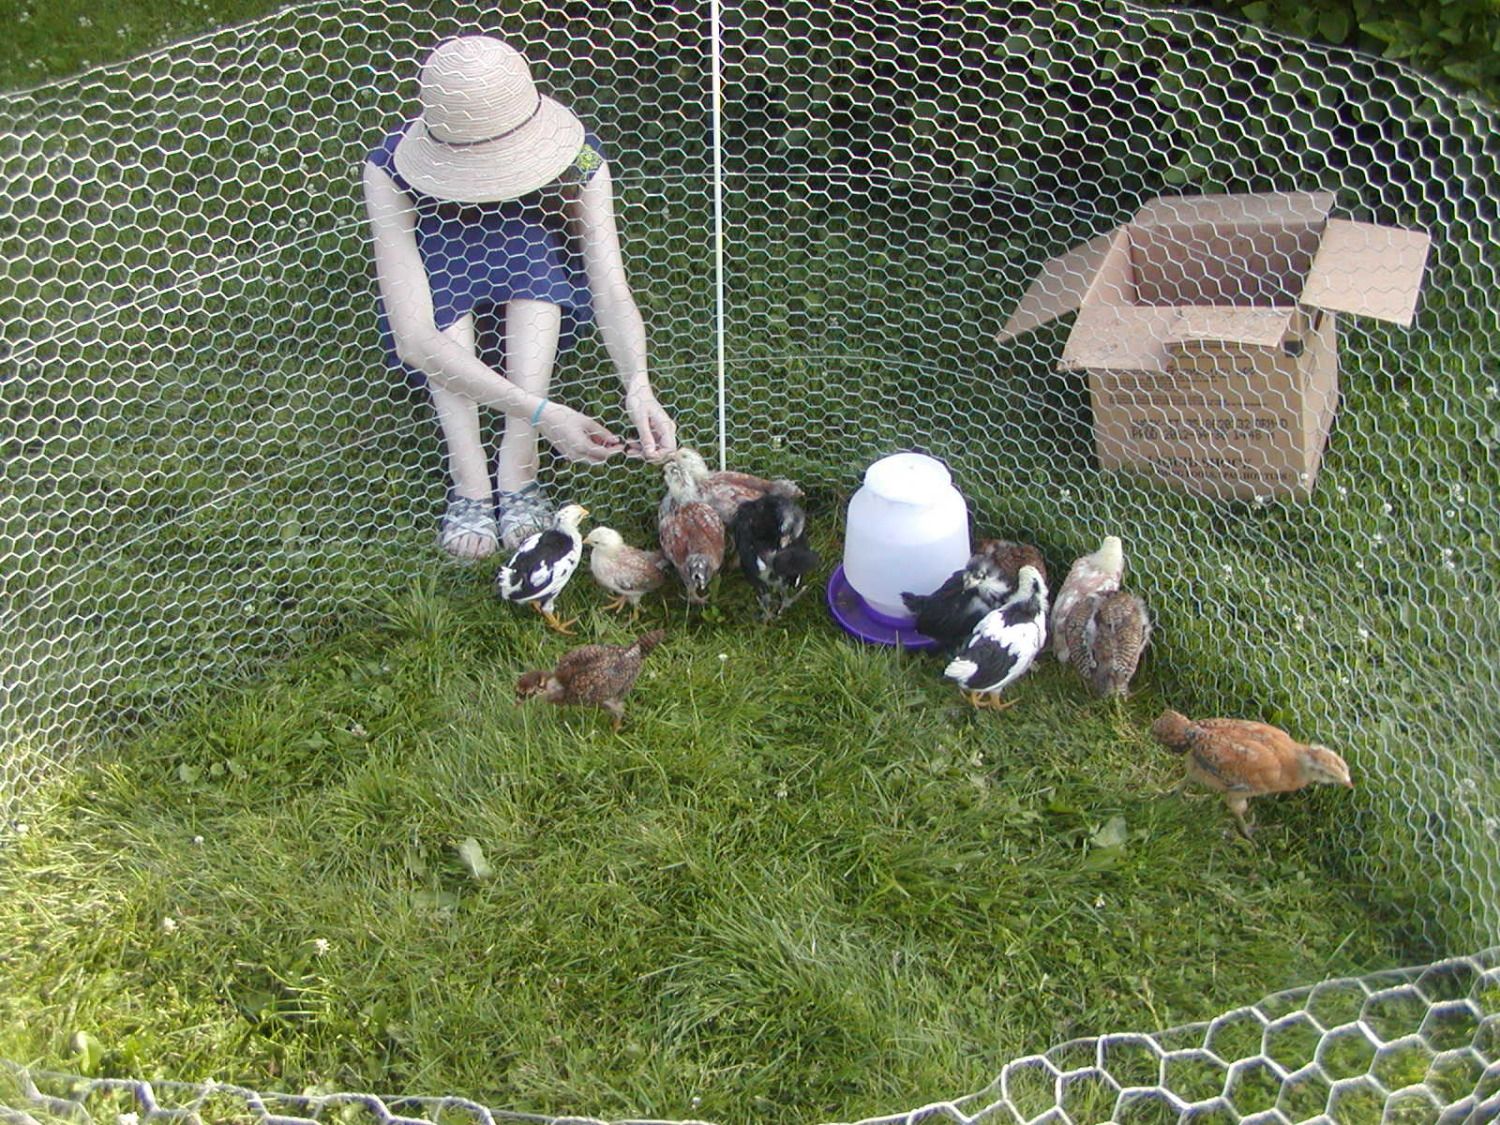
The chickens were out in their "playpen" in the afternoon
then moved into their new home. Sure was a LOT easier to see in the stall before some idiot put 1/2" hardware cloth all over every opening!
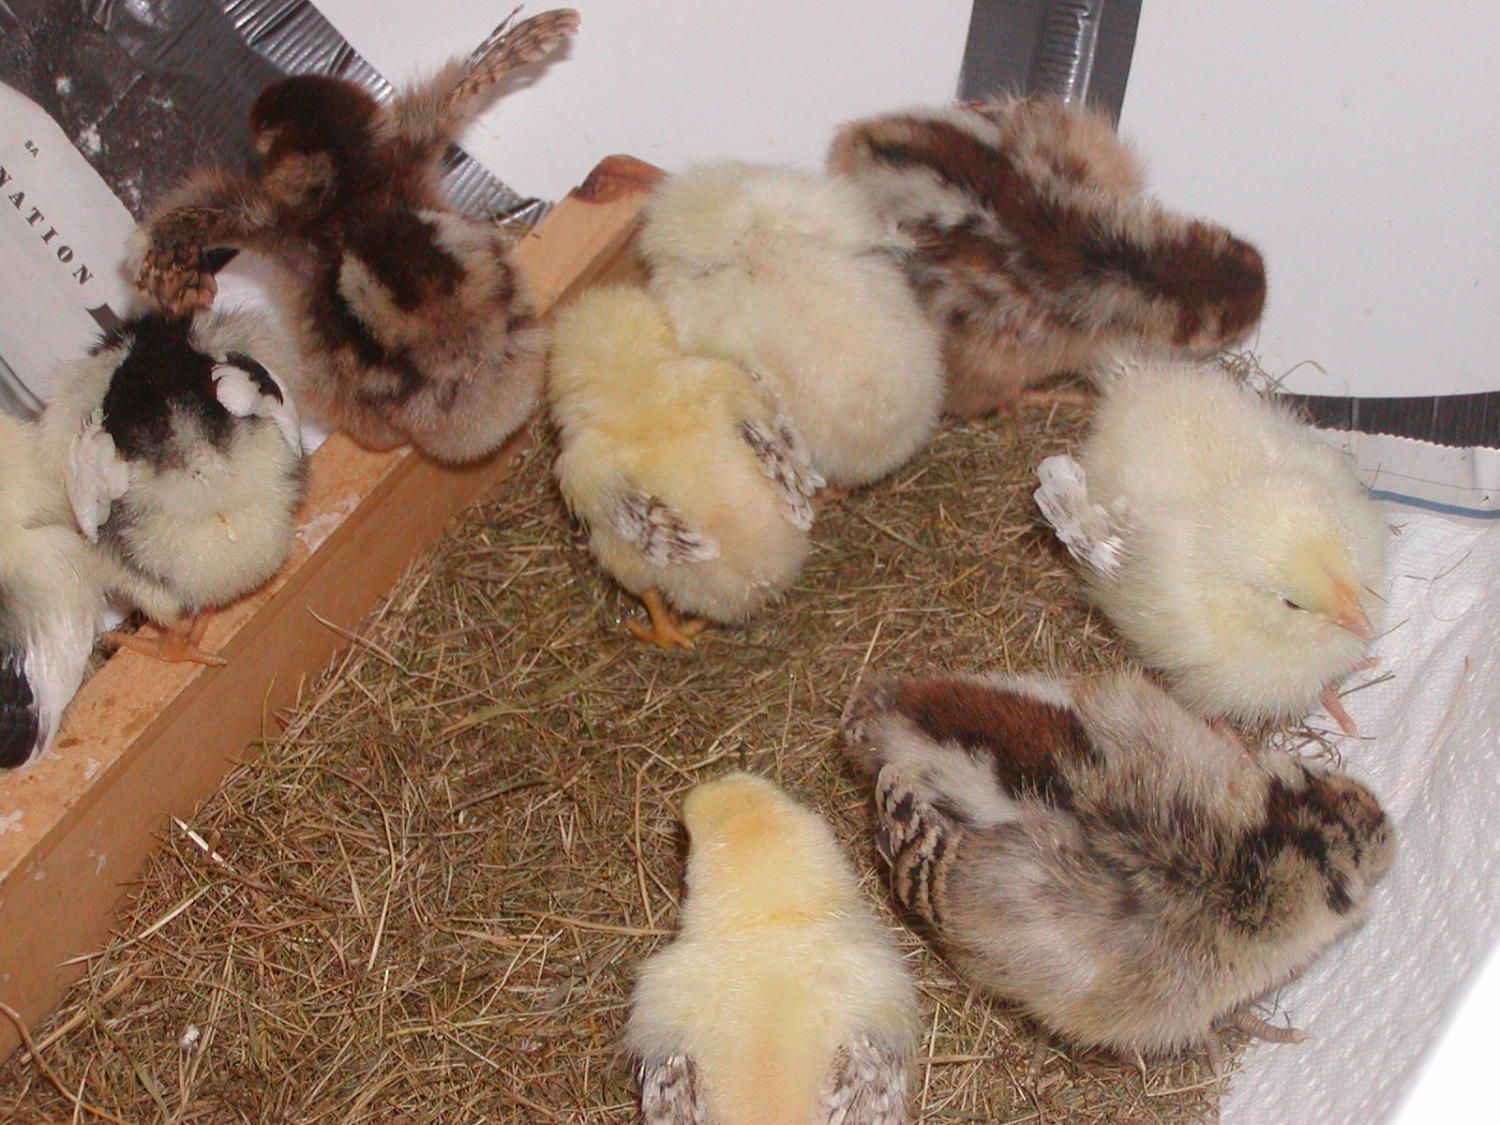
Just a WEE bit different at 3 1/2 weeks than at 6 days!
Total cost was about $150 - Most of that was the hardware cloth.
1/2" Hardware cloth 36" x 100' - Amazon - free shipping $90. Looks like the price has gone up to $105!!. Guess I bought at the right time.
BIG 5# box of poultry staples - $12 at Tractor Supply. Used plenty, can use the rest for the outdoor run which will be a LOT more expensive -
no existing structure!
People door - door and handle came with the barn
2 adjustable spring hinges $9 each
1 barrel bolt $6.30 and 1 carabiner $0.99
Chicken door (glass came with the house)
2 T-strap hinges $3.50 each
1 snap hook $1.50 (because the only carabiners they had at ACE were stainless and like $9!)
1 hasp $3.29
Ceiling and roosts
Three 10' 2x4s $4 each - blocking for the hardware cloth and 1 roost.
Since I was using poultry staples, NOT staple gun staples, I didn't cover them with strapping. Since the chicken wire that was on the
stall did have strapping screwed in, I reused the screws for attaching other things like door stops - FREE!
The bulk of the 'big wood' came from the support post under the broken rafter - FREE ... or some part of the $12K it cost to
jack the corner of the barn, replace 2 broken rafters, a long section of 8x8 top plate and a long section of 8x8 sill.
But hey, now the barn won't collapse.
Bruce
All done except the nest boxes (they'll go on the front left wall) but the girls don't need them for another 4 or 5 months. I'm good as long as predators don't start carrying Phillips head screw drivers.
First - the mantra (which I needed to repeat to my OCD self on occasion):
"It is a chicken coop converted from a beat up old horse stall inside an old, OLD barn.
The chickens won't know all the other chickens live at the Ritz.
The neighbors won't look over and call a realtor."
OK, with that in mind, here it is:
The coop goes from the post on the left with the outlet to the post on the right by the ladder. 12' wide, 9.5' deep (if you ignore the back wall that seriously leans in). I found the grain feeder I took out to be a great stool
.
I need to put a couple of slats on their glass chicken door, I doubt they want to slide down it.
Or if they do, they probably don't want to try to slide UP it.
It was FREE - the prior owners of the house apparently ordered a number of insulated window "inserts" that they never used.
Since they don't match ANY window in the house, I figure they were meant as fixed windows rather than 'repair parts'.
I just needed to make a wooden frame for it. My chickens have a REAL insulated glass door with a brass catch (
the only 'fancy' things in the place
). The hasp is brass only because they didn't have a plain nickle one.The board inside the chicken door is for deep litter.
[computer crashed - creating as a text file to cut and paste into the forum so I don't keep losing it!!]
I also found a 4" slide bolt at the co-op that has a hole in the end to keep it closed. I'm using a carabiner.
Can't move the door 1/4" now! I'll find another use for the hasp that didn't hold the door tight.
There is hardware cloth on the left of the door as well, I just hadn't covered the rest yet.

Roosts - two at 4' - 12" and 30" from the back wall so they can't pick at each other (you learn SO much reading BYC!!) and one at 2', 9" forward of the top roost.
There is one round fence rail roost and one 2x4 on the flat at the 4' level. "Scientific" experiment to see which the birds prefer. If *I* were a chicken, I think I'd prefer the round ones.
The rails were FREE, they were in the prior owner's prior (and unusable) coop in the small barn with the leaky roof. There are also plastic pool ladder steps at 1' and 3' so the kids can get up. I'll take them out assuming the adult birds can jump/flap 2'. With 12 birds and 16' of roost at 4', no one has to sit on a low roost unless they want to. The plastic steps were FREE! A friend brought some cordwood (FREE!) he isn't going to use and threw the steps in as a bonus. I think there might be some FREE! eggs in his future, but not for 4 or 5 months.
Chickens can't read, right???
The "birds' eye view"
Ready for chicks. I put the waterer from the brooder on the wood block next to the rock under the big waterer when the chicks went in (in case they can't figure out what it is). I saw one small chick on the rock leaning WAY down to drink out of the familiar lower waterer. The reddish Ameraucana (or EE who knows) did drink out of the big one.
The big cardboard box on end in the front right is the "heated area". I moved the heat lamp and thermostat from the brooder. I went out to say goodnight to the chicks and they were all ... in a PIG PILE in the far right corner under the roosts. I try, I really do. The box cost about $90 but it included a 100' roll of 1/2" hardware cloth FREE! Hmmm, maybe I got that backwards. In any case, I used about 90' of the wire encasing every inch of the old stall except the plywood parts.
The chickens were out in their "playpen" in the afternoon
then moved into their new home. Sure was a LOT easier to see in the stall before some idiot put 1/2" hardware cloth all over every opening!
Just a WEE bit different at 3 1/2 weeks than at 6 days!
Total cost was about $150 - Most of that was the hardware cloth.
1/2" Hardware cloth 36" x 100' - Amazon - free shipping $90. Looks like the price has gone up to $105!!. Guess I bought at the right time.
BIG 5# box of poultry staples - $12 at Tractor Supply. Used plenty, can use the rest for the outdoor run which will be a LOT more expensive -
no existing structure!
People door - door and handle came with the barn
2 adjustable spring hinges $9 each
1 barrel bolt $6.30 and 1 carabiner $0.99
Chicken door (glass came with the house)
2 T-strap hinges $3.50 each
1 snap hook $1.50 (because the only carabiners they had at ACE were stainless and like $9!)
1 hasp $3.29
Ceiling and roosts
Three 10' 2x4s $4 each - blocking for the hardware cloth and 1 roost.
Since I was using poultry staples, NOT staple gun staples, I didn't cover them with strapping. Since the chicken wire that was on the
stall did have strapping screwed in, I reused the screws for attaching other things like door stops - FREE!
The bulk of the 'big wood' came from the support post under the broken rafter - FREE ... or some part of the $12K it cost to
jack the corner of the barn, replace 2 broken rafters, a long section of 8x8 top plate and a long section of 8x8 sill.
But hey, now the barn won't collapse.
Bruce
Last edited:
