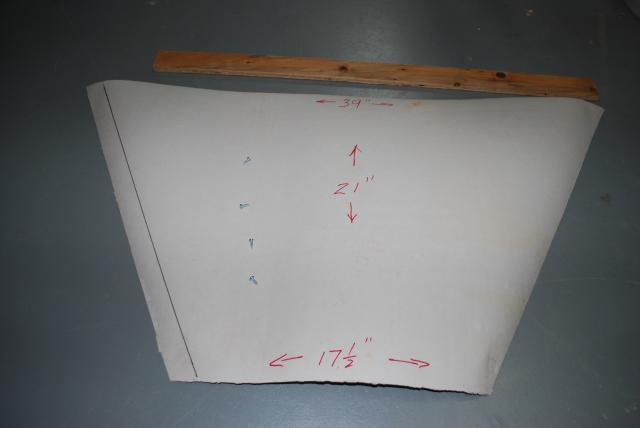
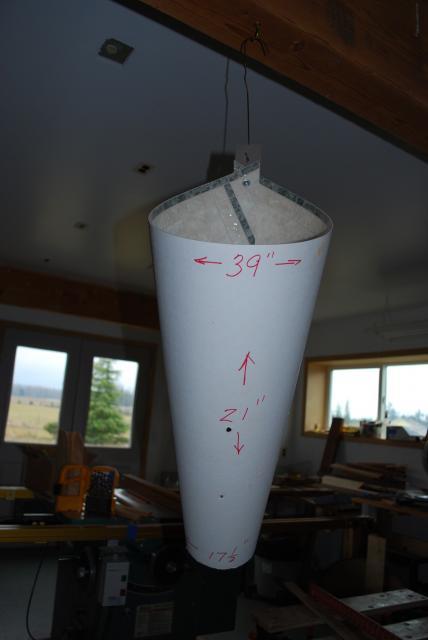
Made a nice cone this way. There is a sheet of metal that is sold in the ductwork section of home depot. It was over 3x too big for this cone, but it was the only size available. The price was good at $9.30 and it was easy to work with.
To avoid sharp edges, I would add that you can add a quarter inch of metal on each edge, fold it over, and make a nice smooth edge. To do this, cut out your shape as described in the post adding the extra metal for the folds. Then:
1) lay anything that is sturdy and has a straight edge along the first line that you are going to fold. I used a piece of scrap wood. Put some pressure on it so the metal underneath doesn't move.
2) score the line on the metal with a nail or other sharp point. This will guide the fold. (Sort of like when you fold a piece of paper before ripping it.)
3) start lifting up the edge with anything that can be used as a wedge. A screwdriver can be used if you don't have a another tool for this.
4) push up the metal edge with your fingers to get it roughly perpendicular to the metal sheet. Needless to say, you should be using gloves for this and all steps.
5) remove your straight edge and complete the fold, pushing it all the way down.
6) Since the sides are cut at an angle, when you fold them down, there will be triangles of metal on one side that do not overlap. Snip these off. It's best to do this before the fold is completely flat. That way, you can cut extra metal so that there's nothing sharp near the edge of your cone.
7) using a hammer, bang the fold flat. I used a rubber mallet and it worked well. If all you have is a metal hammer, I'm sure it will work fine. If using a hammer, put a piece of wood or other semi-soft material under the metal sheet to avoid leaving hammer marks in your metal.
Then, drill and rivet as instructed in the original post.
 LOL Yep! And be as up front and obvious as you can and no one will question you. My first cone is like this metal one but I needed another one for a smaller chicken so I used the same "supply house" for the traffic cone you did.