- Aug 7, 2010
- 913
- 37
- 278
~HI EVERYBODY~
This is my new article about how to make a homemade incubator!
View the article here: https://www.backyardchickens.com/a/urachickenlover2s-incubator
ENJOY!
I've seen some cool designs for homemade incubators all over the internet, but some of them seem so hard to make! My incubator is a cheap, easy to make, and most importantly, EFFECTIVE way to make an homemade incubator!
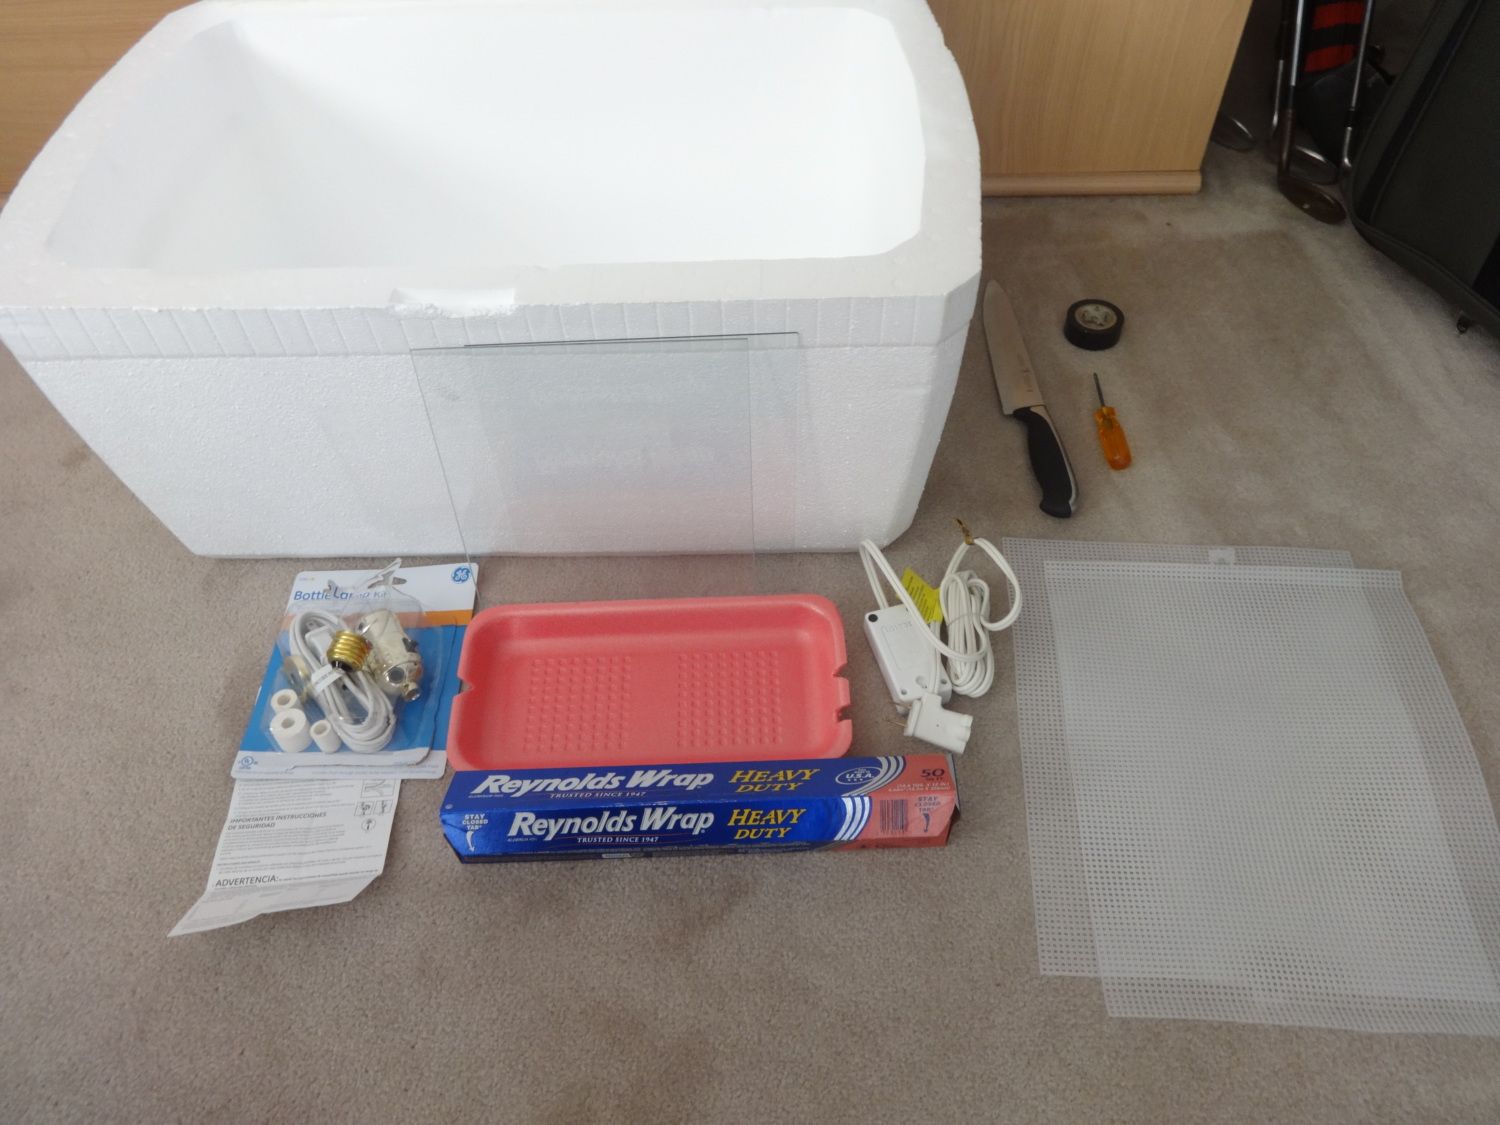 Supplies:
Knife (Be CAREFUL)
Screwdriver
Electric Tape
This is my new article about how to make a homemade incubator!
View the article here: https://www.backyardchickens.com/a/urachickenlover2s-incubator
ENJOY!
I've seen some cool designs for homemade incubators all over the internet, but some of them seem so hard to make! My incubator is a cheap, easy to make, and most importantly, EFFECTIVE way to make an homemade incubator!
Styrofoam Cooler
2 Plastic Picture Frames (same size each)
Light Fixture Kit
Aluminum Foil
A shallow tray
Plastic Mesh (Easy to find in crafting stores)
Light Dimmer Switch (IMPORTANT)
Tools:2 Plastic Picture Frames (same size each)
Light Fixture Kit
Aluminum Foil
A shallow tray
Plastic Mesh (Easy to find in crafting stores)
Light Dimmer Switch (IMPORTANT)
Knife (Be CAREFUL)
Screwdriver
Electric Tape
It is VERY important to plan out your incubator first to avoid any unnecessary holes and cuts!
In general, you will need:
One or two venting holes for air
A water dish for humidity
A heat source
A heat regulator
Something to block direct heat/light from hitting the eggs
Window (Optional)
Step 1: Window
I chose to do the window first because it's the biggest cut you will have to make. First, draw where you want your window to be. Make sure to have the hole slightly smaller than your actual frame so you can take it on. Then, with tape (I would choose duct tape) attach one frame to one side and the other frame to the back. This way, heat isn't lost and you don't have to worry. Also, this is the messy part!
Step 2: Heat Source
The heat source in this incubator, like most of them, is a light bulb. With your screwdriver, make a small hole near the top of one of the sides of the cooler. Do not make it to far up; We do not want the light bulb touching the lid of the cooler. Then, make a second hole about an inch away from the one you made (Not shown). I will explain this later.
This is the tricky part! Be very careful with this. Follow the instructions in the kit. There are 2 wires, one that is smooth, and one that has waves on it. First, thread the 2 wires through the second hole you just made next to your mounting hole. Then, thread them through the hole on the lid of the light fixture (Seen above). Take the socket, and loosen the 2 screws. There is a silver one and a gold one. Twist the open end of the white wire onto each of the gold and silver screws. The WAVY wire goes on the SILVER screw, and the SMOOTH wire goes on the GOLD screw. Tighten the screws to attach the wires onto the socket.
TEST THE LIGHTBULB CAREFULLY TO SEE IF IT WORKS. When it works, close the cap onto the socket, and screw the long screw into the socket hole. Then, insert it into the mounting hole you made.
Now, MOST IMPORTANLTY, get the dimmer switch and plug it into your light fixture. THIS WILL REGULATE THE TEMPERATURE. I don't know HOW MANY times I've seen people try to make incubators WITHOUT a reliable way to regulate the temperature and they fail!

This is Incubator Warehouse! http://stores.ebay.com/Incubator-Warehouse
Step 3: Make it Safe
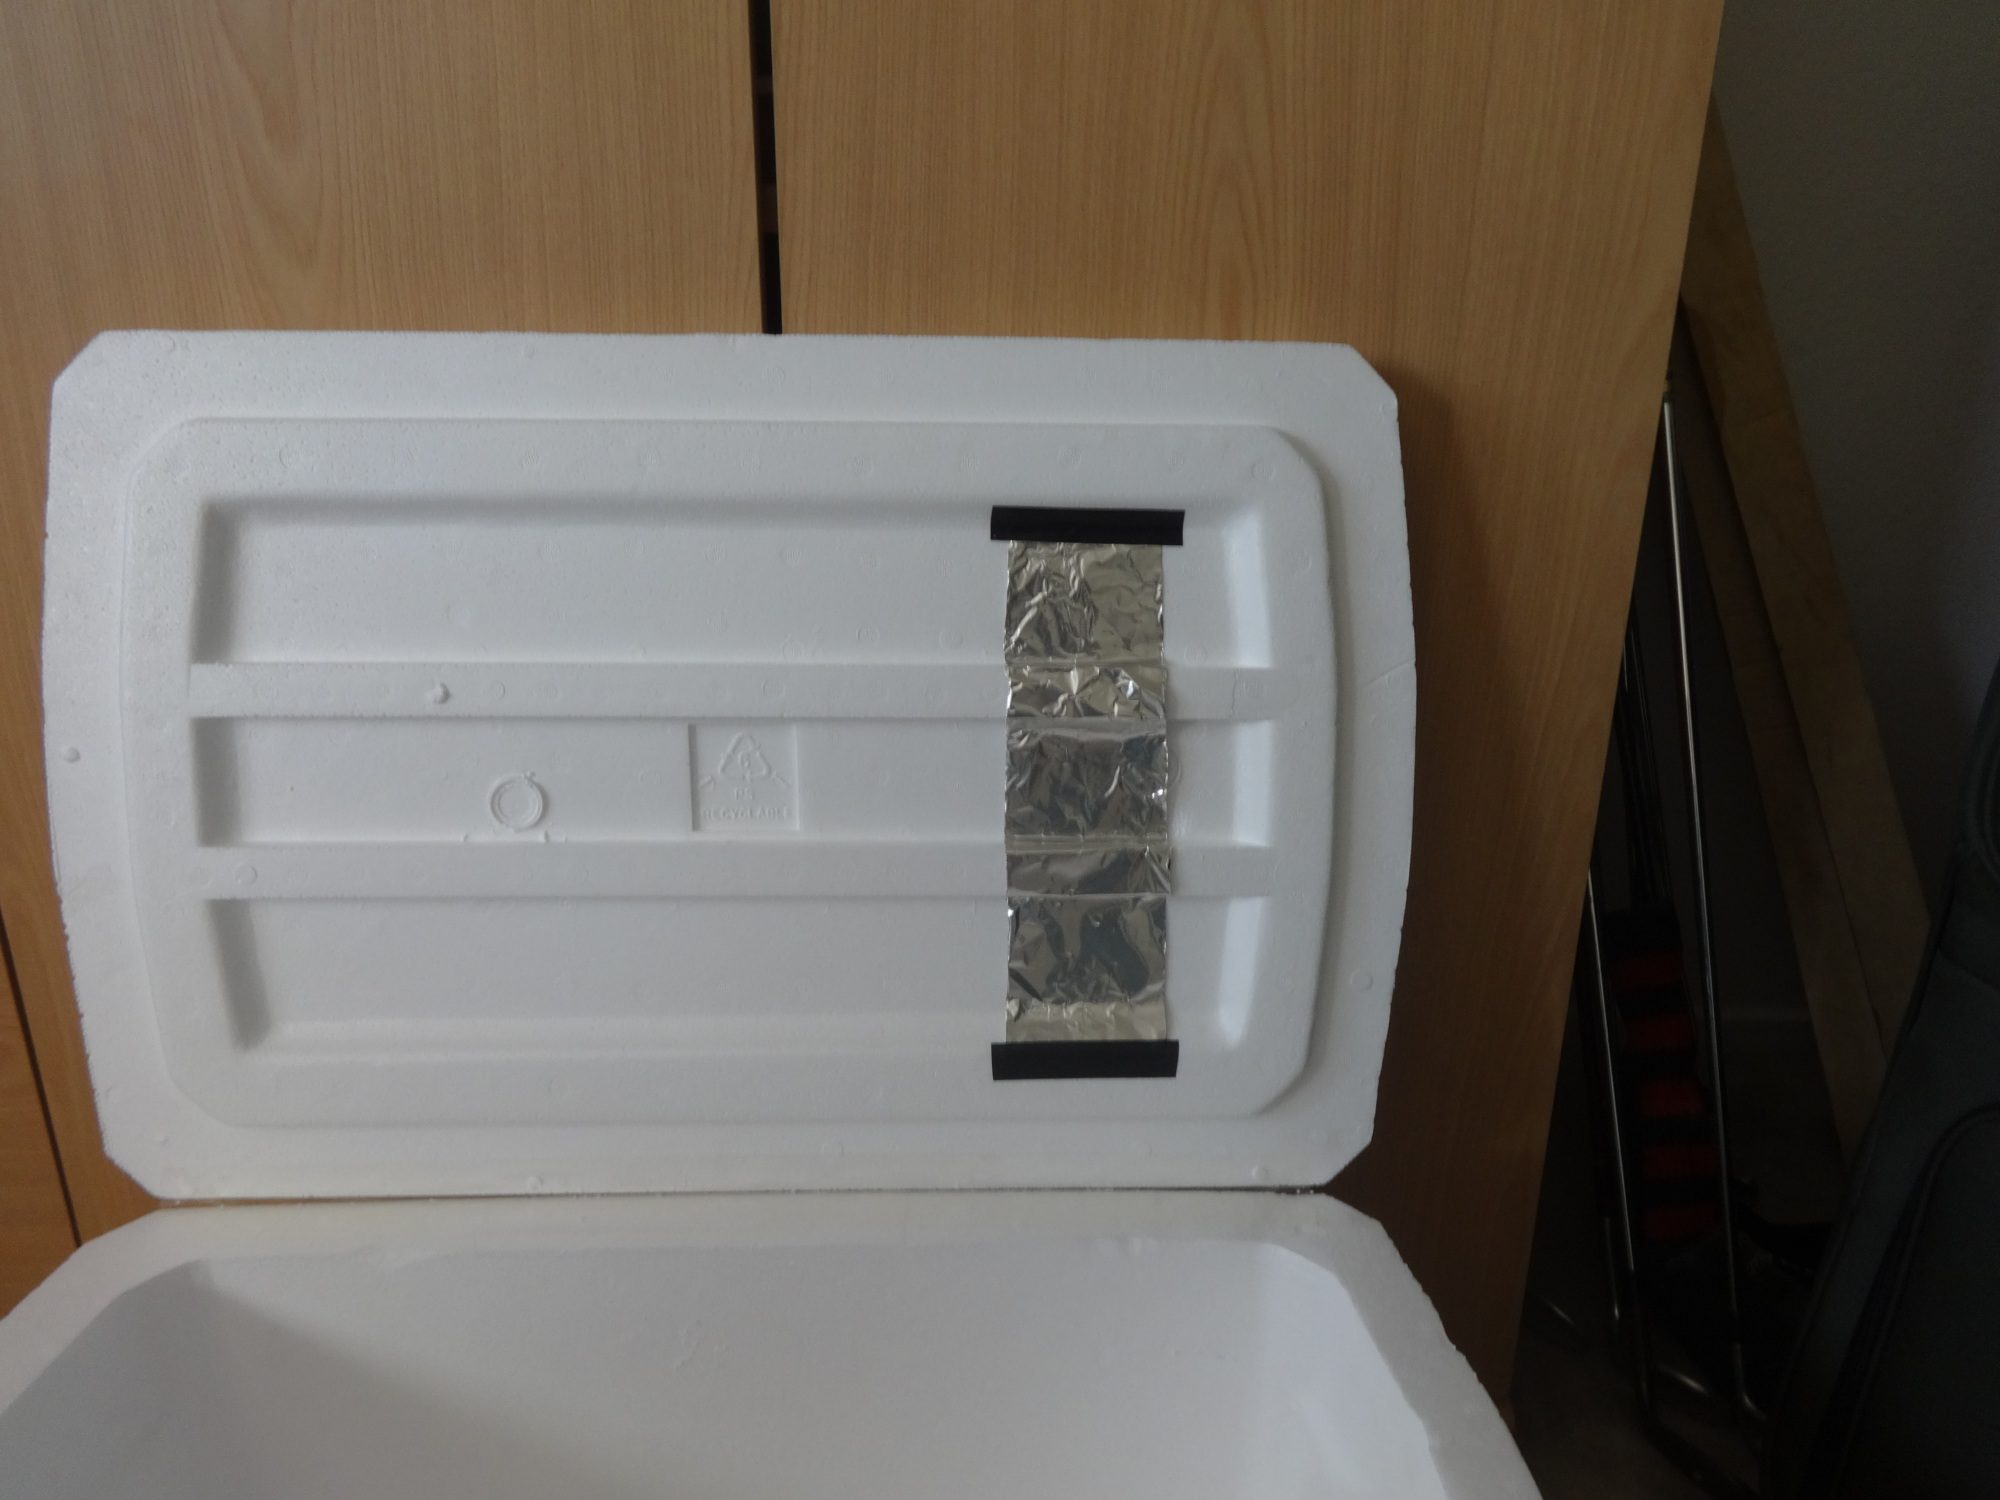

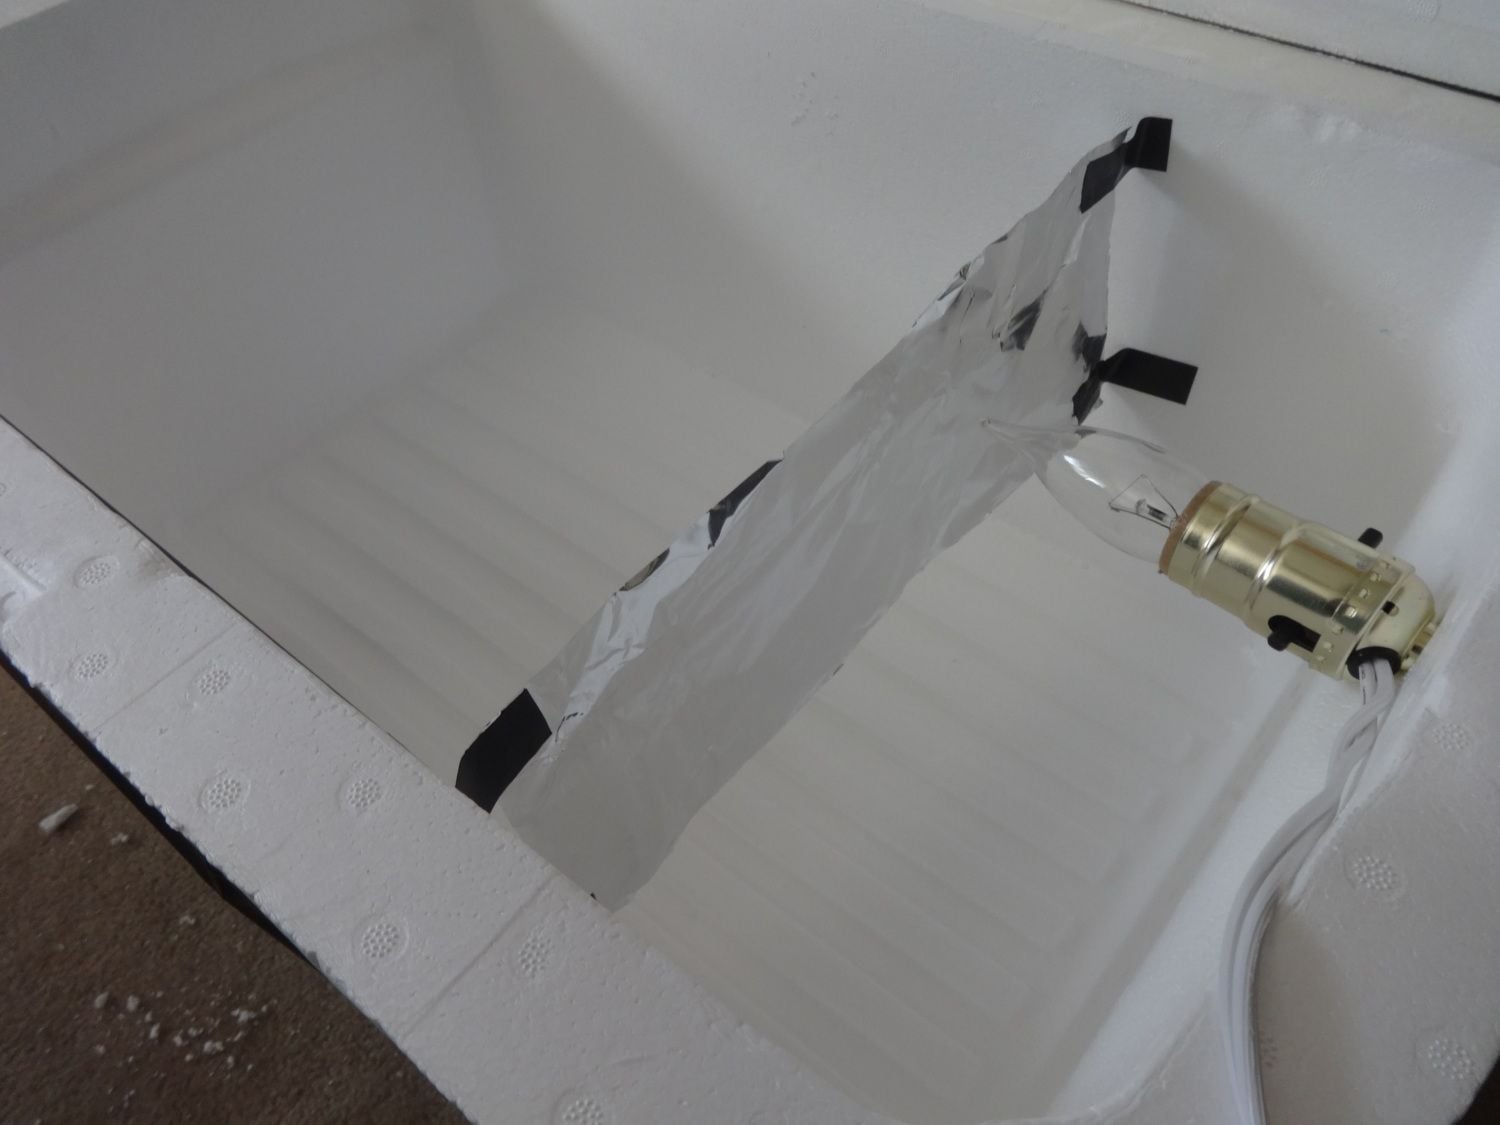
With the aluminum foil, cut out and tape one sheet to the bottom of the lid where the light bulb will be to protect the styrofoam from overheating. Then, cut out another sheet and tape it across the incubator so direct light from the light bulb doesn't go to the eggs. This will prevent overheating, false temperature readings, and dehydration.
Step 4: Water


This is simple but a very important part of the incubator. You will want a large, flat tray to use for the incubator's humidity. What I would do would be to get a small dish and put it inside the bigger dish and fill it with water. Then, when the time comes to raise the humidity and the small dish is already full, then add water to the big dish. Place it under the light bulb for effectiveness.Also, use the plastic mesh to cover this dish. When the chicks hatch, they run around, and you don't want them falling in! Plastic mesh is MUCH easier to handle than metal mesh.
Step 5: Preparation:

With the aluminum foil, cut out and tape one sheet to the bottom of the lid where the light bulb will be to protect the styrofoam from overheating. Then, cut out another sheet and tape it across the incubator so direct light from the light bulb doesn't go to the eggs. This will prevent overheating, false temperature readings, and dehydration.
Step 4: Water
This is simple but a very important part of the incubator. You will want a large, flat tray to use for the incubator's humidity. What I would do would be to get a small dish and put it inside the bigger dish and fill it with water. Then, when the time comes to raise the humidity and the small dish is already full, then add water to the big dish. Place it under the light bulb for effectiveness.Also, use the plastic mesh to cover this dish. When the chicks hatch, they run around, and you don't want them falling in! Plastic mesh is MUCH easier to handle than metal mesh.
Step 5: Preparation:
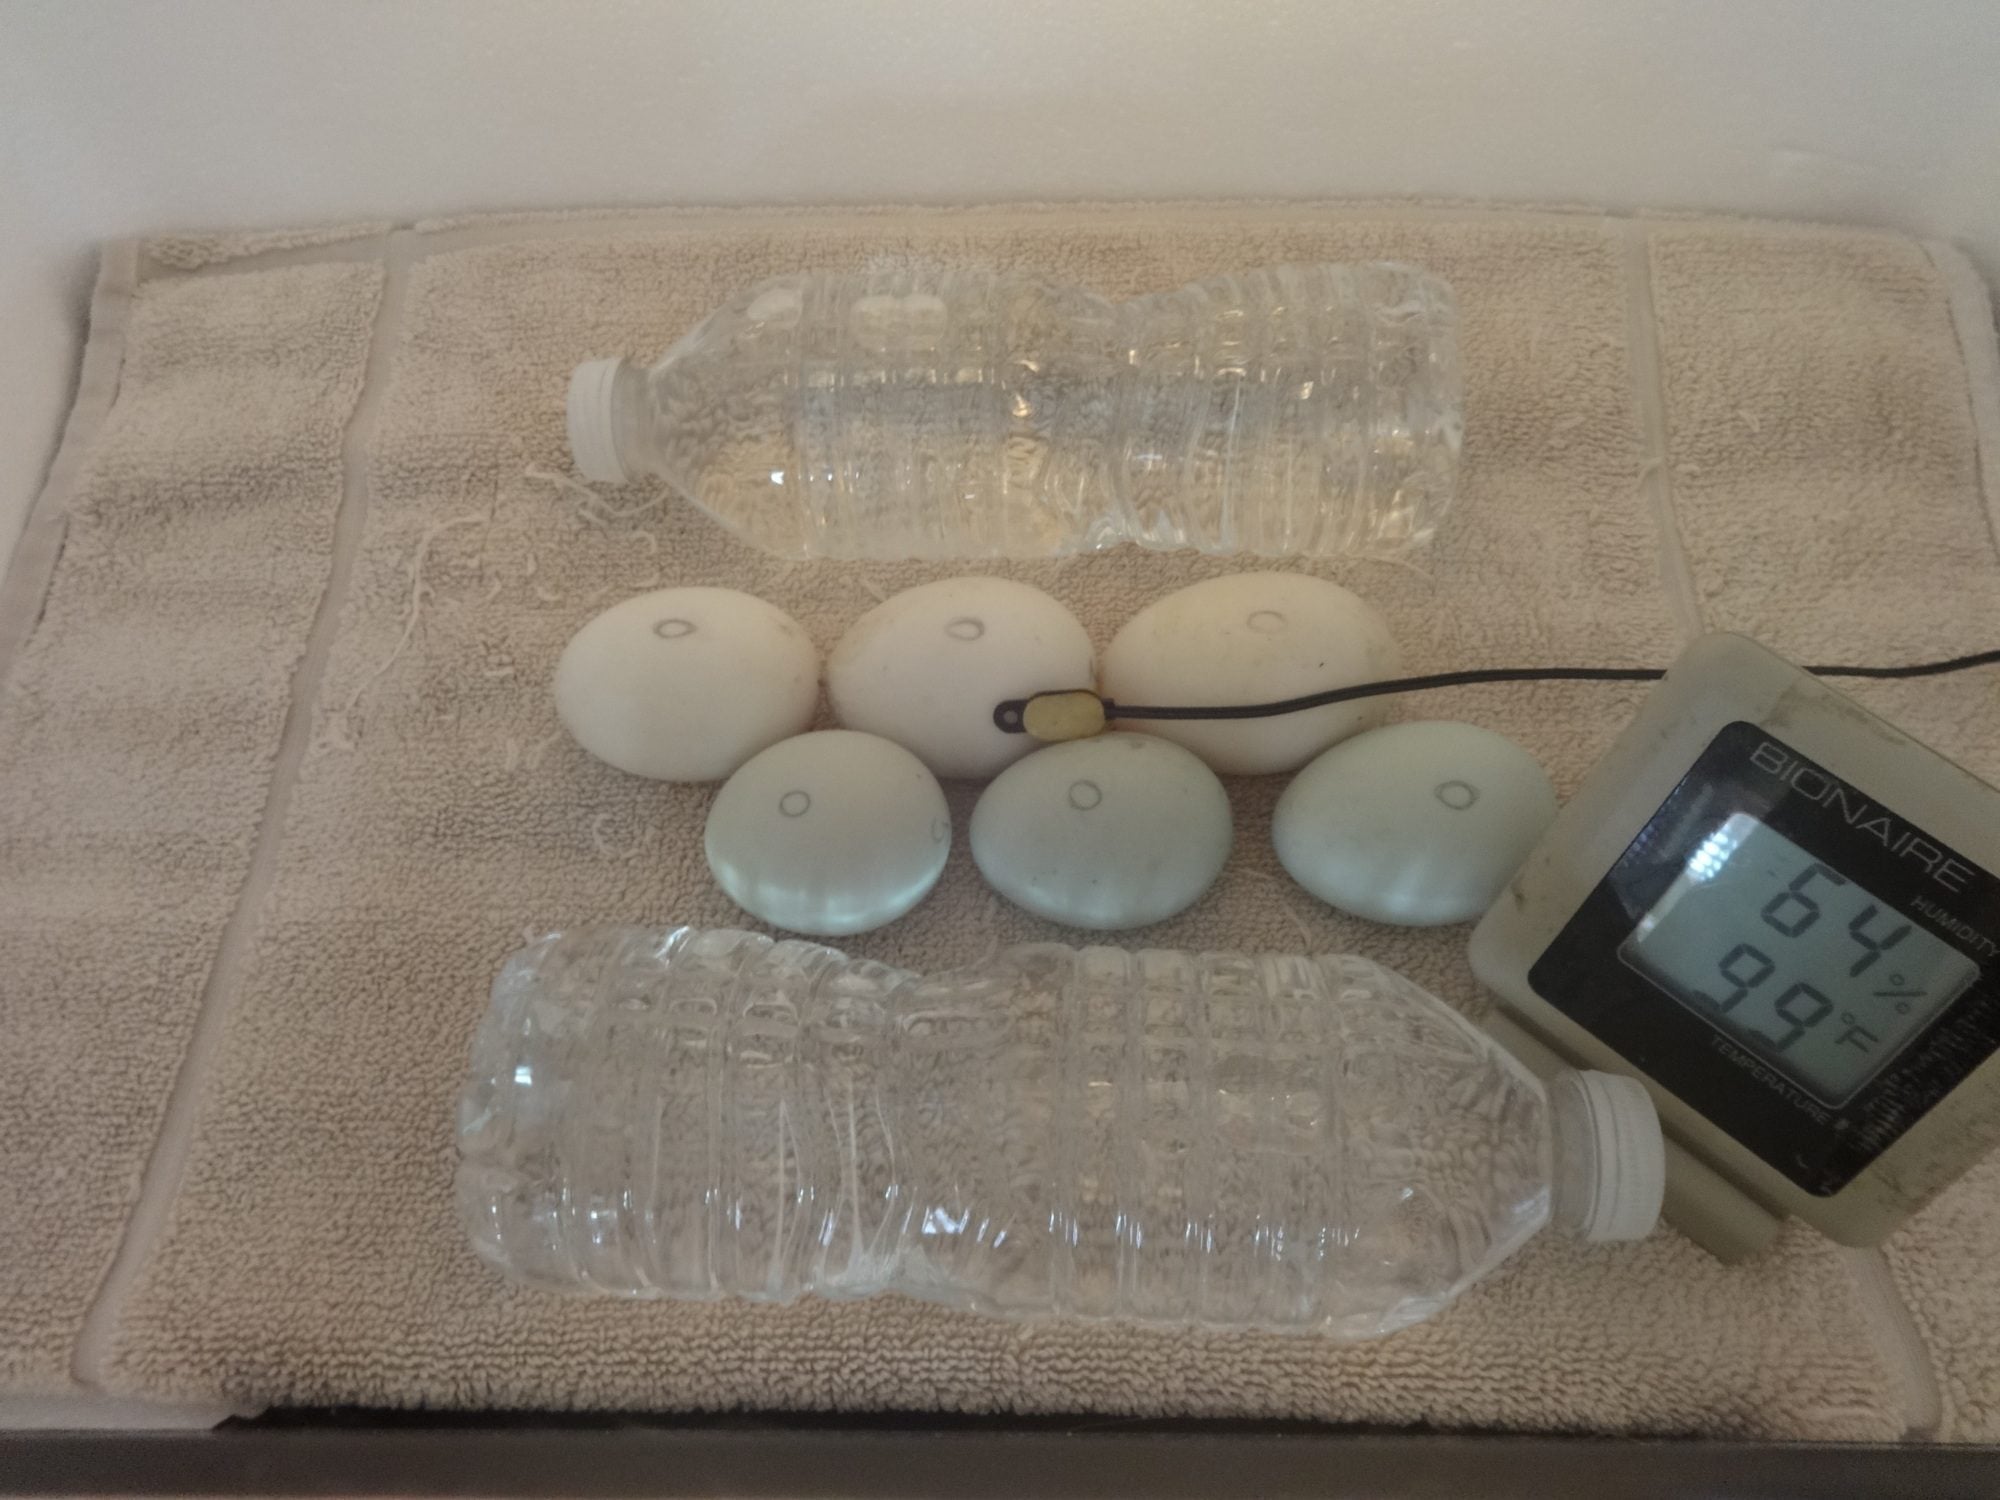
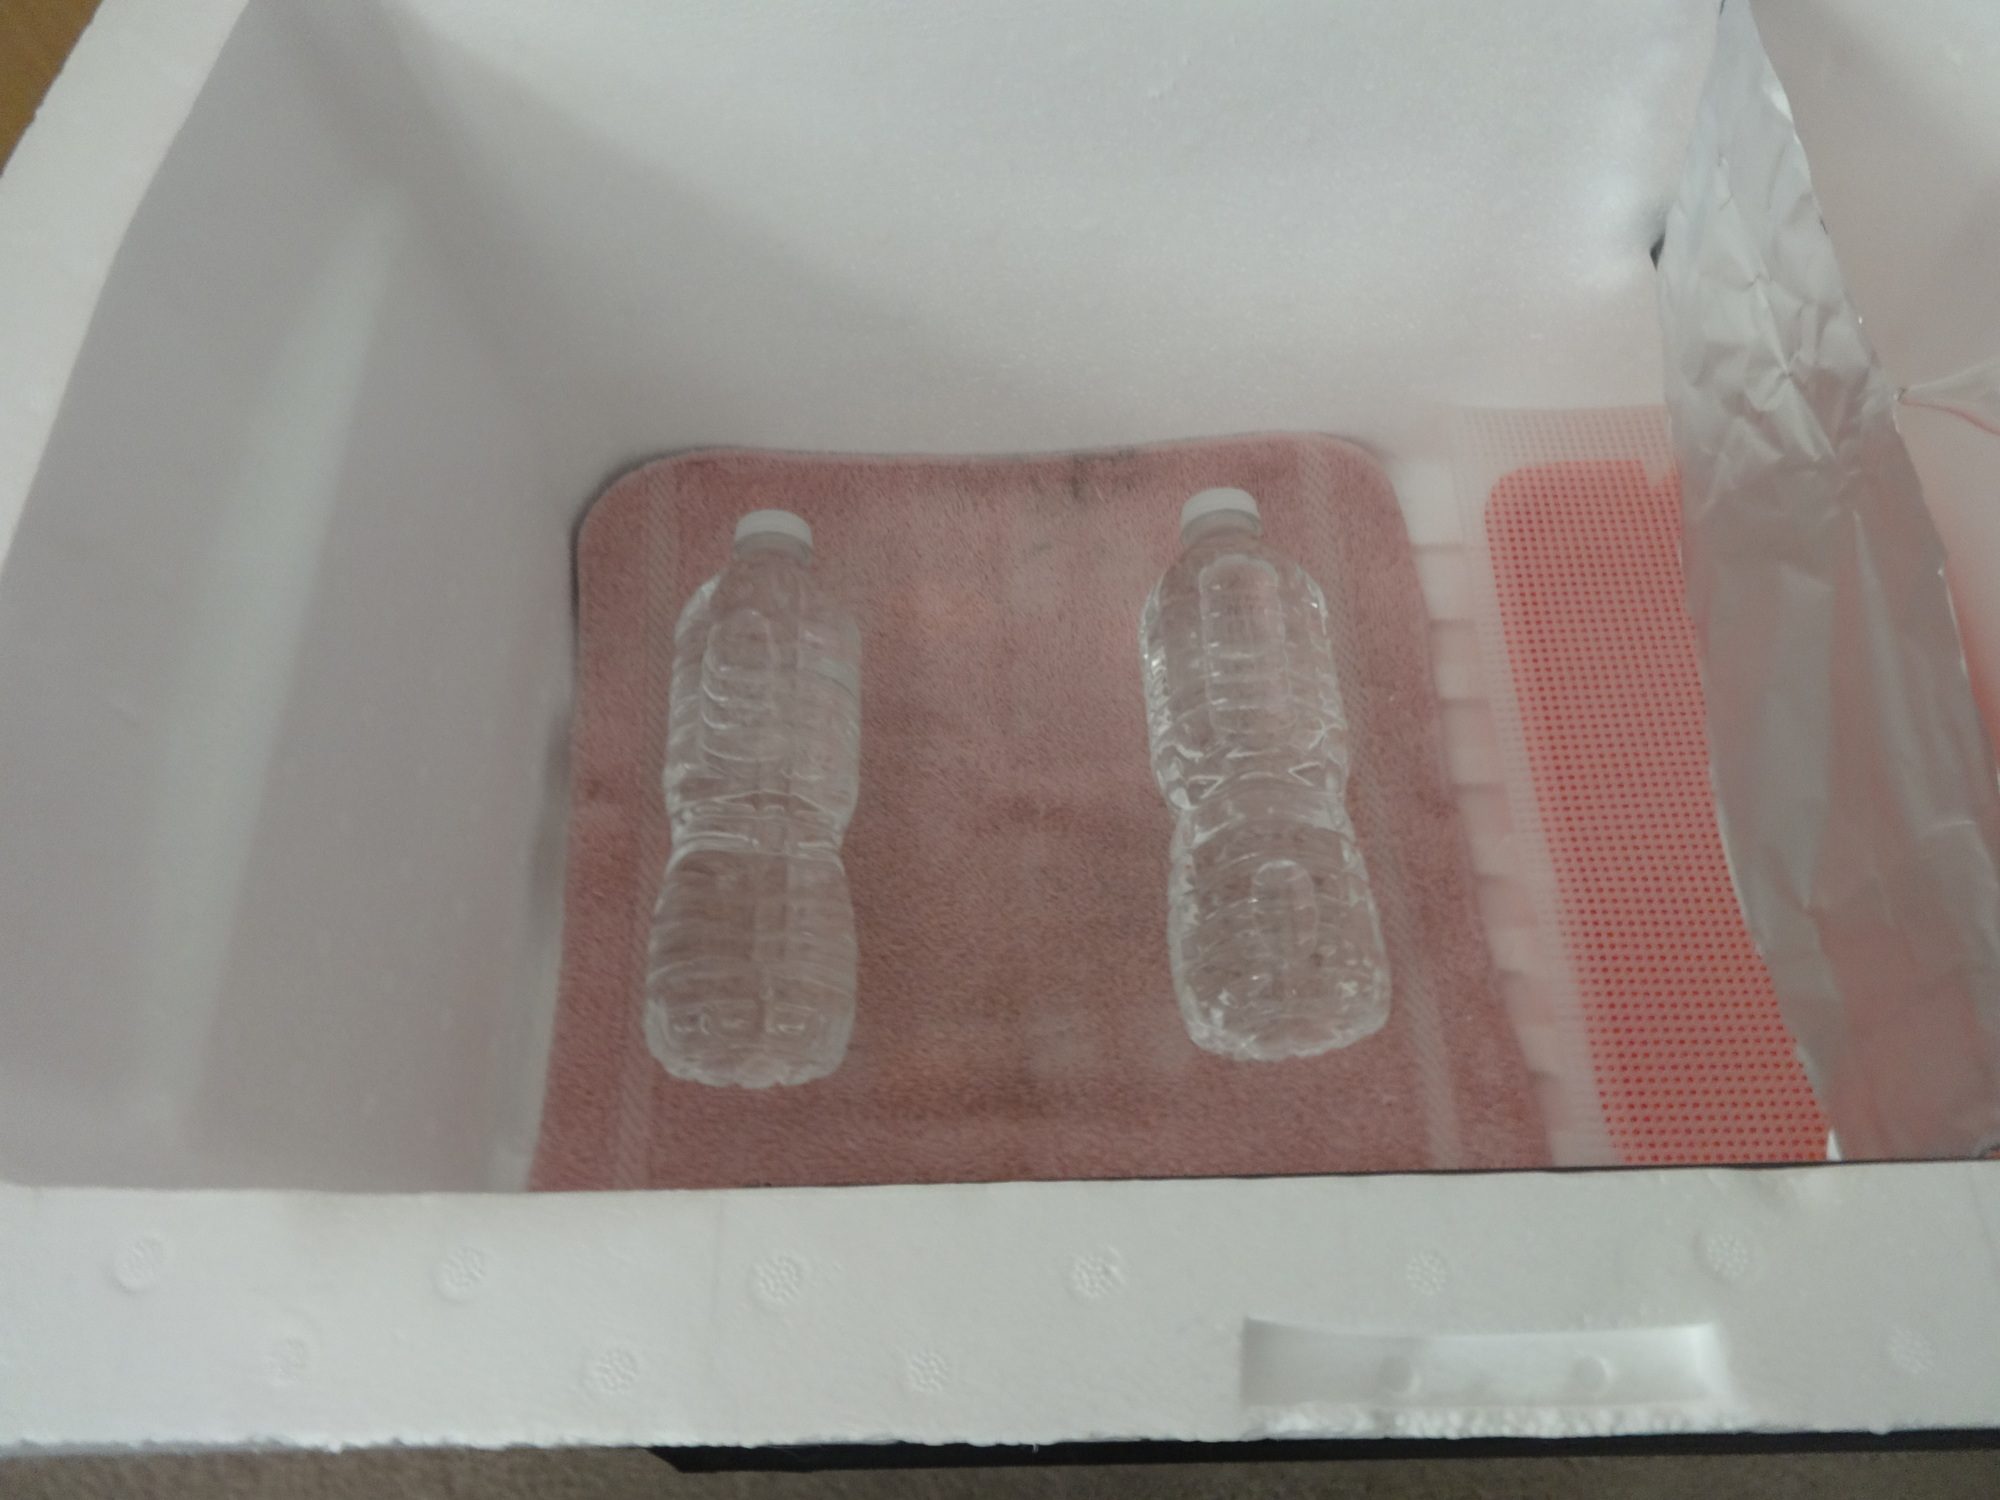
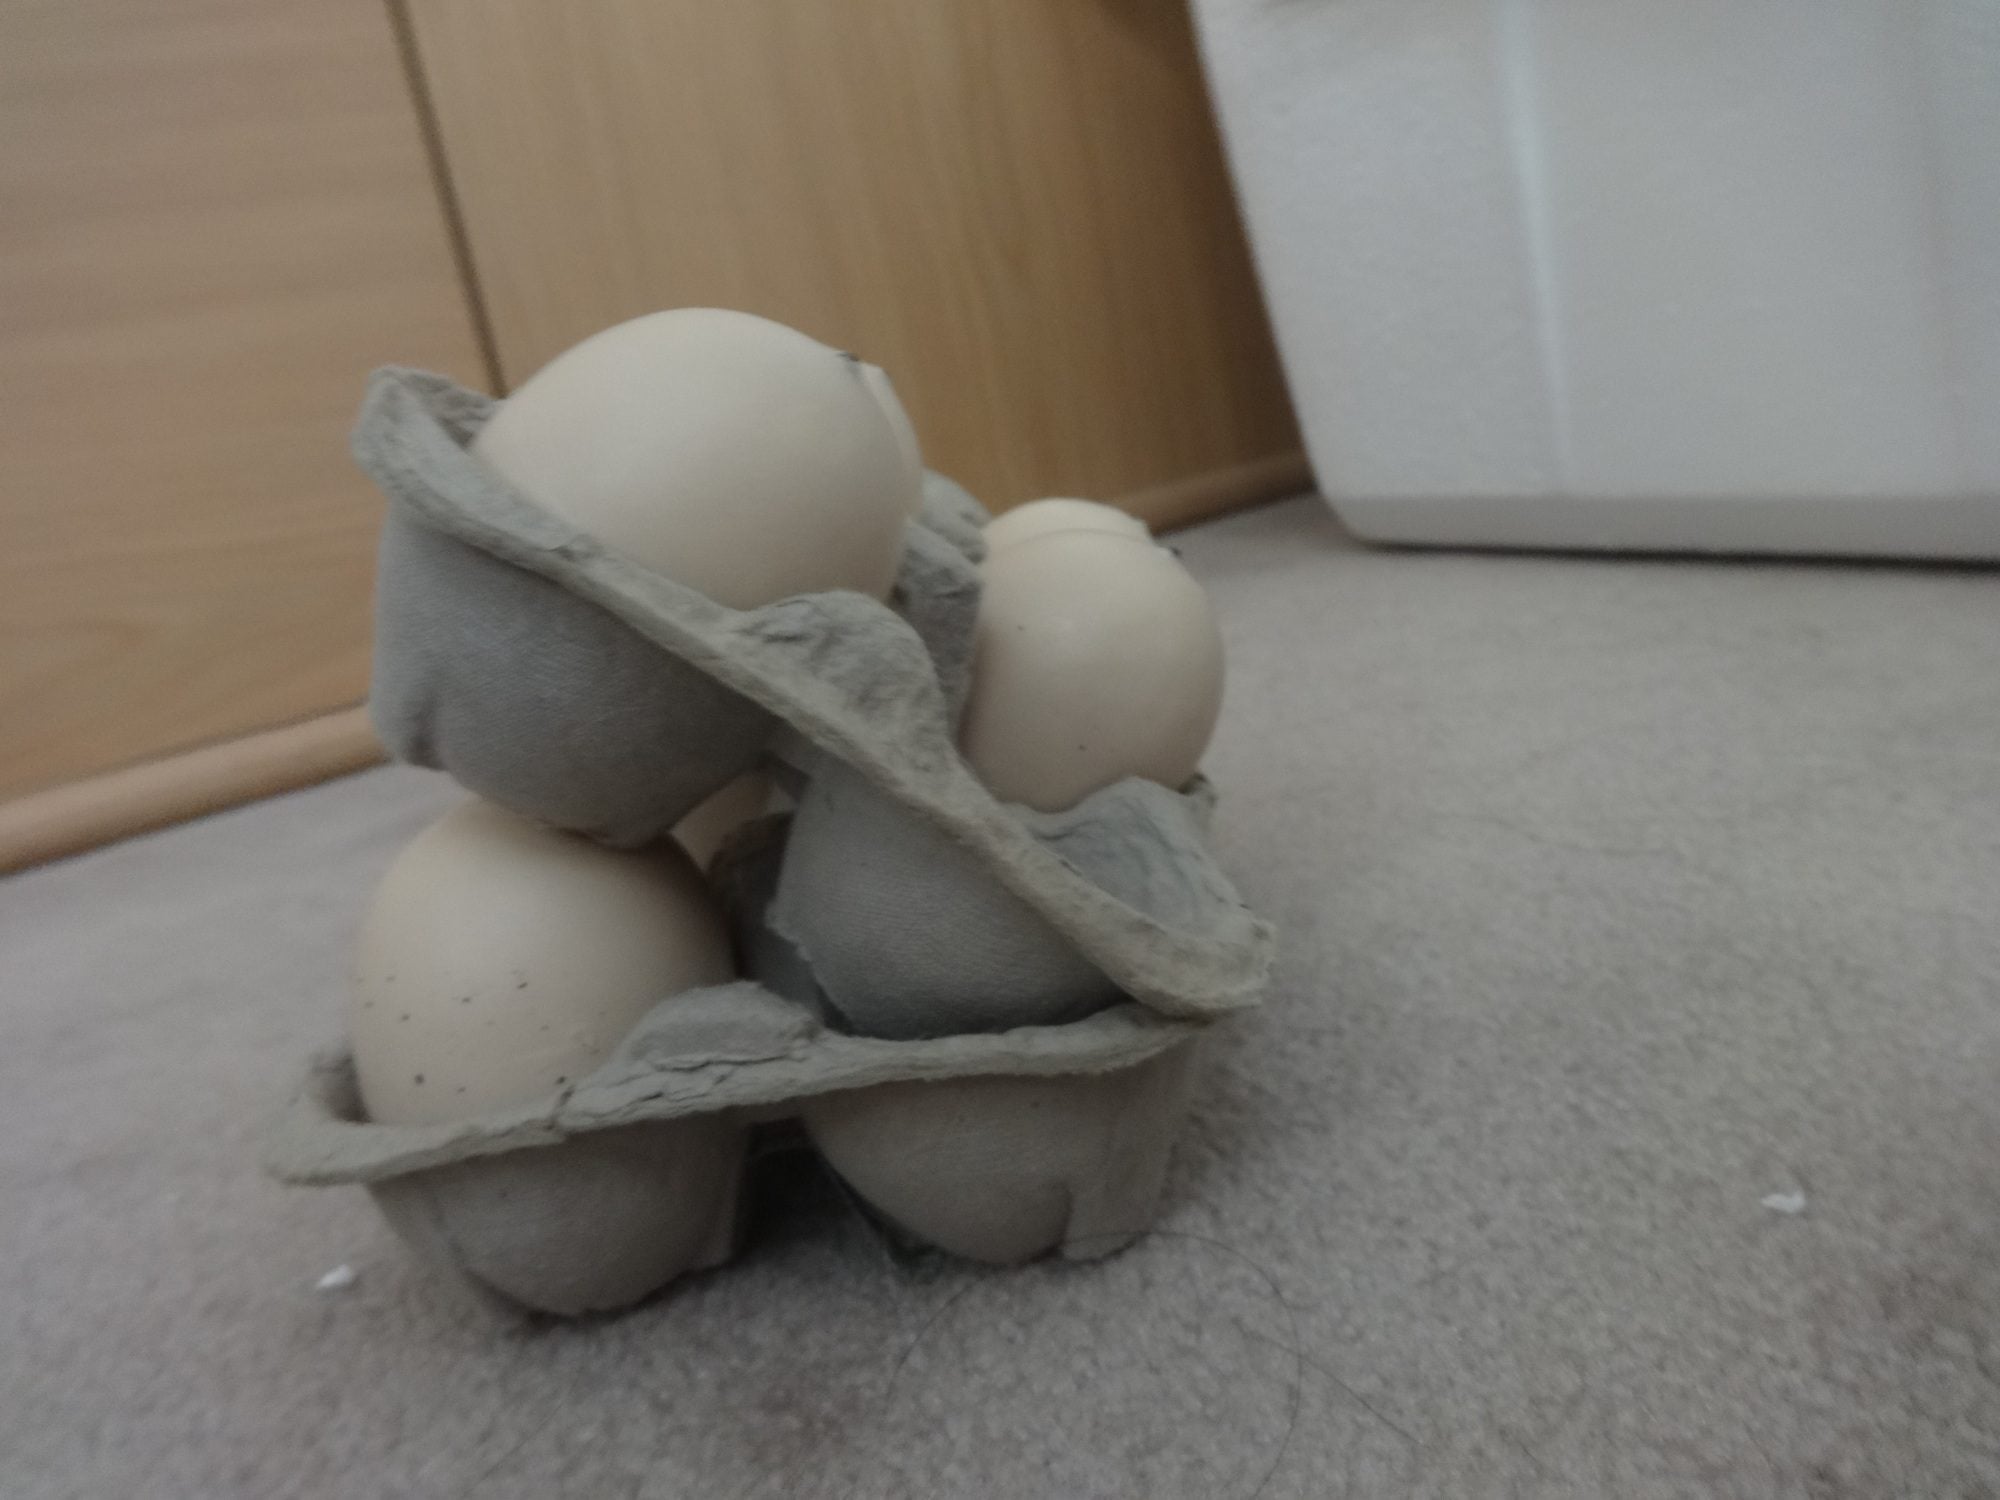
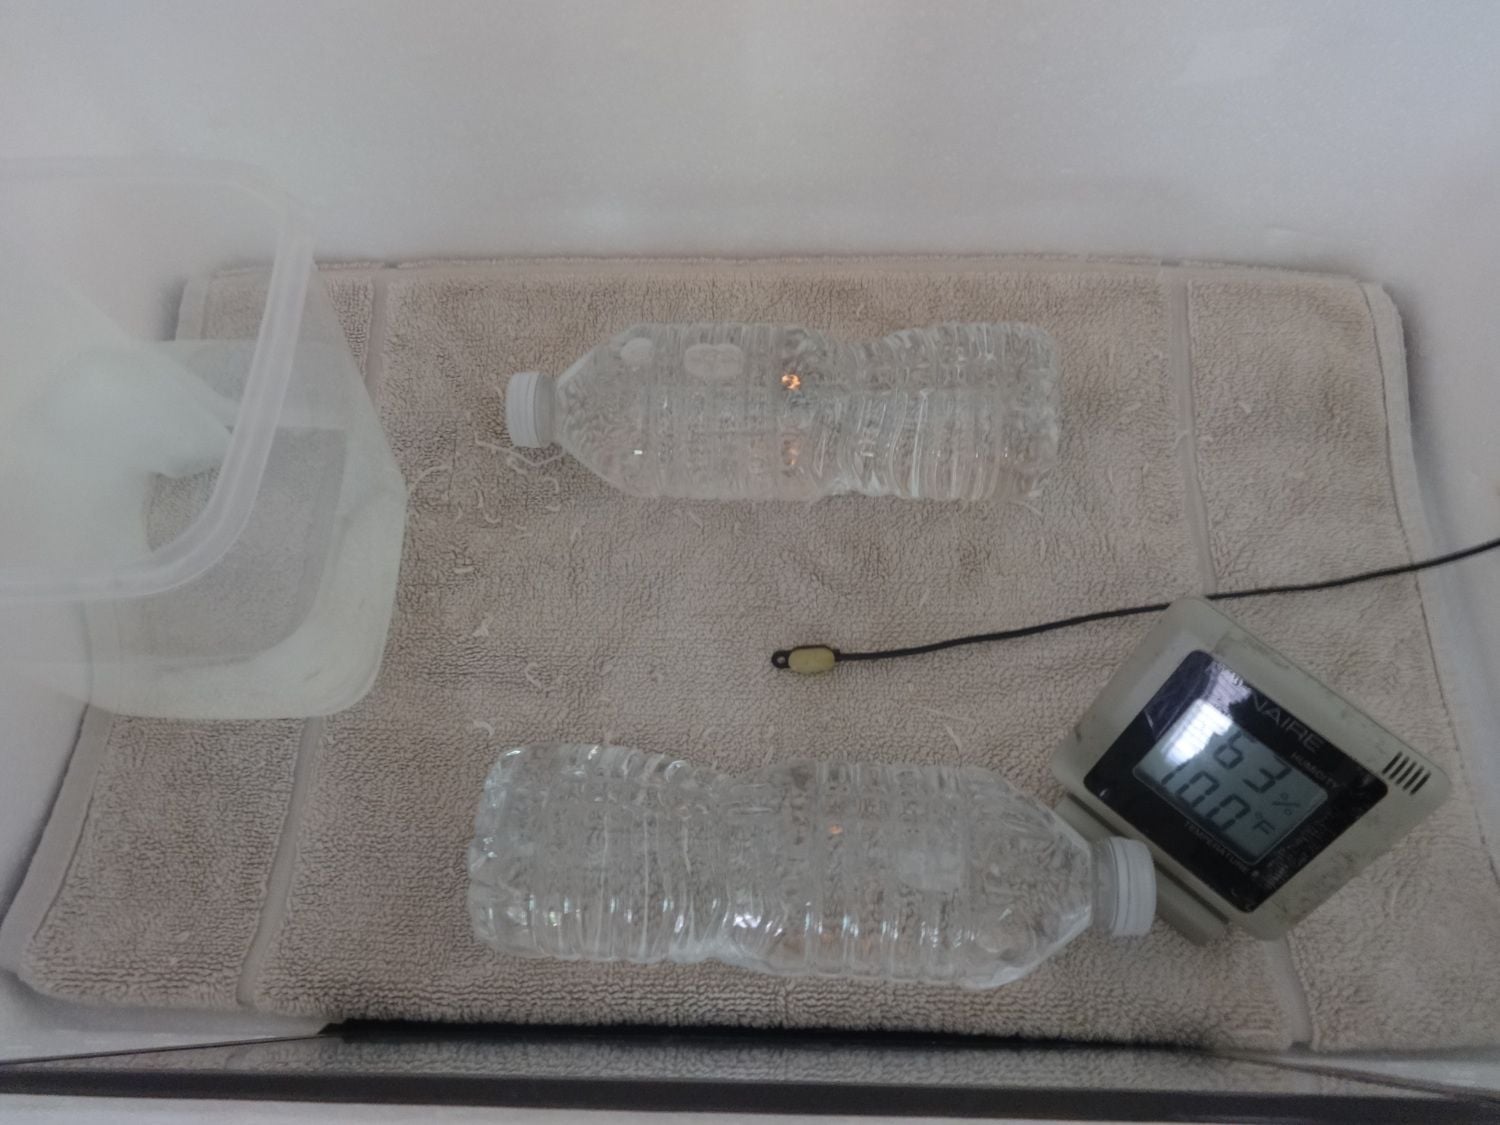
Now That the incubator is almost done, punch one or two small vent holes near the top of the incubator. Make them slightly far apart. Also, here are some suggestions. To stabilize the temperature around the eggs, fill up a few water bottles with warm water and place them near the eggs. This will act as a heat sink, and will not mess up the humidity. Another cool thing you can do to minimize turning time is to put the eggs in an egg turning set as shown above. Get two egg cartons, place 2 fake eggs on one side of the bottom carton, and then put the other carton on top, making a 45 degree angle to put your eggs. This works well with chicken eggs that have a higher hatch rate when lifted up during incubation. (Make sure the fat end of the egg is pointed up. Do research on that!)
Get at LEAST 2 reliable thermometers and 2 reliable hydrometers to measure heat and humidity in the incubator. Test your incubator for a long time before getting your eggs. Play around with the dimmer switch until you find a night/day routine that will keep the incubator between 98 and 100 degrees! I found that after the dimmer is adjusted, it keeps the temperature very well!
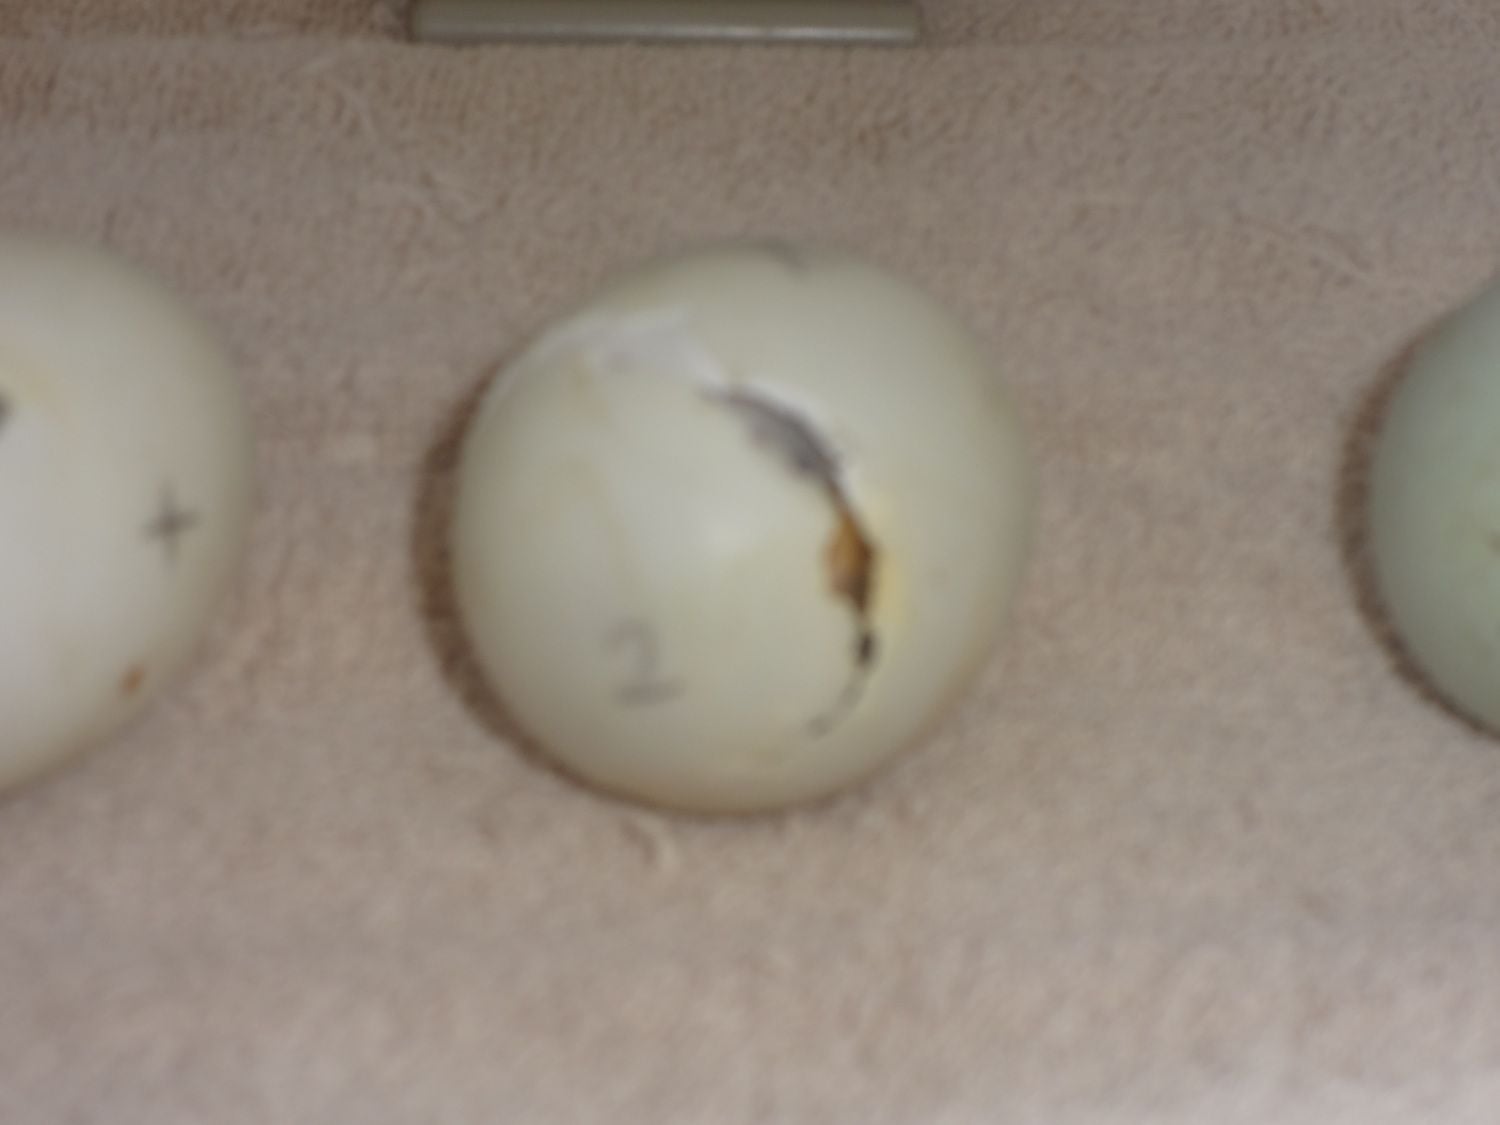
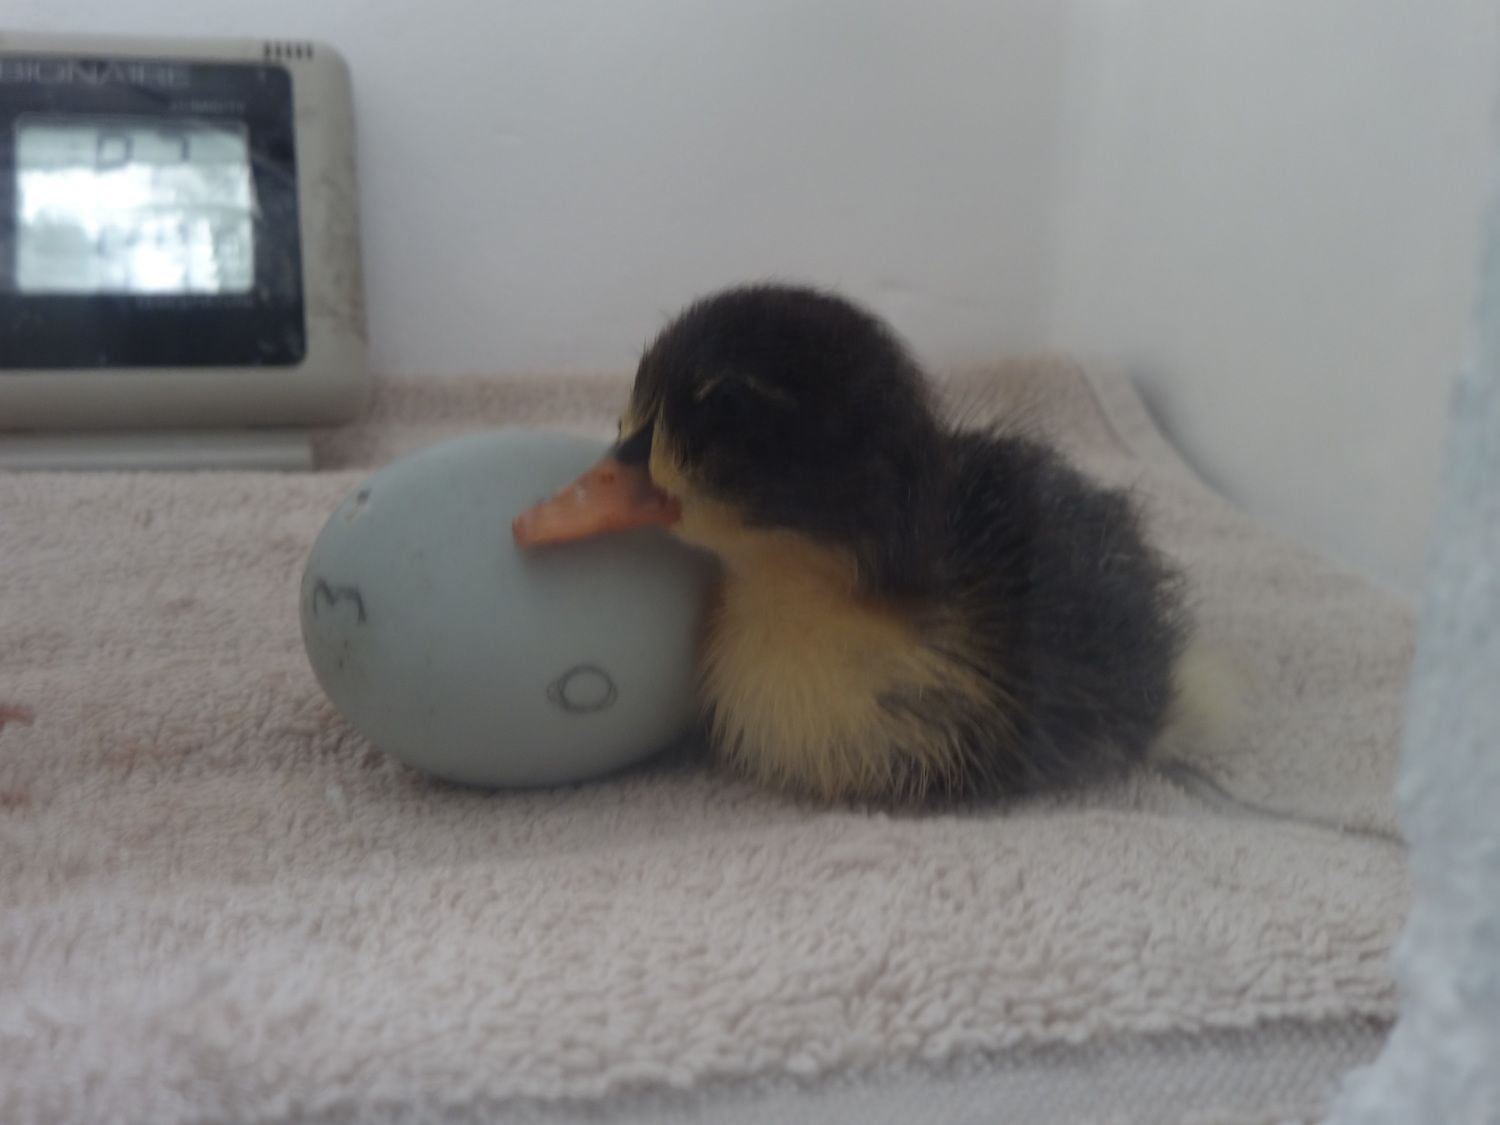
Step 6: Hatch!


Step 6: Hatch!
After making the incubator, I did a little adjustment before hatching my eggs. I moved the light bulb to the top of my incubator, but that was my preference. With the incubator I made in this tutorial, I hatched 4 out of 7 SHIPPED duck eggs! Very good for a homemade incubator! I hope you're happy with this tutorial!