Severe Wet Feather Resolution
If you’re not seeing any progress in your duck’s (or goose's) feathers within the first 5-7 days, it may be time to step things up. The following wet feather corrective procedure should
not be attempted until you first give your duck ample opportunity to remedy their situation on their own
and consult with a vet—
unless their feathers are coated in some kind of substance unnatural to them, in which case this can be done immediately under vet guidance.
- Wash: Place your duck into a lukewarm bath and then place a pea-sized amount of Dawn® dishwashing liquid onto the palm of your hand. I prefer Dawn® Ultra Pure Essentials (which is clear and dye-free as well as hypoallergenic) over the fancier fragranced and colored versions (even the one with the duckling on the label!).
Rub your hands together adding a small amount of water until you have a rich lather. Gently work the lather through their feathers, always working in the direction of feather growth, from base to tip, and
never against. Avoid the areas around their eyes and bill. If needed you can touch-up these regions later with a facecloth soaked in warm, clean water (no soap).
Foster Joseph bathing in the tub
- Rinse: After bathing, drain the tub and commence with a thorough rinsing. Ideally you’ll need a flexible shower head that you can bring down to your duck’s level and adjust to a gentle setting in order to accomplish this. If your bathtub isn’t equipped with one of these, then a plastic cup will have to do (just be sure to use clean water from the tap to rinse your duck rather than scooping up dirty/soapy tub water). Continue rinsing your duck with lukewarm water until you remove all of the soap from their feathers.
- Dry: Lay down a couple fluffy towels and set your duck down on top of them. If your duck is standing, use another towel to gently pat their underside and soak up some of the excess, dripping water. If they’re sitting, the towel beneath them will do the work for you. As the towels get wet, stack more dry towels on top or replace them entirely. Once the bulk of the water has been absorbed, it’s time to take out your hair dryer for the somewhat tedious step of blow drying your duck. Keep in mind this is going to take some time, so make sure you and your duck are set up comfortably for the next hour of feather fluffing (which is a vital portion of the procedure). The good news is once your duck gets used to this pampering, they’ll most likely actively help you out with some preening.
Duck blow drying safety tips:
- Never use your blow dryer in or around a bathtub of water.
- Plug your blow dryer into a GFCI outlet for added safety.
- Pay attention to your blow dryer’s setting. Medium or Low heat settings are much safer than High heat settings, which can burn your duck's skin (including their bill and feet).
- Keep your blow dryer far enough away from your duck’s skin to prevent any burning.
- Don’t hover over one feathery spot for too long to prevent any burning (keep your dryer moving).
- If your duck begins to pant, lower the heat setting and/or open a window or door to allow better airflow into the room.
You’ve now effectively removed all of the dirt and oil from your duck's feathers and successfully restored some of their fluff. Keep in mind, while your duck is now spotless, they can no longer successfully repel water. In essence, what you’ve done is given them a nice, clean palette to start with. They no longer need to struggle to get on top of filth removal; you’ve just done this for them. Instead, they can focus all of their energy on re-oiling their feathers, which is a slow but steady process.
- Wait: Keep your duck in a very clean and dry place (preferably bedded with clean pine shavings) for a total of three days. Give them a small bucket of water—just large enough for splash-preening, but not so large that they can swim or immerse themselves in it.
- Swim: On the fourth day place your duck back into a lukewarm tub of water (no soap) and let them splash and play and swim as much as they want to for about 10-15 minutes and then take them out and set them on towels to dry. If their feathers aren’t fully repelling water yet (which they probably won’t be), you’ll need to blow dry them again.
Continue bathing and blow drying your duck in this manner every 1-3 days until you see maximum improvement in the waterproof effectiveness of their feathers (usually 1-2 weeks). If full waterproofing hasn’t been restored by this time, you’ve likely improved their condition as much as you possibly can; in which case, you’ll need to wait for them to go through a complete feather molt before their situation will be remedied entirely.
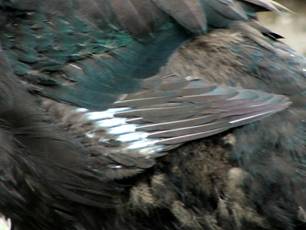
Close up of Cayuga Bonnie Bonster’s sprouting feathers
- Patience: It’s important to remember that you’re not likely to see an immediate improvement in your duck’s ability to repel water. It can take a week or two before their re-oiling efforts add up enough to become significant. Progress may only be very slight at first, if noticeable at all, but it’ll usually improve slowly over the course of the next week or so.
Do
not repeat this procedure (except under vet advisement, when something foreign is on your duck’s feathers). If their wet feather is going to improve, it’ll work the first time. This procedure requires time, cleanliness, patience and attention to detail in order to have any chance of effectiveness. Repeating the procedure only sets your duck back to square one again in their re-oiling efforts.
Remember, this procedure doesn’t actually restore structural damage to your duck’s feathers; it merely helps remove dirt and oil, affording them a clean start. Additionally, it doesn’t work in every case. If your duck’s feathers are messed-up beyond repair, no amount of re-oiling will help make them waterproof or insulate them properly again. Only a complete molt can accomplish this.
http://www.majesticwaterfowl.org/artwetfeather2.htm