How To Take Better Photos Of Your Chickens

absolutely, please share!!!!!

Okay, thanks. You touched on some of this already but there are a few things that haven't been mentioned yet. This was based more on wildlife photography but 90% of it can be applied to pet photography too. I just copied and pasted it. Here it is....


Alright so I got into photography about 4ish years ago and I started out with some pretty good camera gear but my pictures really were not that great. I thought they were pretty good at first, but after looking at what some other people were posting I could tell they weren't. Their pics looked like national geographic quality and I didn't know what I was doing wrong. So I started watching tons of youtube videos and finally got a decent understanding of what makes a great picture great. Here are some of the tips I learned from all of the videos. Disclaimer: I'm not a professional photography and some of the terms I use may not be exactly correct but I have pretty good grasp of the overall "picture"... lol


1) Get as close as possible to the subject.
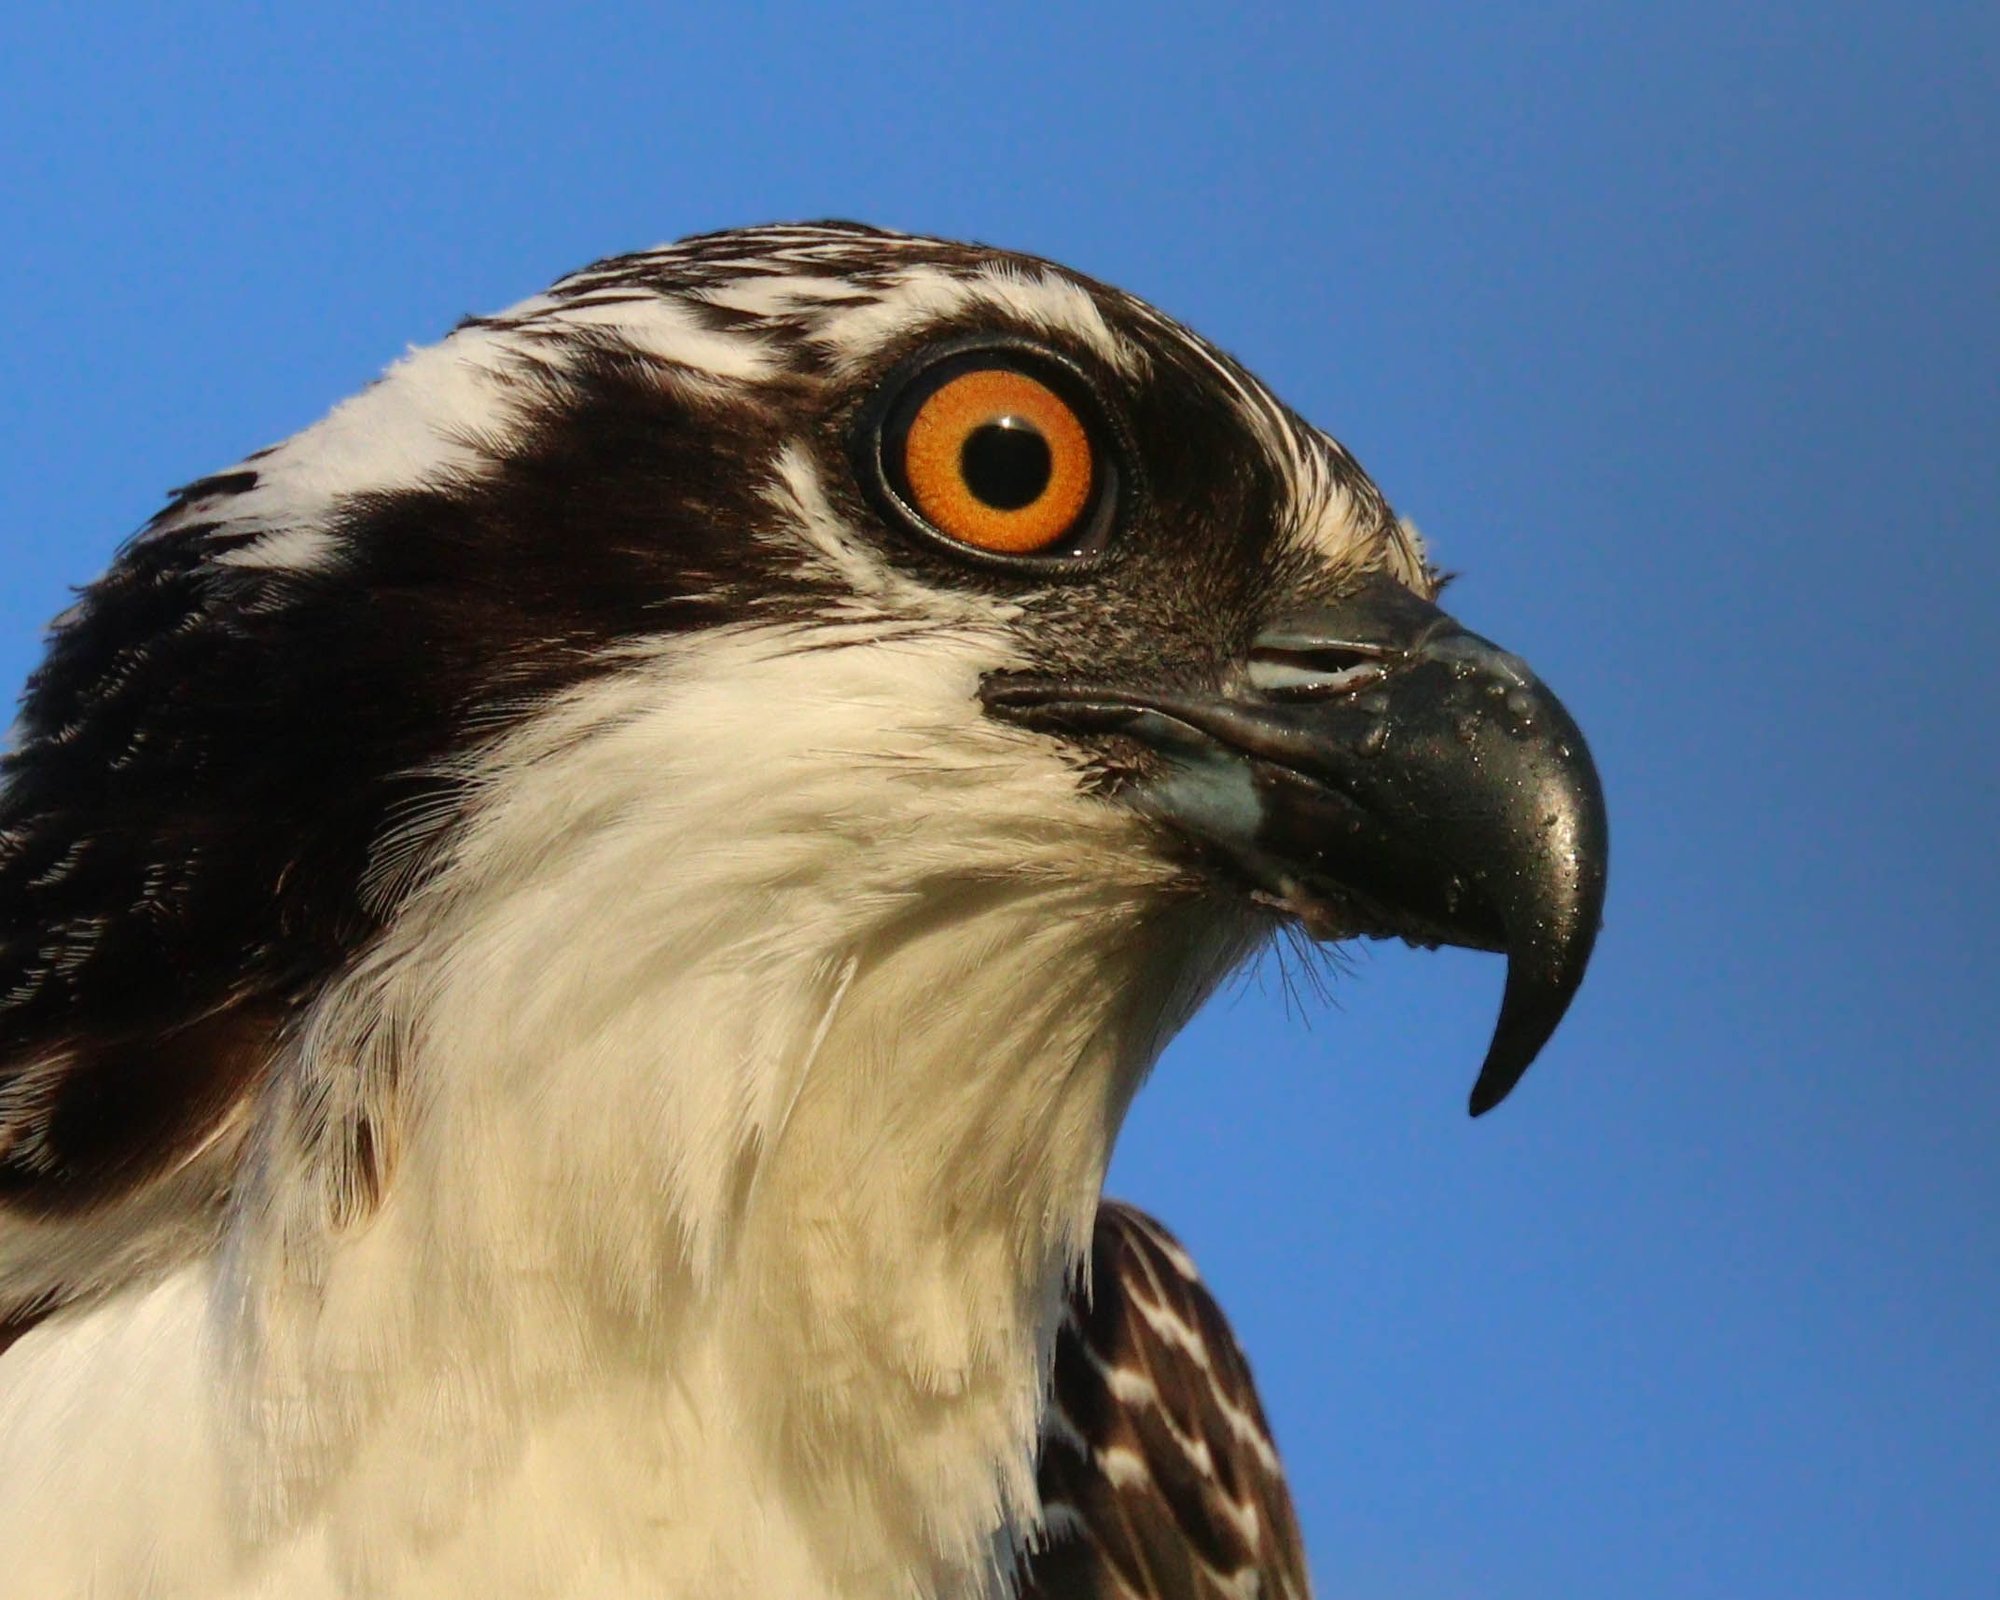
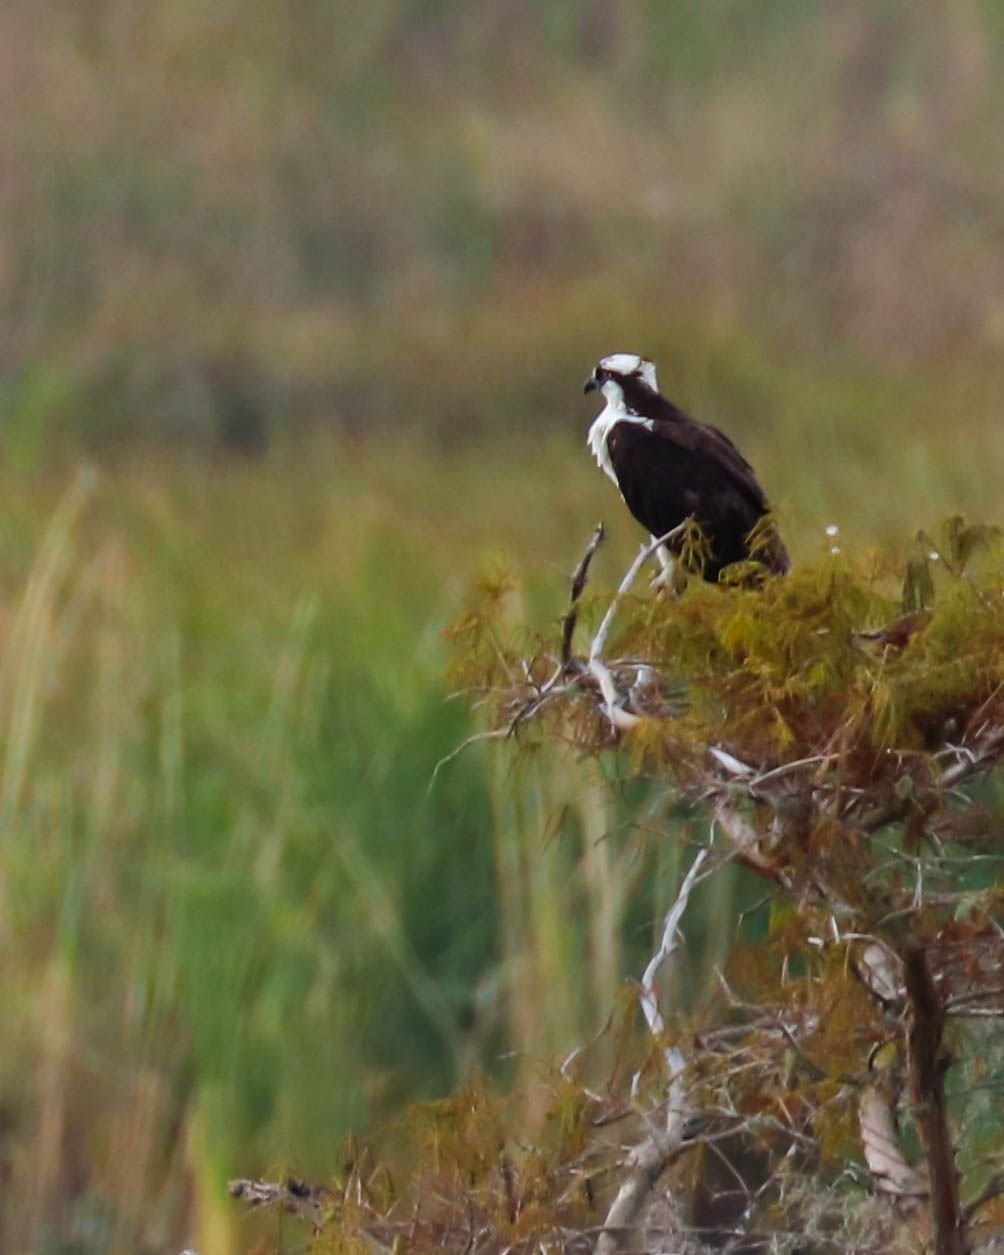
The closer you get, the more detail you get. It's as simple as that. I couldn't figure out how people were getting such great detail in their pics then I realized that a lot of them were 5, 10 and 20ft from the subject. Of course using a high quality zoom lens helps too.

Here's pics from 200yds away, 20yds away, and 20ft away...…

img_6966_eb00e253066c6374d1c59570c867f62d8e1367f8.jpg


img_6313_549b0f9a6596fea0084303462354edf118990d89.jpg


img_3173_dc2dc287ce9fba644a411ff1fb8b3c265adb84e3.jpg


2) Get eye level with your subject (sometimes means laying flat on the ground).

You do this for 2 main reasons.:

#1
when you are above the animal looking down the animal appears subordinate to you. I know it seems weird but its true. When you get eyelevel it's like you are a part of their environment/habitat and it comes across more natural. I know it's weird but you will be able to see what I mean in the following pics.

#2 You want to get low to the ground so that the background is a long, long ways away from you. The further away the background is, the blurrier it is. This helps to create completely blurred out backgrounds which makes the subject "pop out" in the picture. You'll be able to see what I mean in the following pics.

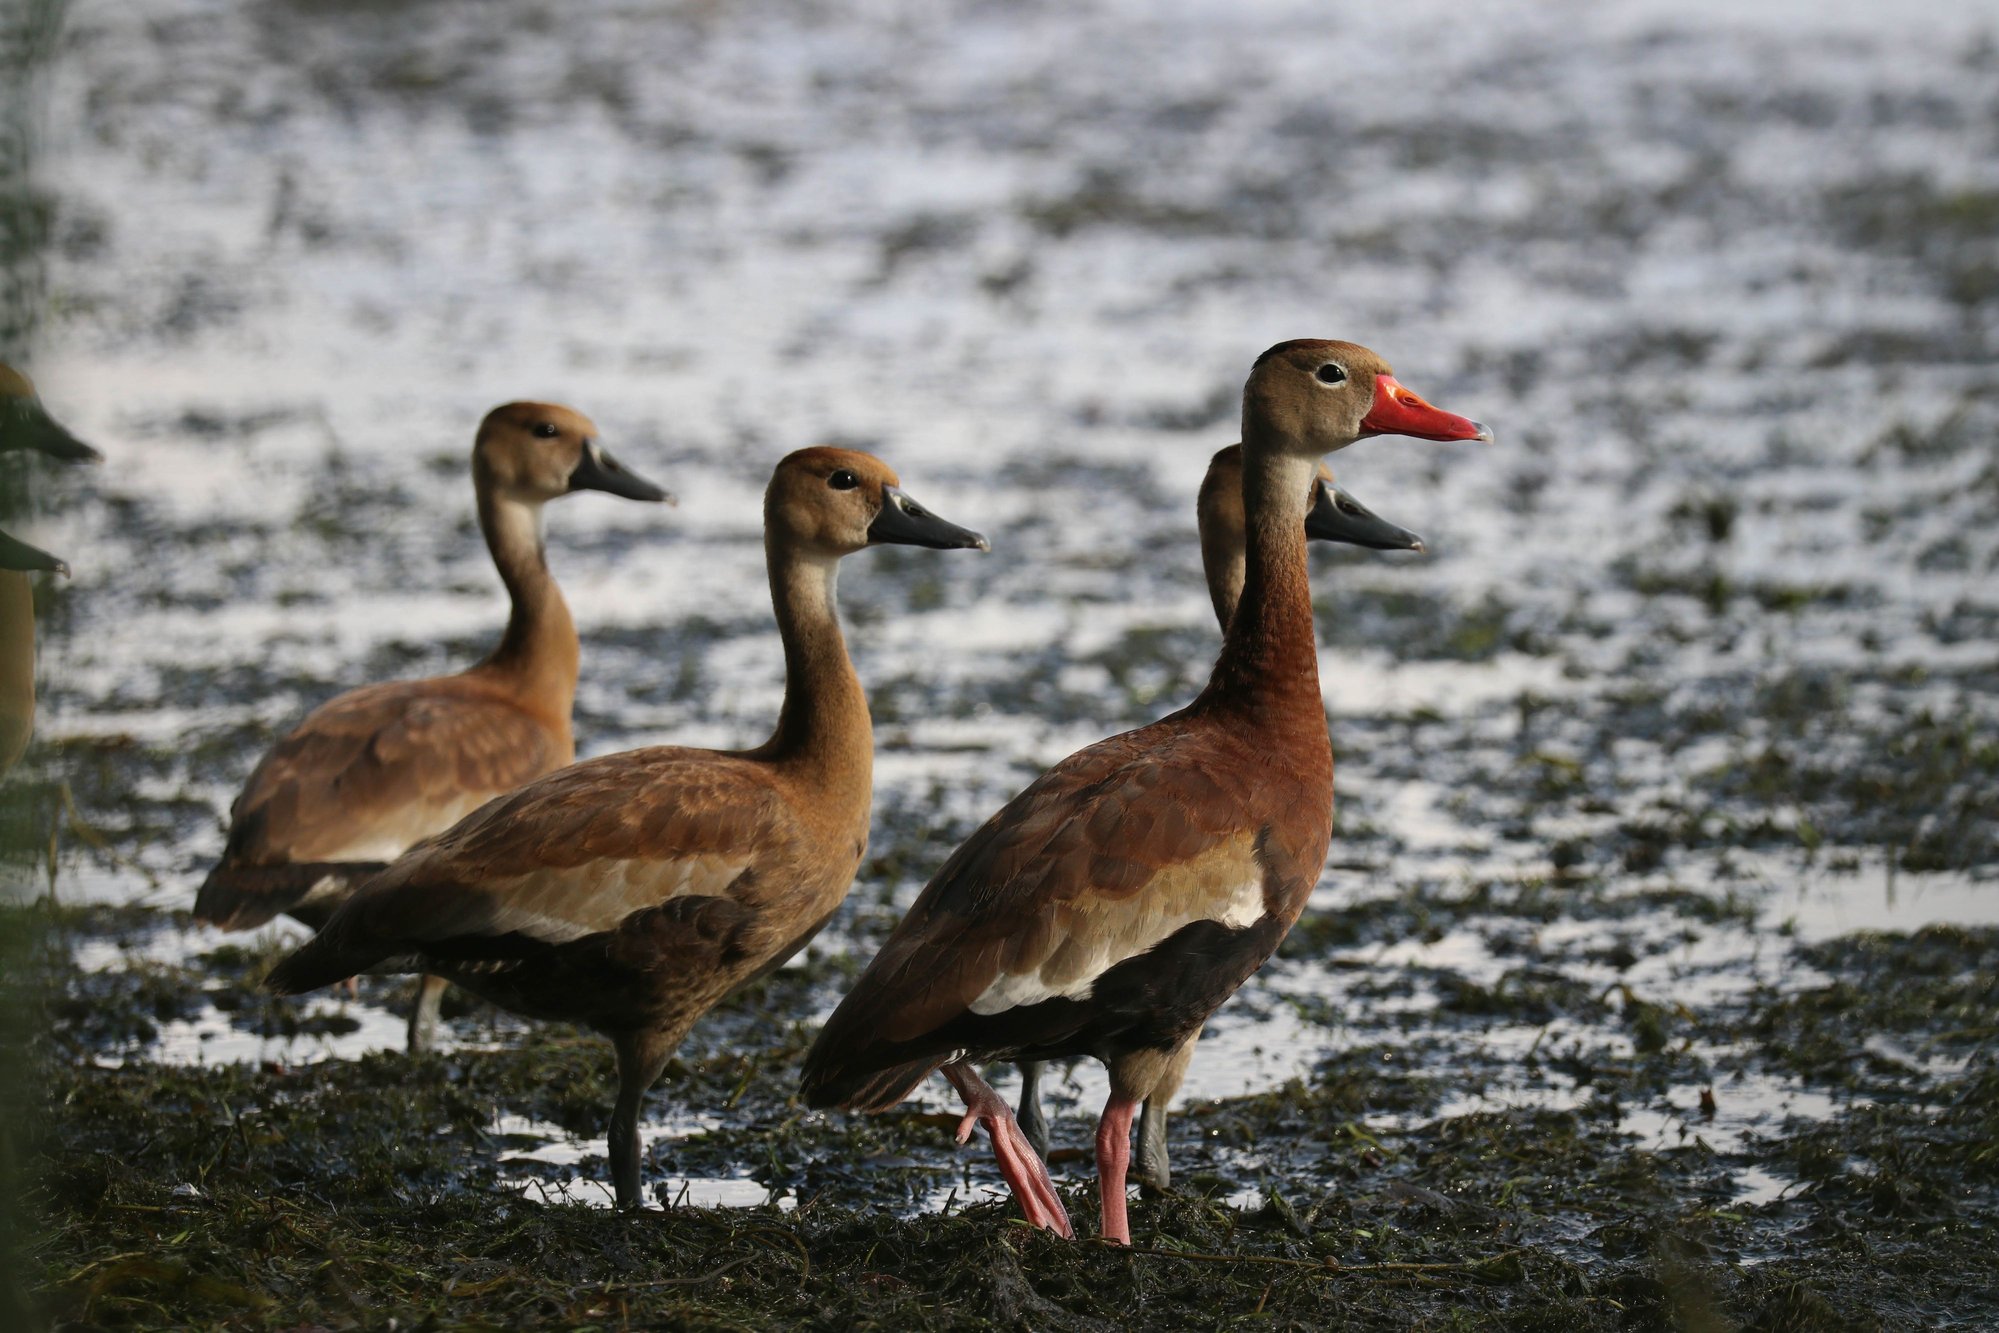
So these two pics are of the same ducks, in the same place, at the same time, with the same camera/lens, and the difference between them is pretty astonishing. In the first pic I'm taking a knee, looking down at the ducks. This is what a "normal" pic looks like. I've taken thousands of them like this, but they're really nothing special. In the second pic I'm laying flat in the mud, lol. By laying down you have more foreground and background in the pic, this allows the foreground and background to blur out and really makes the subject "pop" instead of having the background in focus, distracting you.
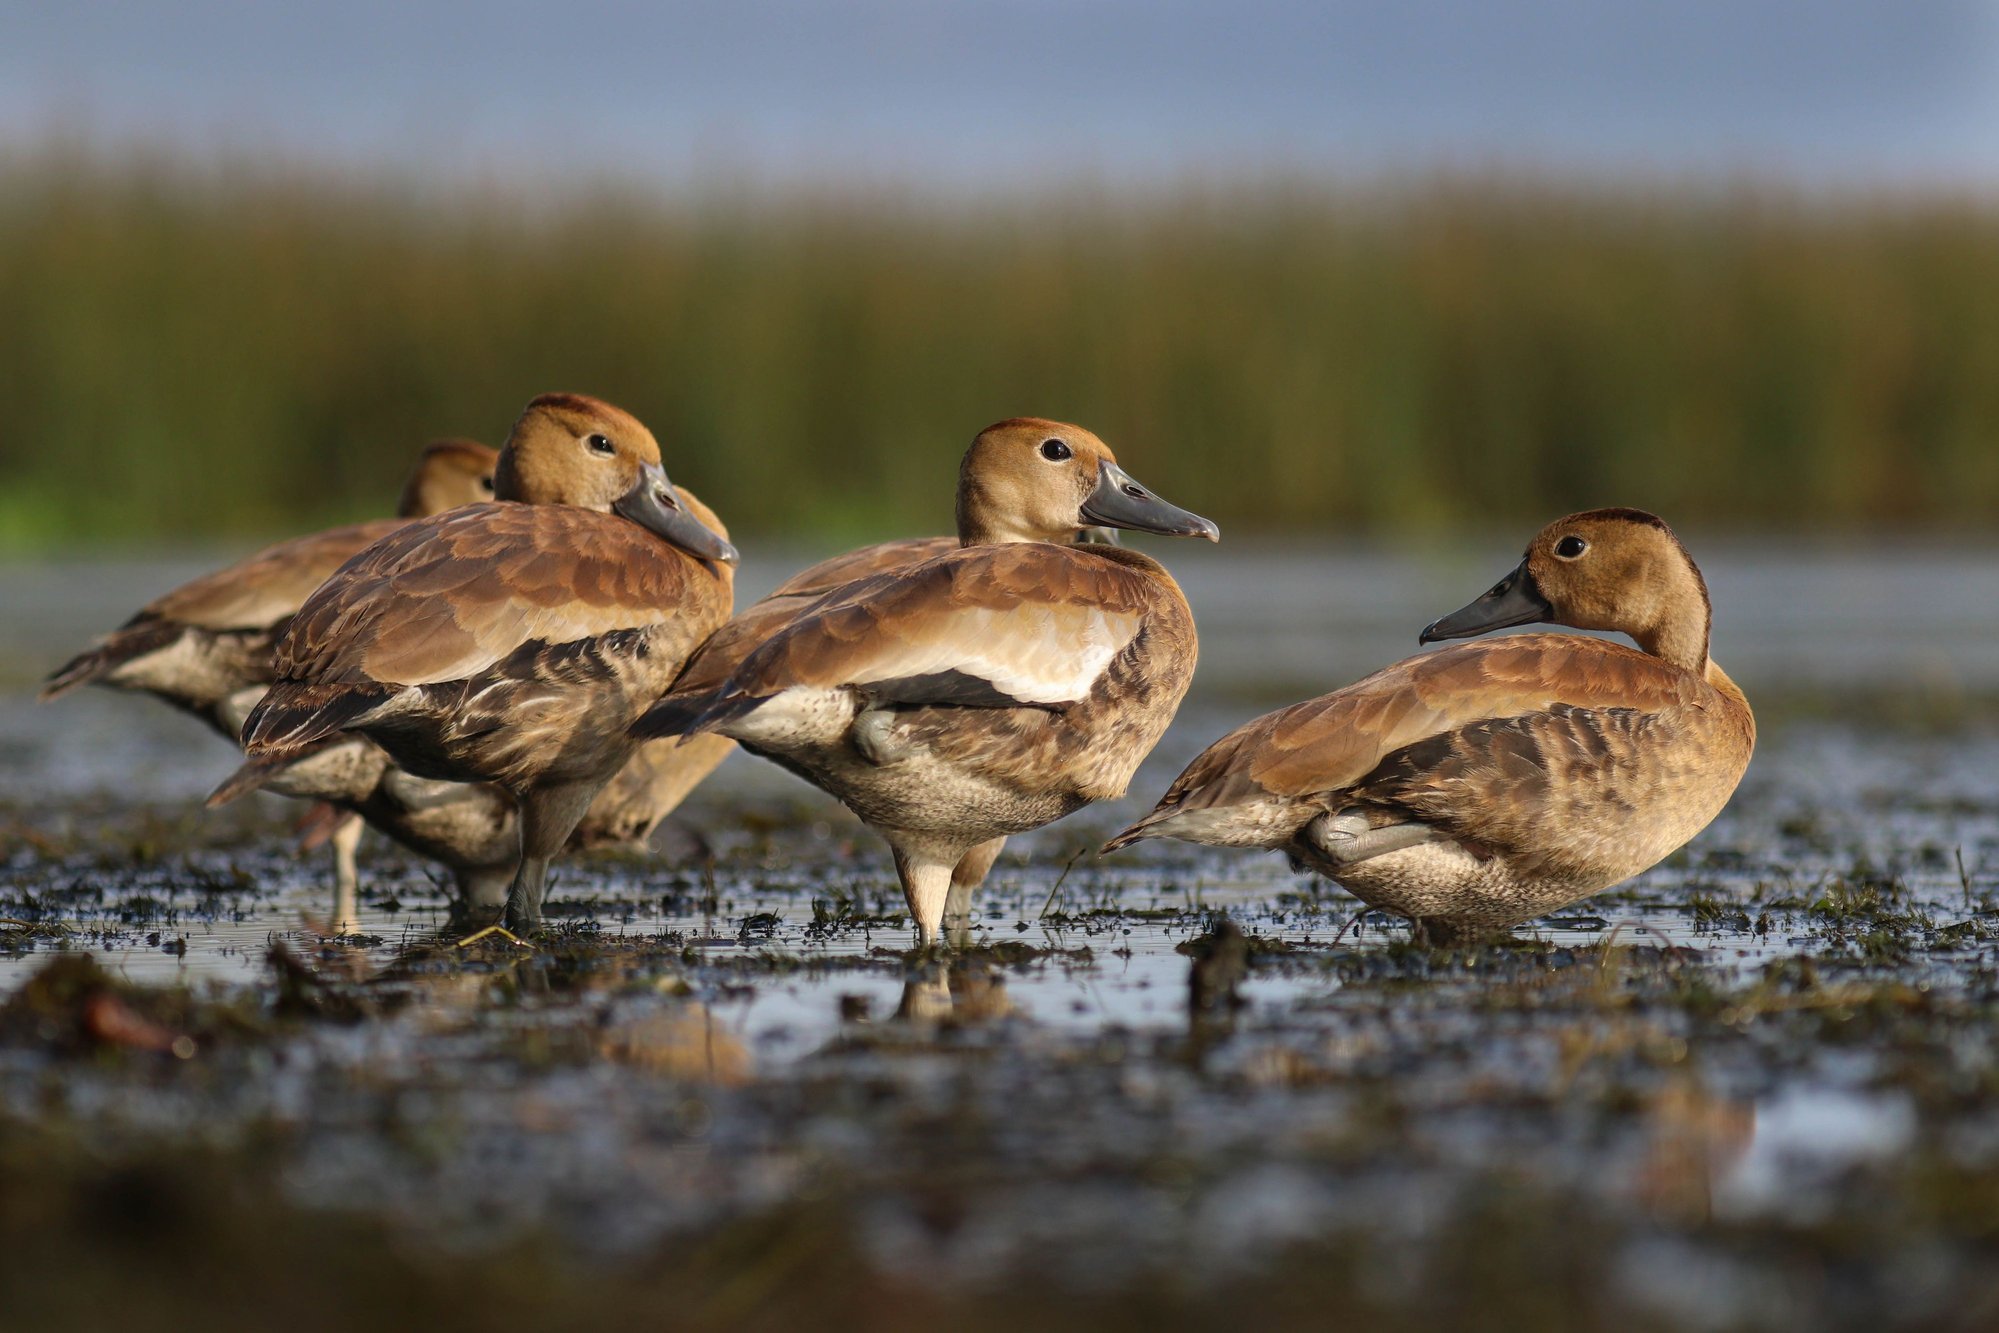
img_4652_4eeb9d458e334842139c4a7d9f7111fe5bd68c20.jpg


img_4902_bc0cd46ab0785168e46b5699b2ff855025541080.jpg


To better explain... in the first pic, the top of the image is around 10ft past the ducks and the bottom of the image is around 6" in front of the ducks. This means the bottom of the image is in focus (distracting) and the top of the image is slightly out of focus (only slightly distracting). In the second pic, the top of the image is now around 40 yards past the ducks and the bottom of the image is around 15ft in front of them. So both the foreground and background are completely blurred out, this makes the ducks really stand out or "pop".

There's another thing I did to improve the second photo. In the first pic, the ducks are looking towards the sun (you can tell by the shadows on the back of their necks). For the second pic, I moved to my right about 15ft and positioned myself between the ducks and the sun, this gets rid of the shadows, and is also going to be one of the next tips...


In the next pic, instead of walking up to the frog and taking a picture looking down at it (or taking a knee and angling down at it), I laid in the grass and got as close to eyelevel as I could. It gives a very different perspective, kind of like you are part of the environment.
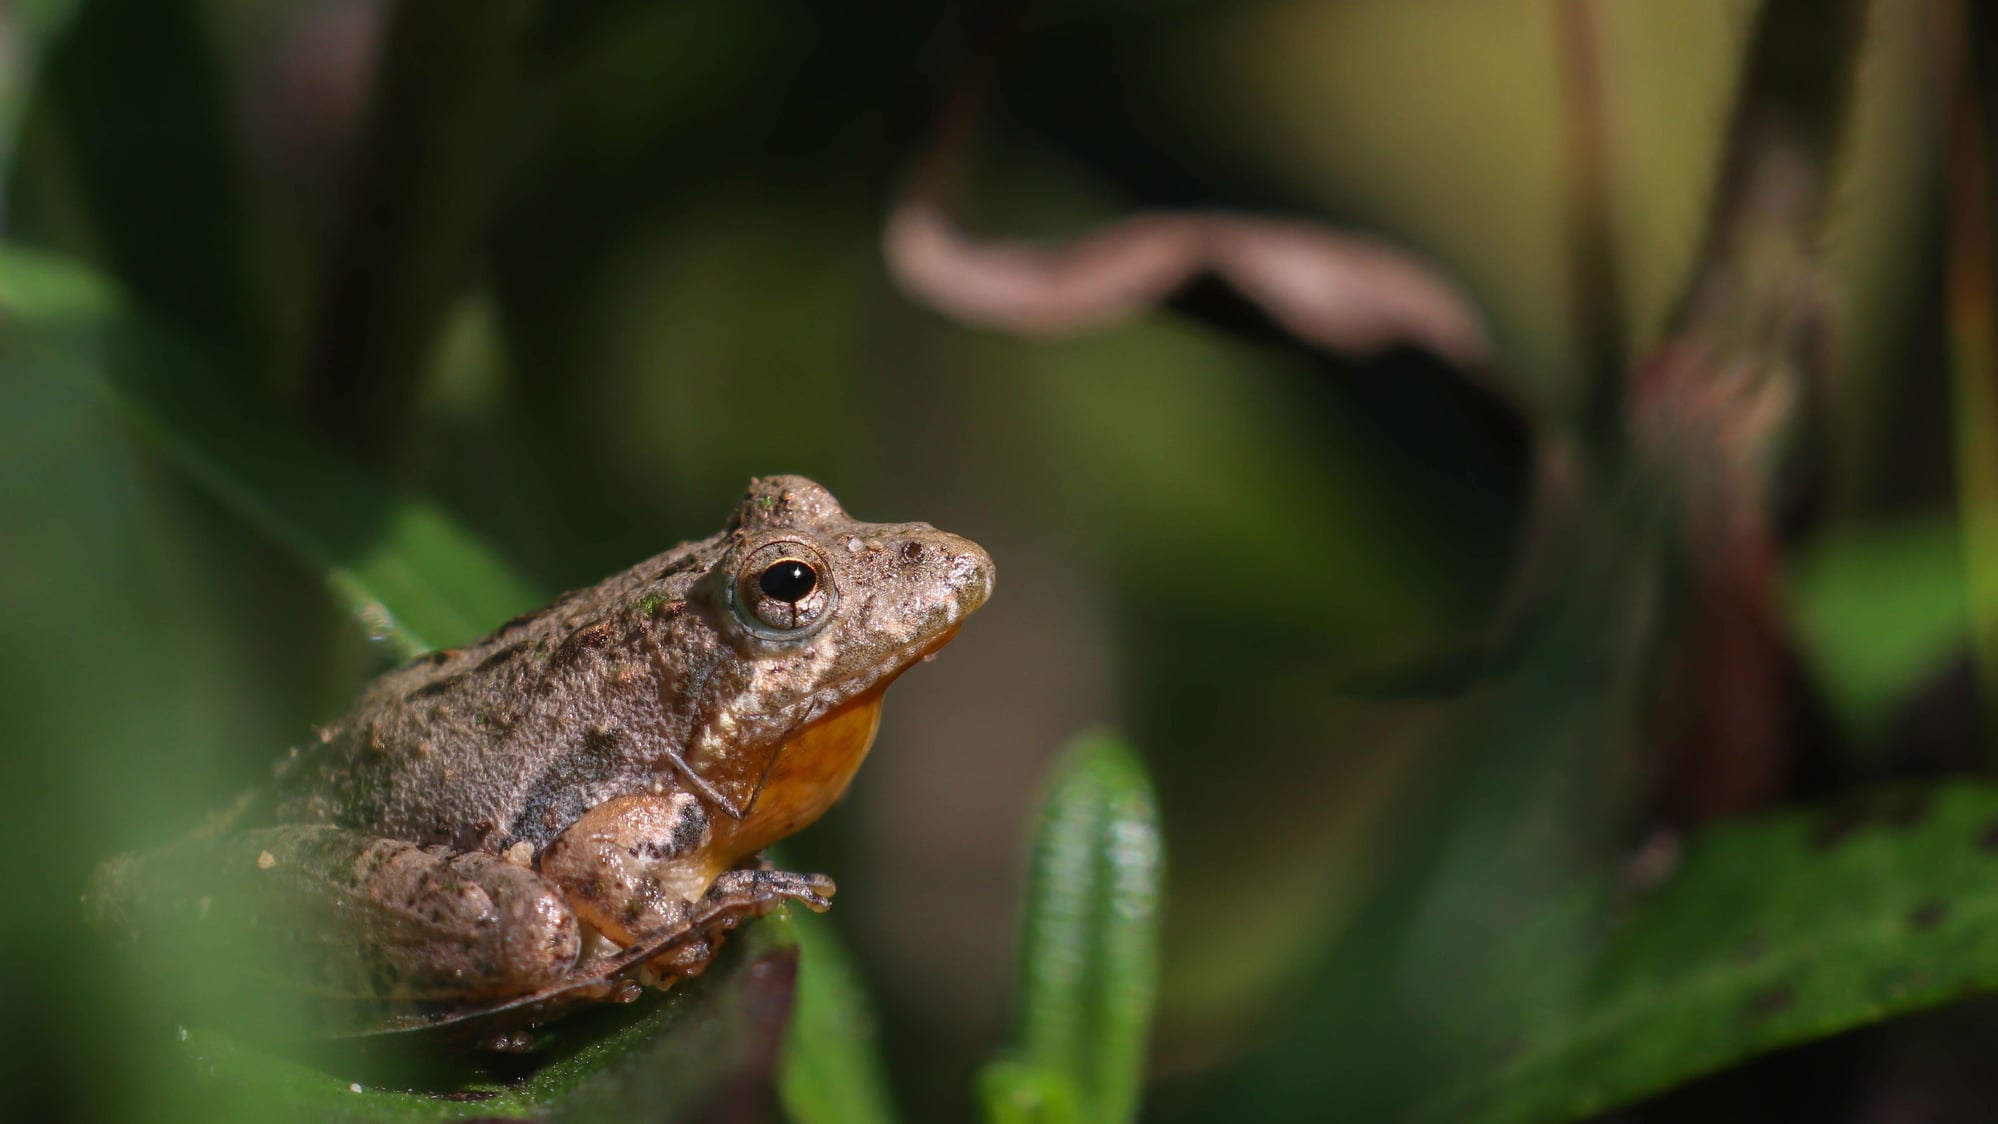

img_1852_68ae947961434b51bbe493544f0fba1a6b49794d.jpg


Look at this goose pic. I was standing or maybe kneeling in this pic. I can only imagine how good this pic could have been if I would have laid down and got an eyelevel pic instead.... (and got closer to him so I wouldn't have to crop in as much, and positioned myself further to left so the light would come from behind me and not cast a shadow on his back half, and so the goose is facing me instead of angling away, these are the next tips...)
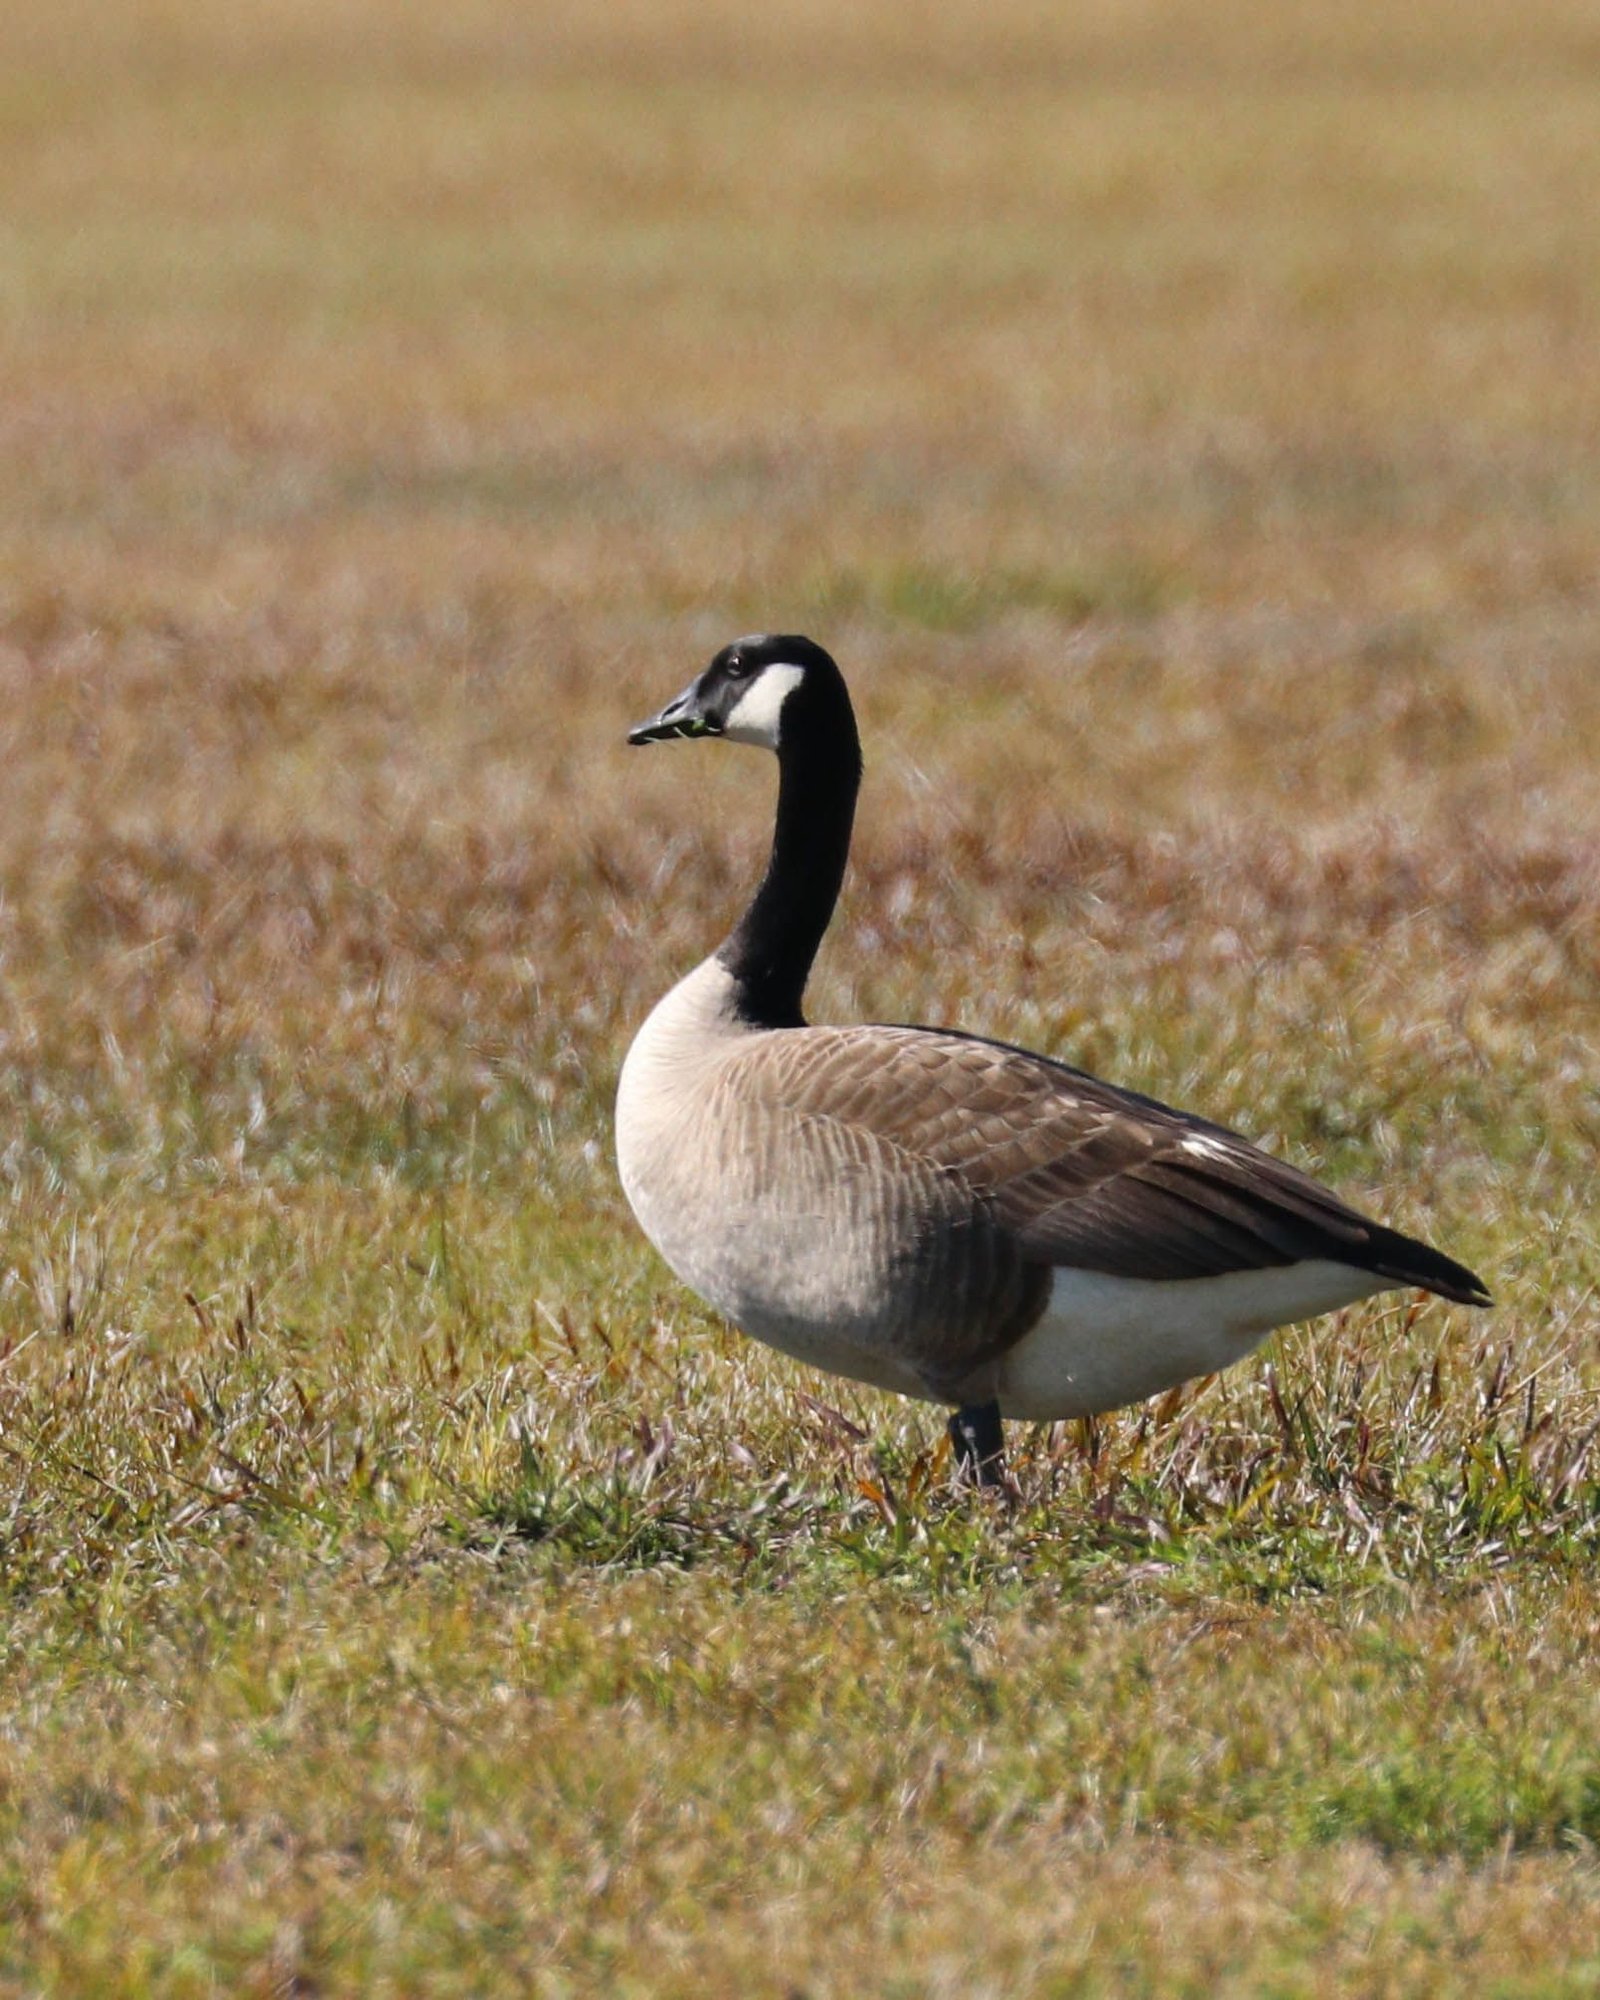

img_9212_195aa5bfbae6aa791a028b888ff1aa1d93615e46.jpg


Here's another goose and this time I got as low as I could, not quite eyelevel, but close. Notice the rather blurry background, it's a better perspective.


IMG_4589.jpg


And here's some geese with that low perspective and blurry backgrounds. My camera is about 6" off the water in this pic. These geese were a long ways away which is why the background is not completely blurred out.
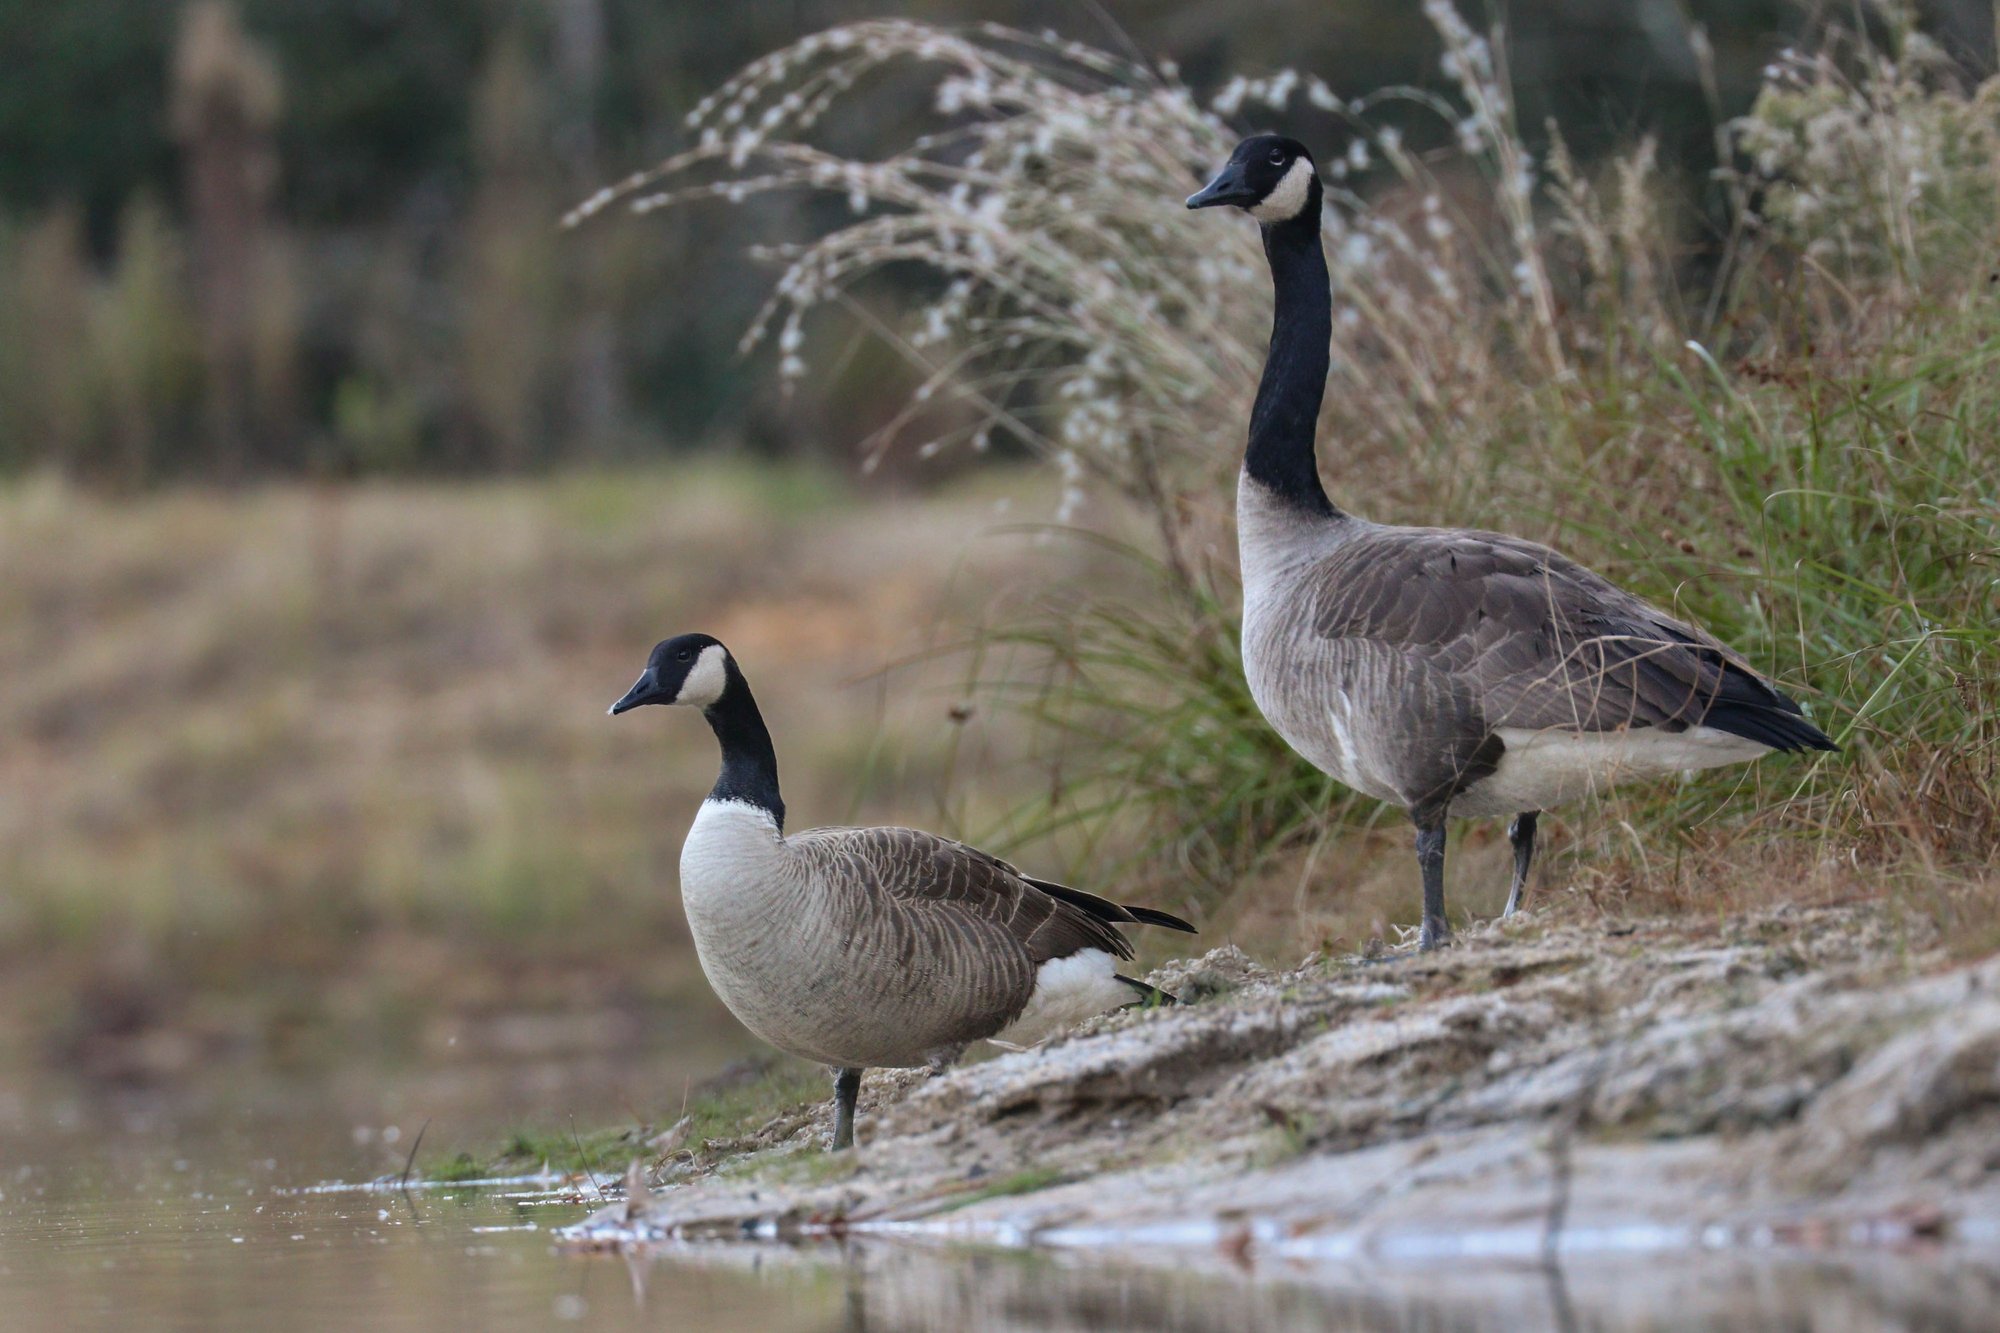

img_6516_c5e1f475a6081d076eb474e1ee671e7890ec91f3.jpg


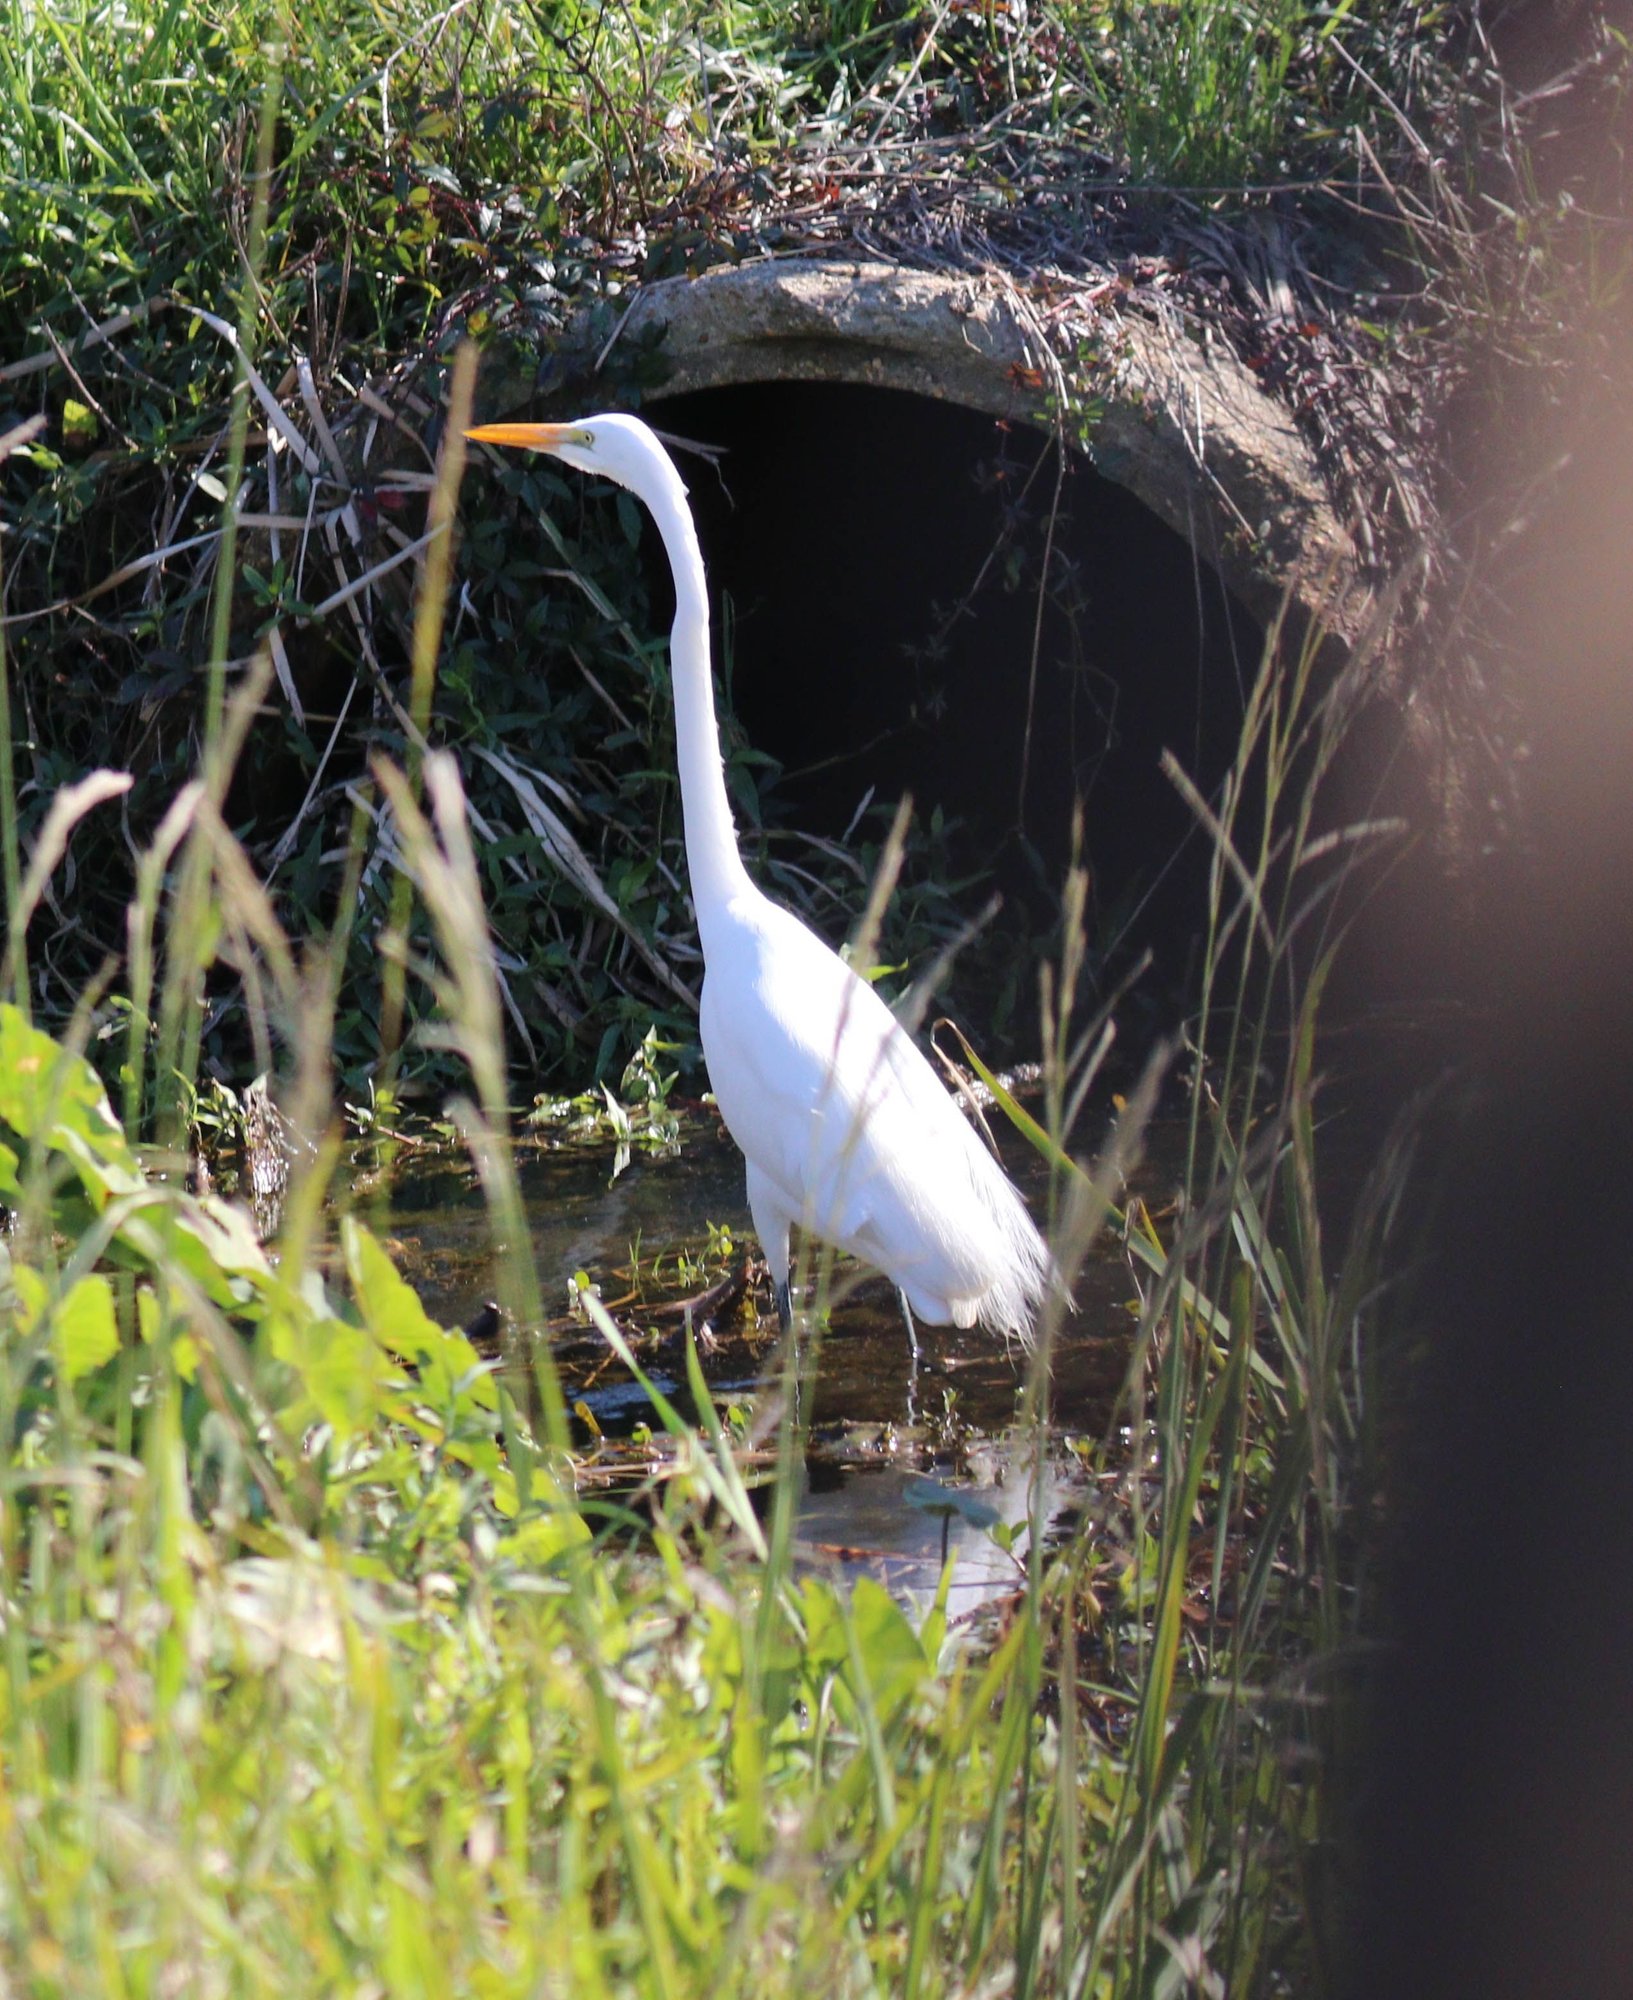
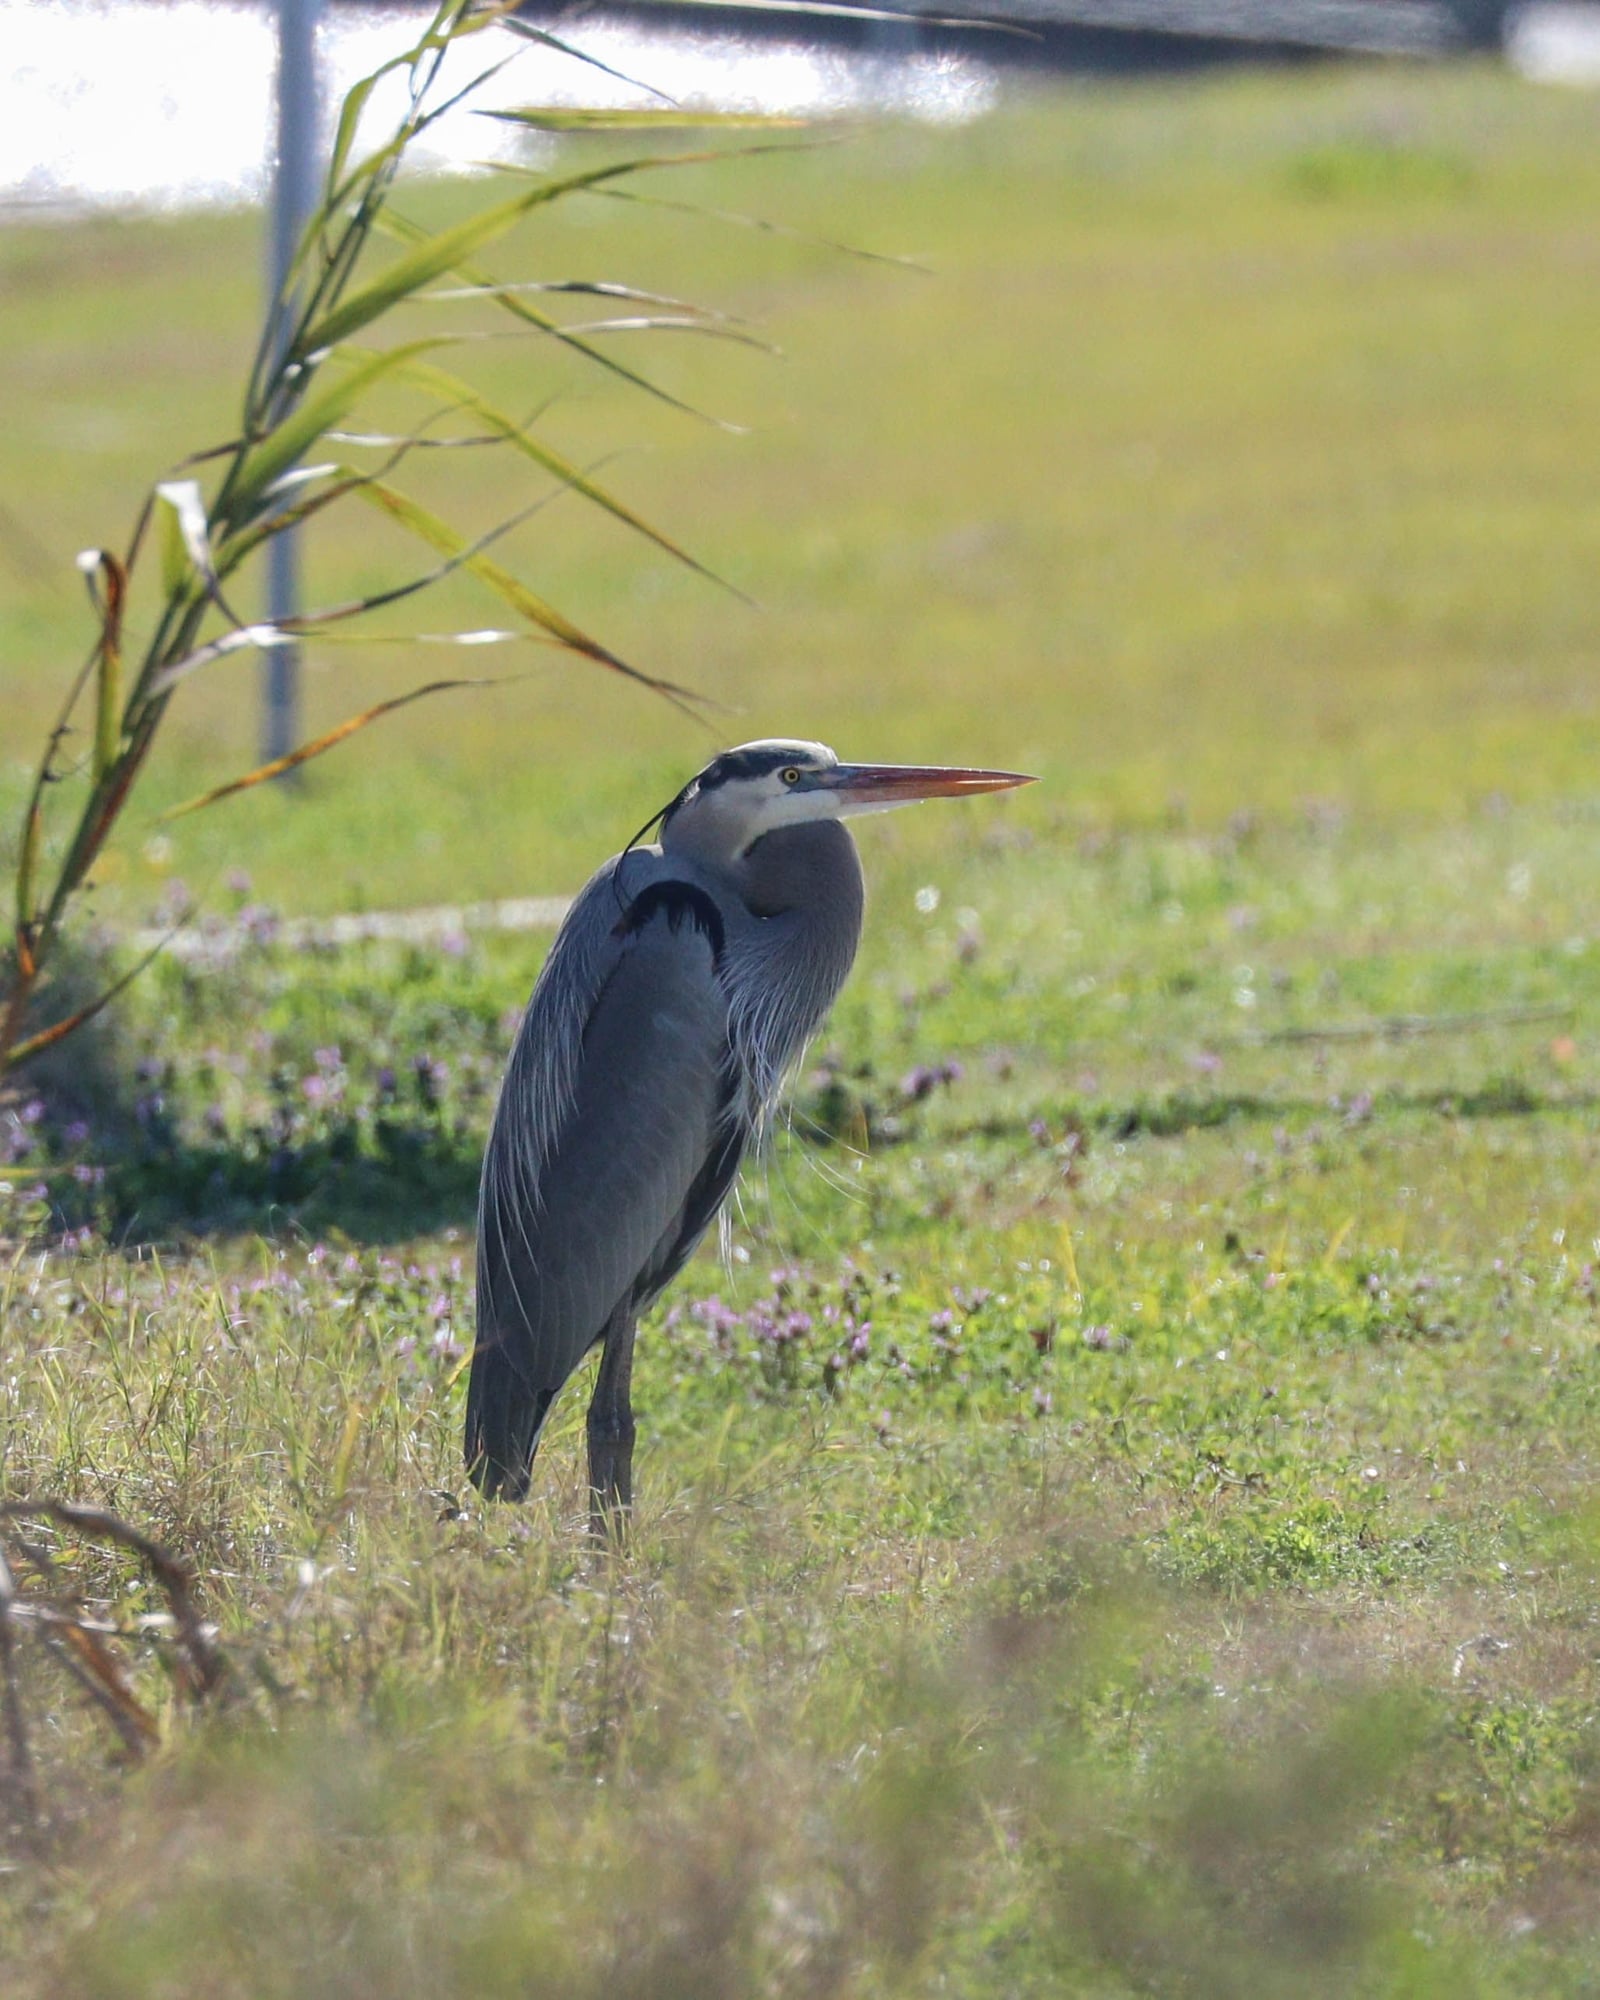
3) Position yourself so the sun is at your back, fully lighting up the subject

Here's a couple old ones, lol. Both these pics are where the sun is high in the sky and bright (called harsh light). See how the bright sun is hitting the birds back, creating a shadow down the side. This is not ideal...

img_9210_d1511714071480260426efb89644f01f81dbd43b.jpg


The sun is slightly behind the bird in this pic. It's very hard to expose this picture properly because if you brighten the bird up the background gets super bright....

img_9218_a251ee5aff5737e44e029e68c093ef8582eecafc.jpg


4) Take pictures during "golden hour". This is right after sunrise and right before sunset. It's a very soft light. If you take pictures at 12 noon with a bright sun (no clouds) you have a bunch of shadows which are very hard to work with.
So the previous pics were in bright harsh light, this is what golden hour looks like..... soft, warm light with a nice golden glow. Remember you want to position yourself so the sun it as your back, lighting up the subject.


1590866465150.png


1590866504823.png


IMG_7331.jpg


5) Make sure the animal is facing you or at minimum perpendicular to you. You don't want to take a pic of an animal that has his back to you or is angling/looking away from you.
Here's one of the first dragonfly pics I ever took. I though it was the coolest pic ever. But he's facing away from me.


1590866799855.png


Here's what it's supposed to look like....


1590866731795.png


1590866579958.png


6) PROPERLY COMPOSING YOUR PICTURE. This is probably the most beneficial tip that anyone can use and there are a couple parts to it.

What I used to do and most people do is center compose the picture. This means you point your camera at the subject, you put it right in the center of the screen and you take the picture. You end up with a picture like this...

IMG_5881-3.jpg


That is not ideal. You want to use the rule of thirds when framing the picture. You don't want the animal in the dead center of the picture, generally speaking. Basically you draw two evenly spaced vertical lines and two evenly spaced horizontal lines on the picture, then you want to place the subject as close as you can to where the lines intersect. So look at this pic with the lines drawn on it....


IMG_5881-31.jpg


So there's 4 intersecting points where you want to try and place the subject, which one do you use?

Well you always want more open space in front of the animal, not behind it. So if he's looking to the right you place him on the left side of the picture. If he's looking up you place him on the bottom of the picture, etc. So you pick the intersecting point that works best...

Check this next pic out, it is not framed correctly. He's looking to the right so there should be more space in front of him in the pic, not behind him.


IMG_5881-21.jpg


IMG_5881-2.jpg


This pic is framed properly. He's not in the center of the pic, he's looking right so I placed him on the left side of the picture and his eye is very close to the upper left intersection.


IMG_5881-1.jpg


IMG_5881.jpg


This next one is also framed correctly. He is looking down and to the left so I placed him in the upper right intersection.


IMG_7481-1.jpg


IMG_7481.jpg


Here's another one that's framed correctly. The head is in the lower left intersection and I'm also eye level with him...… The only thing I wish I had done differently with this one is zoom out just a hair so I didn't cut off the edges of his body.


IMG_8636-1.jpg


IMG_8636.jpg


Here's one more done properly. He's looking left so I placed him in the upper right intersection. Since he is looking up I probably could've put him in the bottom right intersection also. Remember the "rule" of thirds is not necessarily a rule, it's just a good guideline to go by but it does not always apply.


IMG_8614-1.jpg


IMG_8614.jpg


So here's the question of the day. How do you get him positioned on one of the intersections? There's two different ways. The easiest way is to take a pic of him in the center of the picture then crop the picture after you take it and move him where you want him. This is what I do most often but the problem is when you crop in you lose detail so you need a lot of megapixels to be able to crop in a lot.

The proper way to do it is use a single autofocus point on the camera and move it to one of the intersections before you take the picture. This is more difficult especially with animals that can change position. It's actually more simple on a phone. You just frame the picture where the animal is on one of the intersections then you touch the eye of the animal and the phone camera will focus where you touch and take the pic.

So ideally you want the animal to be as close to where you want him framed as possible but it's okay to crop in a little bit to move him around. The more megapixels you have, the more you can crop.


Here's one more pic that is framed pretty good. His head is in the upper right third, he's looking left and has more space in front of him than behind him. But I could have made this pic even better if I had moved to where that big tree limb wasn't intersecting his beak. It is distracting, which is the next tip...…


IMG_6061.jpg


7) Pay attention to your background and move yourself to make it better
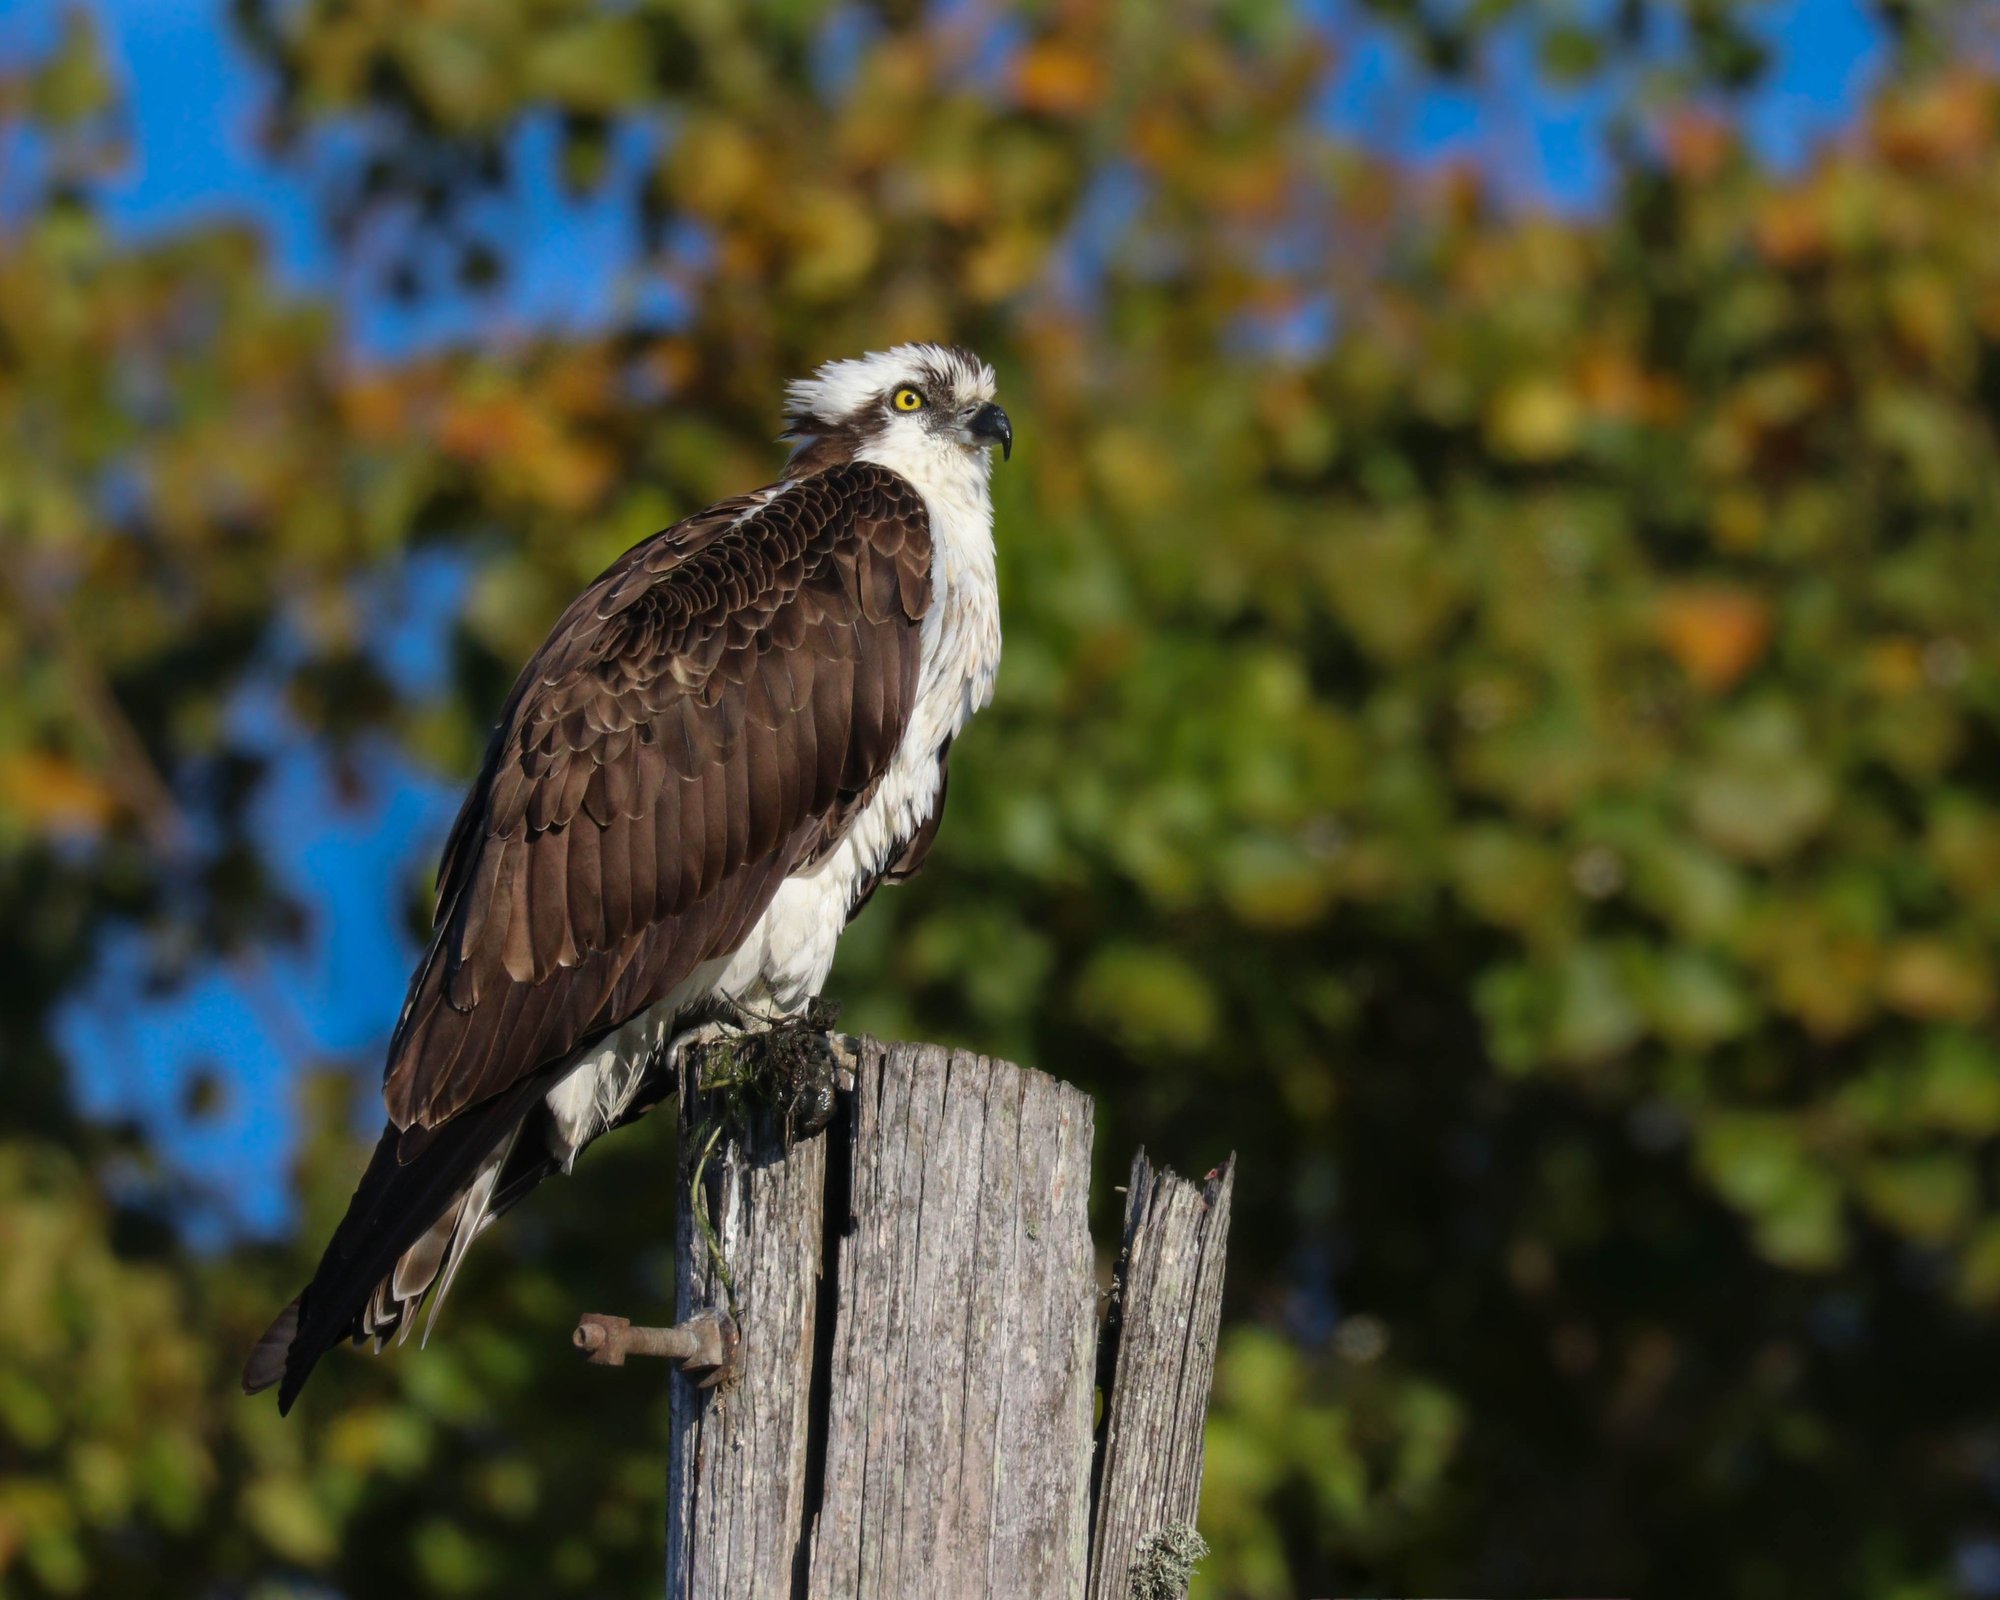
These two pics were taken of ospreys sitting on the exact same pole. (If you notice, one was taken during golden hour and one was not, pretty easy till which is which.)

The difference between the two pics (besides golden hour) is the background. In the first pic the background is very bland. There's nothing in it, just a featureless sky. In the second pic I was 30ft to the left to put some trees in the background. I think the blurred out leaves make for a better photo. BUT.... sometimes the background can be too distracting and take away from the animal. So it's different with every shot.


1590867098674.png


IMG_6313.jpg


If the background isn't adding to the photo, its actually taking away from the photo. Now when I see an animal I want to take a pic of I look at what's behind it and I position myself where I like what is behind him. Usually you want a nice even background that is pretty far away from the subject. If it's real close to the subject it will not be blurry and can distract from the subject.


8) Focus on the eye. Our eyes are always drawn to the animals eyes and their eye should always be in focus. Look at the previous Osprey pic. It may be hard to tell but if you zoom in and look the camera actually focused on his body and his eye is a little out of focus. You need to use a single autofocus point and place it directly on their eye. Or if using a phone click directly on his eye to take the pic.

In this next whistling duck pic the camera focused on the body and I didn't realize it because this was a fast action shot, but if you zoom in you'll notice his eye is also slightly out of focus because his head slightly further away than the body.


1590867280143.png


In this next pic, I paid special attention to getting the focus on his eye since the camera would typically try and focus on his body because its bigger. I used a singe autofocus point and placed it right on his head. (If you notice I'm also eyelevel with him laying flat on the ground, which gives the nice blurred background, I'm also close to him, probably 30ft and the sun is behind me a little off to the right, and this is golden hour right before sunset, and he's composed near the upper right intersection, not center composed) See how I used several of the tips to take this one picture.


IMG_5113-2.jpg


One more thing to mention about the eyes is the catch light.
This is the reflection of the sun in the eye of the animal. This is something you want to try and capture if possible. It adds a little bit of life to the animal. If you scroll back and look at pretty much all of the pics I have posted you will see a shimmer of the sun in each of their eyes. Sometimes you have to wait for the sun to come out from behind a cloud or you may need to move yourself a couple feet side to side to make it work, But you really want to get that catch light in their eye if you can.
 
Last edited:
If the background isn't adding to the photo, its actually taking away from the photo. Now when I see an animal I want to take a pic of I look at what's behind it and I position myself where I like what is behind him. Usually you want a nice even background that is pretty far away from the subject. If it's real close to the subject it will not be blurry and can distract from the subject.
I love all the tips and your photos are awesome, very stunning. Thank you for posting! I will definitely try to do better with this info.

I would just like to add a word of caution to be careful with blurring, like blurring through edits or settings. If the focus on an area is too sharp you can add blur through editing later if you know how. However if focus is lost when the picture is taken it is almost impossible to get back through editing. A subject in a natural environment needs some context, some texture even if the background is busy. Like the pair of geese by the waterfront absolutely beautiful. You can see their environment, you can tell there is a bank behind them and vegetation on that bank. The lack of focus there is spot on perfect. I think that is one of my favorites.. favorite would be the bird with head tucked around and the single eye staring out so brilliantly. Hopefully one day I can aspire to such quality as ya'lls.
 
Thank you @jolenesdad I learn't something here.
I take a lot of pictures. Every now and then I get a good one but more by luck than judgement. I've never considered enhancing them. I'll have a look to see what I can do with the software I've got.
I use a point and squirt camera which doesn't have the same applicationn power as modern mobile phones it seems.
Great job. Thanks again.:thumbsup
 
Is this a place to get photography feedback? I know that @jolenesdad is a photography guy and I'm trying to get better at photography, specifically of my pets.
I’m sure if you posted a picture asking for feedback that there would be people willing to give it. Posting a thread asking for feedback might get more people to see it then just posting here.
 
There’s a whole SLEW of exciting contests coming on BYC, both with the Hatch A Longs and many others from the official BYC contest page. Every year there’s a BYC Calendar Contest, and, there’s a weekly Picture of the Week column too! Because there are so many opportunities to share your birds through your photos, I thought I would start a thread where I would share tips for taking better photos, other people can share their tips, and folks can also share their work and get advice or commentary. I think I went a little heavy with my list of tips, and maybe this would be better served as an article, but I thought a thread was better for others to join in on.

This thread is about tips and editing, make sure if you want to practice a REALLY EGGCITING;) new style, check out @CluckNDoodle ‘s thread on Flat Lay Photography for Beginners!

Feel free to join either with your own tips for others, things you have learned about photography or photographing chickens, or ask questions that have been bothering you about your own photos. We will cover all types of photography, traditional SLR and DSLR photos, camera phones, and point and shoot.

I thought I would start this thread with my personal top 5 tips for taking photos. I’ve personally been a photographer for more than 20 years, and, because I am a glutton for punishment I guess, a majority of my photography experience is in taking photos of animals for commercial and advertising clients. I have several “high powered” digital SLR cameras, but nearly everything I take these days for personal use, and all of the photos I’ll use for sample here are taken from my phone.

I invite EVERYONE to participate in this thread, experts and amateurs alike. The only requirement is to be kind. It takes a lot of confidence to put something out there for any level of critique, so if you are going to be critical of someones work, make sure you are actually being insightful and helpful.
Here are my top tips….

1. Clean Your Lens and use your focus

Okay, this may seem obvious, but, I promise you more than half of you reading this photo could do this RIGHT NOW to make all of your photos better. I see this as the most problematic in photos that are taken on a camera phone. Today’s camera phones are incredible and the photos from them really shouldn’t have noticeable faults. If there is fogginess, halos in lights or reflections, blurred focus or a lack of vibrancy in your photos, clean your lens! EVERY time I take my phone out of my pocket to take a photo, I rub the lens with my t-shirt. Every. Single. Time. You will be AMAZED at the difference in clarity it will cause. Go right now and check your camera phone. There’s a pretty good chance you’re going to see your finger print or something else directly over the lens. Clean it off!
Once your lens is clean, make sure you actually use your focus. if you tap with your finger on the area you want to be focused, your camera will re-focus there.


2. Composition - Subject

One of the best things you can do for your photos is in the composition. You can think about composition while you are taking the photo, but you also can crop the photo after the fact into a more interesting composition. The first area of composition we are going to talk about is placement of your subject. Most people will take a photo with the subject in the center of the frame and call it a day. Sometimes, this is a great thing. Many times, however, you could really add interest to your photo by moving the subject into one of the segments created by the RULE OF THIRDS. The rule of thirds is simple… divide the frame of the photo into thirds both horizontally and vertically. The places where those lines intersect (SEE PHOTOS BELOW) are the most visually intriguing spots to place your subject. Placing your subject at those points or along the lines of thirds is your best choice for composition. (Note: iPhone and other apps superimpose the grid of thirds onto the photo when you crop it. You can also get it to permanently display within your camera app as you are taking photos.)
View attachment 2329013

The Rule of Thirds is not some made up thing… this is literally science. The human eye is DRAWN to those areas of a photo FIRST. Place your subject here, and it will seem to JUMP out at the viewer. See these photos below with the grid superimposed on them.

Here are three photos utilizing the rule of thirds for interest. Following is a composite of the three with the rule of thirds grid superimposed.

View attachment 2328497

View attachment 2328496

View attachment 2328498

View attachment 2328502

3. Composition - Positive and Negative Space

Positive and negative space deals with the subject and placement of your photo. Positive space is simply the subject and other areas of the photo that jump out of the photo. It’s the actual elements of the items in the photo. Negative space is the space between the frame and the subject. Manipulating positive and negative space in a photo is a compelling way to tell a story through your image. Use the rule of thirds to immediately interject an interesting positive/negative space dynamic. Play around with the what can change with positive and negative space in your photos. Too much of either can literally make or break your photos, or tell a completely different story from a different perspective. Remember there should be a balance. In many photos, there are too many additional elements in the photo, creating almost an image of entirely too much cluttered positive space.


Playing around with negative space in an image is an excellent way to give much more depth to your photos. Creative use of negative space is imperative to those of us in advertising and marketing, and if you start to get a handle on using negative space in your own photos, your work will take a gigantic leap forward. Play around with fabric and textures to create negative space in your image.


This image shows the rule of thirds and a play on texture and negative space together.
View attachment 2328499

4. Working with Animals

Be PREPARED.

Working with animals, even your own, is one of the most stressful situations for photography. It’s high-pressure because you are not in control. Animals are pesky little free-thinkers when you don’t want them to be and they’re going to act unpredictably in any situation that is not normal. So, what do you do? You make it normal. Do NOT expect to walk outside with an idea in your head and get it perfect on your first attempt. I always suggest practice before even bringing the camera into the situation. Sometimes it takes me longer in a session to get the subject comfortable than it does to actually take the photos.

For example, one of the best ways to get better photos of anything is to get on the same level as the subject. Of course, you could just squat down. (my thighs say… no thank you.) I found over time that the better solution is to RAISE the animal up. This does a lot of things. It puts you and the subject on the same plane of focus, and makes for more visually interesting perspectives. (Getting UNDER or lower than an animal gives a distorted photo that makes them larger and is very interesting with this method, too.) In certain instances, this can also help to isolate the animal and keep them in one spot. I’ve literally built platforms for horses to stand on to be able to get the right shot. You CANNOT expect to do this and immediately pickup your camera. How do I know this? I’ve been bit, lunged at, spit on, everything trying to order an animal somewhere for a photo. It just won’t work. Take the time, and put in the work to make them comfortable. Awkward tension reads through pictures, and the viewer can feelit.

I see many people, especially with chickens, say they can’t get photos of their chickens because they are running around. Put the camera down. Spend time teaching the chicken to be comfortable where you want to take the photo. Time, treats, love, whatever it takes. THEN get your camera out ONCE YOUR SUBJECT IS COMFORTABLE in the space. Your nerve-activated sweat pores and your temper will thank me. ;-) Remember, this might take days with a chicken. Start with a fence. See if WITHOUT a camera, you can use treats and time to get a chicken comfortable on a fence or something off the ground. Get them to the point where they will stay and await your treat delivery or whatever the reward is. Then, get your camera out.


5. Editing

Digital photography puts ALL the tools at your fingertips to really create compelling and vibrant photos. Use them! (But, don’t overuse them!)

My personal favorite phone application for photos is SNAPSEED. You can use preset adjustments or individually adjust aspects of your photo. You can even adjust individual AREAS of your photo.

It is very important to understand the limits of post production such as this. As a general rule of thumb, I advise you not to use more than 20% of an adjustment on your photo, especially in certain categories. Manipulating a photo past 20% yields some interesting and sometimes intriguing effects, however, they are rarely if ever natural looking to the viewer.

When I used to guide human clients through the retouching process as it was first coming out, I would always say “You should look like yourself. It should be yourself on your absolute BEST day, but you should always look like yourself.” This is true with all of your photography. Bringing this back to chickens…. We have all seen grass, we all know how it can look prettier in certain lighting, but we also know the limits of what grass looks like. If you want such a vibrant color on your chicken that the grass is electric green, you have lost the allure.

In order, these are the adjustment areas that you can do as little to versus those that can take much more….these are most of the standard categories for adjustments in most apps, including the photo editing apps built into your photos in iPhones and Android.


Exposure

There is simply not enough information in digital photos to manipulate this slider too much, unless dealing with a RAW image from a DSLR. Keep this closer to 10% either way. It will adjust the entire photo but will cause your brightest areas of the photo to “blow out” with heavier adjustments and often your darker areas to be muddy/bleed.

Highlights/Shadows

Individually adjust the highlights or shadows of a picture. This is nice sometimes on animals to use the shadows slider to remove shadows from the animal when the photos is taken in full sun.

Contrast

You can adjust the contrast for more of a pop or to soften the image, but be careful here, it’s easy to use too much.

Saturation

Do not use more than 20% here, and sometimes that is a lot. I rarely use it because this is a universal tool that applies an adjustment to the entire image. Colors already saturated in your photo will be over-saturated quickly! (The quickest way to make a black and white photo is to remove all the saturation. You’ll have a grey image, and then adjust the contrast a bit to your liking.)

Brilliance/Vibrance

These are smart tools that adjust highlights/shadows/luminance and saturation without over adjusting parts of the image that don’t need the adjustments. These have more room to use, but be aware of creating an over-processed look. Max 30-40%, sometimes less.

Sharpness

Sharpens the photo and can bring areas into better focus. Over-sharpened photos will have “artifacts” in them and it’s very obvious to the end-viewer. Keep it under 50% for sure. If the photo needs more sharpening that that, you probably need a new photo.

Vignette

I, personally, don’t mind heavy vignettes, up to 50-70% on most programs, because a vignette is a common and traditional method of bringing attention to an area of the photo you want people to focus on that we have always used in the darkroom when processing fine art photos. However, most simple editing tools will only apply a vignette uniformly to the center of the image. IF you are using the rule of thirds, you’re out of luck here. (hint: Snapseed lets you adjust WHERE the vignette should be on the photo.)

Brightness

Uniformly adjusts the lightness/darkness of the photo, with an equal effect. I prefer to use the brightness slider (up to 30-40% if absolutely necessary).

Tint/Warmth

These are color balancers, and can be used as much as necessary. Digital photography can give the entire photo on off-tone, such as green or blue or orange applied to the entire photo. Use these sliders, or a color balance slider, to correct it.

I took tips 4&5 together in this photo. Showed a bit of the raised perspective from 4 and then made adjustments within the ranges I discussed above to “rescue” this dark, flat photo.


Before:
View attachment 2328500

After:
View attachment 2328501


I hope that reading through this long-winded post gave you some confidence and knowledge to try something new with your photos and encouragement to take your personal photos to the next level. Please join the thread and let everyone know what your tips are for taking better photos, and I as well as many others I am sure, would be happy to answer any questions you have before making your selections to enter the next rounds of contests here on BYC!
I can't find how to post photos on BYC and I'm not a techie. Is there a simple way to do this? I'd appreciate any help!
 

New posts New threads Active threads

Back
Top Bottom