I'm not able to set posts for a run

I'm glad I'm not the only one with rocks. I plan on using the ample rock we have here to lay over the wire around the perimeter for sure and I also have tons of old brick. I wasn't planning on going as far out as Pat suggested but there isn't any reason why I couldn't.

I was very bad today...I asked for Saturday morning help and then went to a horse auction - I'm looking for a Haflinger. There wasn't any I was interested in so I took my first western riding lesson ever. I had great fun and came home to a spouse who framed the doors and all the windows for the coop!

Thanks so much,

Merna
 
Last edited:
Ditto on the rocks...we rented an auger also. Best money I ever spent. I wish everything else had worked out as easy...
barnie.gif
 
22574_029.jpg


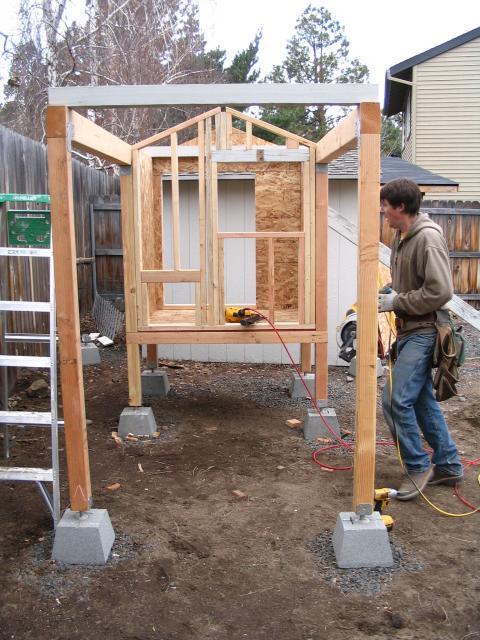
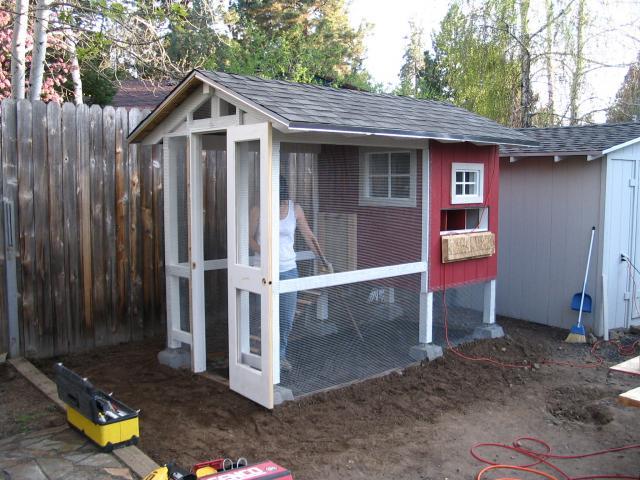
This is how we set our posts. We used concrete block piers with brackets set in them. You can find them at Lowes or Home Depot. Worked out great because we built in a really rocky area as well. Here is what it looks like almost done.

22574_014_2.jpg


We buried the hardware cloth about 12 inches under ground and not a thing has tried or even thought of trying to get in to get our girls. Hope the idea helps..
 
Thanks a bunch! It was alot of work and we are still working on it! We have 6 buff's and they love it! They have been out there since they were 5 weeks old. They are now 8 weeks old and my house is alot less dusty!!!
clap.gif
 
I can SO relate to your problem! We had the same challenge and decided to build the run above ground,without digging post holes.

We are close to being done now. We used PT 4x4's for the base and secured PT 2x4's for the posts and top frame using brackets. The material in the run is extra bank run gravel that we used under ther coop.(the run is built on part of our driveway that had some grass/weeds growing through). I ordered some Top Flight heavy duty netting to stretch across the top.

24700_dsc_0519.jpg


Below, you can see how we used brackets to attach the wood together. Also note: we nailed (roofing nails) hardware cloth on the outside of the run covering 6" of the wood and the rest went in the ground 6 more inches and then 12 inches out. We covered the mesh with rocks (plenty of those around!) and then put the dirt/gravel on top. (Eventually I will add some decorative crushed rock or something around the whole run) We then put 48 inch tall hardware cloth overlapping the 6" of exposed cloth around the run attaching it to all the wood. We are putting additional 2x4's on the outside of the run halfway up to cover and secure the next row of 48inch cloth. It is expensive to use that much hardware cloth, but it just seemed like it would look the best and we were only going to do this once! I may also put 2x6's on the outside base for added security of the mesh...seems like total overkill, but we'll see.
24700_dsc_0521.jpg


Below is how we did the corners to make sure everything was secure:
24700_dsc_0520.jpg


Our chicks have not yet ventured out, but the door is open!
 
We have the same problem, we actually bunrt out the engine on a two-man post-hole digger in only four holes--and none of them sere two feet deep. We ended up digging all of the holes with a shovel and pick and it took hours. The second run we laid the boards on the ground and across the top like some of the pictures you see here. it was MUCH easier!
 
Quote:
That's a great idea and a very nice coop you built. Did you attach the wire at the bottom or did you only lay it out and back fill?

We put preassure treated wood, cut to fit, between the cement piers and stapled the wire to that and then layed it out in the foot deep ditch we dug and backfilled first with river rock and then dirt. Probably overkill but I just didn't want to deal with predators.
 

New posts New threads Active threads

Back
Top Bottom