Incubating Eggs on END...??? Help please..

After playing with the temp settings for WAY too long, we finally got it working pretty well. It is now turning off on at 95 degrees (although it still loses another two degrees before it catches up) and off at 100 degrees. That makes the thermostat range from 95-100, but the overall 'bator holds between 93 and 100. 'We tried to get it to 101, but the screw adjustment is so touchy, we kept overshooting it. Finally, we figured we'd better stop while we had this close. I'll probably have to run the incubator longer than 21 days, since the lower temps may lead to late hatching.

I will get my newest pics posted tonight, so check back in a bit if you don't see them!
smile.png


Thanks for all your help, btw!!!
big_smile.png
 
SCIENCE FAIR PROJECT UPDATE!

Well, my son's incubation project seems to be going fairly well... I was really worried, thinking that we wouldn't get any development since we're so new at this. I just figured the temp or humidity would be too off or something would go wrong.

We started incubating on Sept. 12th, and we candled for the first time last night. It was hard to see through all the eggs, especially since some of the eggs were smaller than the tube I was using so the light kept leaking around the edges too much. Even so, some of the eggs definately appeared to have some veining! We marked the eggs that we think showed development with an "X" but we still left all the eggs in the incubator, in case we missed some signs in the others. I purchased an egg candler on eBay, so that should help us see more next time.

We will candle again on Days 12 and 18. Right now, it appears that we have chicks developing in 10 out of 18 eggs; 6 from eggs that were stored at room temperature before incubation, and 4 from eggs that had been refrigerated for at least a week before incubation. We'll see if these continue to develop or if more show development as time progresses. So far so good, though!
smile.png
 
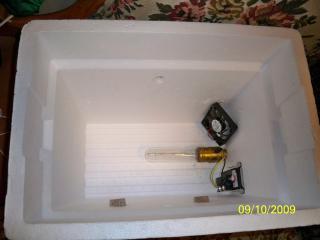
Here are the latest pictures of the finished incubator.

14377_floor.jpg
14377_bottom.jpg

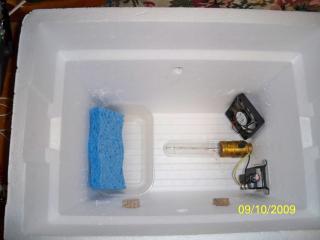
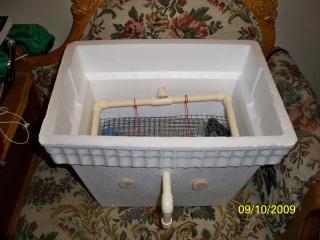
These two show the bottom of the cooler with the light, fan, and thermostat in place; and then the addition of a small container to hold water and a sponge.

14377_hardware_cloth.jpg
14377_egg_tray.jpg

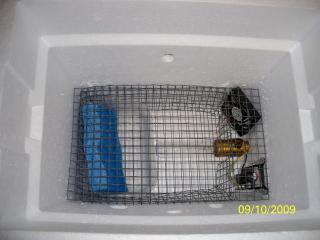
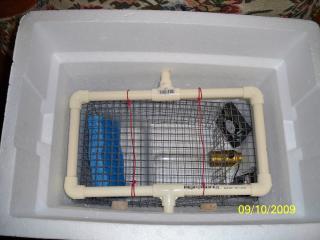
From there, we added a wire shelf using hardware cloth, for the eggs and chicks to rest on during the hatching period. The right pic shows the empty egg turner frame in place above the shelf.

14377_handle.jpg
14377_eggs_temp.jpg

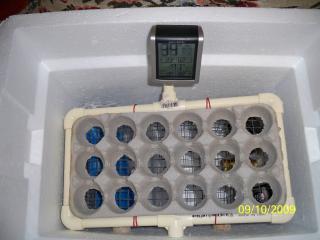
This is how it looks from the front showing the handle for the egg turner. The next pic shows the placement of the hygrometer on the back wall of the incubator, above the egg turner frame.

14377_thermometer_top.jpg
14377_window.jpg

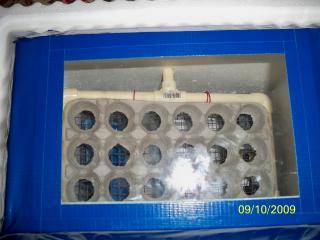
Here's a view of the thermometer and the egg tray from the outside of the 'bator, as seen by looking through the top window.

14377_eggs.jpg
14377_front_top.jpg

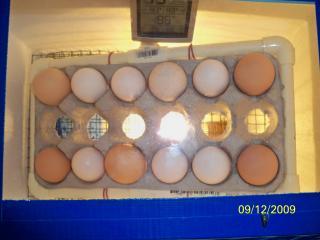
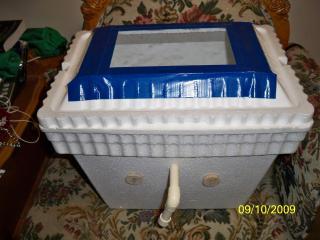
Last but not least, here's a top view of the eggs we're incubating, although we added some more eggs the next day to completely fill the tray. The final picture shows the completed unit with all the trimmings.

I hope you liked our incubator gallery! Feel free to post any comments or inquiries.
smile.png
 
Quote:
Here's a quote from "Raising Chickens For Eggs and Meat" by Mike Woolnough

He's just finished talking about how he stores his eggs in normal egg boxes kept on the worktop in the kitchen prior to incubating.

He goes on to say;

"It may be purely coincidental, but we have noticed that we get a fairly high percentage of hens from eggs stored this way. When we stored them in a cold outhouse we got quite a lot of boys from the hatch - and once, when we were forced by cicumstances to hatch eggs that had been in the fridge for a few days, we got 100% cockerels!!"

Maybe you can let us know how the chilled ones come out?

Paul
 
Not now but when you have no eggs in the incubator you could move the thermostat off the corner an stand it up in the middle by the light. The closer it is to the light the faster it kicks off from the heat of the light.

Lets say now it comes on at 95 an the thermostat kicks off when the hole incubator gets to 100. Now if you move it by the light. The thermostat still comes on at 95 but now the thermostat is getting radiant heat off the light too. The thermostat goes up to 100 degrees an kicks off but the incubator as a hole has only went up to about 97. Now that the light is off the thermostat in not getting any radiant heat an cools quickly back to the 97 degrees of the rest of the bator an is ready to kick back on at 95 again. So just by puting the thermostat closer to the light you went from a swing of 95-100 to 95-97. The closer it is to the light the tighter the thermostat acts but the longer it takes to heat the bator up from a cold start.
 
Quote:
Cool! I had wondered if bird gender could be affected by incubation temperature, as it is in reptiles. I will definately be watching and keeping track of the chick's genders as they develop. I think I will put them in two different brooding boxes according to the eggs they came out of.
smile.png


Quote:
Hmmm, that's a very good tip! We hadn't realized the placement of the thermostat could be so crucial; but it sounds like that could be just what we need to reduce our deadband. Obviously, there are a few things we are realizing after the fact, and plan to do slightly differently the next time around. Thanks so much for sharing your wisdom with us!
smile.png
 

New posts New threads Active threads

Back
Top Bottom