Thermostat
YES you NEED ONE! Thermostats are easy to install!
What is a thermostat and why do I need one? A Thermostat is a temperature-sensitive switch that controls space conditioning, in this case heat! When the temperature drops below the thermostat setting, the switch moves to the "on" position, and your heat source runs to warm the air to the setting you selected and then shuts the heat source off when temp is achieved. Thermostats can regulate ambient (area temps) or radiant heat (at heat source) and some even have a probe.
HERE IS A PERFECT EXAMPLE OF A STYRO BATOR VS CoolerBATOR with a WAFER thermostat, and this is our CHEAPO walmart brahnd cooler with little insulation and see below pic, the lid of the cooler has absolutely no insulation! WAFER THERMOSTATS ROCK! P E R I O D
Story:
Last night DH decides to close the Coal stove half of what its been for days, Its only 62 when I woke up.
NOTE COOLERBATOR TEMP 6AM
NOTE the Styro TEMP 6AM
IF HE DIDNT KILL the 7 day old EMBRYOS I will be amazed, its going to take me half the day to get it back up and then to stable it I havent a clue, plus he opened up the coal stove because its only 62 upstairs today. Hubs tells me he closed it around 10 pm so it was cooling from 10 pm to 6 am
IF THAT IS NOT ENOUGH REASON for disliking Styrofoam incubators with crappy thermostats I can give you a BOAT LOAD OF OTHER REASONS.
GREAT thermostat and it’s cheap, about $14. And it includes a probe that you will set at the level of your eggs in the incubator. You can find them here: Digital Thermometers 110 VOLT Digital Thermostat and Solid State Relay Wiring Diagram found here Wiring Diagram Video SEE VIDEO HERE... YouTUBE Links to the Solid State Relays EBay Solid State Relays
Here is a combo unit!
WAFER Thermostat
GREAT thermostat and it’s about $24. Make sure you get the “Assembly” and not just the wafers (see pic.) Wafer thermostats are the most used in incubators because they read the temperature which surrounds your eggs, not just the heat coming directly off a light or heater.
You can find them here Wafer Thermostat Assembly
Please refer to wiring diagrams for either single or double light fixtures in this VIDEO (scroll to bottom of link page)
See the little Allen wrench thing from the wafer thermostat?
It is marked which way to turn up!
Above you will notice that an extension cord is cut through for wiring the thermostat and lamps and is the only input of electric to this unit. Below you can see the fan plug is then plugged into the extension cord.
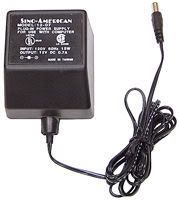
HOT WATER HEATER Thermostat DO NOT WASTE YOUR TIME with a hot water heater thermostat!
These have a lot of variance in temperature since it reads RADIANT heat directly from the light bulb or heat source. When we installed ours it was almost touching the light bulb and we STILL had over a 2 degree variance in temps. HOWEVER, IF you ALREADY purchased a hot water thermostat here is the diagram to install it. REMEMBER the closer to the heat source the less variance you will have with this type. You will have to keep adjusting the unit closer and closer to the bulb until you have reached the best temps with as little variance as possible. AGAIN, PURCHASE one of the other two Thermostats as they are well worth it!
Please refer to link: Hot Water Heater Thermostat Wiring Digrams
Heat Source = Light Bulbs!
We use CERAMIC Light SOCKETS already with the wires, see below... You can also use lamp kits. We use TWO lights! Why? If one lamp blows we still have the other that will continue to heat the incubator to its correct temp and can save your entire hatch. This is HIGHLY recommended if you hatch expensive eggs or shipped eggs. We use two 40 Watt Bulb! Refer to thermostat wiring diagrams for installation. Placement of the lamps should be towards the top of the cooler but NOT close enough to melt it. You don’t want them low directly over your eggs.
If you didn't install a double, I HIGHLY SUGGEST YOU do two lights in one of these!!
THEY DO BLOW, and they blow your hatch could easily be lost!
Fan Installation
You will need a 12v dc pc Computer cooling fan, new or used.
You can find them for a few bucks here: cheap less than 5 bucks shipped FANS on ebay
You will ALSO need a 120v input 12v DC output USED adaptor/transformer/inverter. We used one from an old phone. You will snip off the end and wire it to the pc fan. Wire the black to the black and the red to the other mixed color wire. Secure w/ electrical tape and wire nuts. Location should be where it can blow across the bottoms of BOTH bulbs so that the heat is quickly dispersed and this also will reduce HOT SPOTS in the incubator under the bulbs.
We use Plexiglas. Glass from a cheap picture frame or window will work too! The bigger the viewing area the better! We use clear sealant, in the pic above it is still wet but has since dried clear.
Ventilation Holes
Yes, you NEED THEM! Please refer to: Hatching 101 ~ Ventilation Section
We have ¼” holes all around the bottom of the cooler and the same along the top, refer to above pic. We also have the drain plug, and we drilled three ½” holes on the sides near the top, one is close to the fan but not directly behind it for more air exchange.
Wire Platform and Water Wells
You can cut wire so that it is shaped like an open box and fits in the bottom of the incubator, just remember to make it high enough so you can fit water dishes in the bottom, Remember surface area is more important than depth when trying to up the humidity. Please refer to: Hatching 101 ~ Humidity Section
TEST RUN
Always do a test run on your incubator, and CALIBRATE Thermometers and Hygrometers!
Please refer to: Hatching 101 ~ Temperature Section at the end of this section is HOW TO CALIBRATE!
UPDATE ADDITION
I had to rig something fast for humidity this time too, since I have no room for my dish with a sponge, too many eggs in hatch this time around!
I do have the two trays under the eggs but its not enough this packed, I think the fan isnt picking up surface area on them as much since its jammed
I have the sponges near holes so I can spray water in with a spray bottle lol
This was my rig job last night, I may use it from now on instead of on the wire with the eggs!
caulked! excuse the rusty caulk, I had a nail in the caulk and then I had tape over it to keep the caulk good for next use
I had to cut the other end down as my sponge is big, I still had to cut my sponge though.
Works like a charm, plenty of room for eggs to hatch AND it holds extra water to pull from!
Bubbles is on some kind of crusade to prove that she's nice. Instead of smacks, she's giving hugs. I ain't falling for it. She's setting us all up... aren't you @Bubbles12345 ??? I know... it's just not the same!!!


 I aint that special! BTW... Only reason I stuck out my tongue is sally was being Very Annoying.


