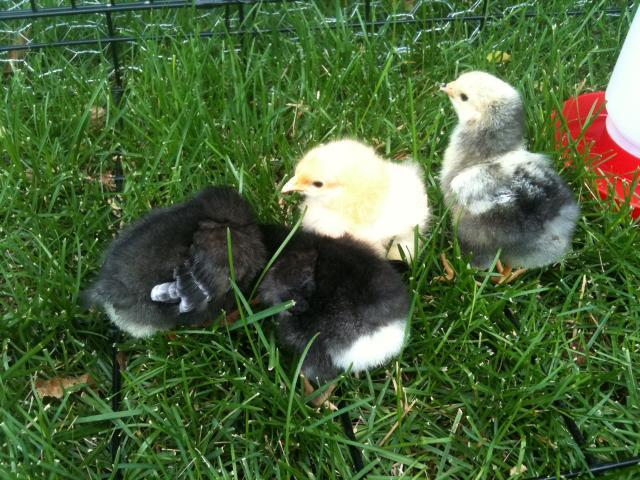
I told my hubby, Mike, I wanted chickens. He said "no &%$@#! way". So the next day I tried again, adding that I only wanted 4 (the max amount our zoning allows) and he would be able to build me a coop. While he still wasn't crazy about the idea he was excited to have a building project so 4 chicks showed up shortly!
I had spent a lot of time looking at looking at all the coops on here and started picking and choosing the style and features I like and would work best for our situation. Mike started designing the coop on Sketch Up which really helped us visualize what we needed to do and needed to buy. This is Mike's first construction project although he had a good grasp of how he needed to do things. We (and most of the time by we I mean Mike) started construction at the begining of the month, working after work and weekends. When I refer to what day something was done they were always consecutive days and little things got done in between but these were the big progress days!
One day one Mike dug trenches, put down pean gravel and leveled weather treated 4x6 down as foundation. We can get some decent winds but our backyard is fairly protected so hopefully this will prove to be sufficient. We also have a fair amount of predators (coyotes, raccoons, hawks, foxes and my own cats & dog) for being in the middle of suburbia so I'm hoping that a buried foundation will be a good start to keeping anyone from digging in.

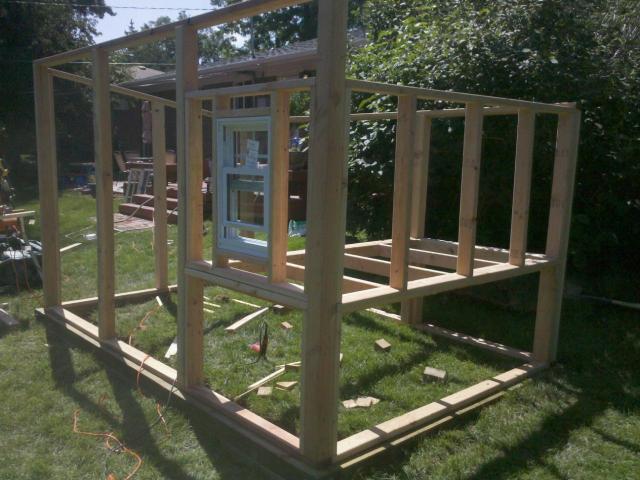
A couple days later Mike started on the framing and of course this is when the weather decides to get up into the mid nineties for several days. So Mike would get home from a long work day out side in the sun and start working on the coop, the man's my hero! The following picture is day 2 of framing. The wall with the window at this point was removable at this point but Mike had plans to install it on heavy duty hinges so it can swing up for cleaning. I hunted for weeks on Craigs List for windows. I wasn't looking for anything fancy, just a small size and cheap and I found 2 for $15. They were show room sample windows and I've seen several coops with the same ones so they must be fairly easy to come by through cheap sources! One of the windows had a run in with a falling ladder but even with one pain broken our coop has nicer windows than our house.
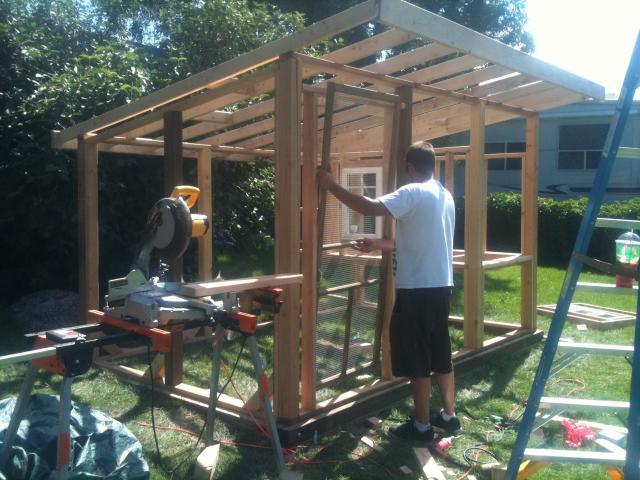
It was about day 4 or 5 that Mike began the roof supports using 2x6s and the temperature was around 100 degrees. I learned that I am much less useful than I thought I would be. At this point I was really only good at running to Lowes to buy things and to 7-11 for Slurpees to beat the heat. After Mike slaving away in the heat for days I was able to start staining the 4x4's that support everything. Finally I got to feel like I accomplished something! I should note that I was inside with our one year old daughter so it wasn't like I was being completely lazy but compared to Mike it sure felt that way! Mike also decided to add angled wedges to the base to the 4x4s for extra support. It made it completely wiggle proof and also ended up adding a little more interest to the design.
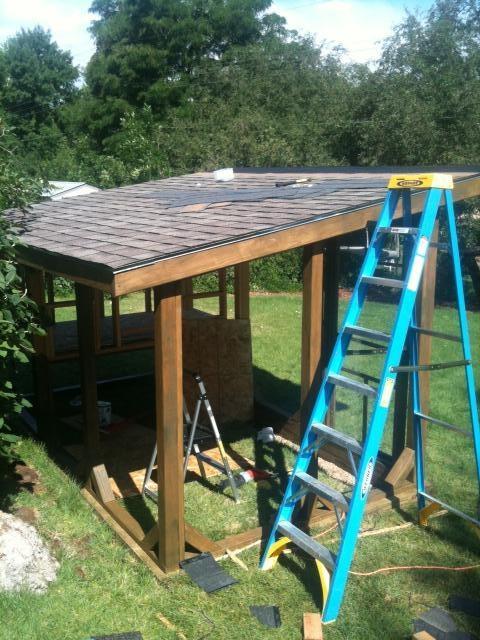
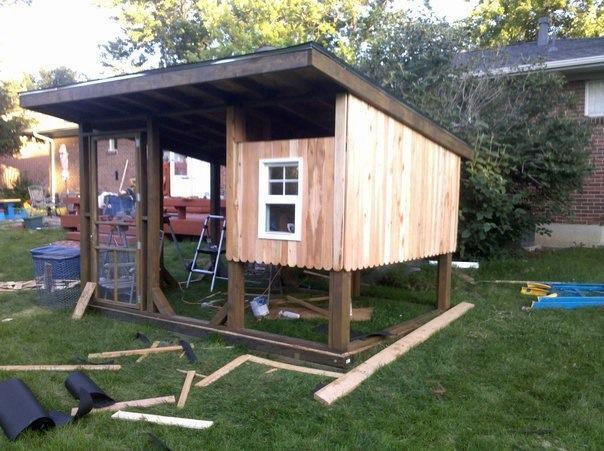
Day 6 we got roofing materials (opened bundles of shingles are $5 at Lowes!) and by that evening plywood and tar paper were down. The shade that it provided was a very welcome addition! By the end of day 7 Mike had the flashing and shingles all done. The guy at Lowes suggested we get nails which were longer than we really needed so now they show on the inside of the run area. Oh well, it can't be perfect. Finishing the roof was good timing because at this point our hot weather streak turned into a monsoon for the next week. After this pic was taken I put up hardware cloth with screws and washers in a few places that wouldn't hinder us going in and out during the rest of the construction. What a pain in the butt that stuff is! I don't look forward to doing more of it.
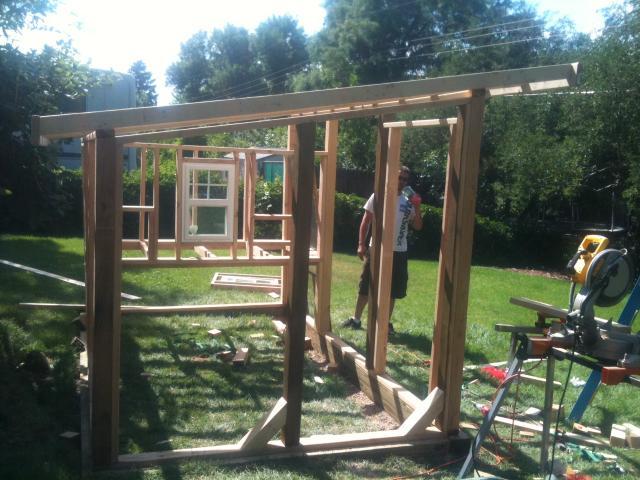
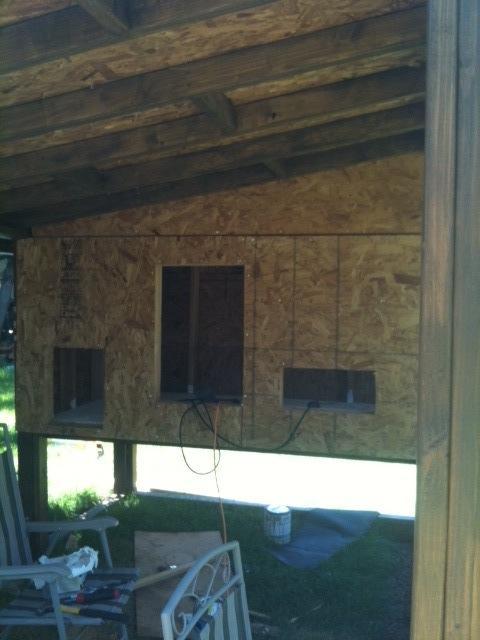
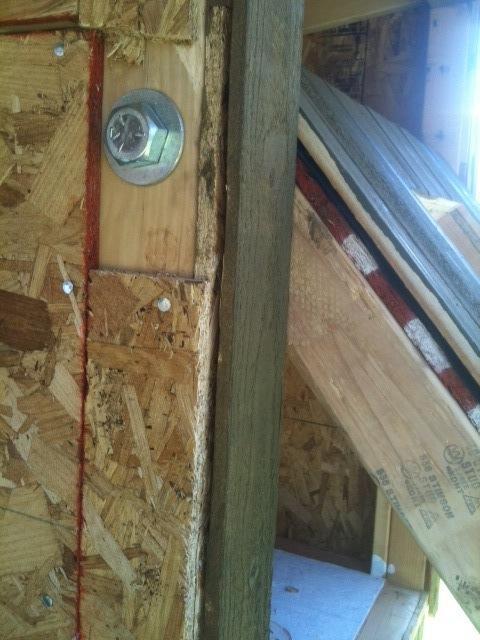
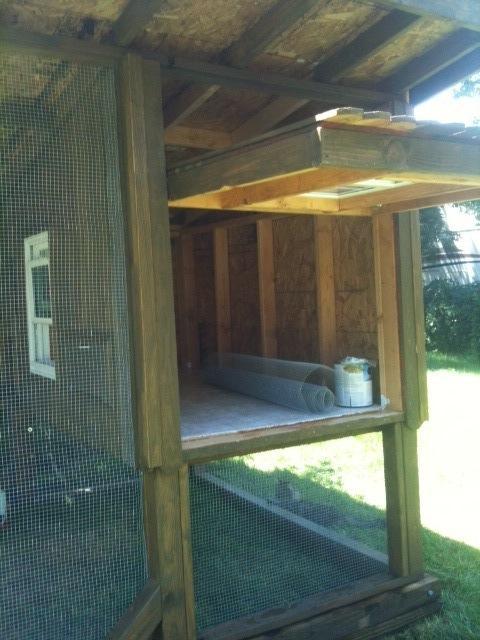
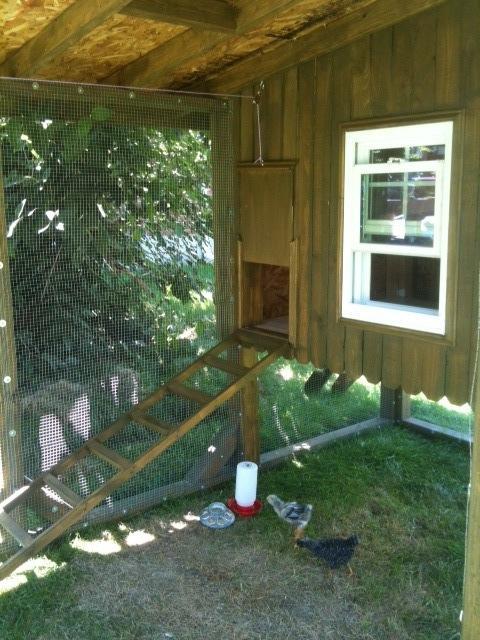
Thanks to the rain our progress was hindered a little bit and I started to lose track of days! During breaks in the rain Mike put up OSB walls although I've since learned that may not have been an ideal material choice. Oh well, we'll cross our fingers that it lasts for a little bit anyways! Our roof proved that be leak proof though! We had some of the heaviest rain I have ever seen and I spent a couple of nights watching lightening move past from under the coop roof and not a single drop came through! Mike got the opening wall hung using giant bolts and nuts. I can't get a good pic while holding the wall open so I'll post one later when I have some assistance. You can get an idea in the next pic of where the pop door, one of the windows and door to the nest box will be.
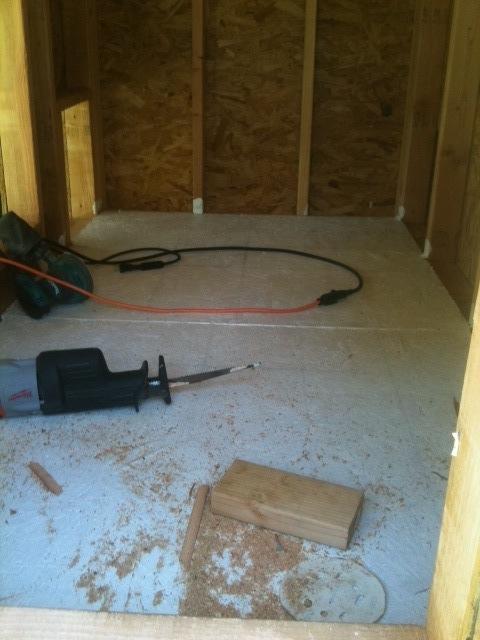
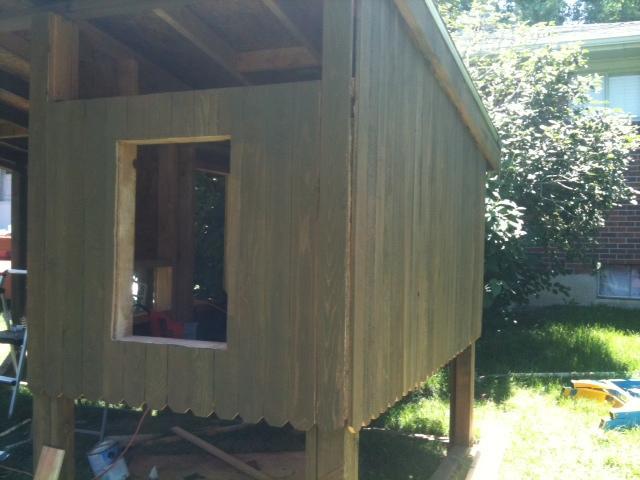
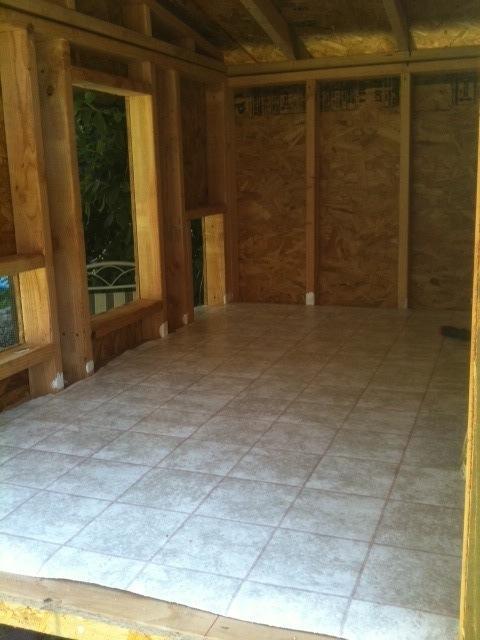
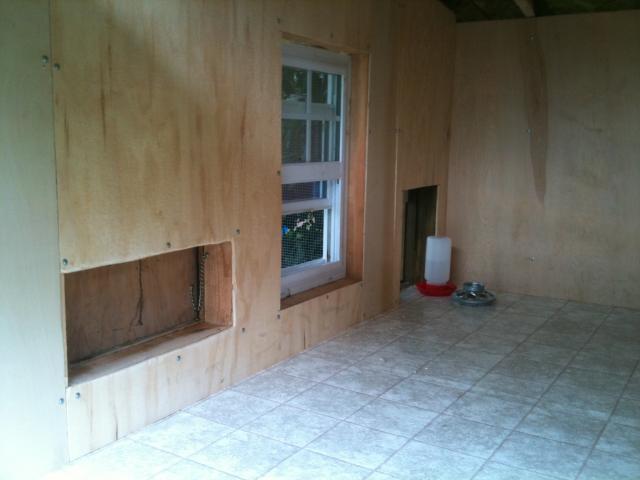
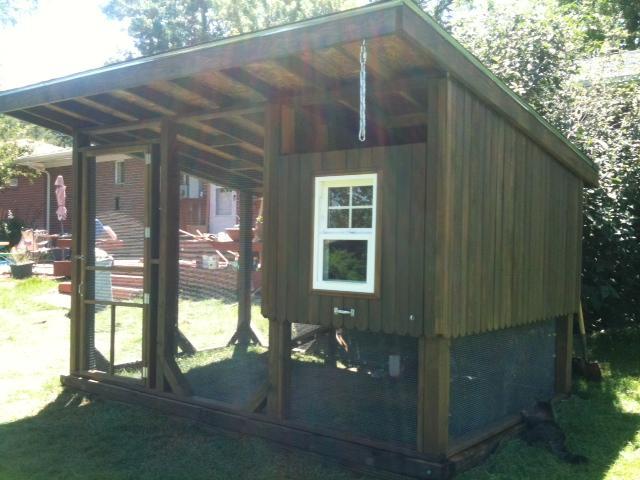
This past weekend Mike was out of town so not a whole lot got done. I did get around to painting the OSB coop floor to water proof it. This was originally going to be final flooring but now that I've seen how unsmooth it is I'll be putting down linoleum for easier cleaning. Mike got back yesterday afternoon and wrapped the coop in tar paper left over from the roof while I went to get siding. We decided to go with 3.5" dog eared fencing slats with the eared side down for a little interest. We only got two sides up yesterday and I stained them this morning and they looks great! Mike's gone again tonight so unless I get around to putting in the linoleum or maybe hanging some hardware cloth (gag) after putting the baby to bed tonight there won't be anymore progress till he's back tomorrow night. I'm excited to get the rest of the siding done and start on the interior!
Update 7/20
Yesterday I glued the linoleum flooring down and it looks really good! It took a while to try and smooth all the air bubbles out and there are a few bumps here and there from the OSB underneath but it looks like it will be so easy to clean. This afternoon we'll be getting the rest of the materials we'll need to finish up the actual coop structure (siding, insulation, plywood for the interior walls, trim) and hopefully rain will stay away long enough for us to get work done!
Update 8/20
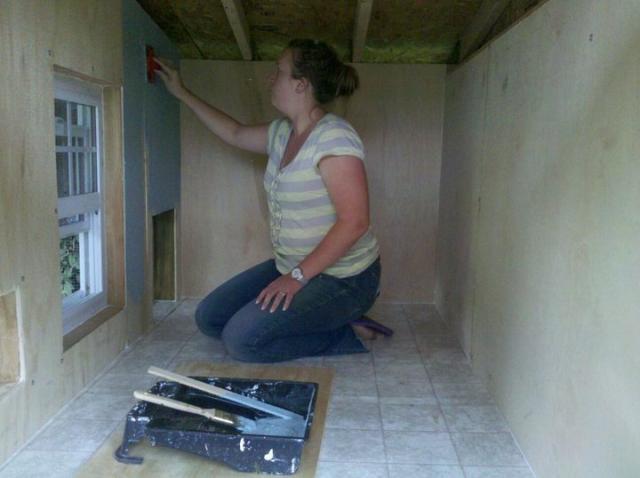
I've been meaning to get on here and update our progress but life's been busy! We're 99% done with the coop and the girls have been moved in for several weeks now. I finished hanging all the hardware cloth which I can easily say is one of my least favorite things in the world to do. Mike made a great guillotine style door with a pulley system so we can open and close the door with out going in the run. We insulated the coop with foam sheeting, Great Stuff expanding foam and bubble wrap. The sheeting was a pain in the butt to cut and I would suggest avoiding it if you can! Mike put up plywood on the interior walls, which we painted with exterior paint from the mistint section at Lowes. I was a little disappointed because I had intended to use a gloss paint to make cleaning easier and didn't realize that I picked up matte until after I bought it but it was $5.00 for a gallon so beggars can't be choosers. We then caulked any any seams to keep out drafts and keep moisture from getting in the walls.
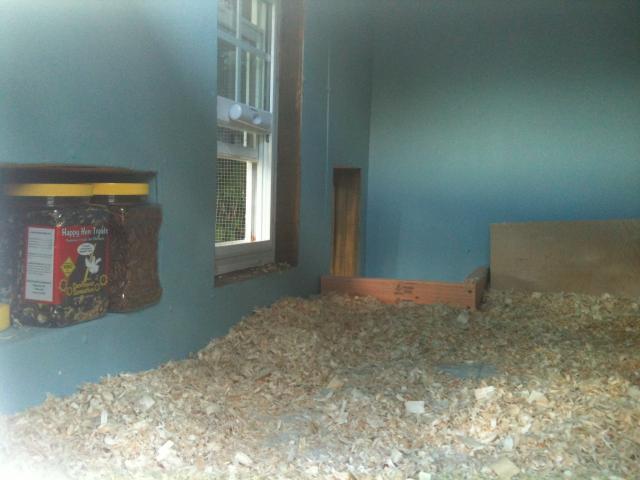
When we did our initial design I forgot to raise up the door so that I could do deep little without shavings constantly spilling out. As an after though I made a barrier with a 2x4 to keep the shavings at bay. The 2x4 will be replaced with a 2x6 when I eventually get around to it. We added a temporary roost with is just a short length of 1x3 this will be switched out to a 2x4 and run the length of the coop when I find the time. The chickens haven't quite figured out the roost bar yet and prefer to sleep smooshed in a corner on top of one another but hopefully they'll figure it out soon enough. We put hardware cloth over the window openings so we don't have to worry about night time creatures climbing in if we forget to close the windows. I made a PVC nipple waterer and feeder. The waterer seems to be working pretty well, the girls figured it out with in a day or so. The feeder on the other hand jams up because I used 2" pipe and have since read that 3" or 4" are ideal so it need to be redone. Please excuse how sloppy the installation looks in the pic, the placement isn't final as I figured they'd need to be raise in a month or so when the girls are closer to being their adult size.

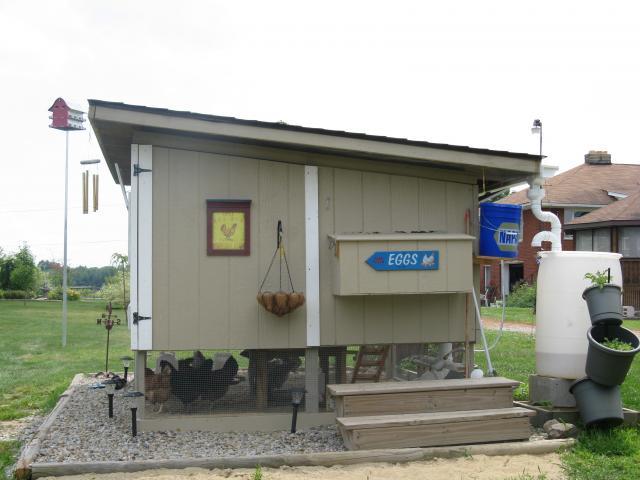
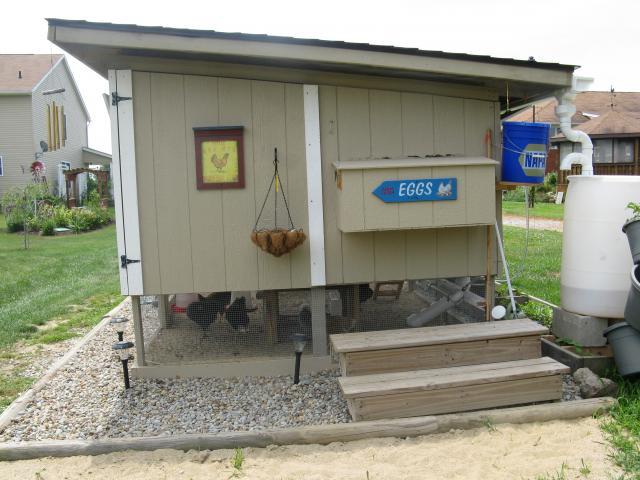
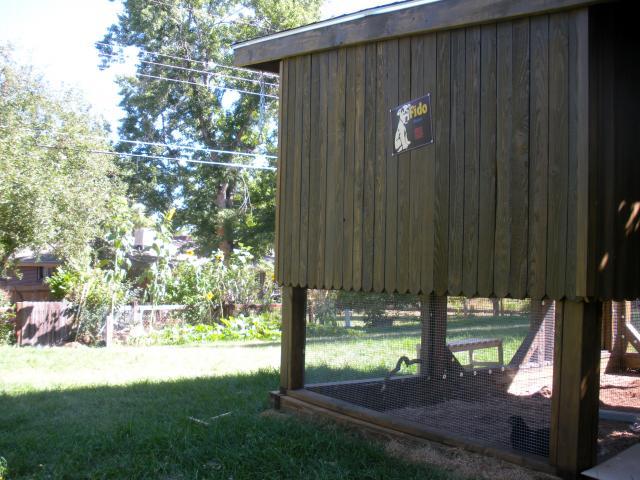
Of course our coop need a name so after stealing the name "Fuster Cluck" from someone on here I made a sign! I was pretty proud of myself. I still need to stain it before it gets hung up, hopefully I'll get around to it this weekend.

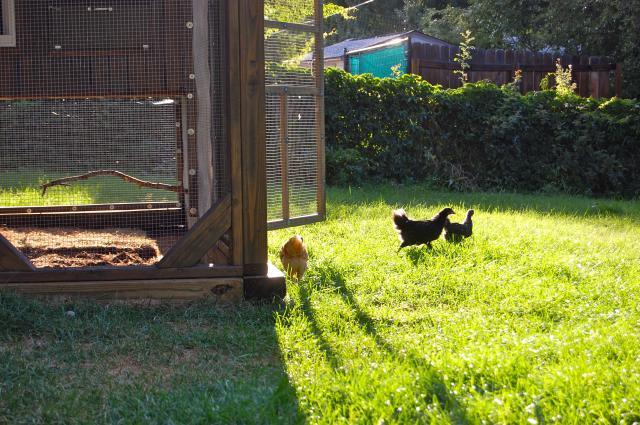
So far the girls are loving their new set up! Most nights they get to run around the yard for an hour or so before they head back to the coop and put themselves to bed.
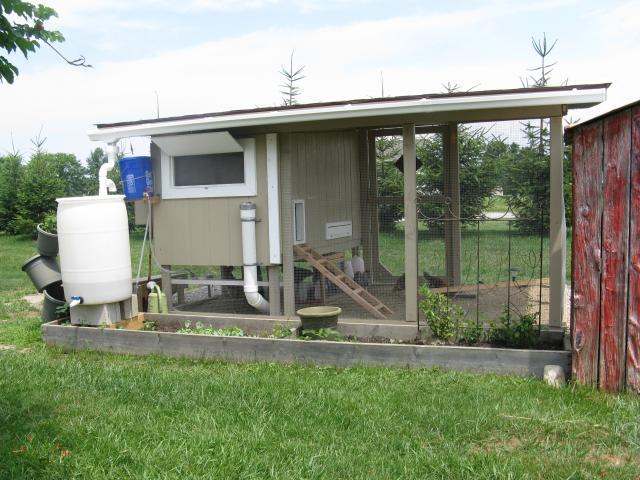
There is a ton more I want/need to do like add a gutter (draining to a rain barrell) since the side the water drains to is up hill. We've begun digging out some of the dirt on the floor of the run, we plan on adding sand in the next week or so.
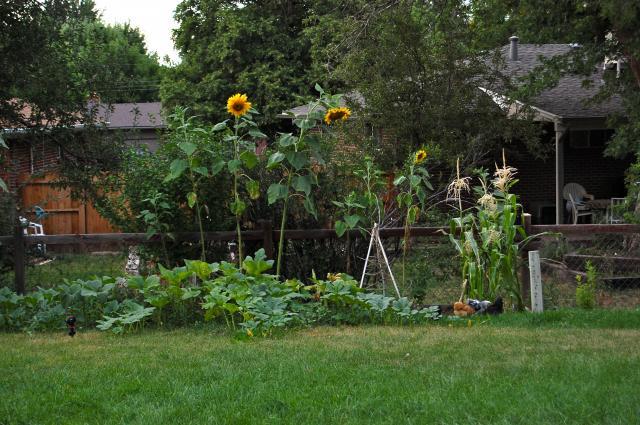
One more pic! The chickens discovered the garden the other day, hopefully they'll leave it alone until I put some chicken wire around it!
Update 8/24
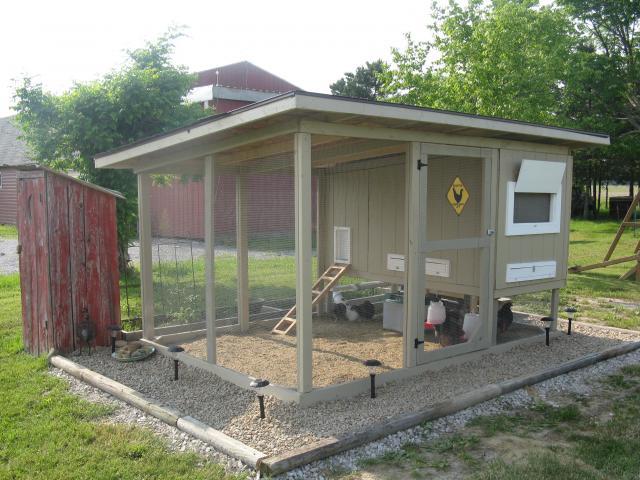
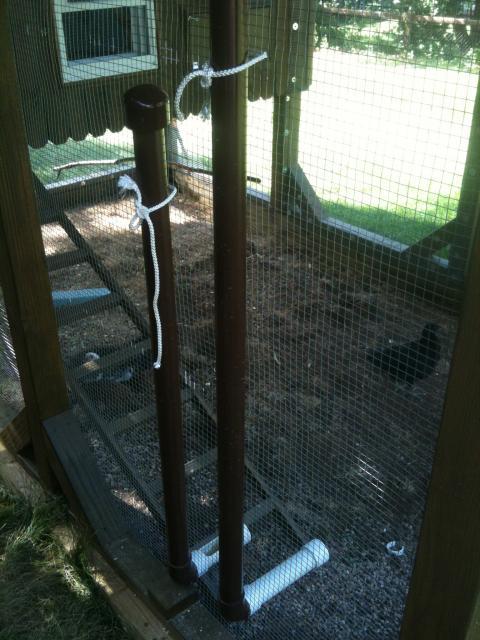
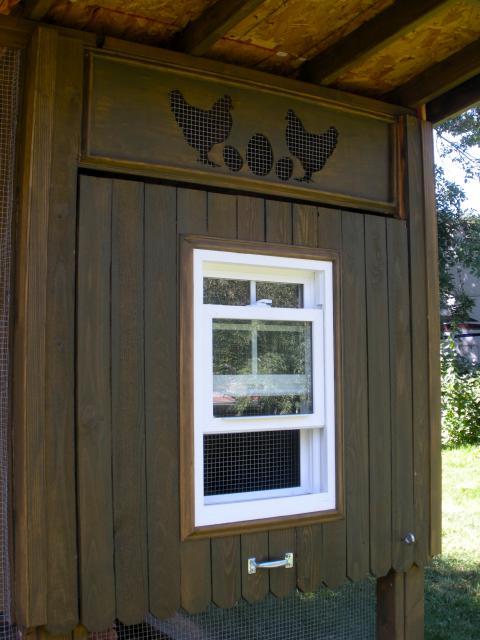
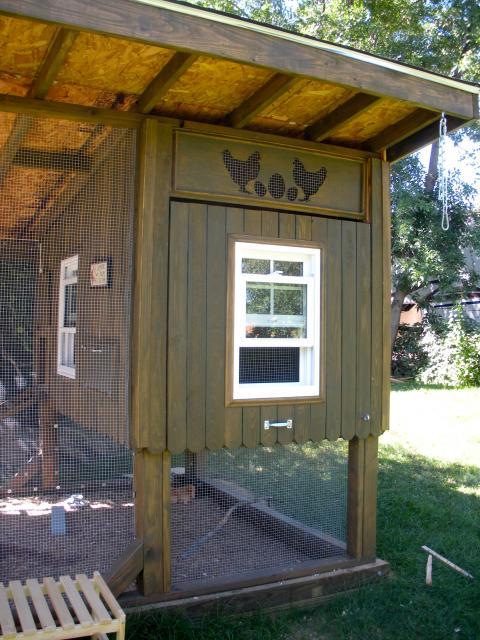
Mike made this awesome panel the other night! Is there anything the man can't do!? I'm off today to go look at sand and hopefully it will be in this weekend!
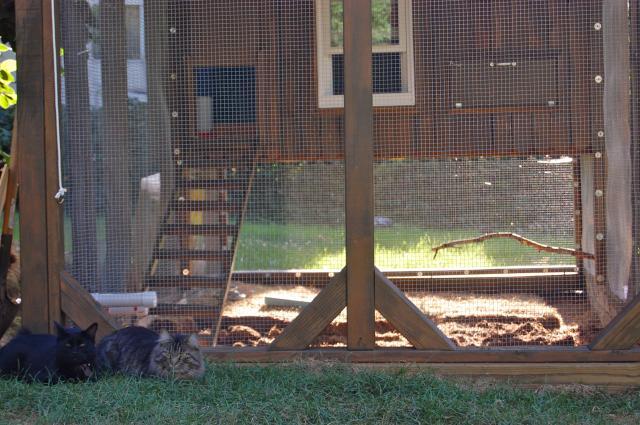
A view from the back.
Update 8/26
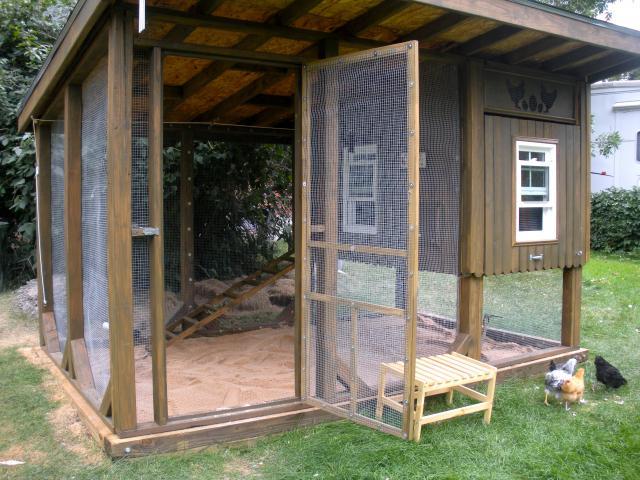
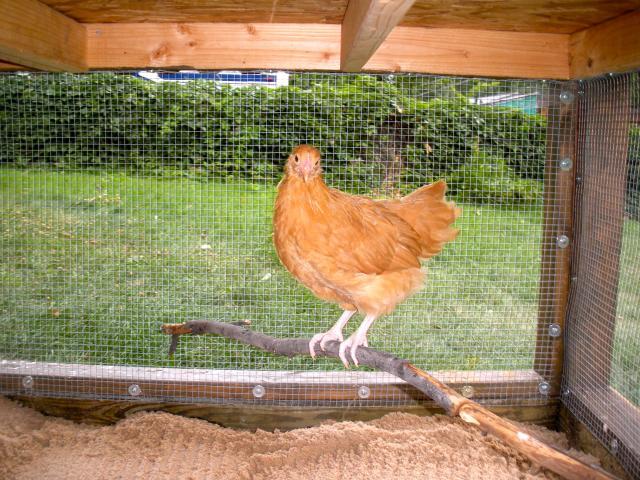
We have sand! I may have gone over board and ordered WAY too much, 2 tons when probably 1 ton would have done the trick, oops. Aw well, live and learn. We went with concrete sand. I was hoping to find what I keep seeing referred on here to as river sand but the 2 sand and gravel places I went to didnt offer it or know what I was taking about so this what the next best thing. The sand makes the coop look so fresh and clean! Yes, i realize its only been in the for a few hours and it wont look so nice once there poop all over it but its better than the bare dirt. The chickens were a little unsure if it at first but once I tossed some goodies on top of it no one seemed to notice, except for Chicken Pot Pie who is still perched up on an roost in the run refusing to get down. I also got around to making a nesting box yesterday and a roost. They arent perfect but they'll do the job for now. Only thing left to do is finish off the inside on the hinged wall with some plywood and raise up the waterer. Now that the sand is in there the waterer is way too low. With any luck the coop will be 100% done after this weekend!
Poor Pot Pie!
I had spent a lot of time looking at looking at all the coops on here and started picking and choosing the style and features I like and would work best for our situation. Mike started designing the coop on Sketch Up which really helped us visualize what we needed to do and needed to buy. This is Mike's first construction project although he had a good grasp of how he needed to do things. We (and most of the time by we I mean Mike) started construction at the begining of the month, working after work and weekends. When I refer to what day something was done they were always consecutive days and little things got done in between but these were the big progress days!
One day one Mike dug trenches, put down pean gravel and leveled weather treated 4x6 down as foundation. We can get some decent winds but our backyard is fairly protected so hopefully this will prove to be sufficient. We also have a fair amount of predators (coyotes, raccoons, hawks, foxes and my own cats & dog) for being in the middle of suburbia so I'm hoping that a buried foundation will be a good start to keeping anyone from digging in.
A couple days later Mike started on the framing and of course this is when the weather decides to get up into the mid nineties for several days. So Mike would get home from a long work day out side in the sun and start working on the coop, the man's my hero! The following picture is day 2 of framing. The wall with the window at this point was removable at this point but Mike had plans to install it on heavy duty hinges so it can swing up for cleaning. I hunted for weeks on Craigs List for windows. I wasn't looking for anything fancy, just a small size and cheap and I found 2 for $15. They were show room sample windows and I've seen several coops with the same ones so they must be fairly easy to come by through cheap sources! One of the windows had a run in with a falling ladder but even with one pain broken our coop has nicer windows than our house.
It was about day 4 or 5 that Mike began the roof supports using 2x6s and the temperature was around 100 degrees. I learned that I am much less useful than I thought I would be. At this point I was really only good at running to Lowes to buy things and to 7-11 for Slurpees to beat the heat. After Mike slaving away in the heat for days I was able to start staining the 4x4's that support everything. Finally I got to feel like I accomplished something! I should note that I was inside with our one year old daughter so it wasn't like I was being completely lazy but compared to Mike it sure felt that way! Mike also decided to add angled wedges to the base to the 4x4s for extra support. It made it completely wiggle proof and also ended up adding a little more interest to the design.
Day 6 we got roofing materials (opened bundles of shingles are $5 at Lowes!) and by that evening plywood and tar paper were down. The shade that it provided was a very welcome addition! By the end of day 7 Mike had the flashing and shingles all done. The guy at Lowes suggested we get nails which were longer than we really needed so now they show on the inside of the run area. Oh well, it can't be perfect. Finishing the roof was good timing because at this point our hot weather streak turned into a monsoon for the next week. After this pic was taken I put up hardware cloth with screws and washers in a few places that wouldn't hinder us going in and out during the rest of the construction. What a pain in the butt that stuff is! I don't look forward to doing more of it.
Thanks to the rain our progress was hindered a little bit and I started to lose track of days! During breaks in the rain Mike put up OSB walls although I've since learned that may not have been an ideal material choice. Oh well, we'll cross our fingers that it lasts for a little bit anyways! Our roof proved that be leak proof though! We had some of the heaviest rain I have ever seen and I spent a couple of nights watching lightening move past from under the coop roof and not a single drop came through! Mike got the opening wall hung using giant bolts and nuts. I can't get a good pic while holding the wall open so I'll post one later when I have some assistance. You can get an idea in the next pic of where the pop door, one of the windows and door to the nest box will be.
This past weekend Mike was out of town so not a whole lot got done. I did get around to painting the OSB coop floor to water proof it. This was originally going to be final flooring but now that I've seen how unsmooth it is I'll be putting down linoleum for easier cleaning. Mike got back yesterday afternoon and wrapped the coop in tar paper left over from the roof while I went to get siding. We decided to go with 3.5" dog eared fencing slats with the eared side down for a little interest. We only got two sides up yesterday and I stained them this morning and they looks great! Mike's gone again tonight so unless I get around to putting in the linoleum or maybe hanging some hardware cloth (gag) after putting the baby to bed tonight there won't be anymore progress till he's back tomorrow night. I'm excited to get the rest of the siding done and start on the interior!
Update 7/20
Yesterday I glued the linoleum flooring down and it looks really good! It took a while to try and smooth all the air bubbles out and there are a few bumps here and there from the OSB underneath but it looks like it will be so easy to clean. This afternoon we'll be getting the rest of the materials we'll need to finish up the actual coop structure (siding, insulation, plywood for the interior walls, trim) and hopefully rain will stay away long enough for us to get work done!
Update 8/20
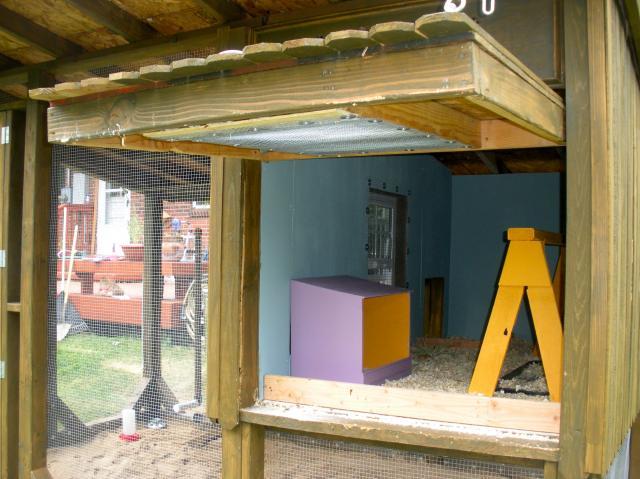
I've been meaning to get on here and update our progress but life's been busy! We're 99% done with the coop and the girls have been moved in for several weeks now. I finished hanging all the hardware cloth which I can easily say is one of my least favorite things in the world to do. Mike made a great guillotine style door with a pulley system so we can open and close the door with out going in the run. We insulated the coop with foam sheeting, Great Stuff expanding foam and bubble wrap. The sheeting was a pain in the butt to cut and I would suggest avoiding it if you can! Mike put up plywood on the interior walls, which we painted with exterior paint from the mistint section at Lowes. I was a little disappointed because I had intended to use a gloss paint to make cleaning easier and didn't realize that I picked up matte until after I bought it but it was $5.00 for a gallon so beggars can't be choosers. We then caulked any any seams to keep out drafts and keep moisture from getting in the walls.
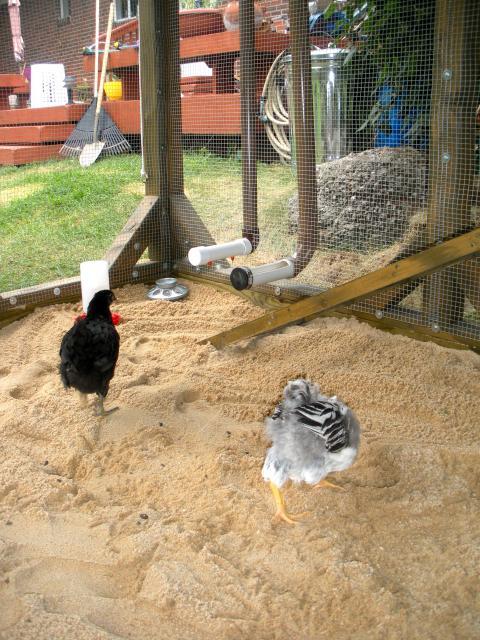
When we did our initial design I forgot to raise up the door so that I could do deep little without shavings constantly spilling out. As an after though I made a barrier with a 2x4 to keep the shavings at bay. The 2x4 will be replaced with a 2x6 when I eventually get around to it. We added a temporary roost with is just a short length of 1x3 this will be switched out to a 2x4 and run the length of the coop when I find the time. The chickens haven't quite figured out the roost bar yet and prefer to sleep smooshed in a corner on top of one another but hopefully they'll figure it out soon enough. We put hardware cloth over the window openings so we don't have to worry about night time creatures climbing in if we forget to close the windows. I made a PVC nipple waterer and feeder. The waterer seems to be working pretty well, the girls figured it out with in a day or so. The feeder on the other hand jams up because I used 2" pipe and have since read that 3" or 4" are ideal so it need to be redone. Please excuse how sloppy the installation looks in the pic, the placement isn't final as I figured they'd need to be raise in a month or so when the girls are closer to being their adult size.
Of course our coop need a name so after stealing the name "Fuster Cluck" from someone on here I made a sign! I was pretty proud of myself. I still need to stain it before it gets hung up, hopefully I'll get around to it this weekend.
So far the girls are loving their new set up! Most nights they get to run around the yard for an hour or so before they head back to the coop and put themselves to bed.
There is a ton more I want/need to do like add a gutter (draining to a rain barrell) since the side the water drains to is up hill. We've begun digging out some of the dirt on the floor of the run, we plan on adding sand in the next week or so.
One more pic! The chickens discovered the garden the other day, hopefully they'll leave it alone until I put some chicken wire around it!
Update 8/24
Mike made this awesome panel the other night! Is there anything the man can't do!? I'm off today to go look at sand and hopefully it will be in this weekend!
A view from the back.
Update 8/26
We have sand! I may have gone over board and ordered WAY too much, 2 tons when probably 1 ton would have done the trick, oops. Aw well, live and learn. We went with concrete sand. I was hoping to find what I keep seeing referred on here to as river sand but the 2 sand and gravel places I went to didnt offer it or know what I was taking about so this what the next best thing. The sand makes the coop look so fresh and clean! Yes, i realize its only been in the for a few hours and it wont look so nice once there poop all over it but its better than the bare dirt. The chickens were a little unsure if it at first but once I tossed some goodies on top of it no one seemed to notice, except for Chicken Pot Pie who is still perched up on an roost in the run refusing to get down. I also got around to making a nesting box yesterday and a roost. They arent perfect but they'll do the job for now. Only thing left to do is finish off the inside on the hinged wall with some plywood and raise up the waterer. Now that the sand is in there the waterer is way too low. With any luck the coop will be 100% done after this weekend!
Poor Pot Pie!
Last edited: