I did it!!! It took me a couple of months. But I did it! 90 % of the work was done by myself (my DH helped some...gotta give credit where credit is due! And he would be upset if I took all the credit). I am very proud of how they are turning out.
We did not have the money to buy a coop and I wanted to get more birds. So I started to look for great ideas here on this site. You guys are great inspiration. Thanks!
Our first coop was just taking a corner of our old tool shed and adding a run next to shed. It held 10 birds. But I wanted to get more. I couldn't expand the coop inside the shed without taking over the whole shed. And then where would the DH put all his tools! So I decided that I would just build a new coop for the new flock. My husband had access to as many free pallets as we needed from work and even some plywood. I got lots of people saying all you need to do is slap up some plywood and wire and call it a day. I wanted to make a coop out of trash but not make it look like trash!!!
So here is what I did!
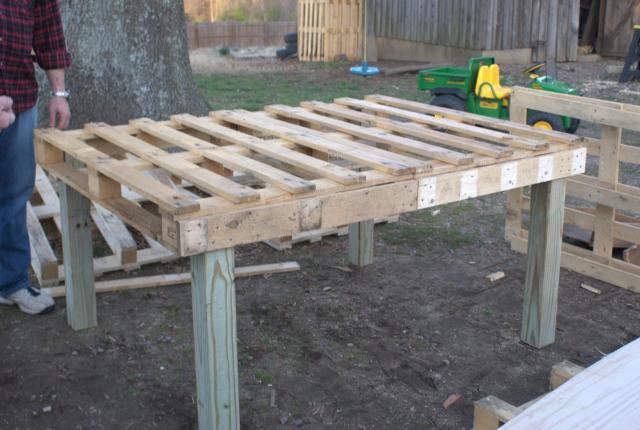
I bought one treated post and cut for the legs. Attached 2 pallets side by side for the base (which made it bow in the middle. . . Remember that I am learning as I go. So I got a 2X4 a ran through both pallets for rigidity. 1st lesson learned)

Then put a sheet of thin plywood on it and covered with rubber floor tiles (that I also got for free) for easy cleaning.
Then because I am so short, I started to build the coop on the ground to be put together later. You can kinda see the beginnings of the coop in the pic above without the roof. I wish I had gotten more pics of it at this stage but I was too busy with building it.
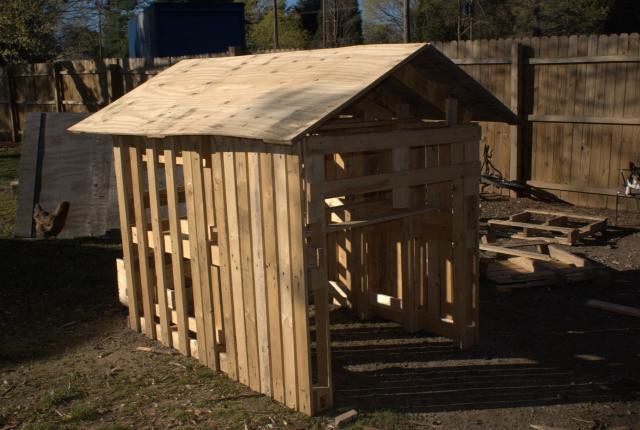
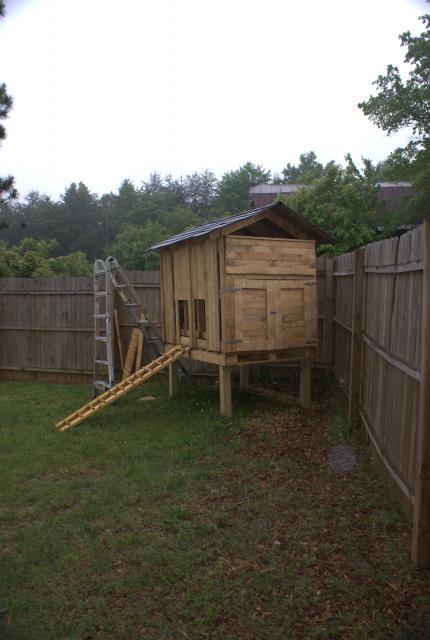
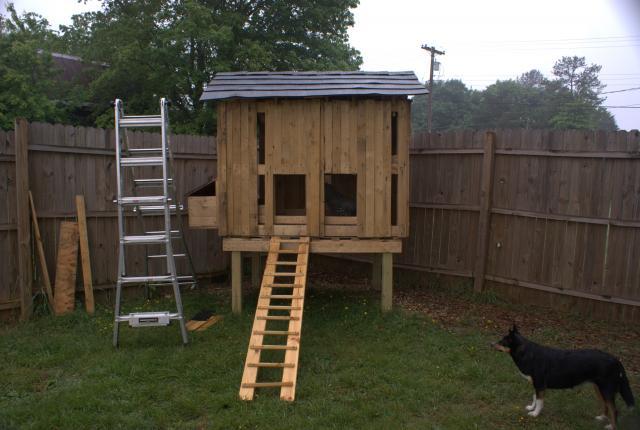
Here are pics with it roofed and siding started.
At this stage, I had to do some rethinking. The coop was WAY too heavy. The way the pallet boards were spaced, it left a small gap in between the boards. So to cover the gap, I was using another board from a deconstructed pallet. Overlapping the boards was making this thing a beast and would have been near impossible to move. So I had to tear off all the siding boards and restart with only a single layer. This made it lighter but is still very heavy. My DH and I got it moved to the corner of the yard which was no small task.
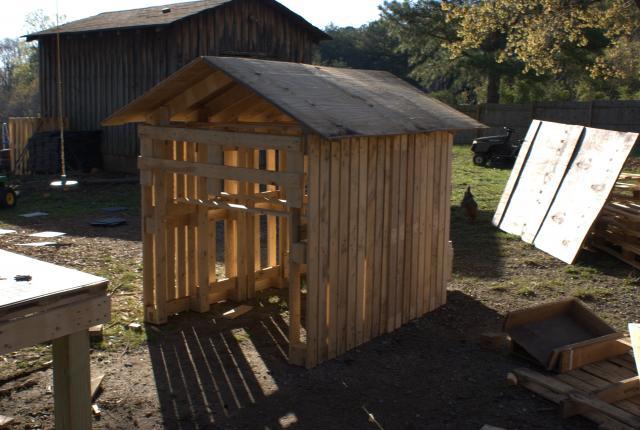
I roofed the coop with the same rubber tiles I used for the floor. I used a couple tubes of nail glue and overlapped them.
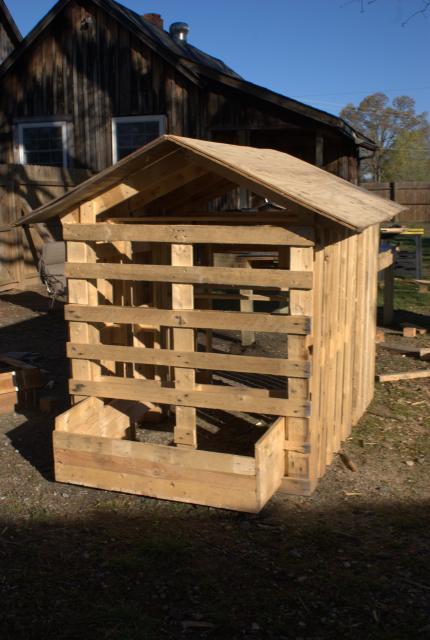
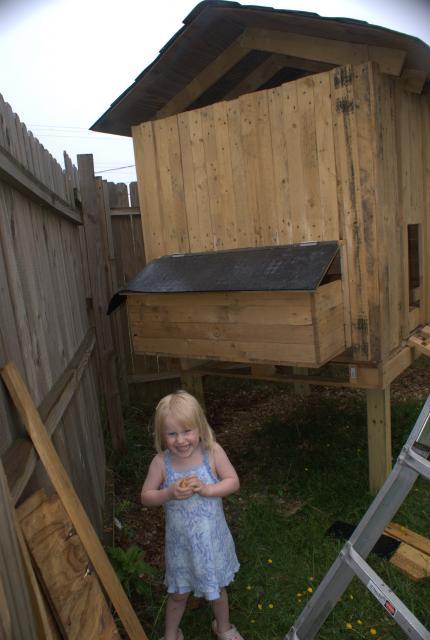
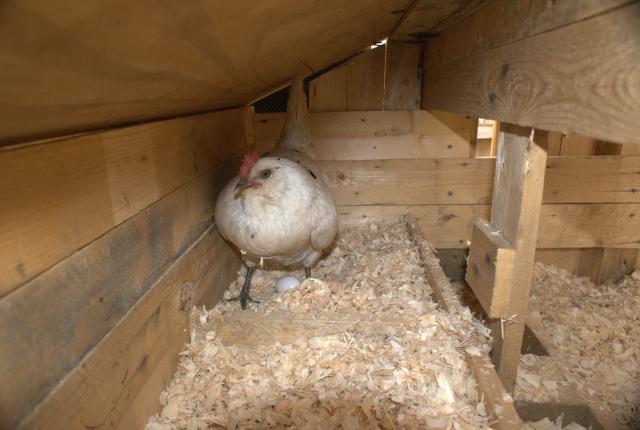
As you can see, it is not totally finished. I need to attach the pop doors and rip a couple of boards for the siding. Waiting to borrow a friends table saw to finish that. But I had to get my birds in the coop. So they are in it, such as it is. And just in time. A few days later Dot, my EE/leghorn mix, laid her first egg in her new coop!
Anyway, the coop only cost me a 2x4, a post for the legs, some hardware (hinges, etc.) and glue and some nails (less than $50). Not to mention the 2 months of mess in the back yard! But oh so worth it!
Seven new birds added to my flock which brings the total to 15! Well not really...I have 25 meat birds in the brooder also. Now to make a chicken tractor for them! It is started but not completed yet. I will post pics when it is done. It is amazing how chickens keep multiplying. I love chicken math.
I will leave you with encouragement that you can do anything and anything done wrong can be fixed! You can do it !
(A conversation that I overheard with my DH and his friend.)
DH: I am helping my wife build a chicken tractor today.
Friend: That Chicken coop has been quite the ordeal.
DH: It is only an ordeal because my wife keeps getting more chickens!
We did not have the money to buy a coop and I wanted to get more birds. So I started to look for great ideas here on this site. You guys are great inspiration. Thanks!
Our first coop was just taking a corner of our old tool shed and adding a run next to shed. It held 10 birds. But I wanted to get more. I couldn't expand the coop inside the shed without taking over the whole shed. And then where would the DH put all his tools! So I decided that I would just build a new coop for the new flock. My husband had access to as many free pallets as we needed from work and even some plywood. I got lots of people saying all you need to do is slap up some plywood and wire and call it a day. I wanted to make a coop out of trash but not make it look like trash!!!
So here is what I did!
I bought one treated post and cut for the legs. Attached 2 pallets side by side for the base (which made it bow in the middle. . . Remember that I am learning as I go. So I got a 2X4 a ran through both pallets for rigidity. 1st lesson learned)
Then put a sheet of thin plywood on it and covered with rubber floor tiles (that I also got for free) for easy cleaning.

Then because I am so short, I started to build the coop on the ground to be put together later. You can kinda see the beginnings of the coop in the pic above without the roof. I wish I had gotten more pics of it at this stage but I was too busy with building it.
Here are pics with it roofed and siding started.
At this stage, I had to do some rethinking. The coop was WAY too heavy. The way the pallet boards were spaced, it left a small gap in between the boards. So to cover the gap, I was using another board from a deconstructed pallet. Overlapping the boards was making this thing a beast and would have been near impossible to move. So I had to tear off all the siding boards and restart with only a single layer. This made it lighter but is still very heavy. My DH and I got it moved to the corner of the yard which was no small task.
I roofed the coop with the same rubber tiles I used for the floor. I used a couple tubes of nail glue and overlapped them.
As you can see, it is not totally finished. I need to attach the pop doors and rip a couple of boards for the siding. Waiting to borrow a friends table saw to finish that. But I had to get my birds in the coop. So they are in it, such as it is. And just in time. A few days later Dot, my EE/leghorn mix, laid her first egg in her new coop!
Anyway, the coop only cost me a 2x4, a post for the legs, some hardware (hinges, etc.) and glue and some nails (less than $50). Not to mention the 2 months of mess in the back yard! But oh so worth it!
Seven new birds added to my flock which brings the total to 15! Well not really...I have 25 meat birds in the brooder also. Now to make a chicken tractor for them! It is started but not completed yet. I will post pics when it is done. It is amazing how chickens keep multiplying. I love chicken math.
I will leave you with encouragement that you can do anything and anything done wrong can be fixed! You can do it !
(A conversation that I overheard with my DH and his friend.)
DH: I am helping my wife build a chicken tractor today.
Friend: That Chicken coop has been quite the ordeal.
DH: It is only an ordeal because my wife keeps getting more chickens!


