- Dec 21, 2009
- 448
- 15
- 121
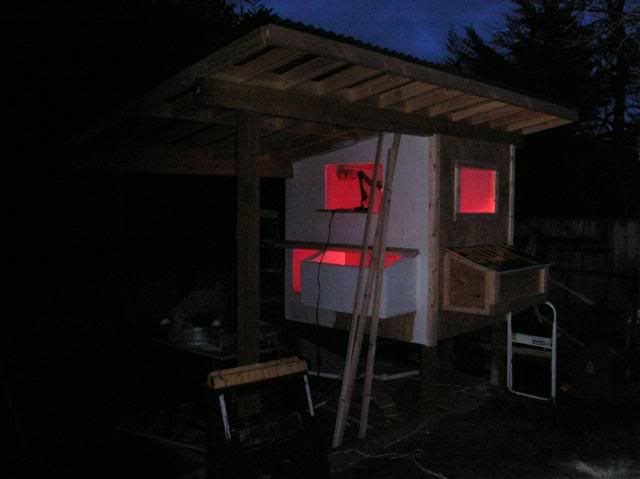
I made the command decision to finish prepping the coop and moved the birds in this afternoon. Storey's says there is no reason at all why chicks over 2 weeks can't be moved out of their early brooder and into a proper brooder house.
I've been monitoring the temperature and humidity in there all day after swapping the 60 Watt bulb out for a 100 Watt bulb, and my brooder thermometer says that the litter under the light is the same temp as the brooder in the house. I am satisfied that I have adequate heat and ventilation.
I had a few things left to do so I got them done today. First, I finished installing the window and nest box locking hardware so everything is secure. I'm using an aluminum carabiner instead of a padlock for now.
Next, I built a small stand out of 1x3 lumber, covered it with hardware cloth and put it directly on the coop floor, surrounded by litter. I dumped about a quart of compressed newspaper pellets (ferret litter) in the middle of that platform. Now if they spill any water it will leave the pine litter dry and they won't track wet chips all over the coop. The compressed newspaper absorbs an amazing amount of liquid and will keep the floor dry. I bought a 1 gallon water dispenser to fit it.


While I was at the feed store, I scored the last bag of DE that they had. For us newbies, that is Diatomaceous Earth, Feed Grade. There is an agricultural grade out there that people use for slug control, and that is NOT the right stuff. What you want comes in a 40 pound bag that looks like this:

The DE is a light brown and very fine powder, and you most definitely need a good dust mask or respirator when you handle it. I have a bunch of food grade plastic buckets that I store things like this in, and 2 buckets will hold 50 pounds of anything, so 40 pounds of DE fits just fine. I have gasketed lids that I pound on the buckets with a wooden mallet. I dusted a bit of DE into the litter and nestboxes.
I also built a wooden platform for their food dispenser so it is at least above the litter. We'll see how it does about billing, but it is temporary. I already made a hanging feeder for them when they finally move outside, and I plan to hang it out in the run. The only time I will keep rations in the coop is when they are confined to it like now.
I made a larger "intermediate" roost too. It's nothing fancy, but it is bigger than the one they had, and lower than the permanent roost that they cannot reach yet. I also grabbed a small bag of timothy hay and used it to fill the nest boxes. I know they won't lay anything in there for some time, but I want them to know there is something different about those boxes right off the bat. Scratching around in the hay will give them something to do, and as long as they are going to poop in there, I might as well have something down to absorb it and make it easy to clean out later.

So there they are. The oldest is there on the left, and you can see that she is substantially larger than the other four. She already has breast feathers and I have no doubt she is ready to be in bigger quarters. The others are only 9 days behind her, and are also well along with growing feathers. They all suddenly have necks, and aren't the fuzzy little peeps any more. You can see the temperature and humidity transmitter on the door sill. Good place for it for now, and eventually I will mount it permanently on the wall
I am closely watching what goes on out there and will be popping out there tonight to peek in the windows to see how they are doing. I have no reason to think that the brooder light won't keep them warm, and I am certain they are secure out there. I believe I have successfully configured my small coop as a decent brooder house for now, and all I need to do is open the door for them once they are ready to hit the covered run.
Developing, but I feel good about this move! I am prepared to move them back inside if necessary, but the forecast here is for amazingly mild weather. If we were looking at a major winter storm, I probably would not make this move, but the weather is cooperating and we are a "GO!"...
Cheers!

I've been monitoring the temperature and humidity in there all day after swapping the 60 Watt bulb out for a 100 Watt bulb, and my brooder thermometer says that the litter under the light is the same temp as the brooder in the house. I am satisfied that I have adequate heat and ventilation.
I had a few things left to do so I got them done today. First, I finished installing the window and nest box locking hardware so everything is secure. I'm using an aluminum carabiner instead of a padlock for now.
Next, I built a small stand out of 1x3 lumber, covered it with hardware cloth and put it directly on the coop floor, surrounded by litter. I dumped about a quart of compressed newspaper pellets (ferret litter) in the middle of that platform. Now if they spill any water it will leave the pine litter dry and they won't track wet chips all over the coop. The compressed newspaper absorbs an amazing amount of liquid and will keep the floor dry. I bought a 1 gallon water dispenser to fit it.
While I was at the feed store, I scored the last bag of DE that they had. For us newbies, that is Diatomaceous Earth, Feed Grade. There is an agricultural grade out there that people use for slug control, and that is NOT the right stuff. What you want comes in a 40 pound bag that looks like this:
The DE is a light brown and very fine powder, and you most definitely need a good dust mask or respirator when you handle it. I have a bunch of food grade plastic buckets that I store things like this in, and 2 buckets will hold 50 pounds of anything, so 40 pounds of DE fits just fine. I have gasketed lids that I pound on the buckets with a wooden mallet. I dusted a bit of DE into the litter and nestboxes.
I also built a wooden platform for their food dispenser so it is at least above the litter. We'll see how it does about billing, but it is temporary. I already made a hanging feeder for them when they finally move outside, and I plan to hang it out in the run. The only time I will keep rations in the coop is when they are confined to it like now.
I made a larger "intermediate" roost too. It's nothing fancy, but it is bigger than the one they had, and lower than the permanent roost that they cannot reach yet. I also grabbed a small bag of timothy hay and used it to fill the nest boxes. I know they won't lay anything in there for some time, but I want them to know there is something different about those boxes right off the bat. Scratching around in the hay will give them something to do, and as long as they are going to poop in there, I might as well have something down to absorb it and make it easy to clean out later.
So there they are. The oldest is there on the left, and you can see that she is substantially larger than the other four. She already has breast feathers and I have no doubt she is ready to be in bigger quarters. The others are only 9 days behind her, and are also well along with growing feathers. They all suddenly have necks, and aren't the fuzzy little peeps any more. You can see the temperature and humidity transmitter on the door sill. Good place for it for now, and eventually I will mount it permanently on the wall
I am closely watching what goes on out there and will be popping out there tonight to peek in the windows to see how they are doing. I have no reason to think that the brooder light won't keep them warm, and I am certain they are secure out there. I believe I have successfully configured my small coop as a decent brooder house for now, and all I need to do is open the door for them once they are ready to hit the covered run.
Developing, but I feel good about this move! I am prepared to move them back inside if necessary, but the forecast here is for amazingly mild weather. If we were looking at a major winter storm, I probably would not make this move, but the weather is cooperating and we are a "GO!"...
Cheers!