My Pvc Chicken Coop Project

yOUR RUBBERMADE PROJECT IS WORKING OUT NICELY.
Quote:
What's this, & where'd you get it?

THANKS for your GREAT ideas!
 
It is a took especially made for cutting pvc pipe. It has a sharpe blade and is a ratchet. You can get them at Home Depot, Lowes or probably even a hardware store. It is very very well worth it.
Quote:
What's this, & where'd you get it?

THANKS for your GREAT ideas!
 
Suzegg, I absolutely love your coop! I am actually doing a small coop very similar to this for my new batch of silkies I've got coming in next month...I got the idea off of googling somewhere, and it will just be a smaller version of what you have. Another idea I may put into place later is making a square framed tractor made of 1/2 or 3/4 PVC I seen one on here that someone made for about 50$ using PVC as a frame and wiring it, though they didn't put a solid wood area for roosting/nesting since they were in Arizona I think? so rain and cold weren't a huge deal for them. Anyway I will be posting my coop in a week or two when I'm hopefully all done (i'm busy busy busy busy and 3 straight days of rain will put a damper on anyone's plans! - lol)

I'm just screwing my PVC into my wood base, I was looking for something solid to weigh down the tractor and also deter my neighbors dogs and loose rabbits from trying to dig at it so I'm using treated 4X4's I already had laying in the shed...The PVC pipe I'll be using is stuff I had and other that my dad had left from laying electrical lines in his yard late last year.
I'm using alot of material we already had on hand, things i thrifted from my dad
wink.png
, or my neighbor didnt need, so I think my total cost (is only mainly going to be the screws, a 1' skirt 1/2 hardware cloth at very bottom, and another sheet of plyboard I'm using for nesting area) so I'm guessing at MOST I'm looking at 30$ put into it out of pocket. Which is fantastic.
smile.png


I'll definately take pictures and post up when its all done!

I made this name and everything just so I could post on your thread when I came across it!
smile.png
 
Thank You. I think the idea I used will help out alot of folks who want to keep things simple and cost effective. Once the chickens get bigger I will use the inside of the back part of the coop for their roosting and nesting area. I am thinking about making a shower curtain type closure to seperate the run from the roosting/nesting area. Then I can put a heat lamp or two in there for cold spells, and remove it when it warms up. But I think I am counting my chickens before they hatch, it will be awhile before they want to lay. I put the original wood/wire brooder in there for now and they kind of go in and out of there as they please. But again thank you, and good luck with your endeavors. You certainly have quite a bit to tend to.
Quote:
 
HEy Great JOb!, Looks like it will work out well for you. Awsome Job, keep it up. !!!!
Quote:
 
Also looks like your fence will protect from the wind quite a bit.
Quote:
 
Suzegg, I had started on the frame, then didn't like it, so was going to start over when i found the perfect frame for FREE today! (its been raining for 5 days here, just havent gotten anything done till today!) half my yard is bog from all this rain!

The frame is some kind of frame crate they use at warehouses and wrap up in plastic...i saw them putting it and pallets on side of road so ran home (12 miles!) grabbed blazer and trailer and hauled tail back and got 2 heavy duty HEAVY pallets, the wood frame thingy, and about a dozen regular pallets...now I am re-doing my entire idea for the coop itself. It will be wood, but I have industrial 1/8 inch thick plastic wrapping and i'm thinking about layering it on (its about 18" tall) and then painting it with a plastic paint so the house looks shingled...

I thought about doing a large coop like yours and building on some kind of sturdy plastic area but I figure it wouldn't be weather proof enough so I decided to make my run PVC only and the coop wood. also will be able to lock them up tight at night like I do in my larger coop.
smile.png


I will start compiling my work in progress pictures once i get some progress made. lol. I will be going to buy some plyboard tomorrow probably and since it will be the only dry day try like the devil to get something done!!!
 
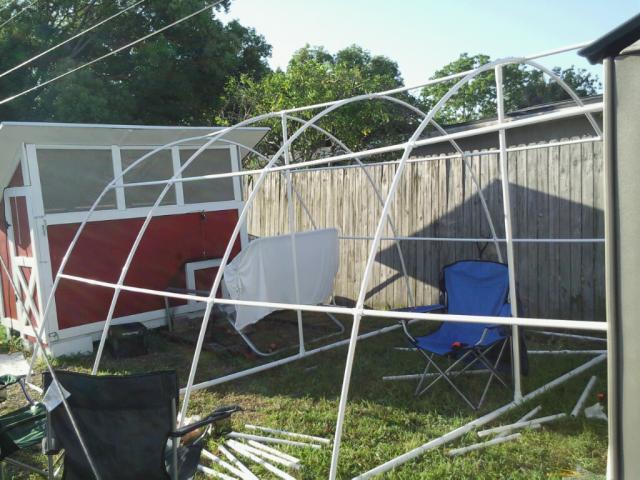
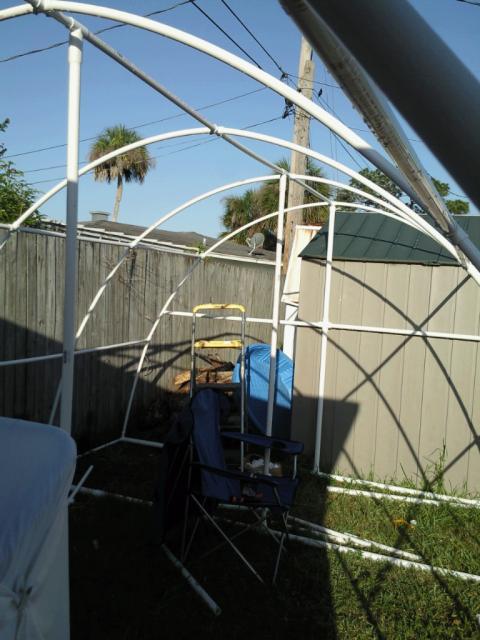
Okay so here are some pictures I had taken with my phone today. I ended up dismantling it and putting it back together a bit differently this AM, so it looks like alot less is done. lmao today has been stripping wood off of pallets and doing cutting.
smile.png


At this point total money spent is =23 (rounded) and thats for :
* small can of red paint (- $8)
* 3 pieces of wood 1X2 and 1X3 for the sides and upper supports/extra tacking area for wire. (not on it yet going to be on this evening though!) ( $3.20)
* 1" wire 48" X 30' ($12+ )

I've got enough wood from pallets to do about 60% of the coop, and I have other lumber and 2 scrap pieces of plyboard, so I think I may have to buy or try to find another 4X4 piece of plywood and a few more pallets. Also tin for roof. The coop I'm now going for clapboard style, real old southern tobacco barn look
smile.png
with the rough sawn pallet pieces and stuff I have it will work really well and will use less material and I wont have to buy more plastic spray paint like i would have if I did the plastic siding. I've been altering my plans to fit what I got and don't got XD but i think I have a picture of how it will look pretty firm in my head now. I'm going to do some insulation, but just going to use the giant cardboard boxes that I can get from where my sister works at and use them as insulation.
smile.png

Side view run

CoopProject2.jpg


front - back view run

CoopProject.jpg


The free crate that will make the perfect frame for my coop! (tore it down some from its original look-forgot pics of before XD)

CoopProject3.jpg
 
Last edited:

New posts New threads Active threads

Back
Top Bottom