New addition on our 11 month old unfinshed coop

Pics

ScottandSam

Still learning
6 Years
Dec 24, 2016
836
820
246
Shell Knob, Missouri
That's Right . I was told we had 20 chicks coming around March 2016 and that I needed to build a coop. Of course this was something we had talked about for the last 2 years on and of. I guess the wife was never happy that I did not start on a coop so she figured if she ordered the chickens I would have to build it. So How I started the build was to find a coop online that caught my eye. Since this would be close to the house It had to look better than what I would have put out in the front field.


And then the walls started taking shape.......


I looks back at the pictures and I can't believe how the grass was just filling in only to be gone a few months later. The trees are all black walnut. a few where taken down after this picture and a few more need dropped for the run we will add this summer.
 
Well a new job and the addition on house has slowed things down to a stop on the coop. I have planned to make some changes to better enable a deep litter bed. I also have been finishing it in my head every time I drive by it.
For now I do have some pictures of a few of our newest layers. still waiting on a few to lay. we are down to just one rooster to make room for another fbcm rooster any day now.
so here is a dozen of a few different breeds that are currently laying. I can not wait for them to get there normal size.The colors are better outside so I'll update later when they are all laying.

eggs 2nd.jpg
new eggs.jpg


Scott
 
well heck here are the pictures......................

20170917_182758.jpg 20170918_101737.jpg 20170918_101746.jpg

so here is the boards installed...........................
20170911_152922.jpg 20170911_152942.jpg 20170911_162906.jpg
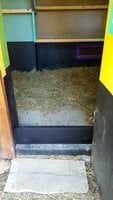
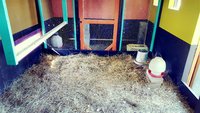
Since we had straw in it I just left it down.....
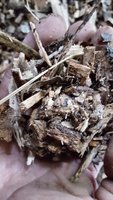
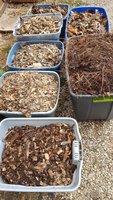
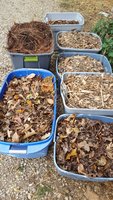
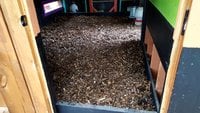
next we added mulch/leafy mix
20170917_182639.jpg


20170914_075416.jpg


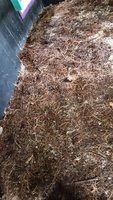
and then pine needles....................................
20170917_174156.jpg


20170917_174226.jpg


then some more this..................
20170917_182735.jpg


and that................................
20170918_111759.jpg
20170918_111825.jpg


then a few more pine needles................
20170918_134053.jpg
20170918_134110.jpg


and that's is where I stopped for now. the girls have done a nice job of mixing everything up.....

Scott
 

Attachments

  • 20170917_182702.jpg
    20170917_182702.jpg
    604.6 KB · Views: 7
  • 20170917_174226.jpg
    20170917_174226.jpg
    676.8 KB · Views: 7
Ok with the siding off the North gable wall. I was able to evaluate the build. I decided it would be easier to re use the existing gable wall in the new addition. This mean I will un-attach it from the existing east and west walls slide it down 8" and then I will only need to build 2 more walls, @ 8' long and tie in the roofline.

And now the new footprint.


The existing coop is 8'W X 6'L and a 10'W x 4'L section. That is 88 sq'. The addition is 10'Wx 8'L so that is another 80 sq'. 40 for the geese and 40 for the chickens. The goal is open the coop up inside and add a wall 4' from the new gable wall in the right of the pic. That wall will be removeable. That way when I can build the geese a separate shelter close to a pond we will be putting in. Or I can remove or slide this wall to the right new gable wall in pic to open up that 40 sq' for more room for additional chicks. Or even leave alone to use the area for smaller chicks till they get ready to be introduced to the flock.
Right now there is a partition wall between the netting boxes and the door that runs front to back.it will be removed. Also a wall and door that goes from the existing partition wall to the gable wall. Behind that door it the little room exposed when the siding came off.

Another pic of the front with our temp run. The chicken now free range 99% of the day and we have lost 9 birds this last year to predators. The run will be built later on to help us not loose so many birds this year.

 
I figure out a what a hen cave
Not fond of most of the 'cave' configurations, most are not adjustable for height and have too many things wrapped around them creating trap points. Many folks don't understand that the chicks need to be able to touch their backs to the heat pad and 'cave' infers a single egress point which can trap chicks that need to get away from the heat.

About the same time that concept got 'hot'(haha!) I was devising a 'pseudo brooder plate' using a heating pad. It works really great, but they do have capacity constraints.
Took several iterations before I got one that is easy and safe to use and am still tweaking the adjustable leg attachments. Biggest issue for me was being able to easily lift/tip the thing up(and back down) to take a look underneath for chicks in distress or dead without reassembling the thing. I fuss a lot during design/build, but hate to fuss while a thing is in use. Fuss first, Flow later.

I still use a heat lamp those first few days, just during the day, to make sure they are all moving/eating/drinking/pooping OK. It sure is nice to have it dark and quiet at night, not to mention the removal of the fire risk that is inherent with using heat lamps.

Whew! Am quite verbose this morning. Apologies to those offended.
 
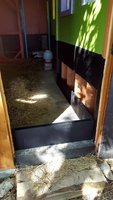
Ok so this weekend I worked on finishing the pop door. I built a siding one and in the wet months she like to swell and not slide. I also cut 2x10 to fit around the perimeter of the floor so we can start a deep little bed this winter. I wasn't sure how that would work out with the hen boxes on the floor but the girls all used them today and I felt like maybe it added some privacy. So here are some pics of the progress today.
20170910_171422.jpg


And as usual The girls want to inspect the work from time to time. They get on me if its not to code.
20170910_171500.jpg


20170910_171520.jpg


iNSIDE LOOK OUT POP DOOR
20170910_171538_001.jpg

Some of our news members. 2 welsummer hens and I think 4 fbcm hens and last our fbcm roo
20170910_171636_001.jpg

Flokies exhausted after chasing off the coyotes last night( the buff there is only 6 months old and puts the others pictured to shame)............
20170910_135628.jpg


Scott
 
Last edited:
Sweet little covered porch!
Might want some cleats on that ramp, or stick a block under the low end.

I've made 2 sliding pop doors, first was rather loose fitting, sloppy carpentry.
The second was a much improved fit due to stepping up my fabrication care....
....Ha! that's the one that swells and sticks when humid. SMH.
 

New posts New threads Active threads

Back
Top Bottom