OK, Whysaywhat... well the weather has been with us the last few days, 77 degrees yesterday and 78 today. So we managed to get most of the run completed. We used 1/2" hardwire cloth and we also buried it 1 foot underground just to be on the safe side. The only thing left to do is put the hardwire on the top of the run and then put the tin roof on top of that. Here's some pics of our progress.
But first introductions.... this is our fat cat, Peaches. Peaches has been watching the chickens ever since we got them as day old peeps. He got kinda close once, but they pecked at him pretty hard and he knows not to mess with them. See how the roosters are watching him thru the fence.... ya, he's getting the stink eye!! lol

In the back corner under the coop is the new rabbits cage. Thumper has been living in with the chickens ever since we rescued him 3 months ago. He don't seem to mind as long as he has his own cage. He has free run, but he keeps the chickens out of his space. Well all except the 3 pullets that we rescued with him. He lets them lay eggs in his cage then he lays on them to keep them warm.
This is a front view of the run. I got the door from a neighbor that was going to haul it off to the dump. I figured we could use it for something. We busted out the centers of the door and put the hardwire cloth on it to make it see thru. The kids are checking out the new run also. LOL
Here's a back view of the run. You can see the chicken ramp better from here. The chickens are just starting to come out to take a look around.
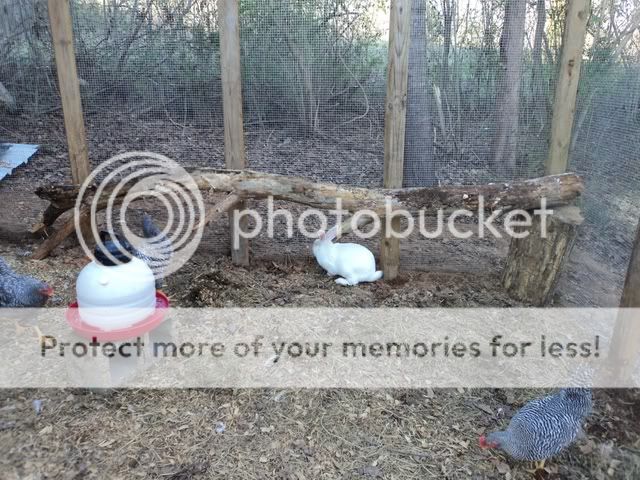
Here's a pic of a log that I scored along the roadside this morning. I put it into the run as sort of a roost and a jungle gym for the hens. You can see our bunny, Thumper, better here. We had to finally cage him tightly because he kept trying to tunnel his way out under the fence.
Here's the best picture of the chicken door and the ramp to the run. On the bottom left, is the homemade feeder. I was proud of myself for this accompleshment. It's just a gallon sized (sliced peaches) can with a pie plate hot glued to the bottom of it. I have better feeders inside, but this one really comes in handy in a pinch.
I don't know if you can see it or not, but we only had one hinge left (that we could find, KIDS!!) that was usable for the chicken door. We will be picking up a couple more to make it more sturdy. I also had a window latch that we used to lock the door. It worked out perfectly.
This is one of the first to venture out to see what was going on. That is our boxer, Harley in the background. He's a real tiger!! My hubby had the brilliant idea of the landing for them to stand on when they first come out. Pure genius!
And finally, here's a pretty good shot of about half my flock. Some of the others were still hiding inside the coop. We had to go in there and kick them out. But then we also had to put them back inside the coop because they wanted to stay out. I figure we'll have to do this for a few days untill they get the routine down pat. lol
We'll I'm totally pooped and sore from all the hard work, (not used to this extra hard work) so I'm off to bed with a muscle relaxer to help me sleep. Hope you liked my pics, and we are not done yet. So more pics to come. Not sure if I'll make it back to HD tomorrow. But maybe......
But first introductions.... this is our fat cat, Peaches. Peaches has been watching the chickens ever since we got them as day old peeps. He got kinda close once, but they pecked at him pretty hard and he knows not to mess with them. See how the roosters are watching him thru the fence.... ya, he's getting the stink eye!! lol

In the back corner under the coop is the new rabbits cage. Thumper has been living in with the chickens ever since we rescued him 3 months ago. He don't seem to mind as long as he has his own cage. He has free run, but he keeps the chickens out of his space. Well all except the 3 pullets that we rescued with him. He lets them lay eggs in his cage then he lays on them to keep them warm.

This is a front view of the run. I got the door from a neighbor that was going to haul it off to the dump. I figured we could use it for something. We busted out the centers of the door and put the hardwire cloth on it to make it see thru. The kids are checking out the new run also. LOL

Here's a back view of the run. You can see the chicken ramp better from here. The chickens are just starting to come out to take a look around.

Here's a pic of a log that I scored along the roadside this morning. I put it into the run as sort of a roost and a jungle gym for the hens. You can see our bunny, Thumper, better here. We had to finally cage him tightly because he kept trying to tunnel his way out under the fence.
Here's the best picture of the chicken door and the ramp to the run. On the bottom left, is the homemade feeder. I was proud of myself for this accompleshment. It's just a gallon sized (sliced peaches) can with a pie plate hot glued to the bottom of it. I have better feeders inside, but this one really comes in handy in a pinch.

I don't know if you can see it or not, but we only had one hinge left (that we could find, KIDS!!) that was usable for the chicken door. We will be picking up a couple more to make it more sturdy. I also had a window latch that we used to lock the door. It worked out perfectly.

This is one of the first to venture out to see what was going on. That is our boxer, Harley in the background. He's a real tiger!! My hubby had the brilliant idea of the landing for them to stand on when they first come out. Pure genius!

And finally, here's a pretty good shot of about half my flock. Some of the others were still hiding inside the coop. We had to go in there and kick them out. But then we also had to put them back inside the coop because they wanted to stay out. I figure we'll have to do this for a few days untill they get the routine down pat. lol

We'll I'm totally pooped and sore from all the hard work, (not used to this extra hard work) so I'm off to bed with a muscle relaxer to help me sleep. Hope you liked my pics, and we are not done yet. So more pics to come. Not sure if I'll make it back to HD tomorrow. But maybe......

Last edited:


