We started it about 4 weeks ago (a couple of days after we got our baby chicks) Here are some pics

My DH and my BIL framing of the coop with untreated wood. We decided to turn it to face in the other direction right after I took this pic. We made so many changes as it was being built.
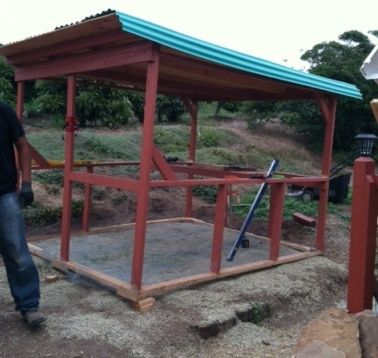
The roofing isn't attached yet but they just laid it on top. I painted as they went. We did add Hardware cloth to the bottom of the coop and some basic gravel for drainage.
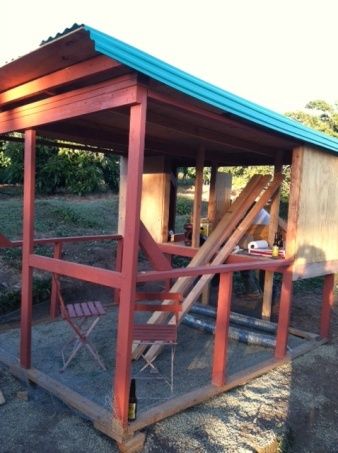
We had some extra help to put up the walls of the coop. The back left side is for the closet.

My Nephew helping with the placement for the window.

The small window thats open is for viewing and ventilation. The window is part of the side door that opens up so that we can clean out the coop without having to go inside. The slider window above the nesting boxes is also great for viewing. The back open side next to the nesting boxes is the closet.
Another pic of the back
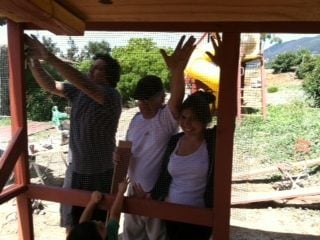
The crew (My Honey, Dad, sister and her baby boy) helping with the Harware cloth.

More help with the coop- My Dad is supervising

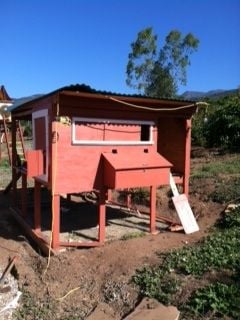
It's Done!!!! (except for the closet door). We finished a week ago exactly. The white framing inside the coop opens up completely. I need to take a picture of it. This is for when we need to do a serious cleaning of the coop.
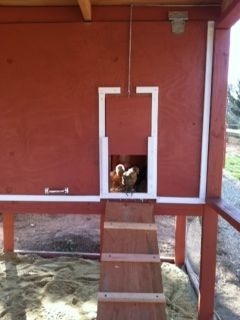
We put sand in the run and in the coop. We did mix in shavings with the sand in the coop since they were used to the shavings. We put them in the coop and this is them checking out the ladder. They kept running by the opening but would not go down the ladder. After a couple of hours we put them in the run.
We have 5 little chickies. 2 Gold Sex Linked, 2 Ameracaunas and 1 Cuckoo Maran. I will take more pictures and post. Now they love it. They run up and down the ladder and push each other off of it.
My DH and my BIL framing of the coop with untreated wood. We decided to turn it to face in the other direction right after I took this pic. We made so many changes as it was being built.
The roofing isn't attached yet but they just laid it on top. I painted as they went. We did add Hardware cloth to the bottom of the coop and some basic gravel for drainage.
We had some extra help to put up the walls of the coop. The back left side is for the closet.
My Nephew helping with the placement for the window.
The small window thats open is for viewing and ventilation. The window is part of the side door that opens up so that we can clean out the coop without having to go inside. The slider window above the nesting boxes is also great for viewing. The back open side next to the nesting boxes is the closet.
Another pic of the back
The crew (My Honey, Dad, sister and her baby boy) helping with the Harware cloth.
More help with the coop- My Dad is supervising
It's Done!!!! (except for the closet door). We finished a week ago exactly. The white framing inside the coop opens up completely. I need to take a picture of it. This is for when we need to do a serious cleaning of the coop.
We put sand in the run and in the coop. We did mix in shavings with the sand in the coop since they were used to the shavings. We put them in the coop and this is them checking out the ladder. They kept running by the opening but would not go down the ladder. After a couple of hours we put them in the run.
We have 5 little chickies. 2 Gold Sex Linked, 2 Ameracaunas and 1 Cuckoo Maran. I will take more pictures and post. Now they love it. They run up and down the ladder and push each other off of it.


