Actually, when I started this project, I didn't realize there was a business out there producing this type of coop (honest!).
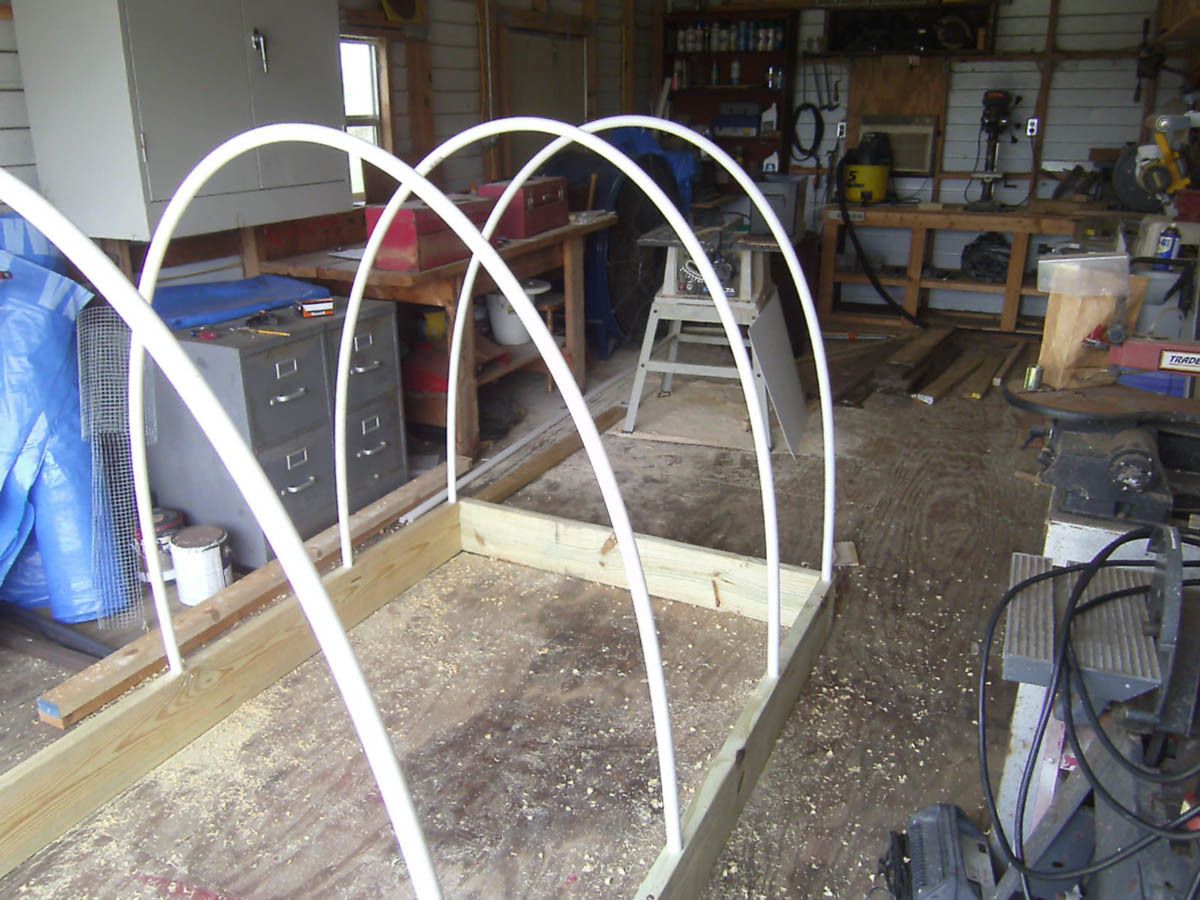
I started building this from a picture I found after searching through google images for "coop" and this stuck with me and I saved it. I thought the design was very cool. Later on, after i started, I found the website where whole kits could be purchased and this particular design was called the 'Stagecoach.' Having said that, if you go to the manufacturer's website, you can see some differences in their design and what i ended up making from a simple picture.
Here's the finished product:
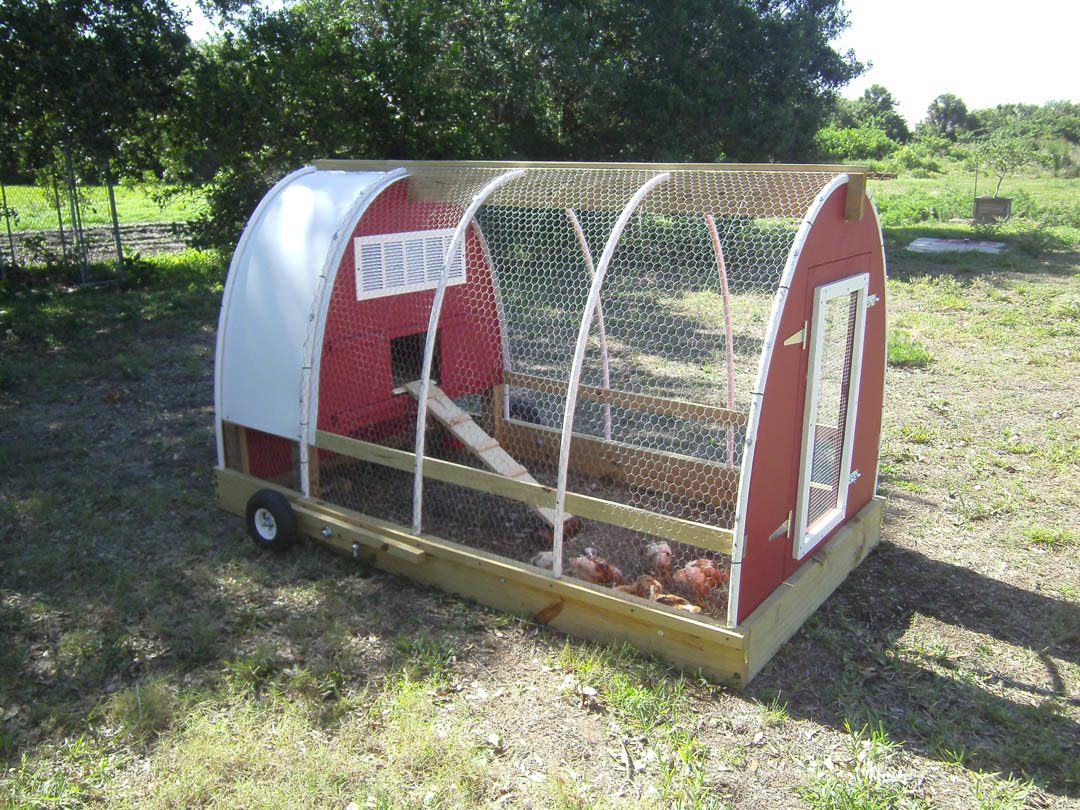
It is built on a 4x8 base and is a little over 4-1/2 feet high. There will also be a double nest laying box on the back that is accessible by a top hatch and we will be adding this next week. The inside of the house has three two foot long roosting rails placed at varied heights from the floor. This should give six chickens 1 foot of roosting space each, but no more than that.
The roof of the house is the plastic wall sheeting sold by Home Depot and Lowes for bathroom wall covering. It's just like paneling only made out of plastic and very bend-able. Time will tell how durable it is in Florida sun.
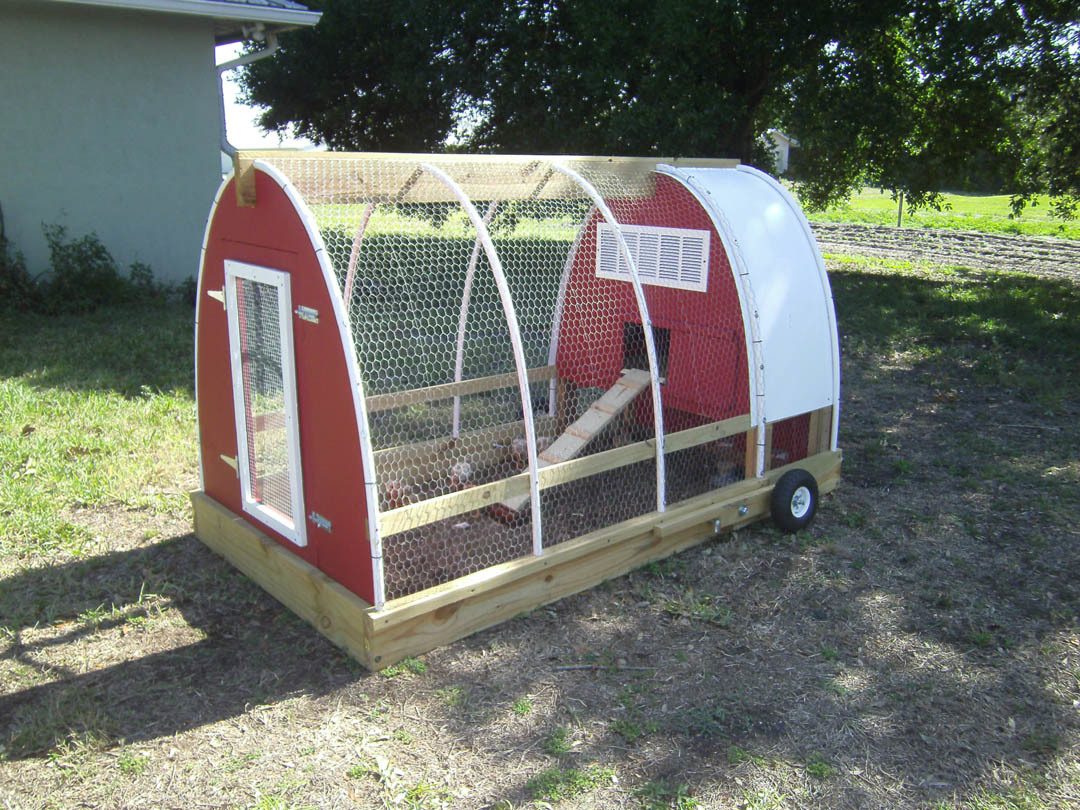
The actual hen house portion is much lower than the original design and is accessible by ramp. We can shut the hen house with the sliding door that slides left and right. (I wish i would have designed a ramp/door combo so that when you vertically lift the ramp up attached by a hinge, it actually becomes the door and safely closes off the house - but I would have had to made the top vent smaller in order to do this)
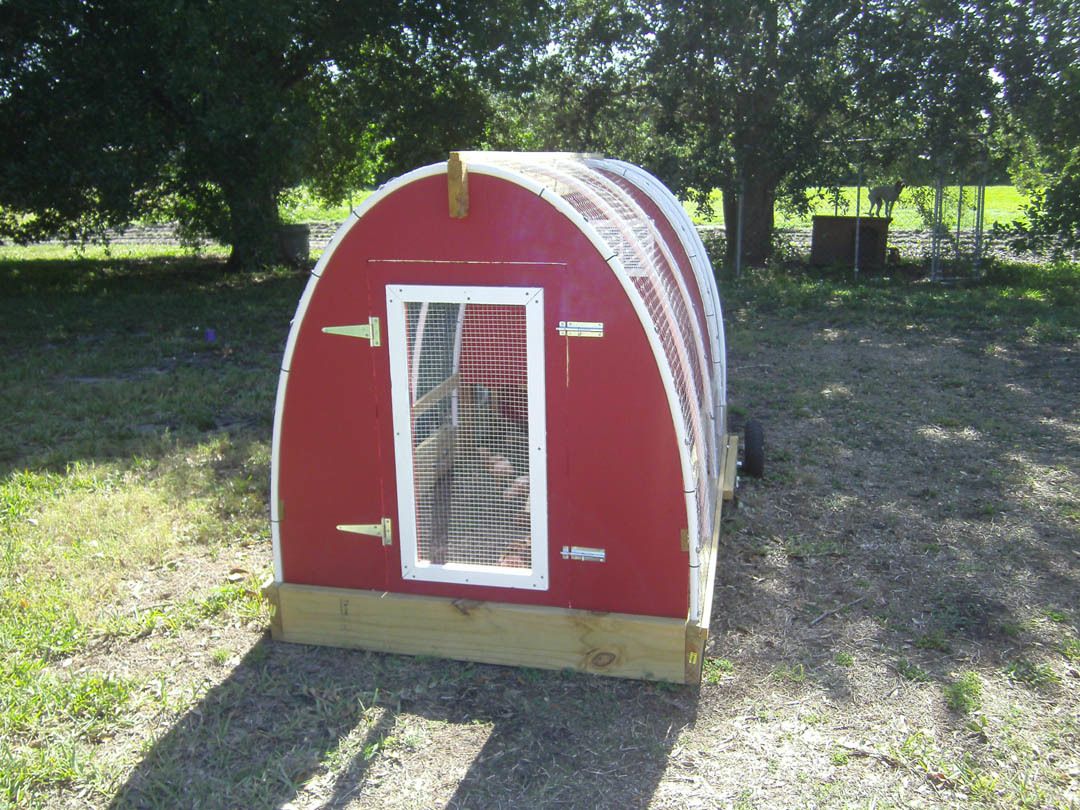
You can just make out the English Pointer (bird dog) in the background on her dog house, destined now to spend most of her days in her pen.
The bottom of the hen house is held up by three blocks of wood on a screw, the blocks can be turned allowing the bottom (which is hinged at the back) to drop down (not shown) dumping out the bedding and refuse and the entire house can be cleaned.
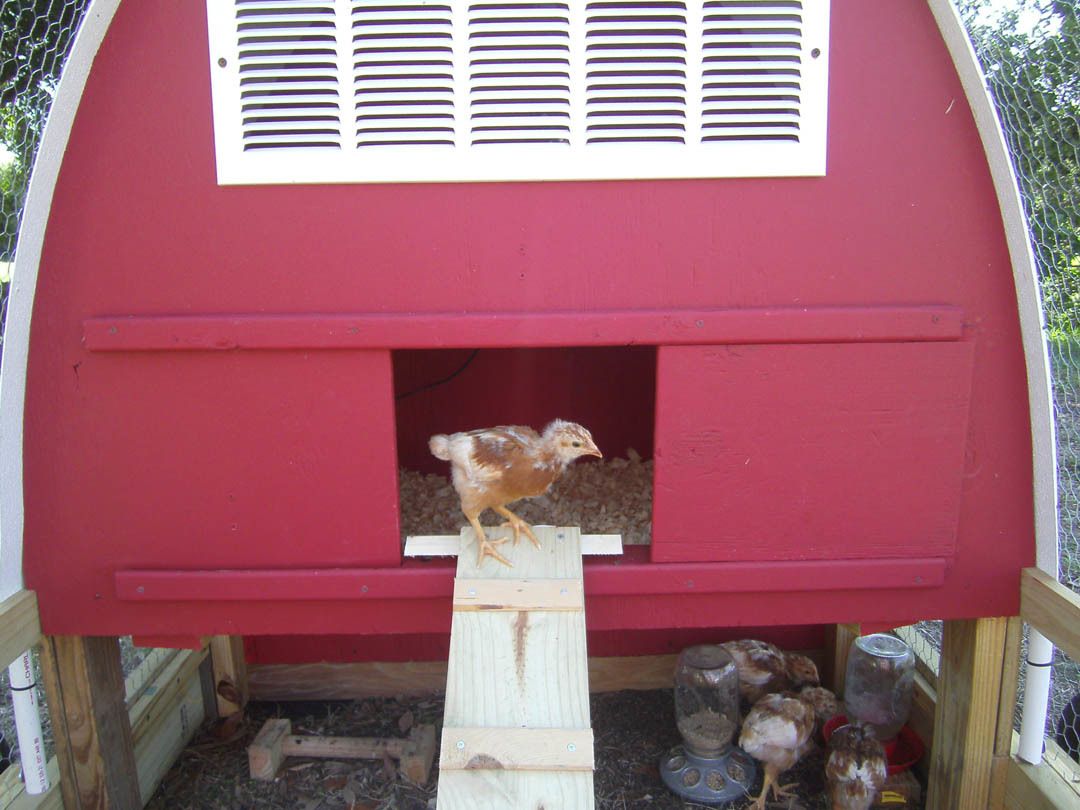
Side Note: Our TSC Red Stars are 4 weeks old today. Yesterday was their first day in the run.
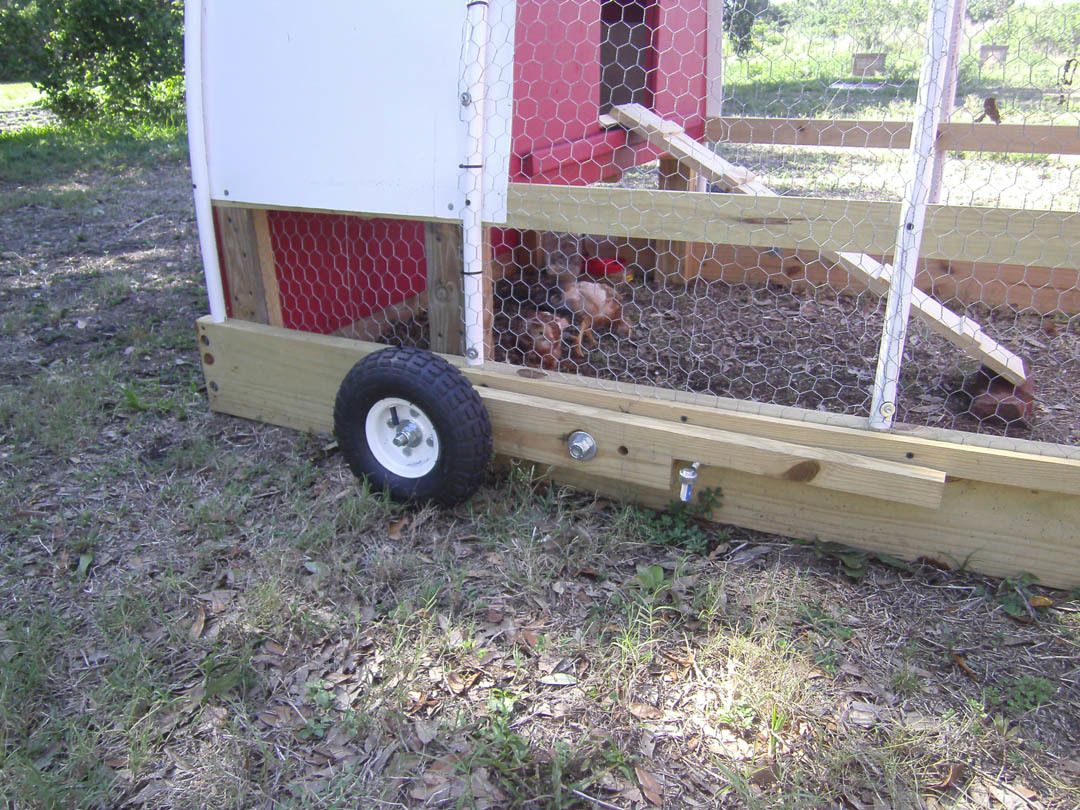
A close up of the wheel mechanism. Lifting the lever on each side places the wheels in a position that balances the coop, allowing it to be moved anywhere in my yard with ease. (ok, I did steal this idea) See that bolt with a hook in it? It's actually a gate hinge, and it holds the lever in place (when engaged) perfectly. They are about $4 each at TSC.
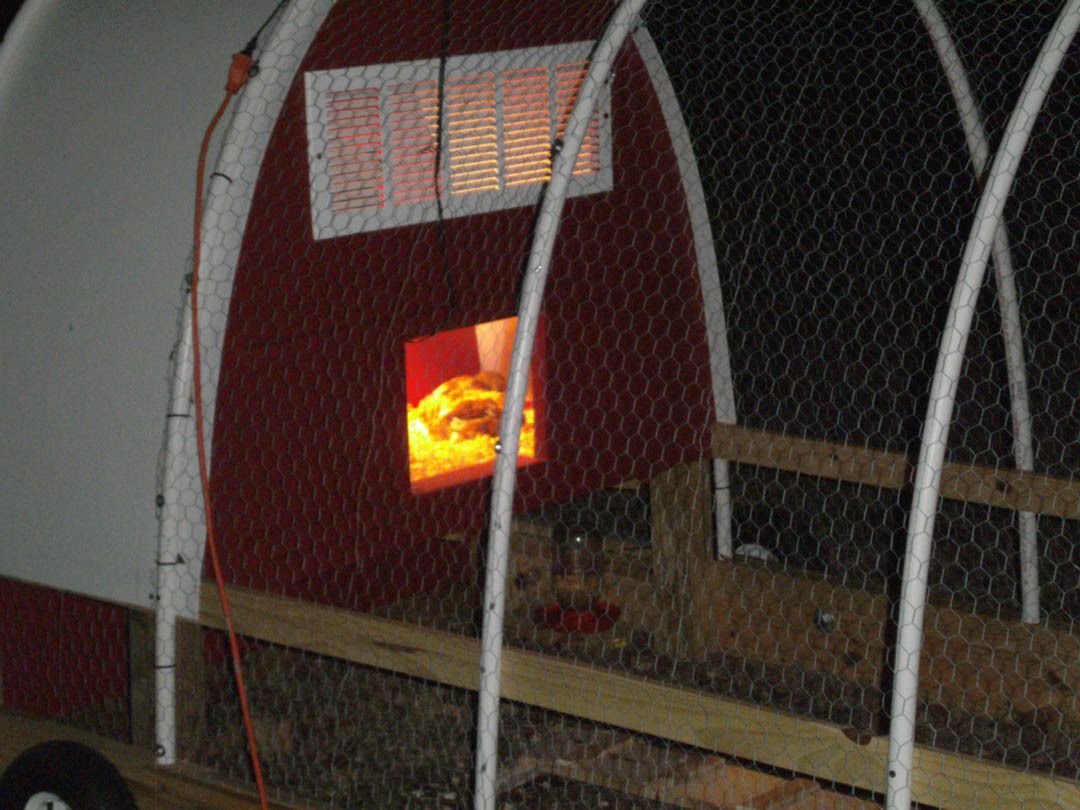
Last night was their first night in the coop. They didn't want to go in the house at first because they enjoyed the pen's grass and dirt too much! After we turned the temporary heat lamp on, they quickly went inside and stayed there.
Nighty-Night baby chicks!
I started building this from a picture I found after searching through google images for "coop" and this stuck with me and I saved it. I thought the design was very cool. Later on, after i started, I found the website where whole kits could be purchased and this particular design was called the 'Stagecoach.' Having said that, if you go to the manufacturer's website, you can see some differences in their design and what i ended up making from a simple picture.
Here's the finished product:
It is built on a 4x8 base and is a little over 4-1/2 feet high. There will also be a double nest laying box on the back that is accessible by a top hatch and we will be adding this next week. The inside of the house has three two foot long roosting rails placed at varied heights from the floor. This should give six chickens 1 foot of roosting space each, but no more than that.
The roof of the house is the plastic wall sheeting sold by Home Depot and Lowes for bathroom wall covering. It's just like paneling only made out of plastic and very bend-able. Time will tell how durable it is in Florida sun.
The actual hen house portion is much lower than the original design and is accessible by ramp. We can shut the hen house with the sliding door that slides left and right. (I wish i would have designed a ramp/door combo so that when you vertically lift the ramp up attached by a hinge, it actually becomes the door and safely closes off the house - but I would have had to made the top vent smaller in order to do this)
You can just make out the English Pointer (bird dog) in the background on her dog house, destined now to spend most of her days in her pen.
The bottom of the hen house is held up by three blocks of wood on a screw, the blocks can be turned allowing the bottom (which is hinged at the back) to drop down (not shown) dumping out the bedding and refuse and the entire house can be cleaned.
Side Note: Our TSC Red Stars are 4 weeks old today. Yesterday was their first day in the run.
A close up of the wheel mechanism. Lifting the lever on each side places the wheels in a position that balances the coop, allowing it to be moved anywhere in my yard with ease. (ok, I did steal this idea) See that bolt with a hook in it? It's actually a gate hinge, and it holds the lever in place (when engaged) perfectly. They are about $4 each at TSC.
Last night was their first night in the coop. They didn't want to go in the house at first because they enjoyed the pen's grass and dirt too much! After we turned the temporary heat lamp on, they quickly went inside and stayed there.
Nighty-Night baby chicks!
Last edited: