Hi, I'm getting a lot of email requests for pics of my coop again - I guess the warm weather has everyone out hammering (me too). I can't find my original thread so am going to post some pics as my email is not very pic friendly. Hope I can help some newbies and that I don't bore anyone who has seen it all before.
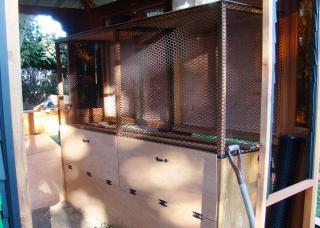
the bones of the coop while under construction; there are runs off of three sides all with two internal roosts. The runs can be split down the middle to make a total of 6. The wire is 1X2 welded wire, the wood is that cheap cherry landscape logs. I started with the roof of the run as chicken wire but I hate the way it sags and have switched to that white plastic lattice. Ihave clear corrugated plastic across the top back of each run for a rain free outside area. I did wrap that area in plastic sheeting for the hard part of winter.
Here you can see the interior roosts, they are made from apx 2x4 cedar porch railing (nice curved edges) and are all on one level - no more fighting for the highest roost. The wire around them is that plastic chicken wire (cheap and easy to work with).
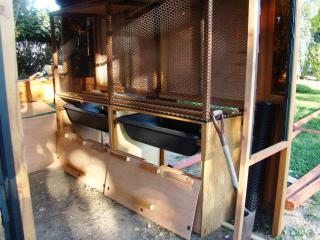
these are the litter boxes under the roosts - they work great! they are from Home Depot in the cement mixing department. I put one coffee can of DE in at the start of the month, sprinkle apx 2 cups over the poop once a week, and only have to empty once a month, straight to the garden. NO ODOR!
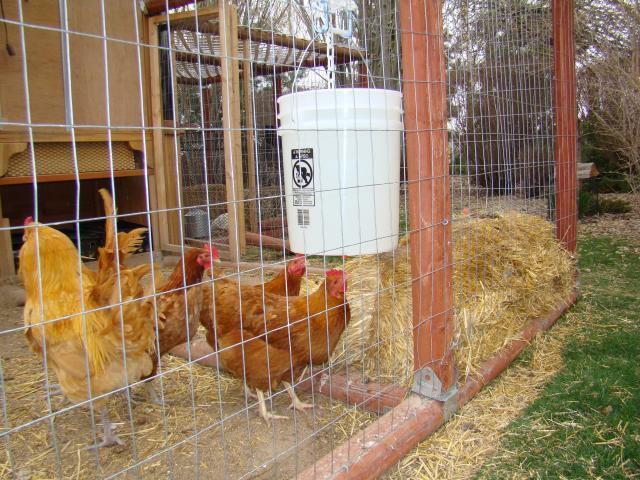
This is the bucket nipple waterer in action.
These are the feeders; I started with curved bottoms but switched to the Y as the little ones were having trouble reaching in the curved.
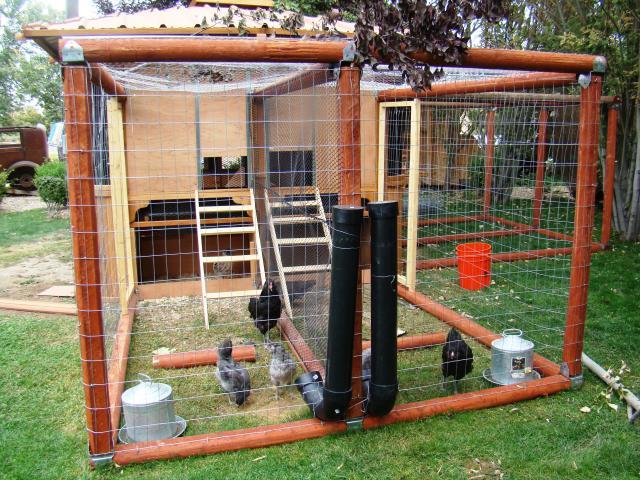

I have since removed the ladders; they didn't use them at all. And also have moved the feeders to the inside as rain was blowing in them.
If you look at the water bucket picture you can see the area under the roost and litter box, that is where the nest boxes are (milk crates).
This has been a work in progress, feel free to ask questions.
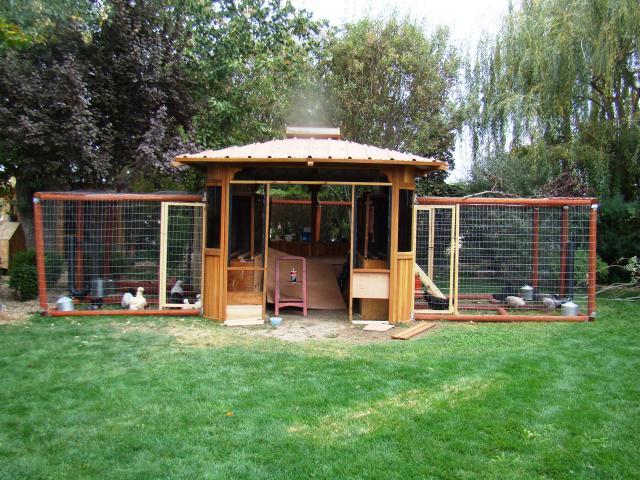
this is what the coop started as:

the bones of the coop while under construction; there are runs off of three sides all with two internal roosts. The runs can be split down the middle to make a total of 6. The wire is 1X2 welded wire, the wood is that cheap cherry landscape logs. I started with the roof of the run as chicken wire but I hate the way it sags and have switched to that white plastic lattice. Ihave clear corrugated plastic across the top back of each run for a rain free outside area. I did wrap that area in plastic sheeting for the hard part of winter.
Here you can see the interior roosts, they are made from apx 2x4 cedar porch railing (nice curved edges) and are all on one level - no more fighting for the highest roost. The wire around them is that plastic chicken wire (cheap and easy to work with).
these are the litter boxes under the roosts - they work great! they are from Home Depot in the cement mixing department. I put one coffee can of DE in at the start of the month, sprinkle apx 2 cups over the poop once a week, and only have to empty once a month, straight to the garden. NO ODOR!
This is the bucket nipple waterer in action.
These are the feeders; I started with curved bottoms but switched to the Y as the little ones were having trouble reaching in the curved.
I have since removed the ladders; they didn't use them at all. And also have moved the feeders to the inside as rain was blowing in them.
If you look at the water bucket picture you can see the area under the roost and litter box, that is where the nest boxes are (milk crates).
This has been a work in progress, feel free to ask questions.
this is what the coop started as:
Last edited:


