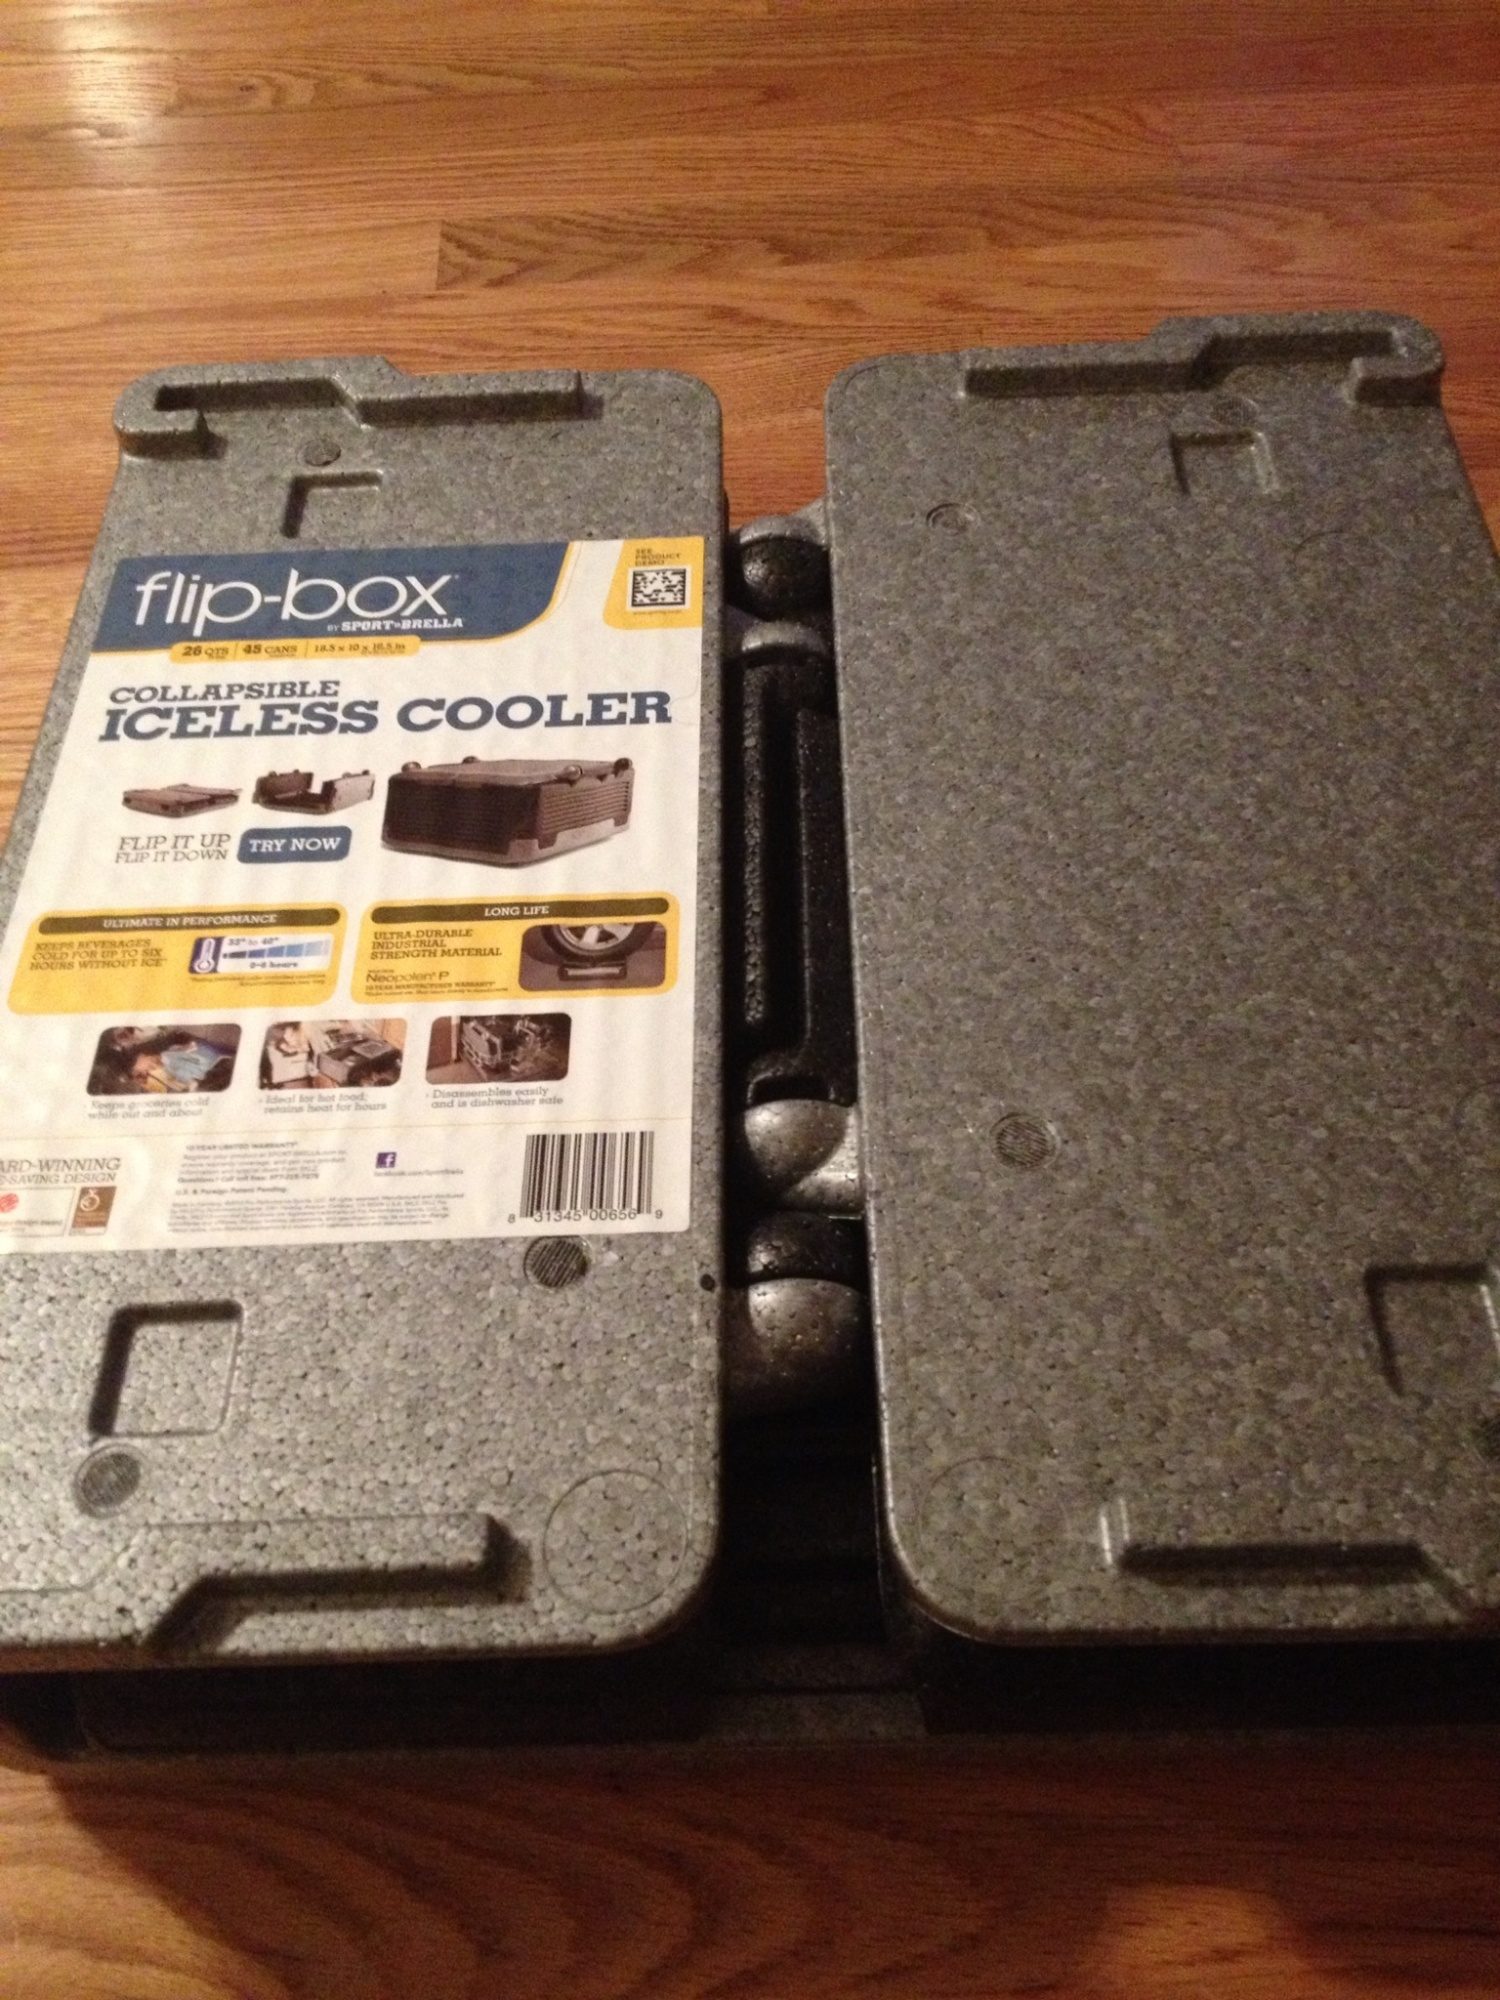
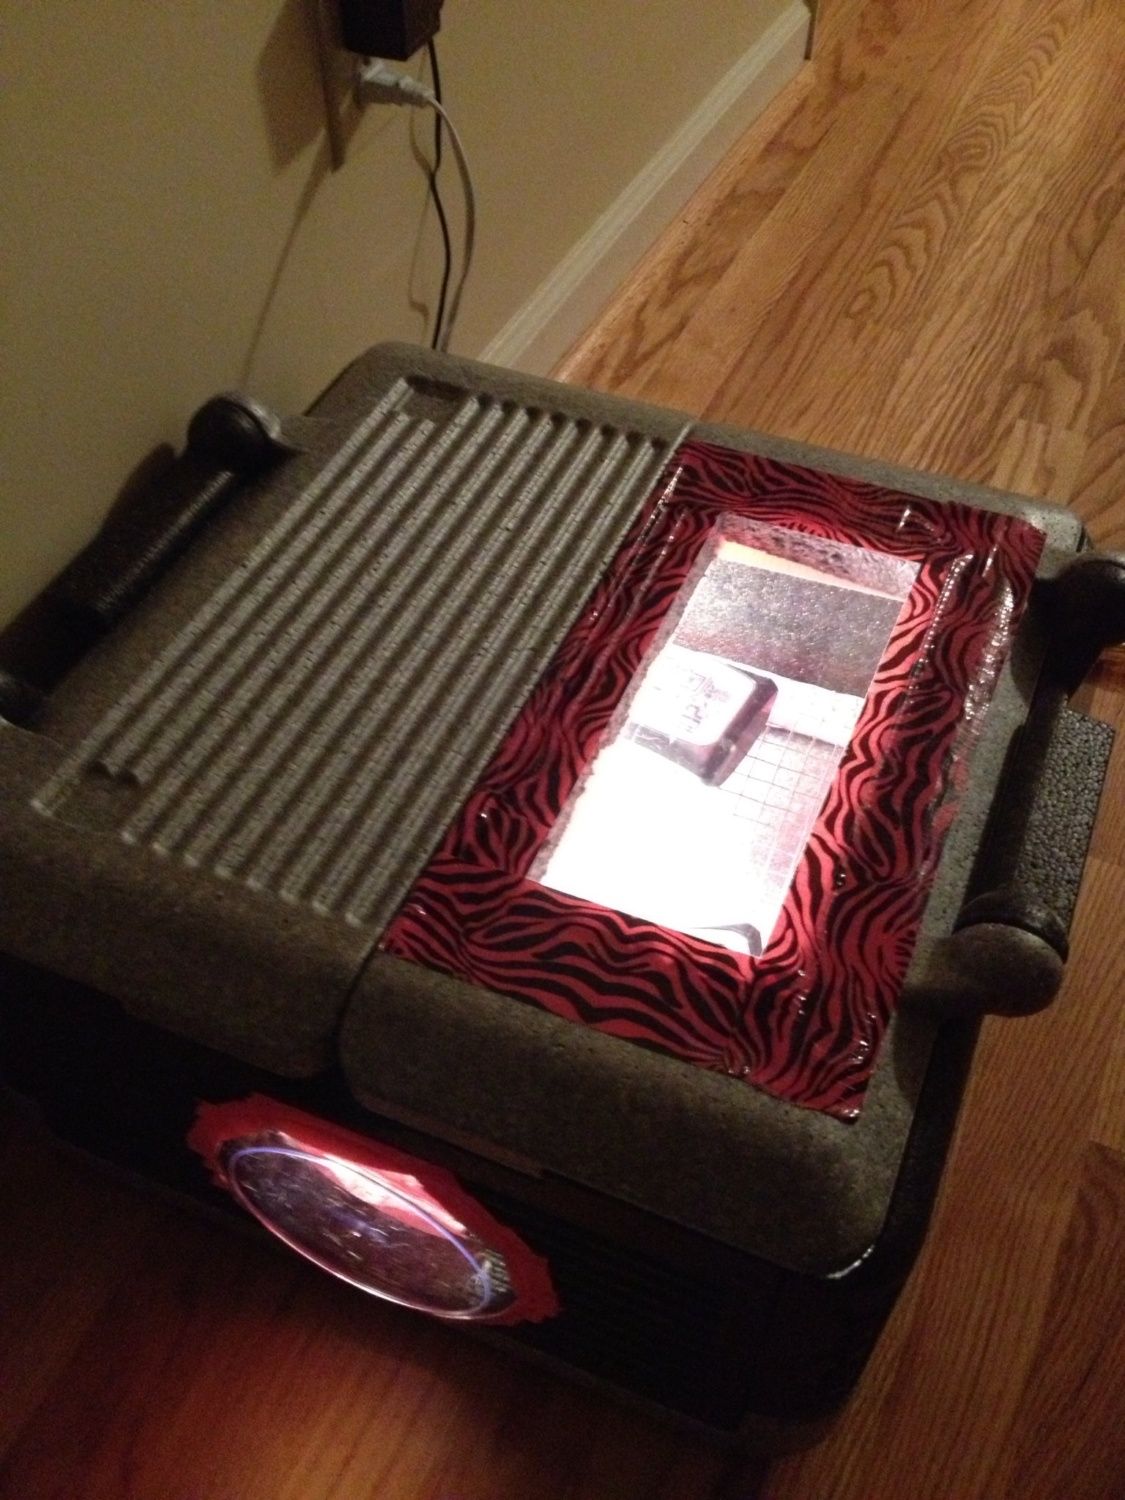
I made my own incubator! It was easier, though more time-consuming, than I thought. It started when I found this cooler at Lowes on clearance half price. It's like styrofoam, but not exactly styrofoam, and is supposed to be so good that it can keep things cold for 6 hours with no ice. One thing I love is that the lid opens in the center, so I'll only have to open one side when I need to get in there. It folds up like in this picture, and is dishwasher safe.
Supplies:
Cooler
Hardware cloth
Hot water heater thermostat
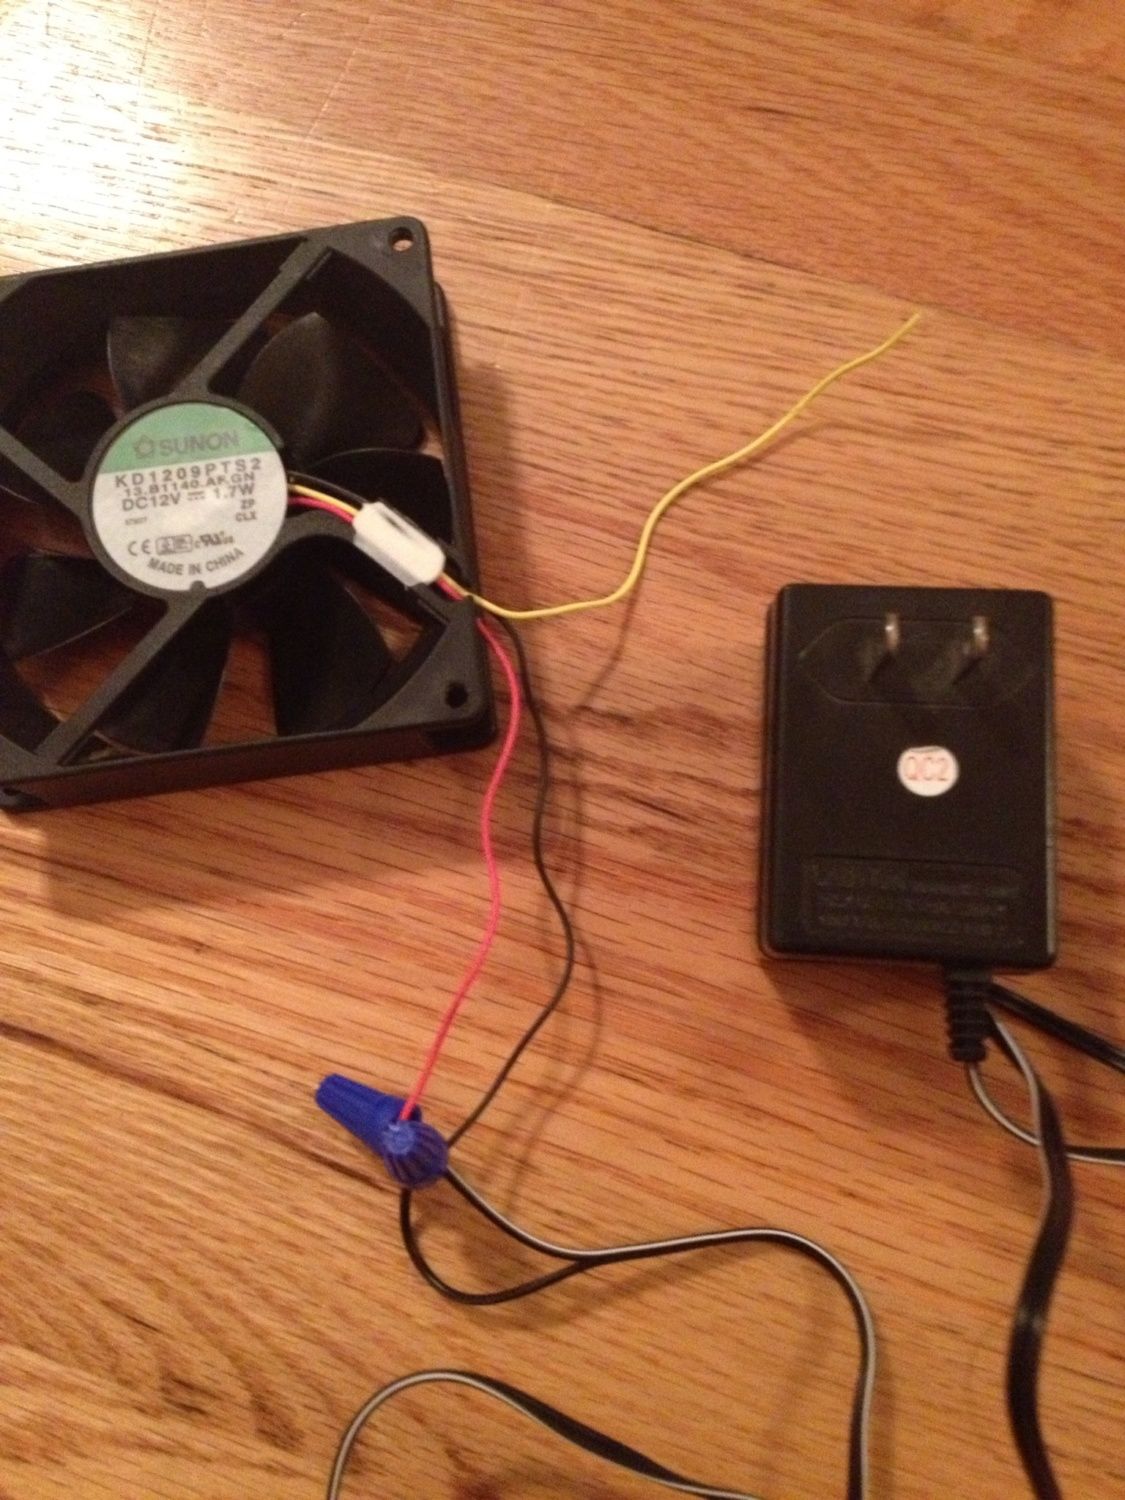
12v PC fan from old computer
120v-12v powe supply
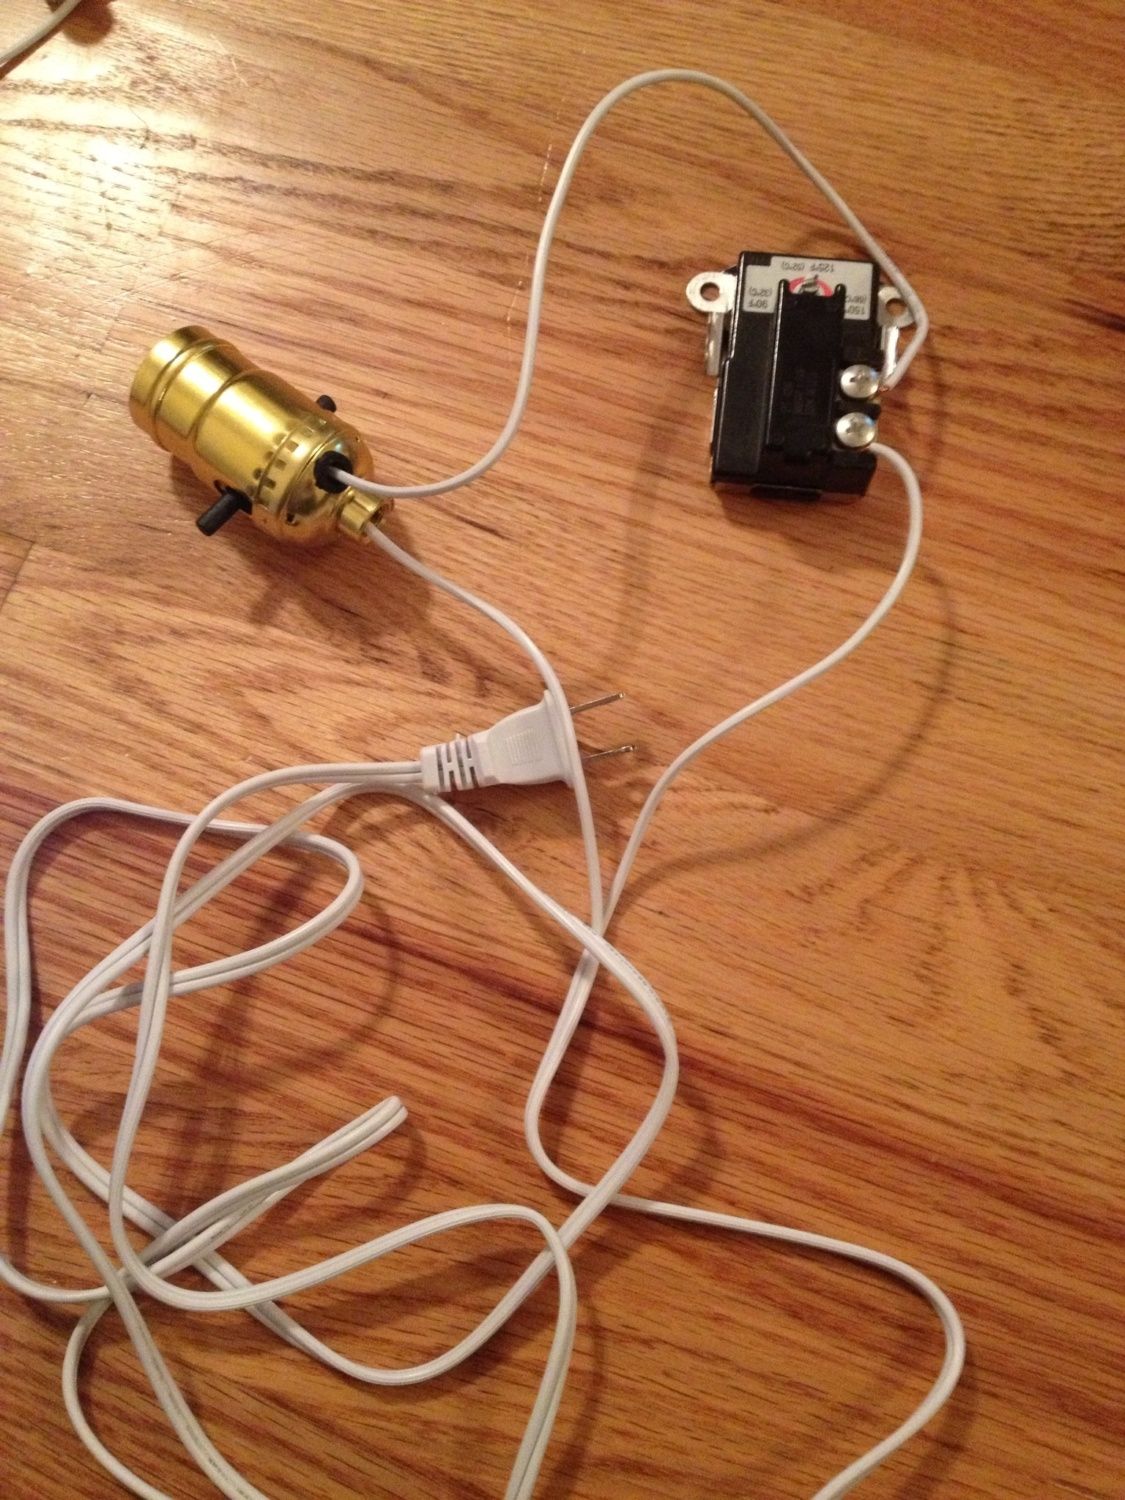
Lamp kit
Plexiglass-type picture frame and clear plastic plates (both from dollar store)
At least two temp and humidity readers.
I modified the hot water heater by drilling extra holes in it, like in this video:
BUT, I only drilled two holes on the front, because, man, that material takes forever to drill through!
I wired it up to the lamp kit per the wiring diagram someone posted on the Chic Chick bator thread.
Then I spliced together the fan to the power supply. Mine fan had three wires. To get it to work, I matched the black to black and the black with white stripe to the red.
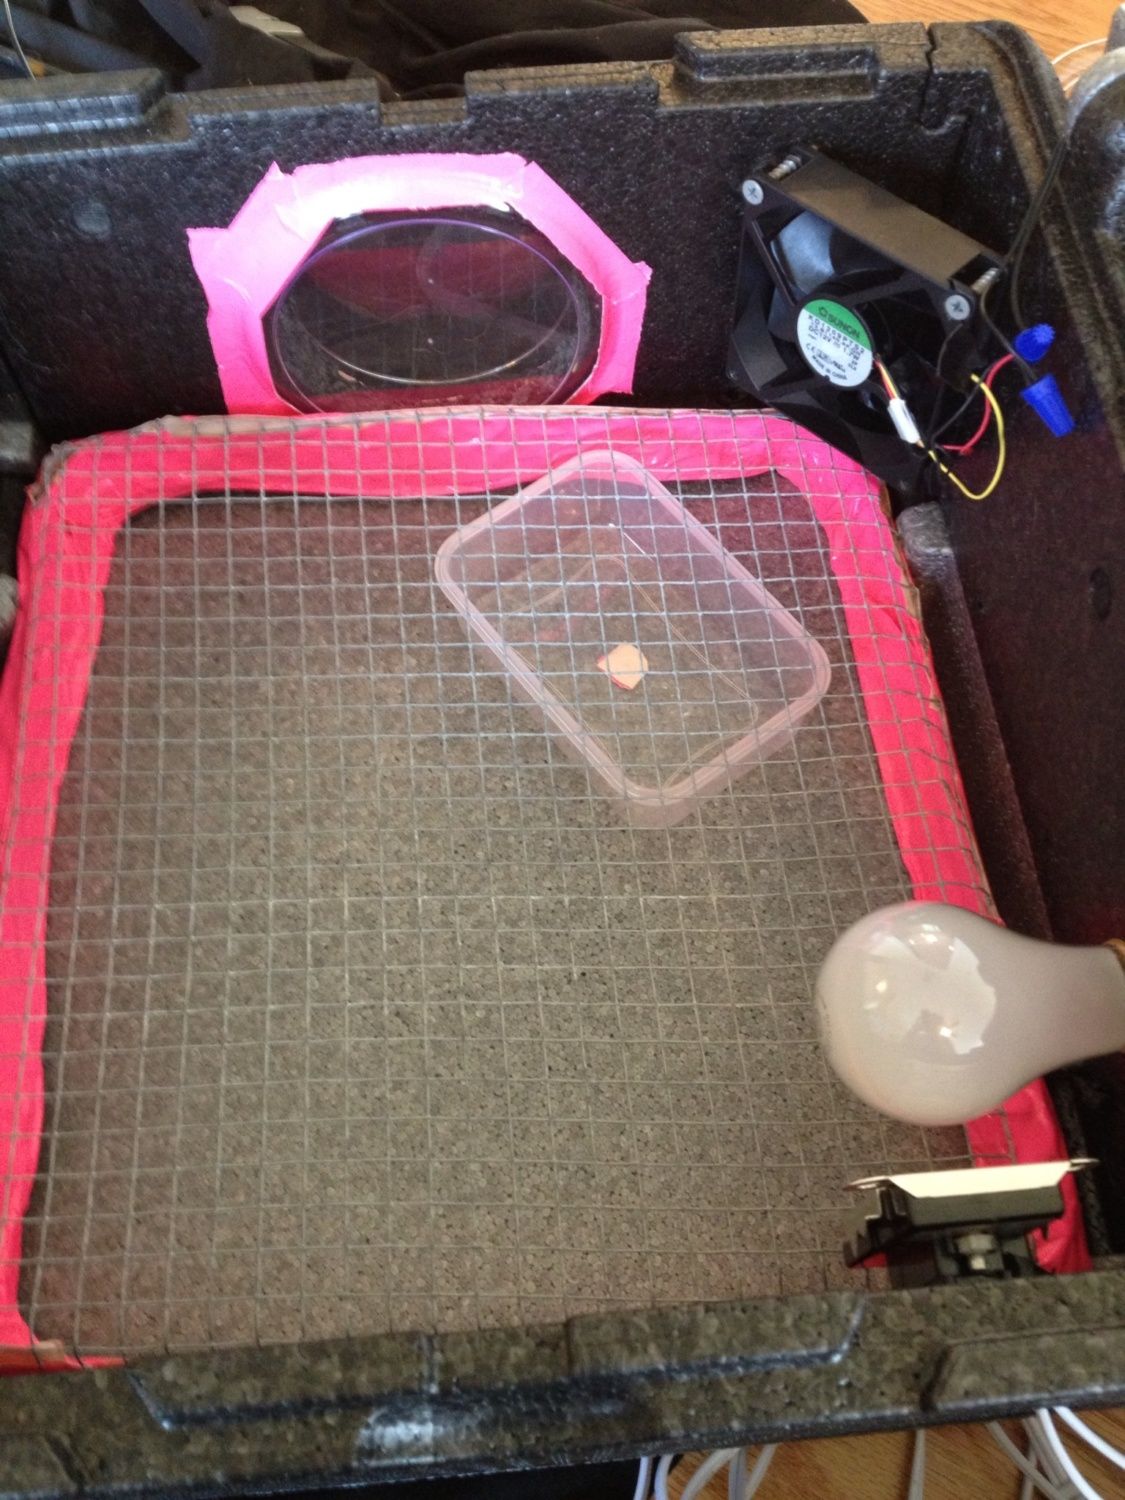
I cut the plexiglass frame by scoring it with a box cutter then snapping it along the score line. I cut two pieces the same size, cut out a rectangle in one side of the lid, and taped one piece to the outside and one piece to the inside, which insulates better than just one piece.
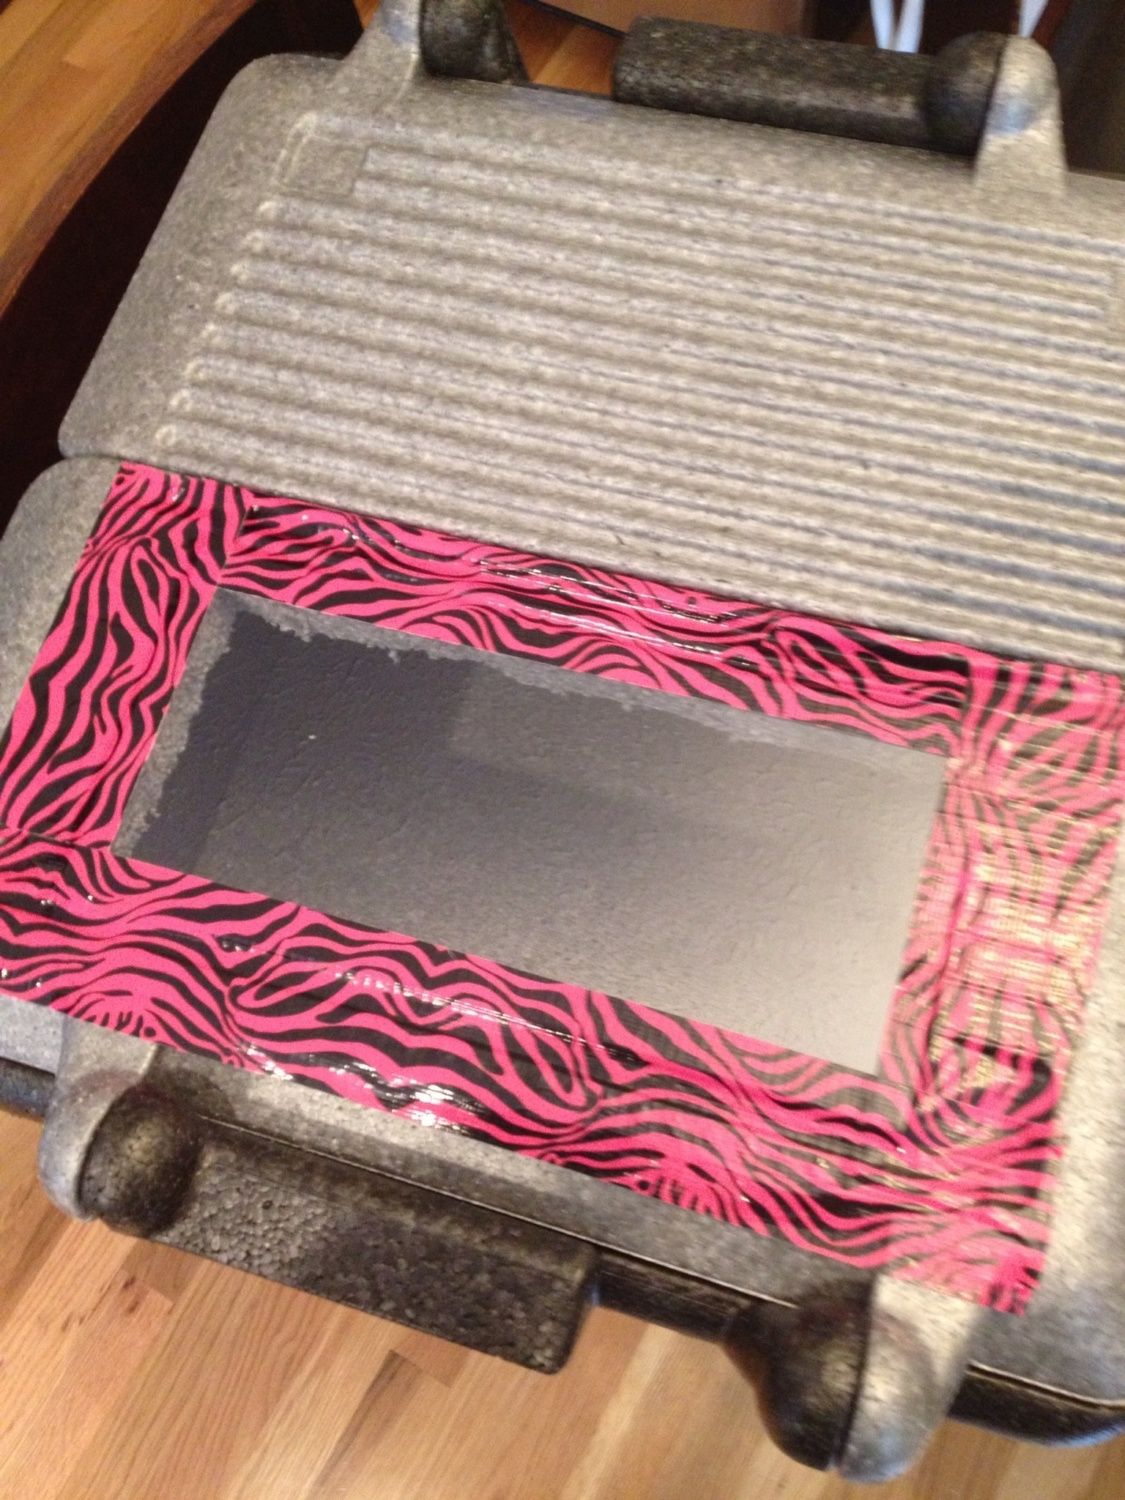
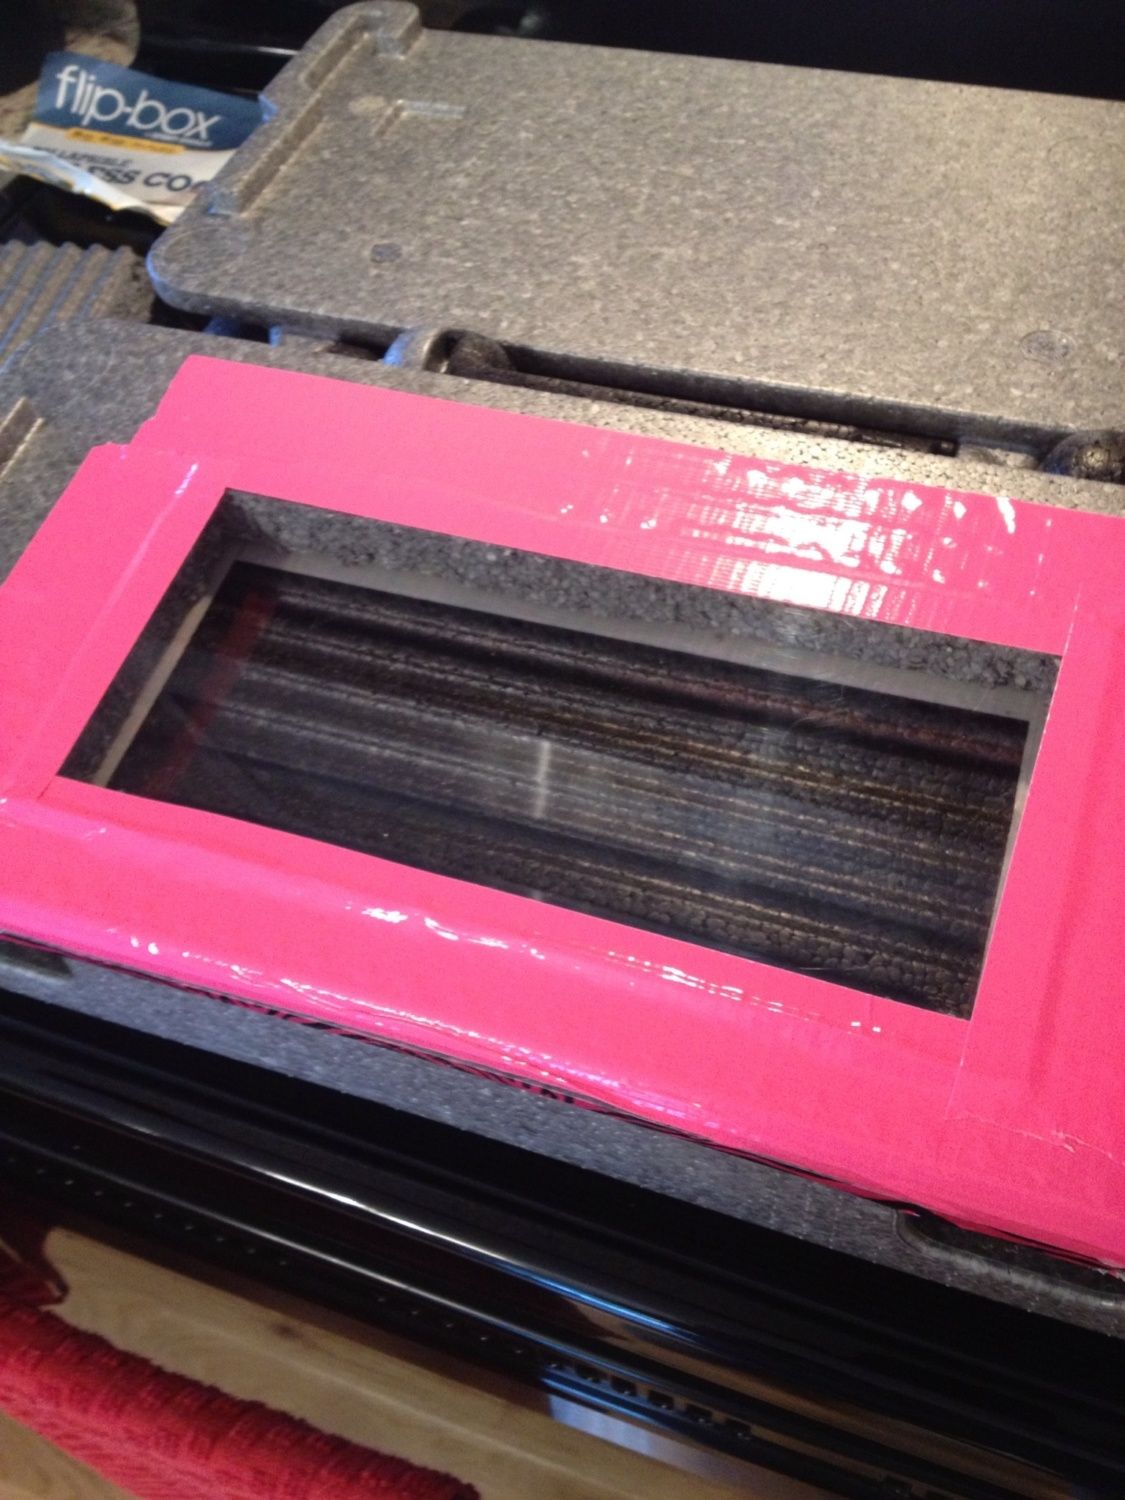
I also used two plates on the side window, one on the outside and one on the inside.
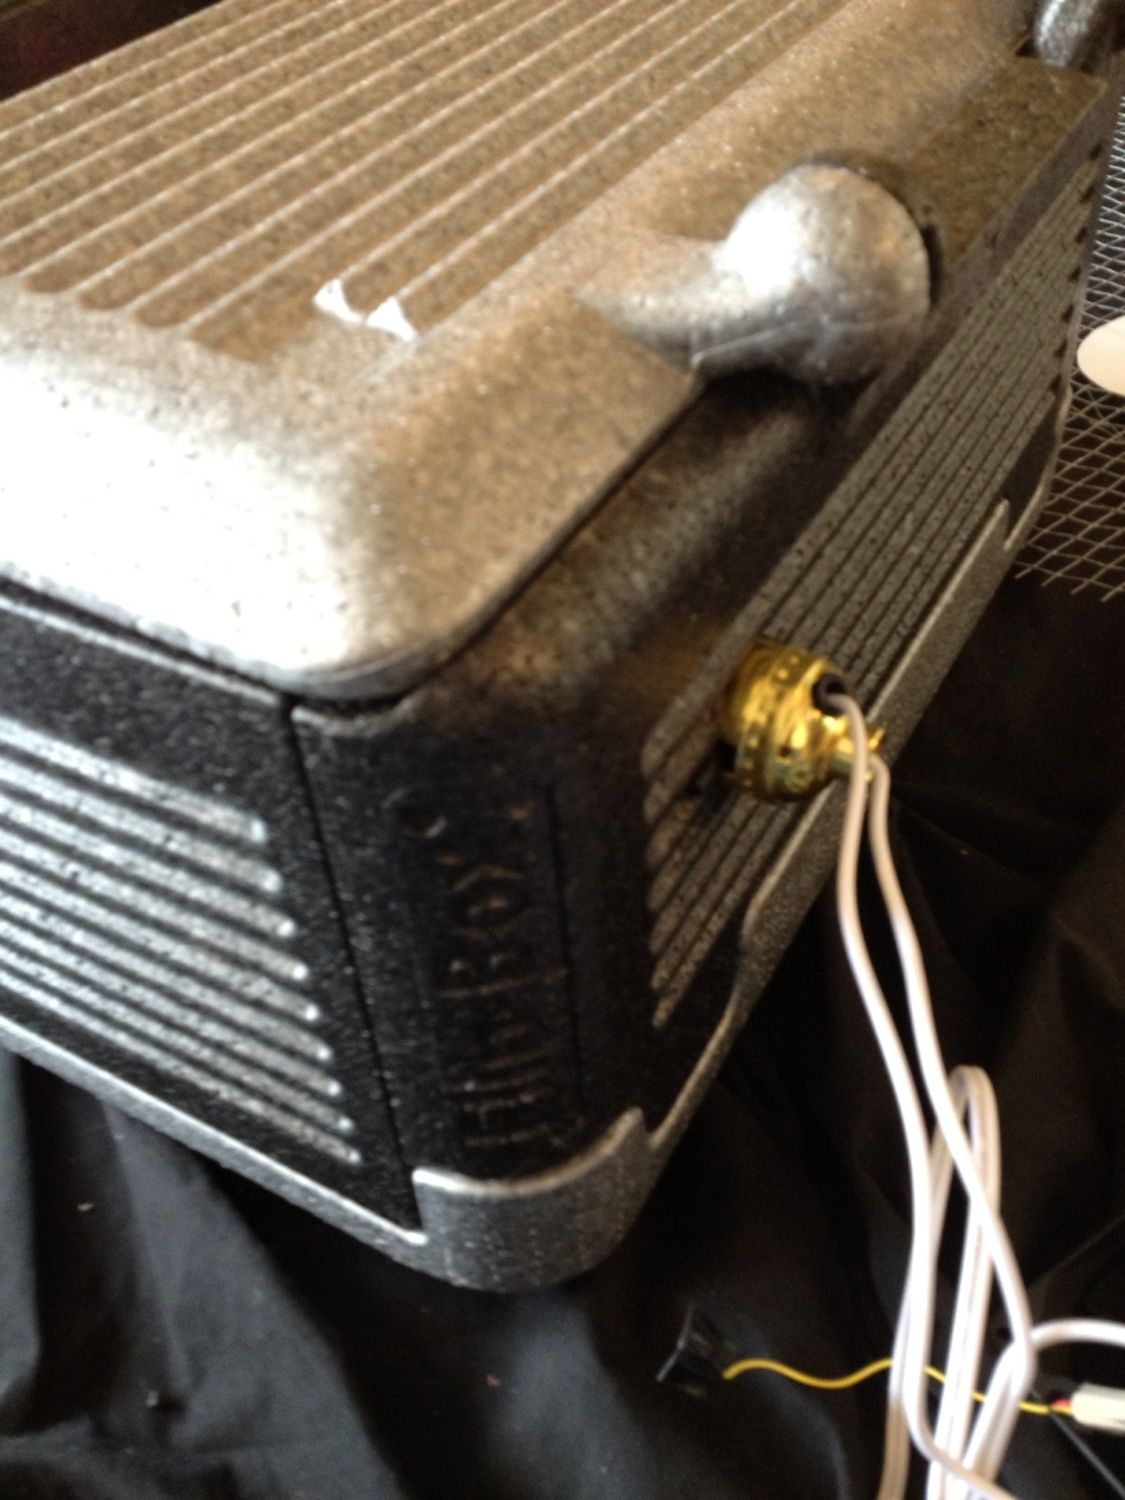
For the bulb fixture, I cut out a hole just big enough for it to fit snugly. The grooves in the side of the cooler actually helped stabalized it, because the little thing you push back and forth to turn the light on and off fit snugly between the grooves.
A hot water heater thermostat works by measuring the radiant heat, so it has to be very close to the bulb. I poked a hole in the side "around the corner" from the bulb to run the wires to the thermostat. I had to detach the wires, put them through the hole, then reattach them to the thermostat.
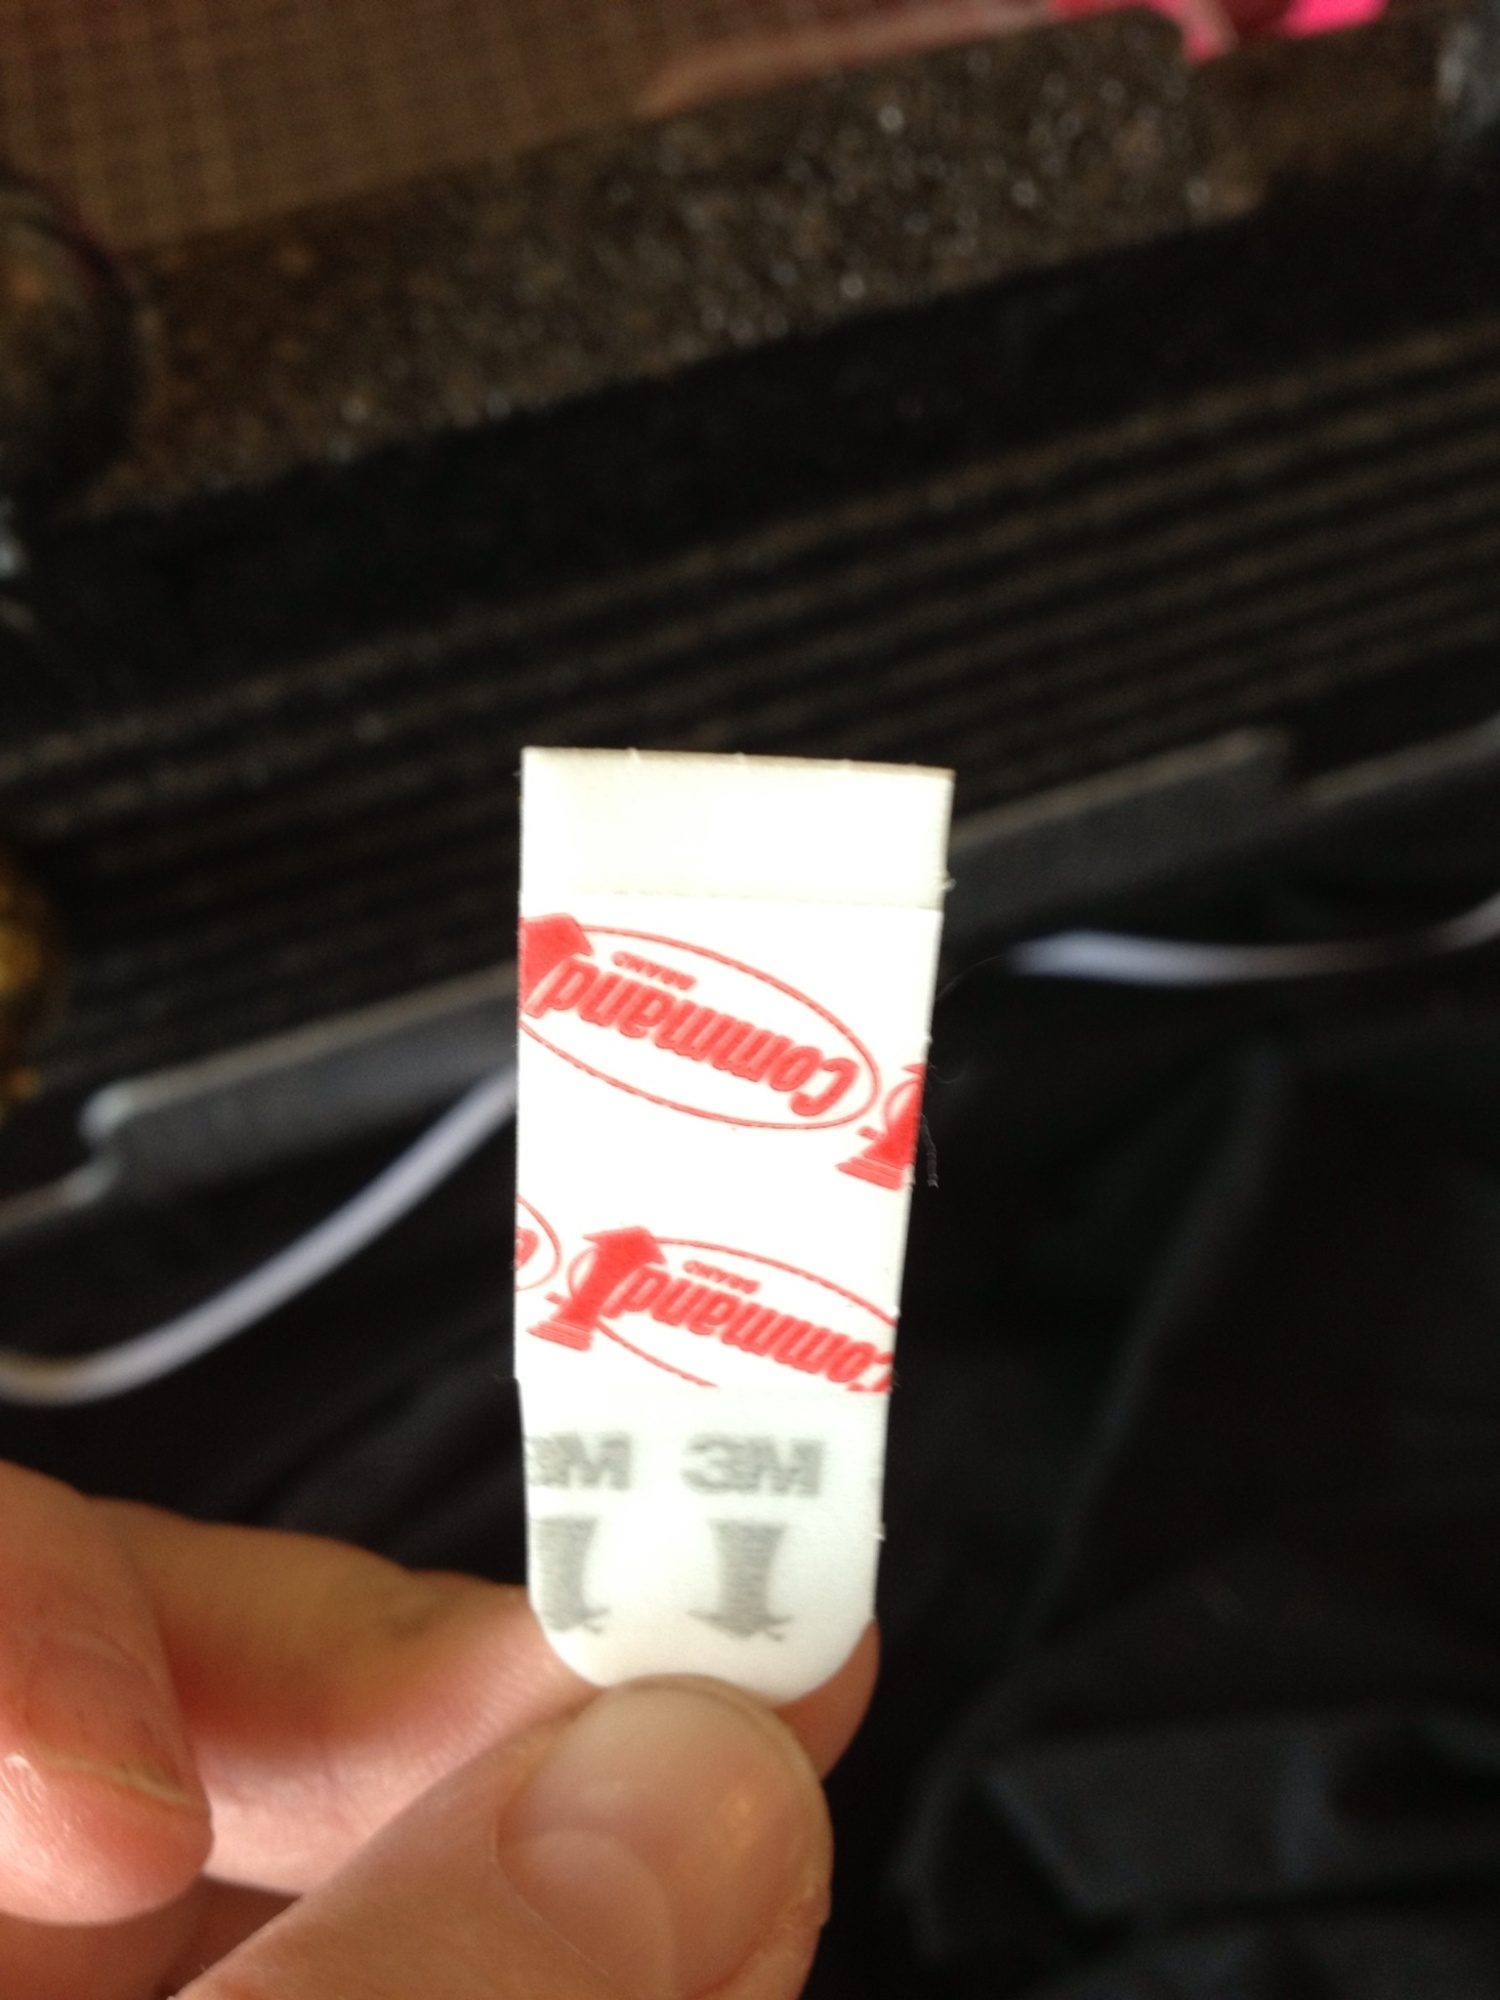
My son came up with the brilliant idea of attaching the thermostat to the cooler with one of those 3M removable adhesive strips that usually come with hooks. Now I can remove everything from the cooler easily so I can put it in the dishwasher to clean between uses. It's also important to cover the screws to the thermostat with electrical tape.
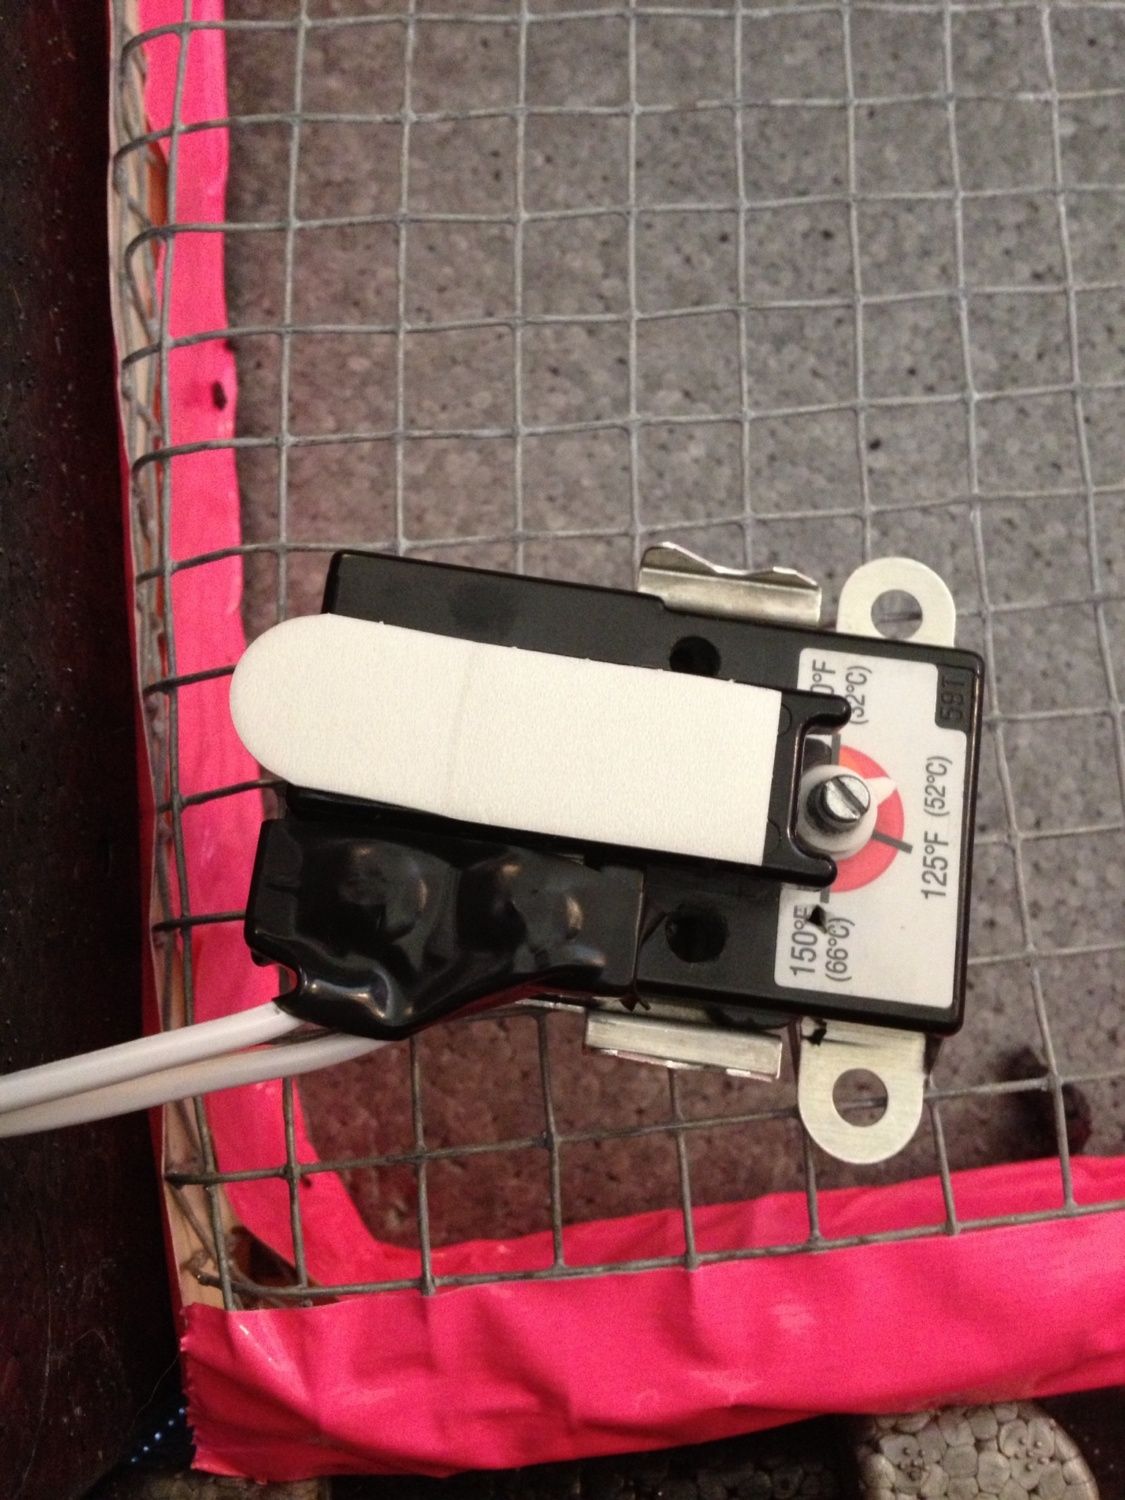
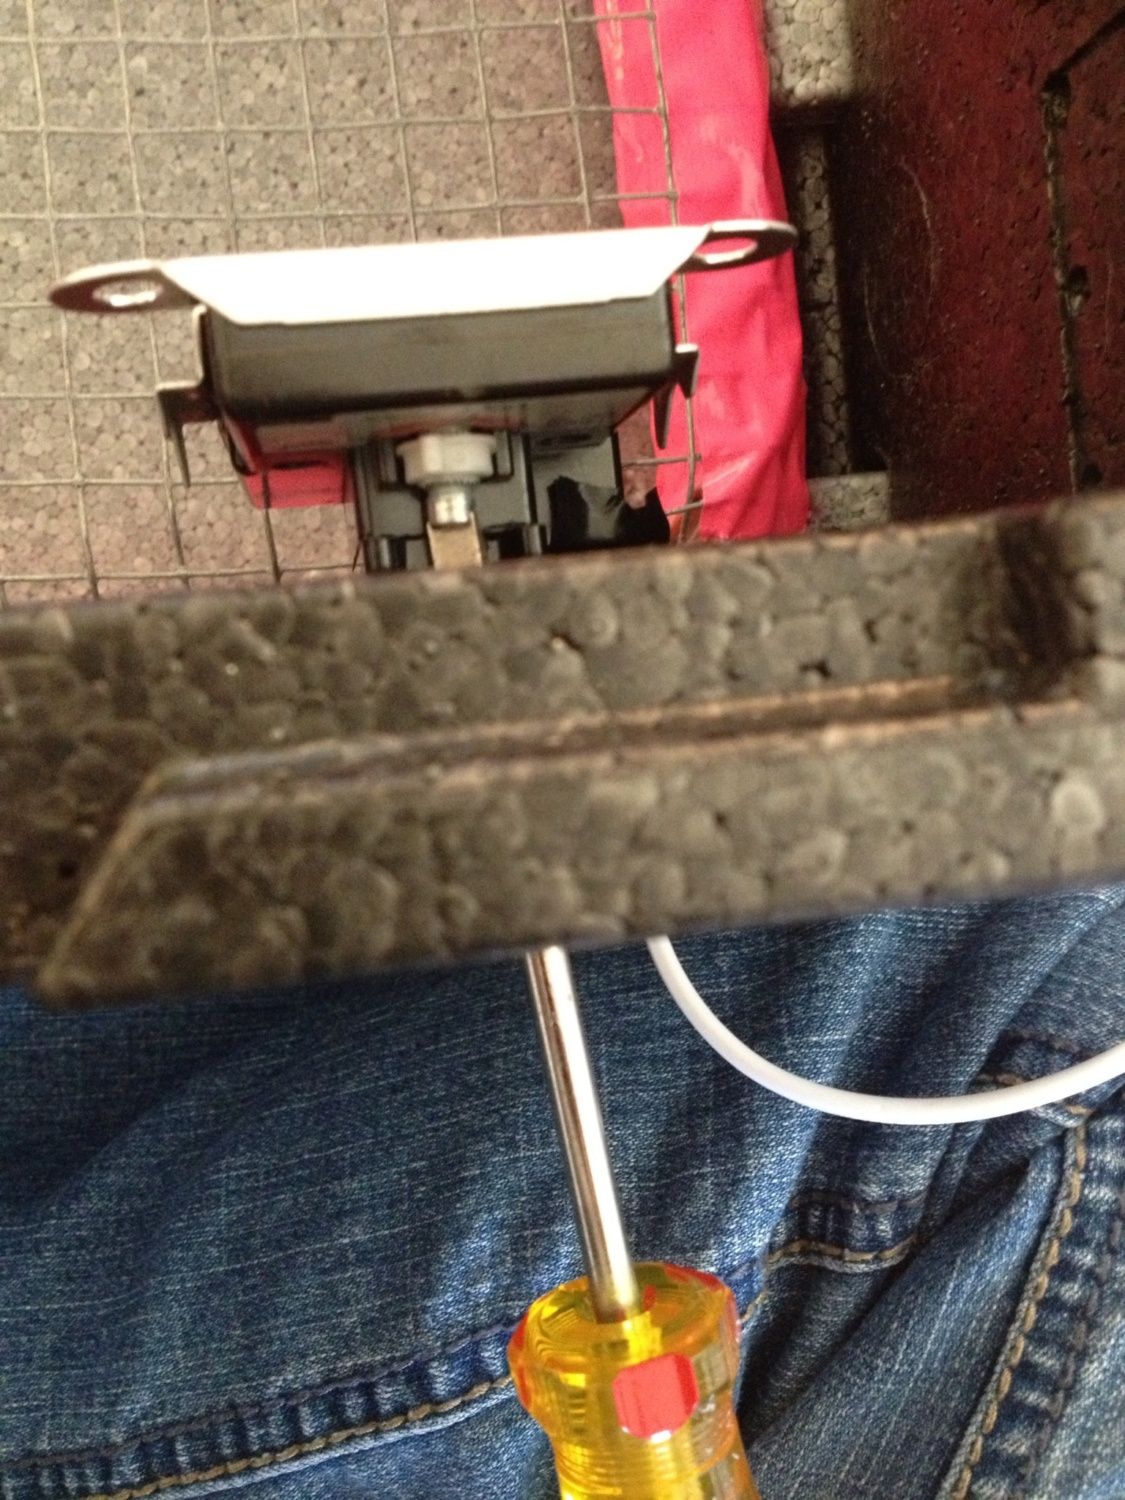
Because the front of the thermostat has to be turned to the wall of the cooler, I poked a hole so I could put a screw driver in to adjust the temperature.
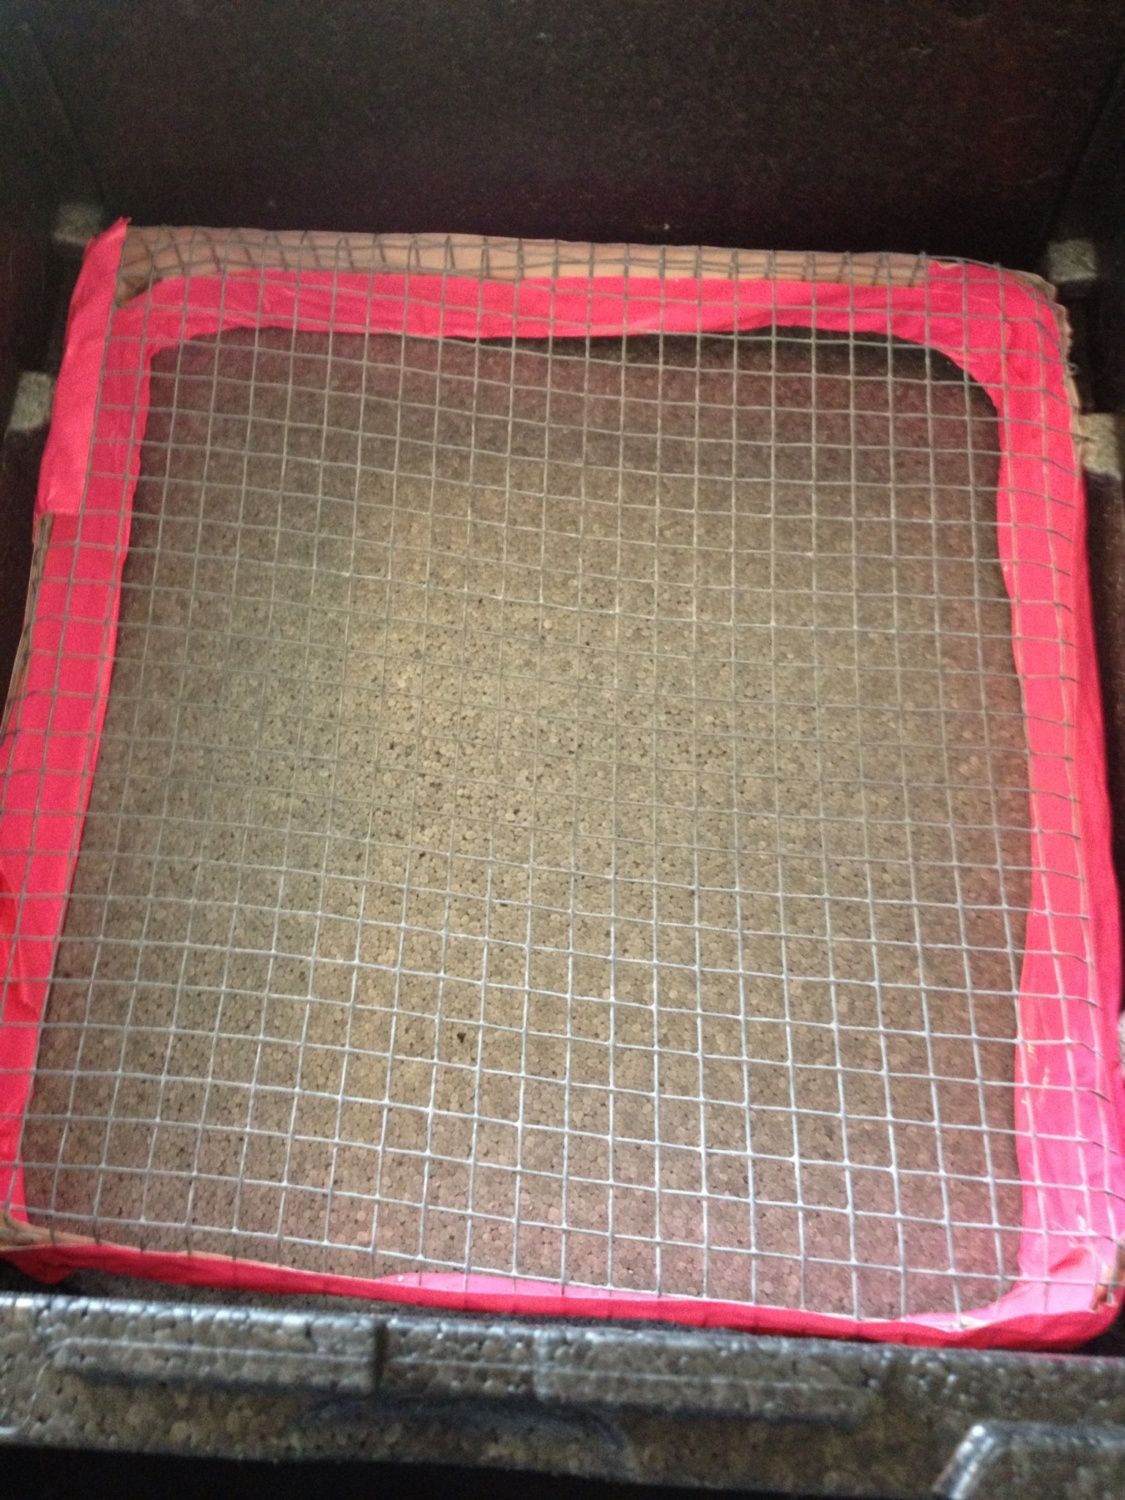
The hardware cloth was a pain to work with, so this isn't the best job. I covered the edges with duck tape so they wouldn't damage the cooler.
I put the fan in the corner, like in this picture, blowing across the water. But that created too cool of a breeze across where the eggs would be, so I moved it so that it faces the bulb. It's attached using long screws just pressed into the styrofoam, so it is also removable. The longer screws hold it away from the wall so air can get behind it.
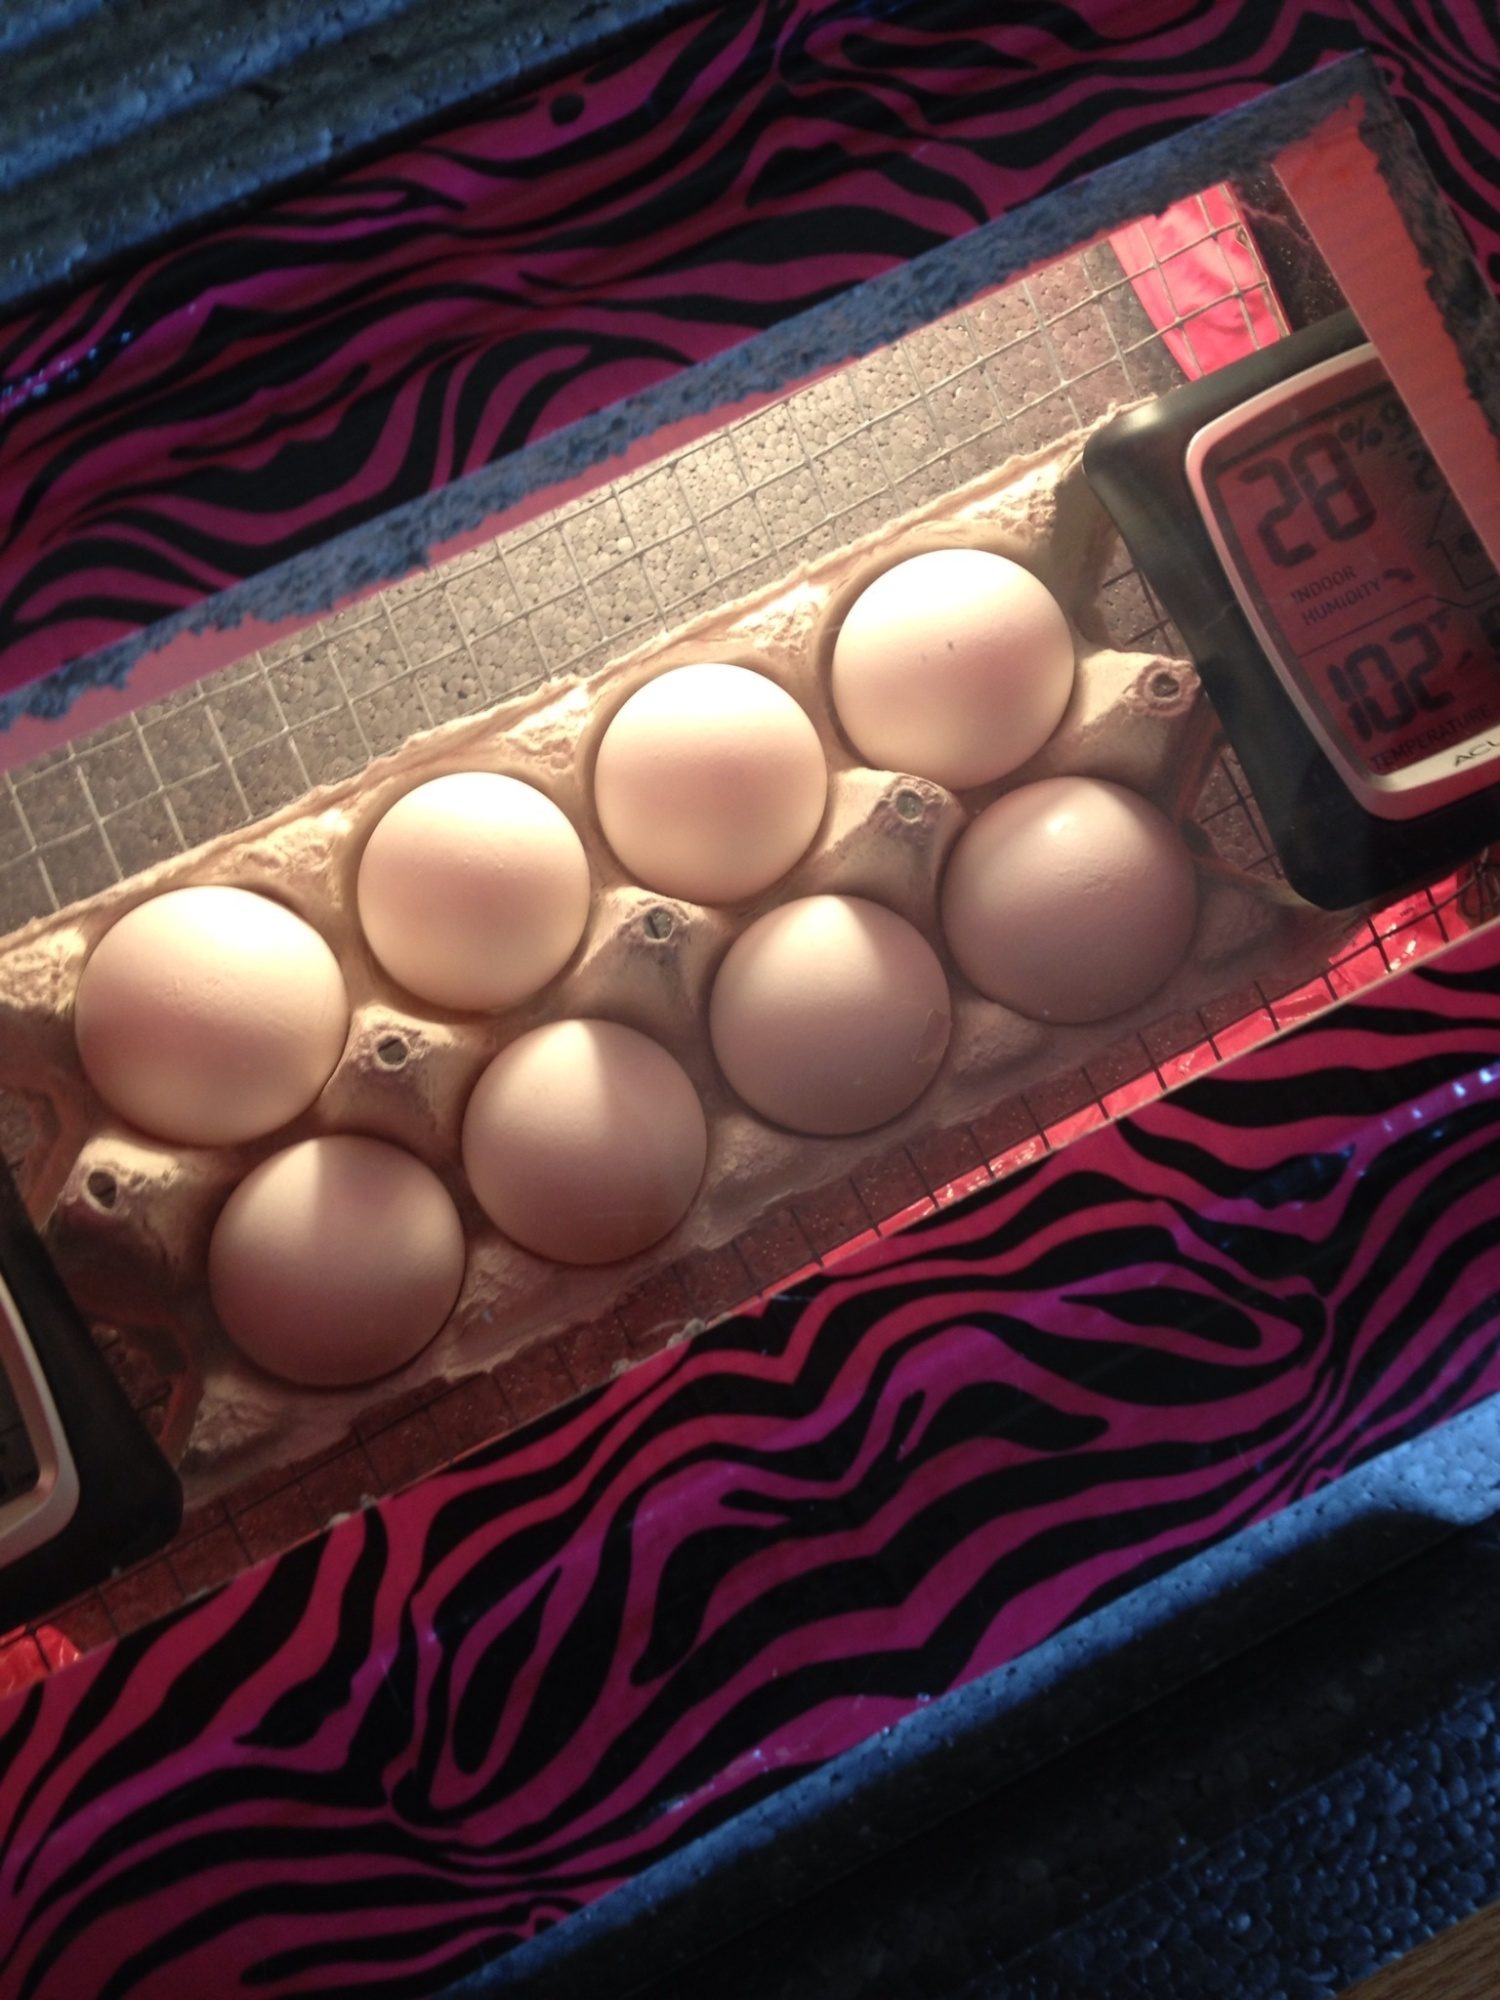
I also removed the bowl of water because the humidity was too high. Since then I read about dry incubation, so I'm going to try that, only adding a few drops of water if the humidity goes below 25%. So far it's holding at around 28%.
The walls of the cooler are thick and tough, so I used the drill to put in vent holes around the sides toward the bottom. 3/16" drill bit.
I didn't put larger vent holes in just yet. The top is not completely sealed, so I'm thinking this might be enough. I also read it's actually good to open the lid for a few minutes each day. So we'll see.
Here it is plugged in, getting the temps stable. I have two digital thermometer/hydrometers in there. I haven't been able to get one with a probe to use with the water wiggler, but I figure people incubated eggs just fine before they had that stuff.
After it got warmed up, I put in room temperature store eggs to adjust the temps so they'd be right with the mass of the eggs.
So here's the super exciting part... The temps have held steady the entire time, only going down a bit when I open the lid. Having no variation with a HWH thermostat is a triumph! I credit the extra holes and the placement. Also last night I forgot to turn the heat on in the house and it got down to 61 degrees, but the incubator temp never went below 99. I credit the awesome insulation of the special cooler.
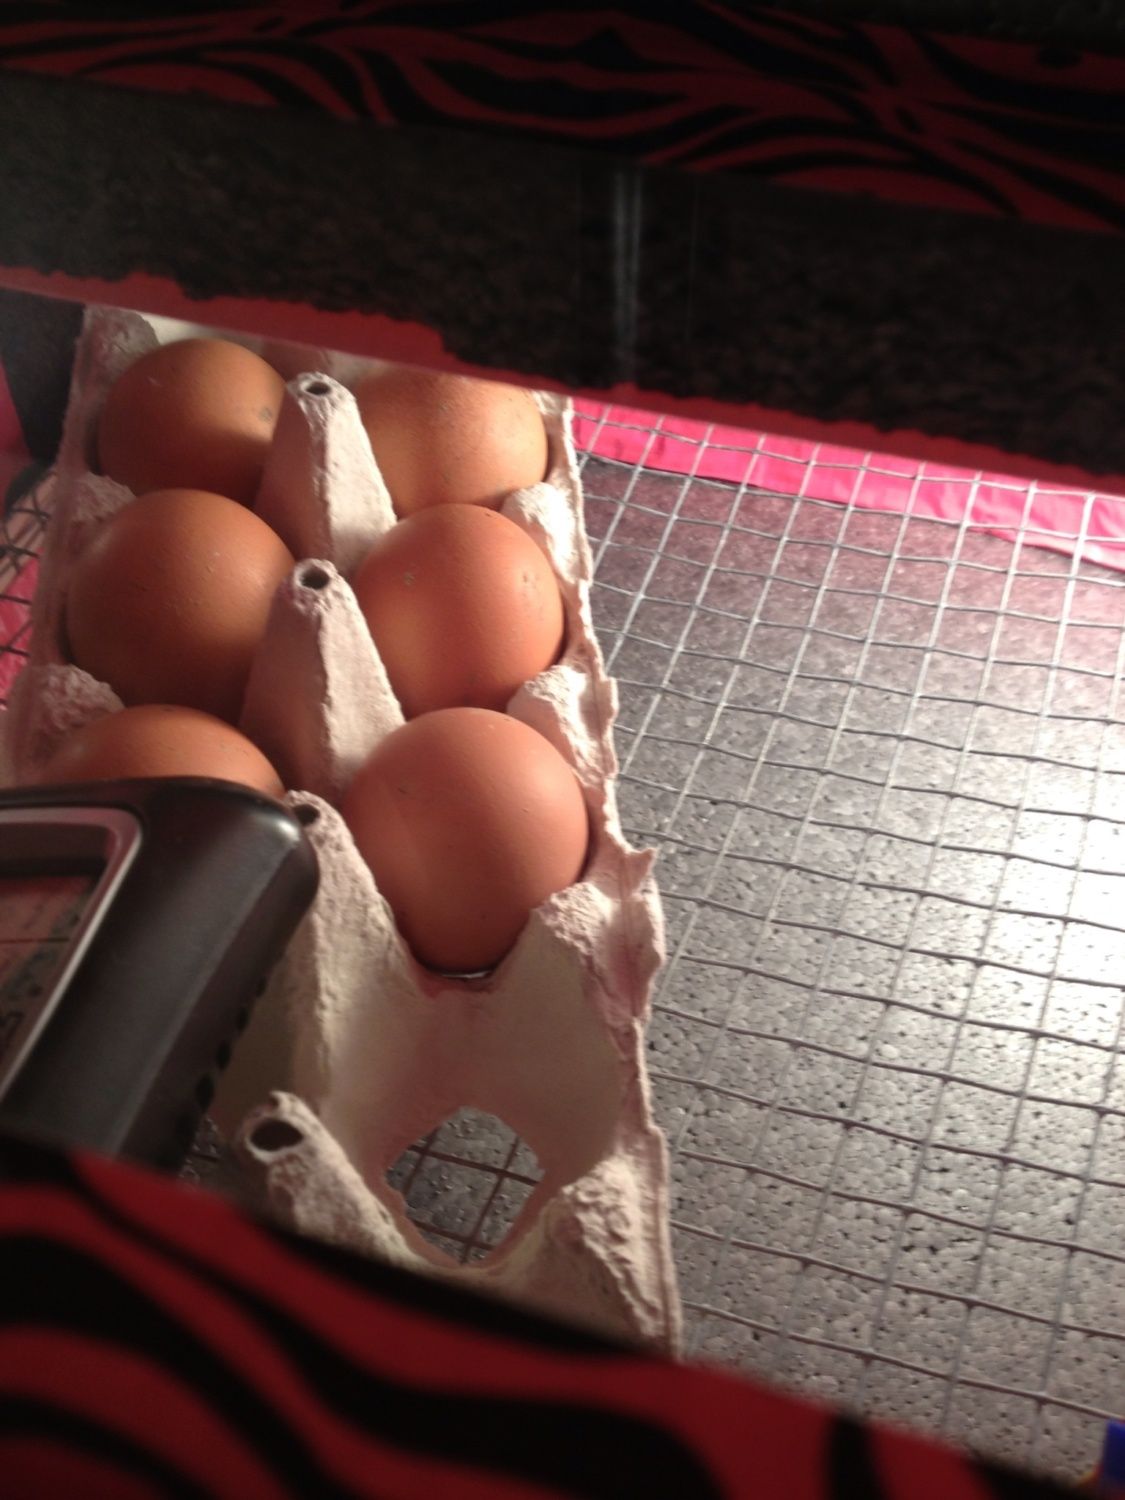
I put six eggs in this evening - I'll keep you posted!
Supplies:
Cooler
Hardware cloth
Hot water heater thermostat
12v PC fan from old computer
120v-12v powe supply
Lamp kit
Plexiglass-type picture frame and clear plastic plates (both from dollar store)
At least two temp and humidity readers.
I modified the hot water heater by drilling extra holes in it, like in this video:
BUT, I only drilled two holes on the front, because, man, that material takes forever to drill through!
I wired it up to the lamp kit per the wiring diagram someone posted on the Chic Chick bator thread.
Then I spliced together the fan to the power supply. Mine fan had three wires. To get it to work, I matched the black to black and the black with white stripe to the red.
I cut the plexiglass frame by scoring it with a box cutter then snapping it along the score line. I cut two pieces the same size, cut out a rectangle in one side of the lid, and taped one piece to the outside and one piece to the inside, which insulates better than just one piece.
I also used two plates on the side window, one on the outside and one on the inside.
For the bulb fixture, I cut out a hole just big enough for it to fit snugly. The grooves in the side of the cooler actually helped stabalized it, because the little thing you push back and forth to turn the light on and off fit snugly between the grooves.
A hot water heater thermostat works by measuring the radiant heat, so it has to be very close to the bulb. I poked a hole in the side "around the corner" from the bulb to run the wires to the thermostat. I had to detach the wires, put them through the hole, then reattach them to the thermostat.
My son came up with the brilliant idea of attaching the thermostat to the cooler with one of those 3M removable adhesive strips that usually come with hooks. Now I can remove everything from the cooler easily so I can put it in the dishwasher to clean between uses. It's also important to cover the screws to the thermostat with electrical tape.
Because the front of the thermostat has to be turned to the wall of the cooler, I poked a hole so I could put a screw driver in to adjust the temperature.
The hardware cloth was a pain to work with, so this isn't the best job. I covered the edges with duck tape so they wouldn't damage the cooler.
I put the fan in the corner, like in this picture, blowing across the water. But that created too cool of a breeze across where the eggs would be, so I moved it so that it faces the bulb. It's attached using long screws just pressed into the styrofoam, so it is also removable. The longer screws hold it away from the wall so air can get behind it.
I also removed the bowl of water because the humidity was too high. Since then I read about dry incubation, so I'm going to try that, only adding a few drops of water if the humidity goes below 25%. So far it's holding at around 28%.
The walls of the cooler are thick and tough, so I used the drill to put in vent holes around the sides toward the bottom. 3/16" drill bit.
I didn't put larger vent holes in just yet. The top is not completely sealed, so I'm thinking this might be enough. I also read it's actually good to open the lid for a few minutes each day. So we'll see.
Here it is plugged in, getting the temps stable. I have two digital thermometer/hydrometers in there. I haven't been able to get one with a probe to use with the water wiggler, but I figure people incubated eggs just fine before they had that stuff.
After it got warmed up, I put in room temperature store eggs to adjust the temps so they'd be right with the mass of the eggs.
So here's the super exciting part... The temps have held steady the entire time, only going down a bit when I open the lid. Having no variation with a HWH thermostat is a triumph! I credit the extra holes and the placement. Also last night I forgot to turn the heat on in the house and it got down to 61 degrees, but the incubator temp never went below 99. I credit the awesome insulation of the special cooler.
I put six eggs in this evening - I'll keep you posted!

