So a few years back I was at my Aunts farm in Alabama and stumbled on 4 old redwood incubators in two old barns that we were going to have the county fire department burn down for us.
I was able to get two of them out of the barn that was to be burned the next day. The other barn was to be burned the day after, but some how also caught fire and the other two were lost.
I took the rescued incubators home and they sat in my barn for 2 years until recently I decided to restore one of them.
On my days off and late nights when the family went off to bed I started my project of restoring this David Bradley/ Leahy 228 incubator. It took me about a month and a half to complete.
It has turned out to be a beautifully restored antique cabinet, but with the convenience of digital thermal and humidity control (resto-mod)
Here are some pics and details of my project.


This is when we took it out of the barn. It had been there since the mid 70's. It literally had rats that had been living in it and had chewed some of the wires inside. It was filled with excrement , it was bad.
Here is where we found it ! Buried in the mess of this old nasty barn
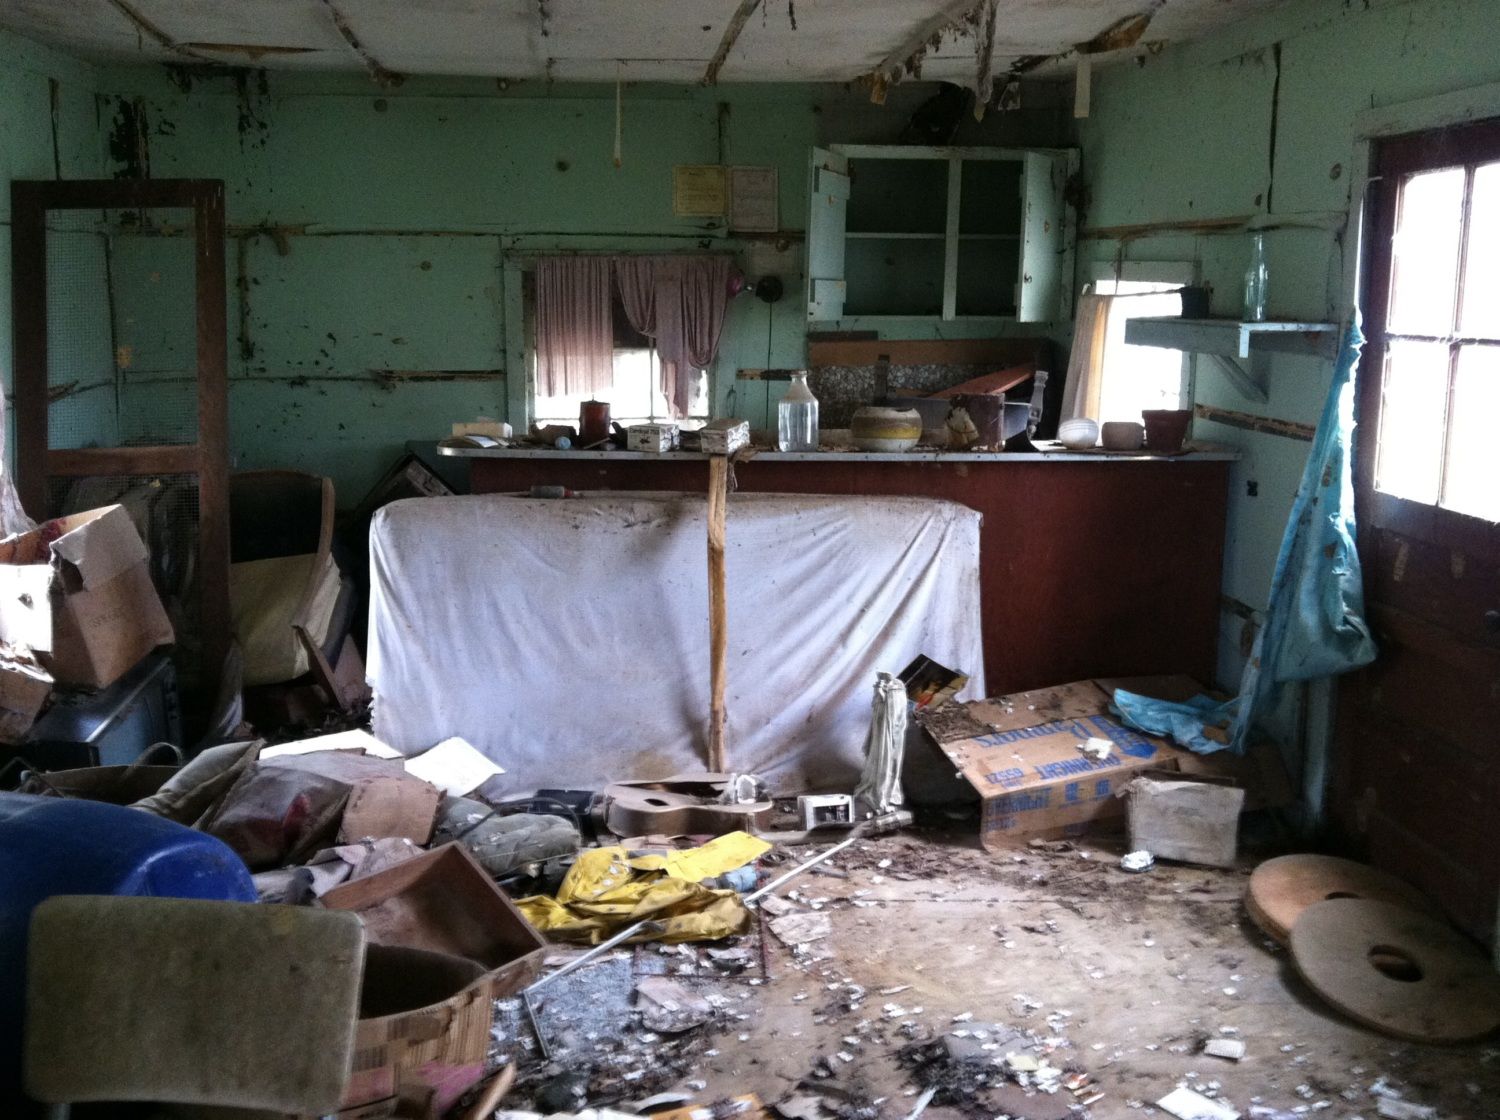
The next step was to gut it of the stock electronics, and sterilize the entire unit. To do this I used pinesol disinfectant and a really small amount of bleach so it would not bleach the color from the delicate red wood. Here are some pics of the inside that show the rat filth and just years of nastiness.

Then the cleaning,


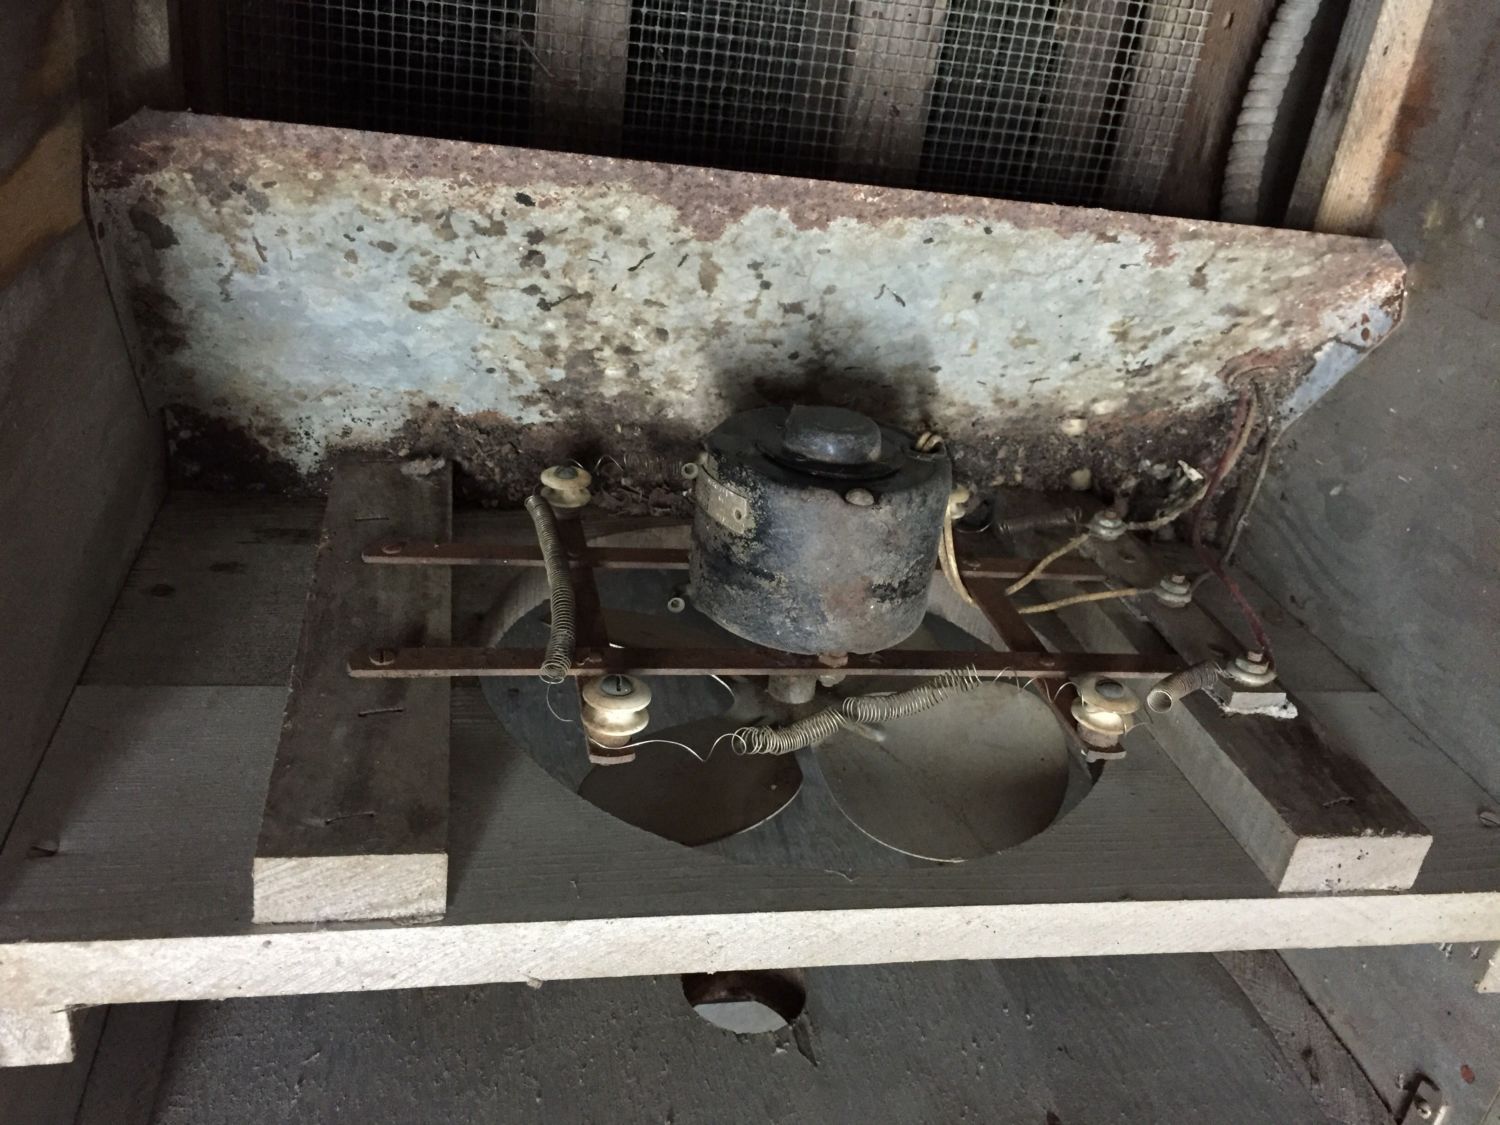
I then sanded the metal pan that is the floor of the inside of the incubator. When done I acid etched to kill the rust and prevent its return. I then taped and prepped it for painting the inside the stock silver that the unit came with.


After paint , using 2000 grit sand paper , I gave the entire out side a good light sanding. This sanding was not to remove all the small scratches or dings that give it character and make it antique looking , but to make it smooth and ready it for preserving the wood. I used tongue oil to do this. Liberally wiping this product on to all exterior parts gave it a beautifully restored ,protective finish !

Then for the guts. I tried to keep this resto-mod looking as era as I could. I did not want it looking modern. I wanted the antique look , but ease of digital control.
I used the original switches that were still in great shape(you can still buy these old switches, as NOS). I sanded ,etched , painted and reused the steel junction box, and cover plate for the electric inside. I updated the screw in fuse to a screw in fuse that is a mini resettable breaker. Installed new 14 gage thhn wire in weather tight flex line and connected it to a new 250 watt heating element. Replaced the fan with a GQF replacement fan , and blade.


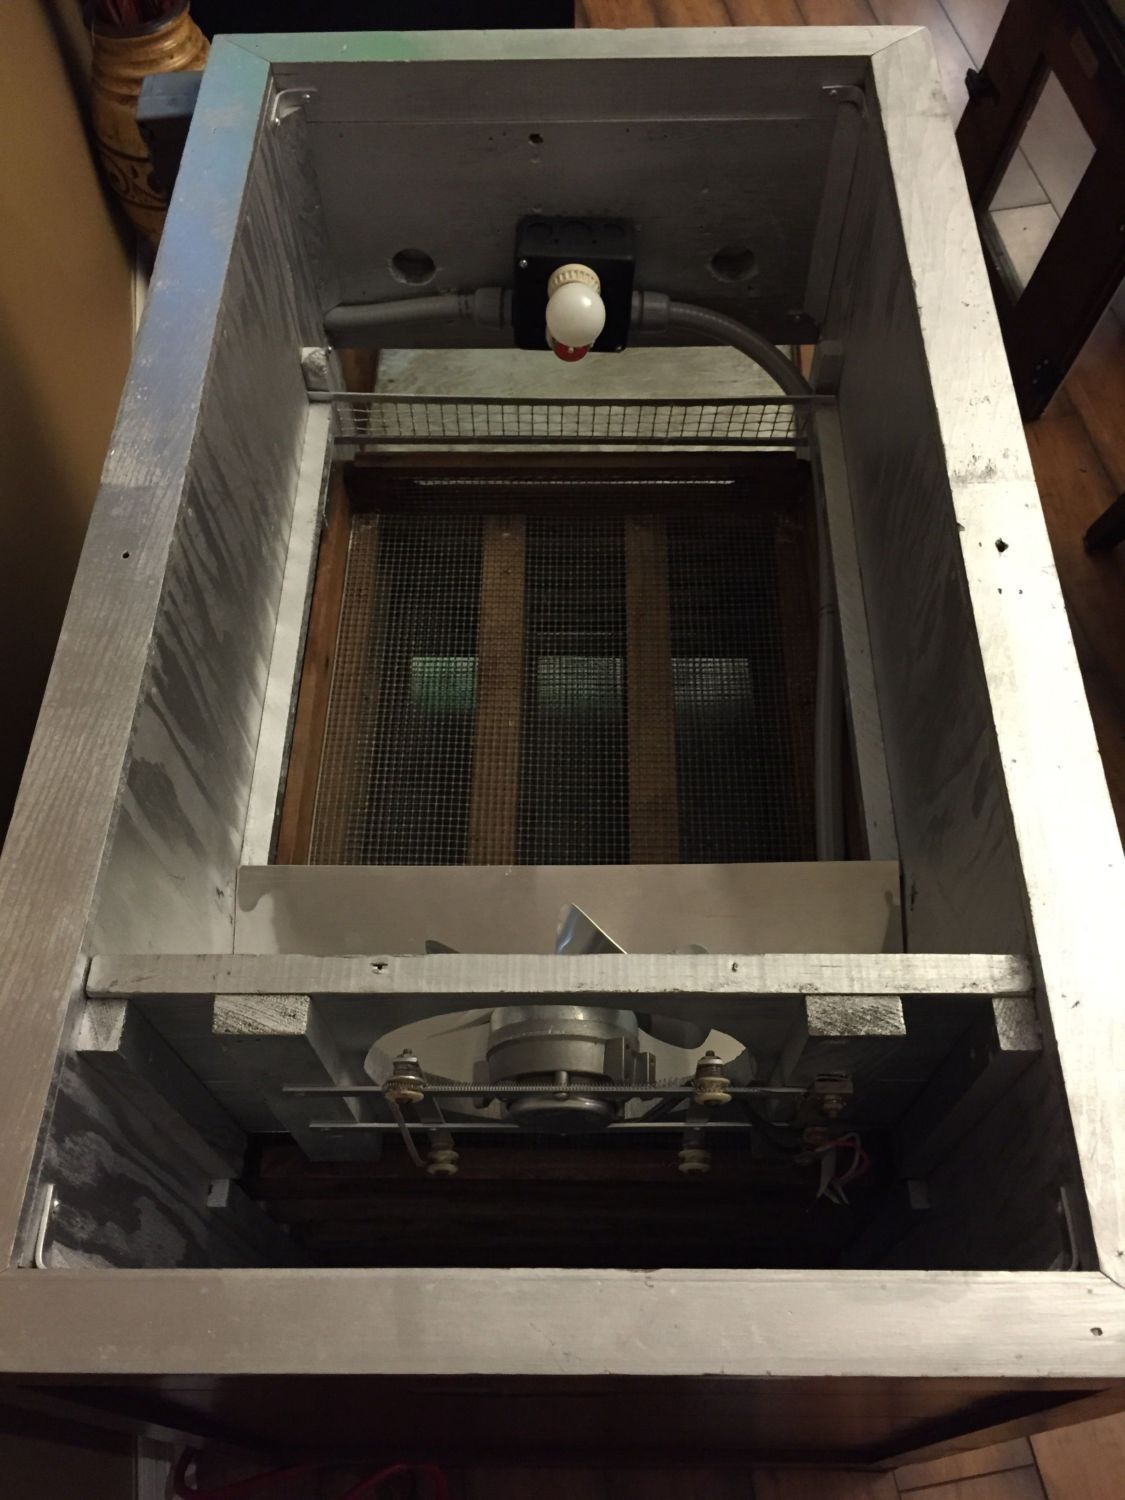
As you can see with the new fan , and the way it rotates , I had to reverse the fan/ heating element board to make the upgrade work.
I replaced the metal air deflection pan that is in front of the fan.
I then added a digital HVAC thermostat controller to control the temperature with a 1 degree differential. Also added a digital hygrometer controller that controls a ultrasonic mist maker for humidity control. Here is a pic of the finished product.

I will update this thread with some detailed pics of the digital controls and the heating element and fan tomorrow , as I am tired and want to go rest and count chickens in my sleep.
I was able to get two of them out of the barn that was to be burned the next day. The other barn was to be burned the day after, but some how also caught fire and the other two were lost.
I took the rescued incubators home and they sat in my barn for 2 years until recently I decided to restore one of them.
On my days off and late nights when the family went off to bed I started my project of restoring this David Bradley/ Leahy 228 incubator. It took me about a month and a half to complete.
It has turned out to be a beautifully restored antique cabinet, but with the convenience of digital thermal and humidity control (resto-mod)
Here are some pics and details of my project.
This is when we took it out of the barn. It had been there since the mid 70's. It literally had rats that had been living in it and had chewed some of the wires inside. It was filled with excrement , it was bad.
Here is where we found it ! Buried in the mess of this old nasty barn
The next step was to gut it of the stock electronics, and sterilize the entire unit. To do this I used pinesol disinfectant and a really small amount of bleach so it would not bleach the color from the delicate red wood. Here are some pics of the inside that show the rat filth and just years of nastiness.
Then the cleaning,
I then sanded the metal pan that is the floor of the inside of the incubator. When done I acid etched to kill the rust and prevent its return. I then taped and prepped it for painting the inside the stock silver that the unit came with.
After paint , using 2000 grit sand paper , I gave the entire out side a good light sanding. This sanding was not to remove all the small scratches or dings that give it character and make it antique looking , but to make it smooth and ready it for preserving the wood. I used tongue oil to do this. Liberally wiping this product on to all exterior parts gave it a beautifully restored ,protective finish !
Then for the guts. I tried to keep this resto-mod looking as era as I could. I did not want it looking modern. I wanted the antique look , but ease of digital control.
I used the original switches that were still in great shape(you can still buy these old switches, as NOS). I sanded ,etched , painted and reused the steel junction box, and cover plate for the electric inside. I updated the screw in fuse to a screw in fuse that is a mini resettable breaker. Installed new 14 gage thhn wire in weather tight flex line and connected it to a new 250 watt heating element. Replaced the fan with a GQF replacement fan , and blade.
As you can see with the new fan , and the way it rotates , I had to reverse the fan/ heating element board to make the upgrade work.
I replaced the metal air deflection pan that is in front of the fan.
I then added a digital HVAC thermostat controller to control the temperature with a 1 degree differential. Also added a digital hygrometer controller that controls a ultrasonic mist maker for humidity control. Here is a pic of the finished product.
I will update this thread with some detailed pics of the digital controls and the heating element and fan tomorrow , as I am tired and want to go rest and count chickens in my sleep.
Last edited:


