Rookie Coop Building Mistakes?

A mistake I learnt after finishing our coop, was plan for screw sizes!!!! I had four different sizes, and a garage full of half empty screw boxes all different sizes, and heads, etc. But wouldnt you know it, everyone in a while, we'd go to start something, and we wouldnt have the right screw depth!!!!!!! it was so frustrating, because it would slow progress for no darn reason!!! Also, a pulled a serious chick move when buying hinges, and bought the totally wrong ones, and now my hunges dont fit right!
 
A mistake I learnt after finishing our coop, was plan for screw sizes!!!! I had four different sizes, and a garage full of half empty screw boxes all different sizes, and heads, etc. But wouldnt you know it, everyone in a while, we'd go to start something, and we wouldnt have the right screw depth!!!!!!! it was so frustrating, because it would slow progress for no darn reason!!! Also, a pulled a serious chick move when buying hinges, and bought the totally wrong ones, and now my hunges dont fit right!
Any pictures yet? ... I have been following the thread... And I built a Brooder box, 4'x4' x 20" prior to chicks, But still building the coop.
 
Last edited:
that is a great looking Coop! Very nice!
love.gif
 
A normal person or couple could build a chicken coop before their chicks need to live in it? Sure, unless you've just had Carpal Tunnel Surgery on your dominant hand and your husband has, um, memory problems. Math problems. Shopping problems.

Anyway, the coop is almost done (I'm falling on the floor and giving thanks) and the chicks are outgrowing the greenhouse box where they've been spending their daylight hours.

Linoleum floor - yes!

Sweet PDZ in the poop boxes (poop boards with 3/4" edges) - yes!

Access doors on all four sides of the coop - yes!

I think the most common mistake/problem that first-time coop builders face is trying to figure out how much ventilation to include. It varies depending on where you live, seasonal humidity, number of chickens, how often you clean the coop, etc., etc. I had a hard time working that out. With all of the unplanned ventilation
roll.png
I think it'll be fine. It's a lot easier to close windows instead of altering the coop later.

The chicks have been in the largest growing box in my greenhouse since it started sounding like a wild frat party was going on in the brooder room. I have been transferring them back and forth from greenhouse to (enlarged) brooder every morning and evening because the greenhouse isn't predator proof. A neighbor came by one evening and saw me putting the chooks into the large plastic tub I carry them in. As I snapped the lid on (dogs) a horrified look came over her face and she cried, "You keep them in a plastic tub?"

LOL. "Sure I just pop this tub onto a closet shelf at night. Makes clean-up a breeze!" Still Laughing.
lau.gif
 
It only took my husband two days to build my coop, it took months to get started, finally I just brought several chicks in the house and let them run around all day...turned the key! But I am still remodeling and adding this or that, and next just how I want the addition to go.
 
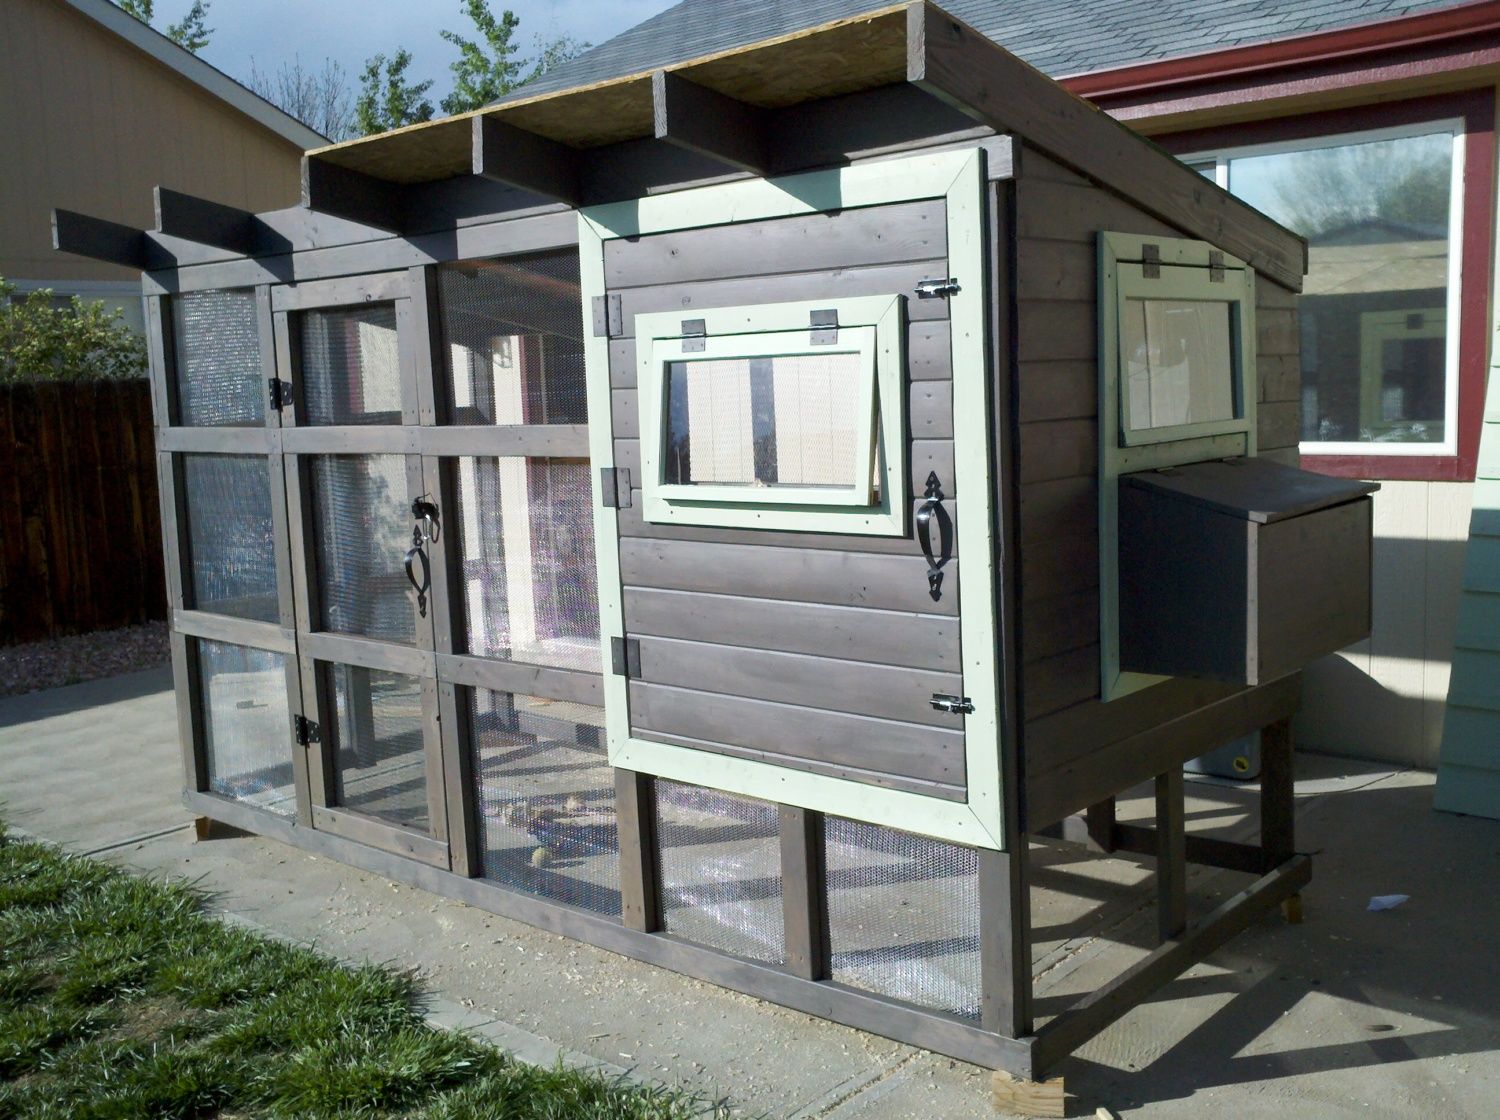
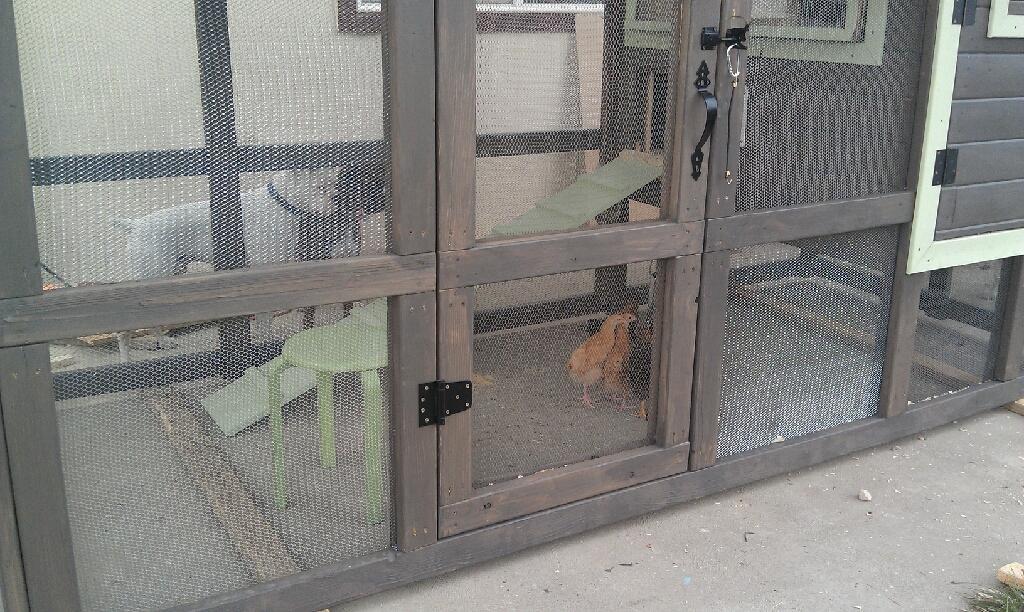
As the original poster, having just completed the last step in my coop build, I will share a few other things we learnt as we went along:

- Cedar Tongue & Groove planks (left over from the covered deck project) are a great idea IN THEORY!!! Not so much in practice. They cracked often, regardless of the screw size and technique we used. Next time, ply wood all the way :)

- DONT buy the cheapest stick down tiles (for the coop floor) possible.....during installation they will rip and tear if you look at them the wrong way!

- Plan your nail/screw depths accordingly for all areas of the projects, this was a problem for us the WHOLE project, LOL

- Also plan your Hinges and latches better than I did! Evey hinge and latch I bought was either too big or too small for what we needed it to be, further exasperating the cracking cedar plank issue, LOL

- Make a plan for the structure, and dont veer from it!!! We changed our plan several times to ............"simplify" the project for my grumbly husband, and lost alot of function I had originally planned for out of pure lack of thinking ahead.
("Oh skip that step dear".....and then two hours later id be like "oops, now that we've skipped that, we cant do this other thing I needed" etc etc.

Overall, I think we did pretty good for two people who know nothing about carpentry and usually want to kill eachother when trying to work together, LOL

I am going to post my coop in the Coop section, and then I will come back and leave a link here.
 
Pre-drill pre-drill pre-drill. Working with that style of board you most definitely need to drill pilot holes for EVERYTHING!
- Cedar Tongue & Groove planks (left over from the covered deck project) are a great idea IN THEORY!!! Not so much in practice. They cracked often, regardless of the screw size and technique we used. Next time, ply wood all the way :)

- Also plan your Hinges and latches better than I did! Evey hinge and latch I bought was either too big or too small for what we needed it to be, further exasperating the cracking cedar plank issue, LOL
 

New posts New threads Active threads

Back
Top Bottom